The Nintendo Switch Pro Controller is widely regarded as one of the best wireless controllers you can buy. However, you may be surprised by how many people initially struggle to get their Nintendo Switch Pro Controllers wirelessly connected to their Nintendo Switch console or Nintendo Switch Lite.
There are a few different ways to get the devices paired up, though. We’ll break down how to do so. Plus, we’ll fill you in on a trick or two that you may not know your Switch Pro Controller has up its sleeve.
Related
8 Best Accessories for Nintendo Switch
These must-have accessories are a necessity for any Nintendo Switch fans!
Wirelessly Connecting Your Pro Controller to the Nintendo Switch and Nintendo Switch Lite
Neither method is really any more difficult than the other, but if you want to just click through a few menus to get your Pro Controller paired with your Switch, you’ll want to go with the wireless method.
The only way to pair your controller with the Nintendo Switch Lite is through a wireless connection, as the Switch Lite doesn’t have the console dock used to connect the devices physically.
On the Nintendo Switch and Nintendo Switch Lite Home screen, there are a handful of icons that rest at the bottom. If you hover over the fifth icon from the left, you’ll see it labeled as “Controllers”. Selecting that will bring you to a secondary page that can be used to sync the consoles and controllers.
When looking at the face of the Nintendo Switch Pro Controller, the device has a small sync button to the left of its USB-C charging port. While holding the sync button, the set of four green lights at the bottom of the controller should take turns flashing back and forth. If you do this while on the Controllers page, you should see a notification on the upper left-hand corner of your screen, indicating that the Pro Controller has paired successfully.
If your Nintendo Switch is docked, you’ll need to utilize the system’s Joy-Cons in order to navigate to the Controllers page and link your controller and system wirelessly. If you don’t have Joy-Cons available, utilize the manual pairing option detailed below.
Manually Connecting Your Pro Controller to the Nintendo Switch Through USB-C
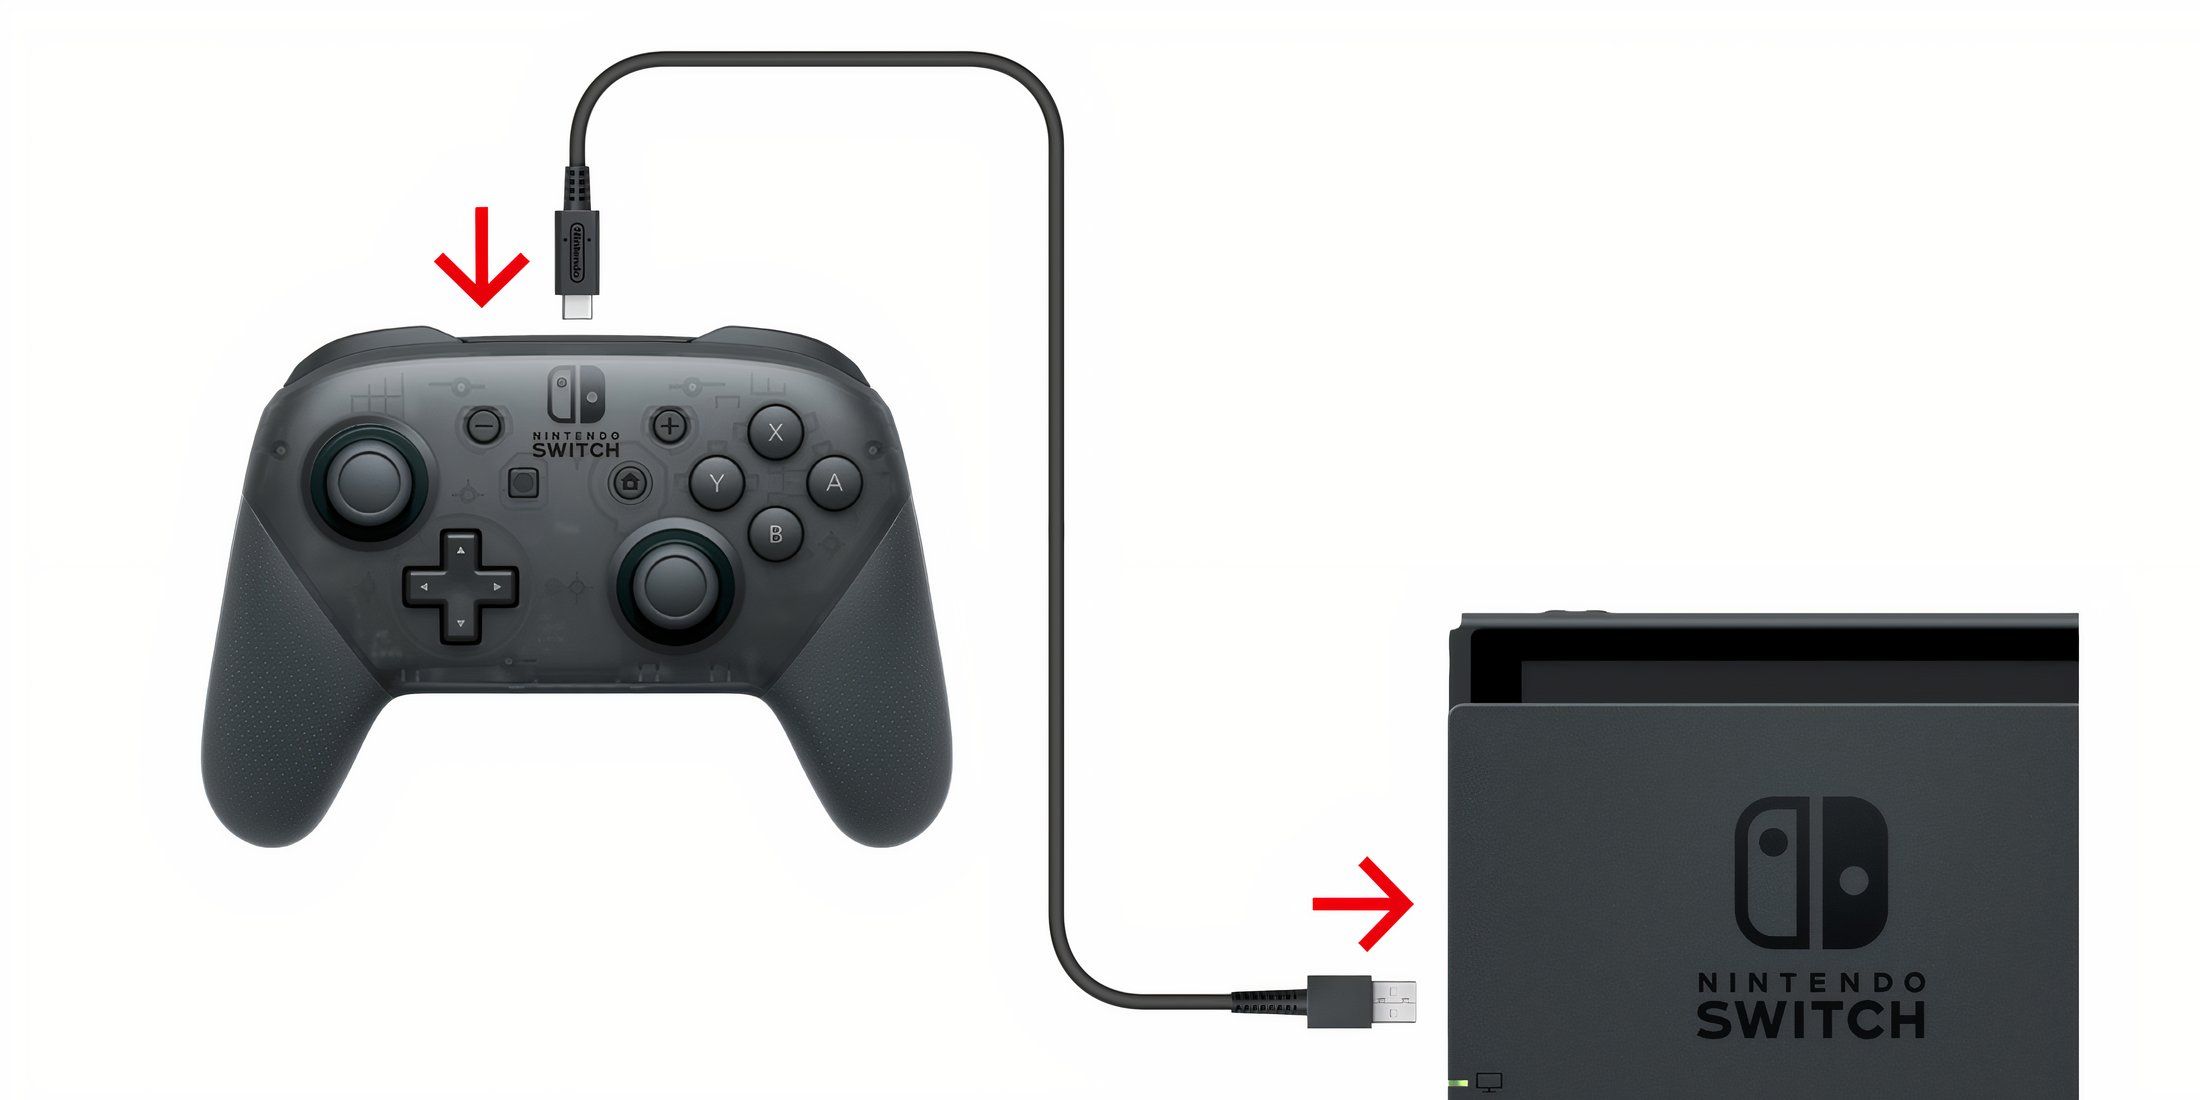
If your Nintendo Switch dock isn’t buried deep within your home’s entertainment stand, it might be easier to manually sync it with your Switch console via the USB-C cable (HAC-010) that should have come with your Switch Pro Controller. To do so, you’ll need to place the console on its dock and switch over to TV mode first.
While in TV mode, plug one end of the USB-C cable into the Nintendo Switch dock. You’ll then plug the other end into the top of the Pro Controller. If you’ve successfully done that, you should immediately see the “paired” notification pop up in the upper left of your television.
Playing with the Pro Controller While Still Connected to the Switch
After you’ve paired your Pro Controller to the Switch with the USB-C cable, you can still play with the cord connected if you choose to do so. This allows you to charge the device while you play if your battery is low. It could also give you a slight advantage when playing competitive games, as a wired connection is typically faster than a wireless one.
It’s not automatic though, as you’ll need to go into the system settings to tell the controller to only communicate through the wired connection. From the Home screen, choose the “System Settings” option towards the bottom right. From there you can choose “Controllers and Sensors”. Following that, just select to turn on “Pro Controller Wired Communication”.
Buy the Pro Wireless Controller for Nintendo Switch at Best Buy
Playing under the wired setting turns off the controller’s wireless functionality. Therefore, the Pro Controller’s NFC feature (which enables compatibility with amiibo devices) will be turned off as well.
Remapping the Pro Controller’s Button Layouts
Did you know that the Switch Pro Controller offers the ability to remap your button layout? As long as you’ve updated your Nintendo Switch to at least version 10.0.0, your system allows you to make changes to your control scheme. In fact, you can store five different profiles per controller type if you’d like, enabling you to easily swap between them from game to game.
Nintendo does specify that they consider the left and right Joy-Cons as individual controller types, just as they do the Pro Controller. So you can map those individually too. Profiles are stored on the Switch itself, not the controller, so all left Joy-Cons would share profiles with other left Joy-Cons, while right Joy-Cons would share profiles with other right Joy-Cons. Likewise, Pro Controllers share profiles with all other Pro Controllers. Additionally, since the profiles are saved on the Switch itself, you can’t bring your stored remapping configurations to other systems you connect controllers to.
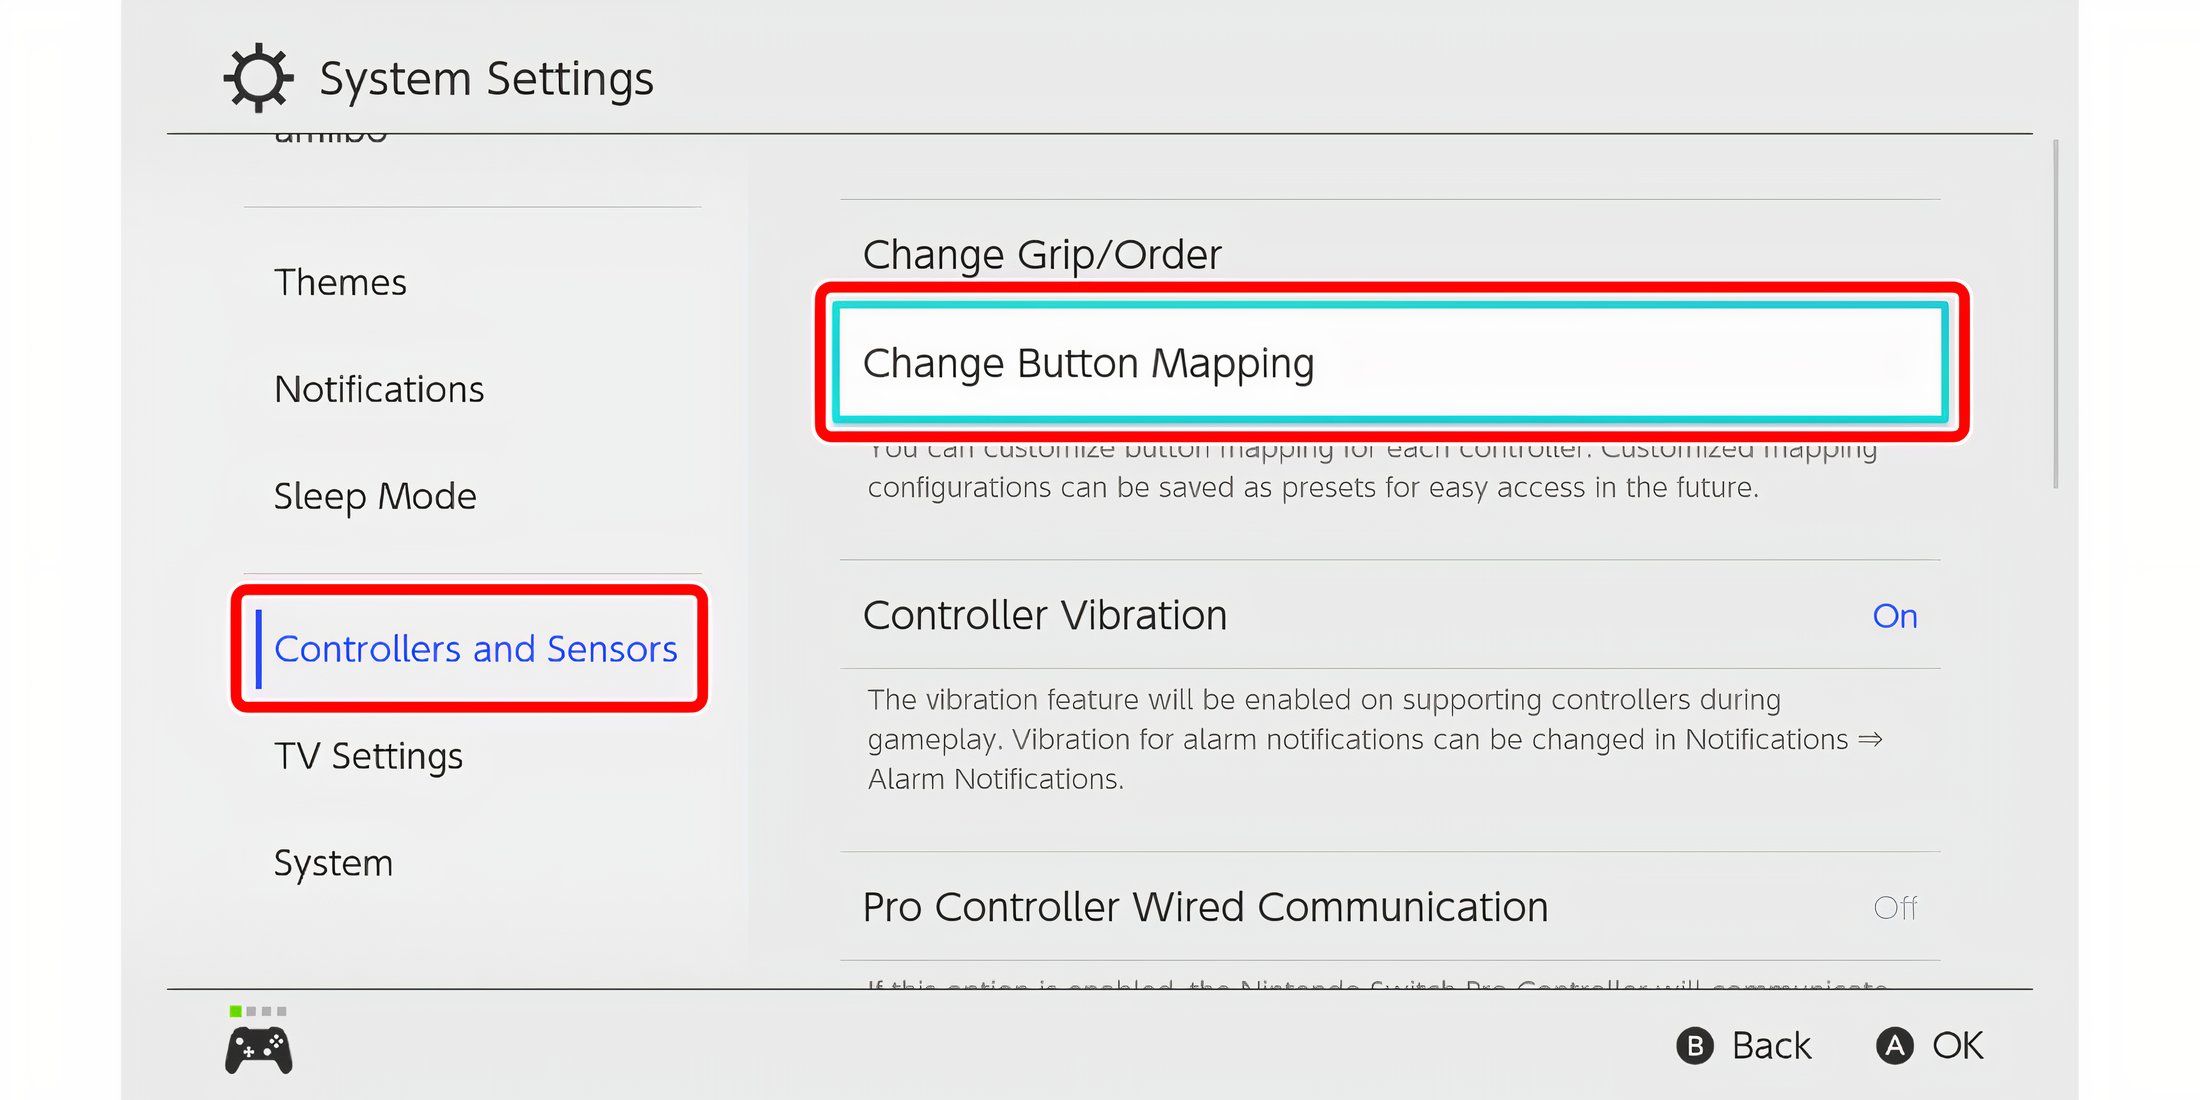
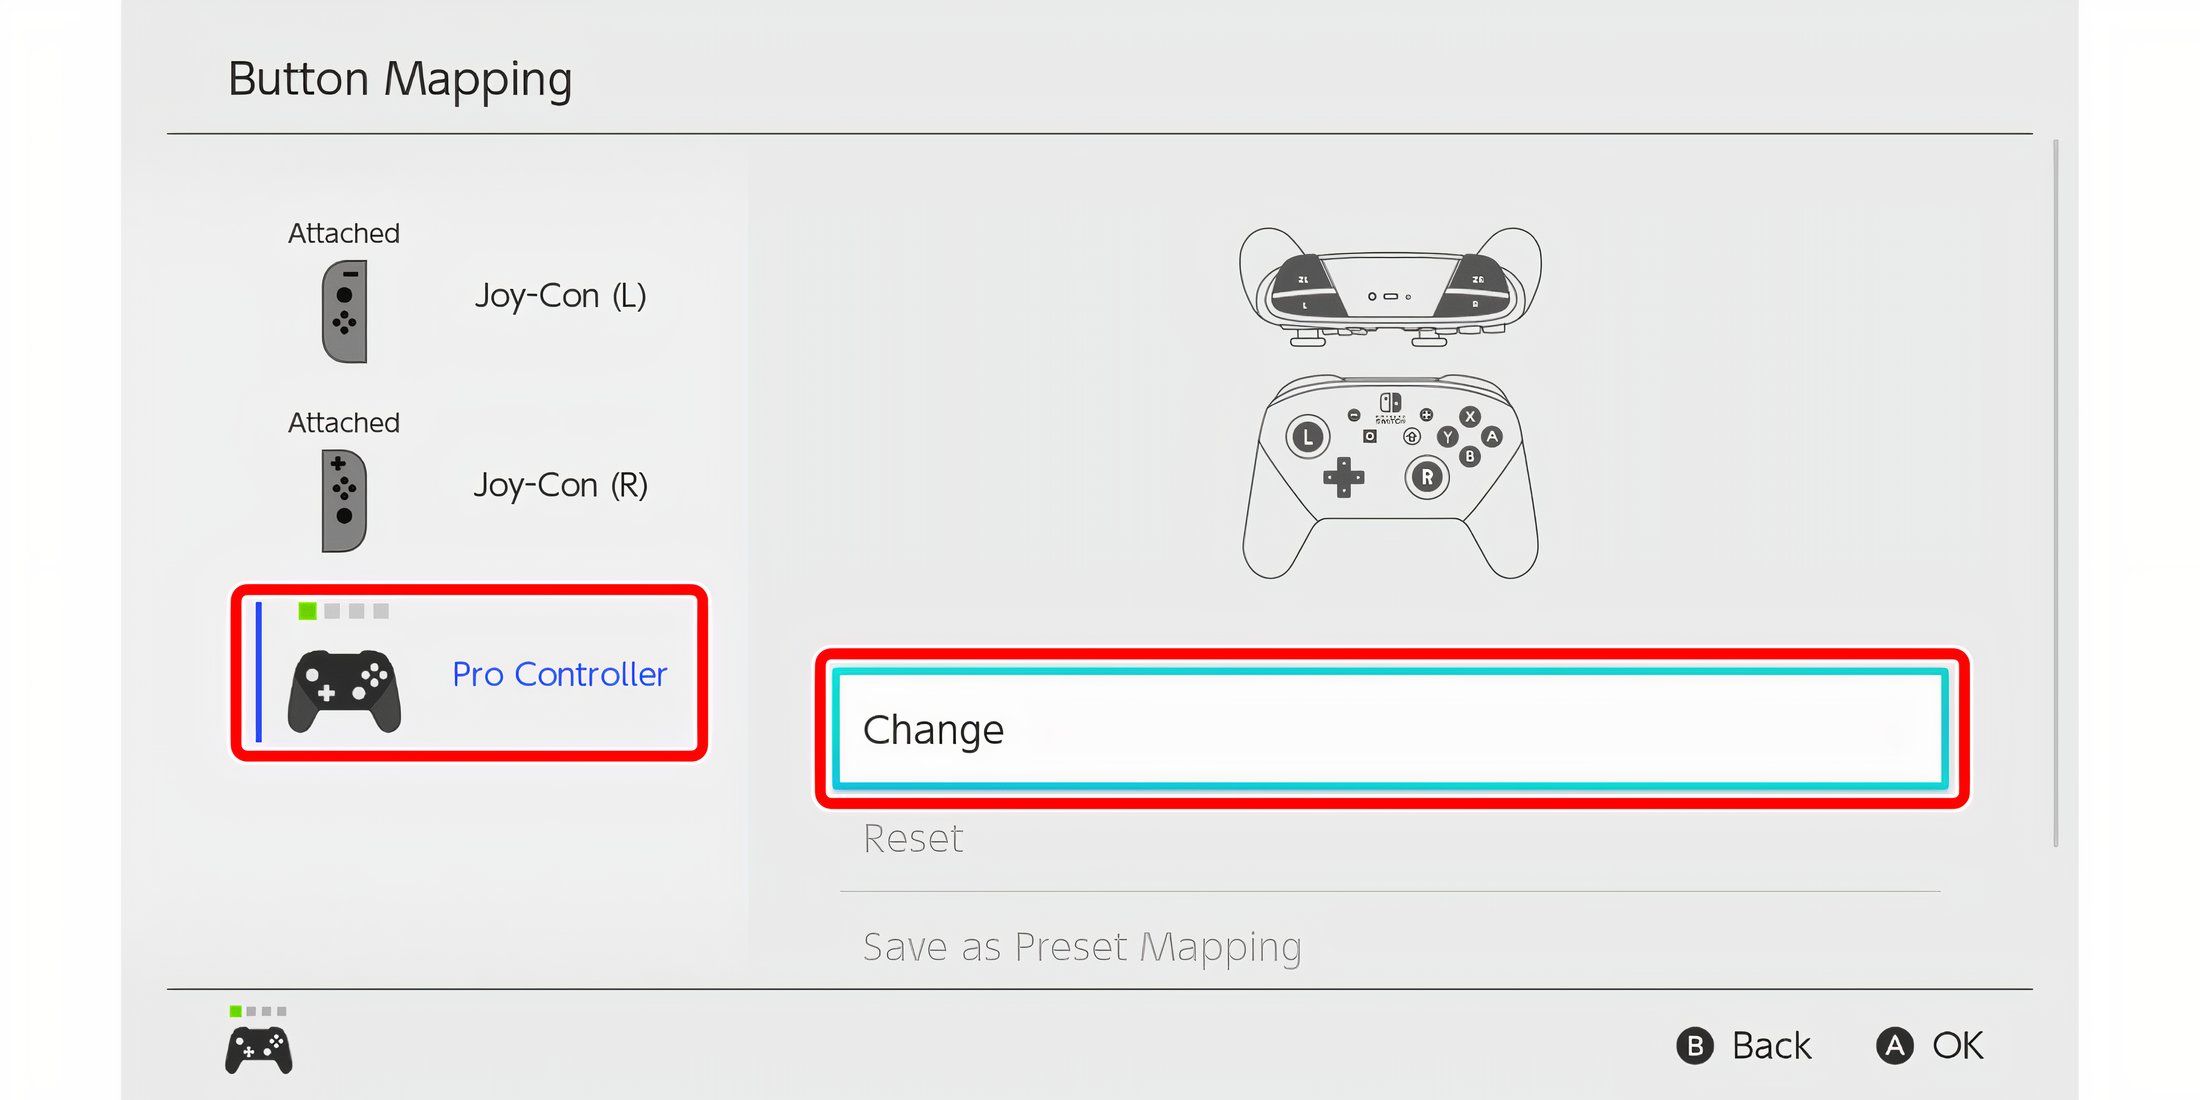
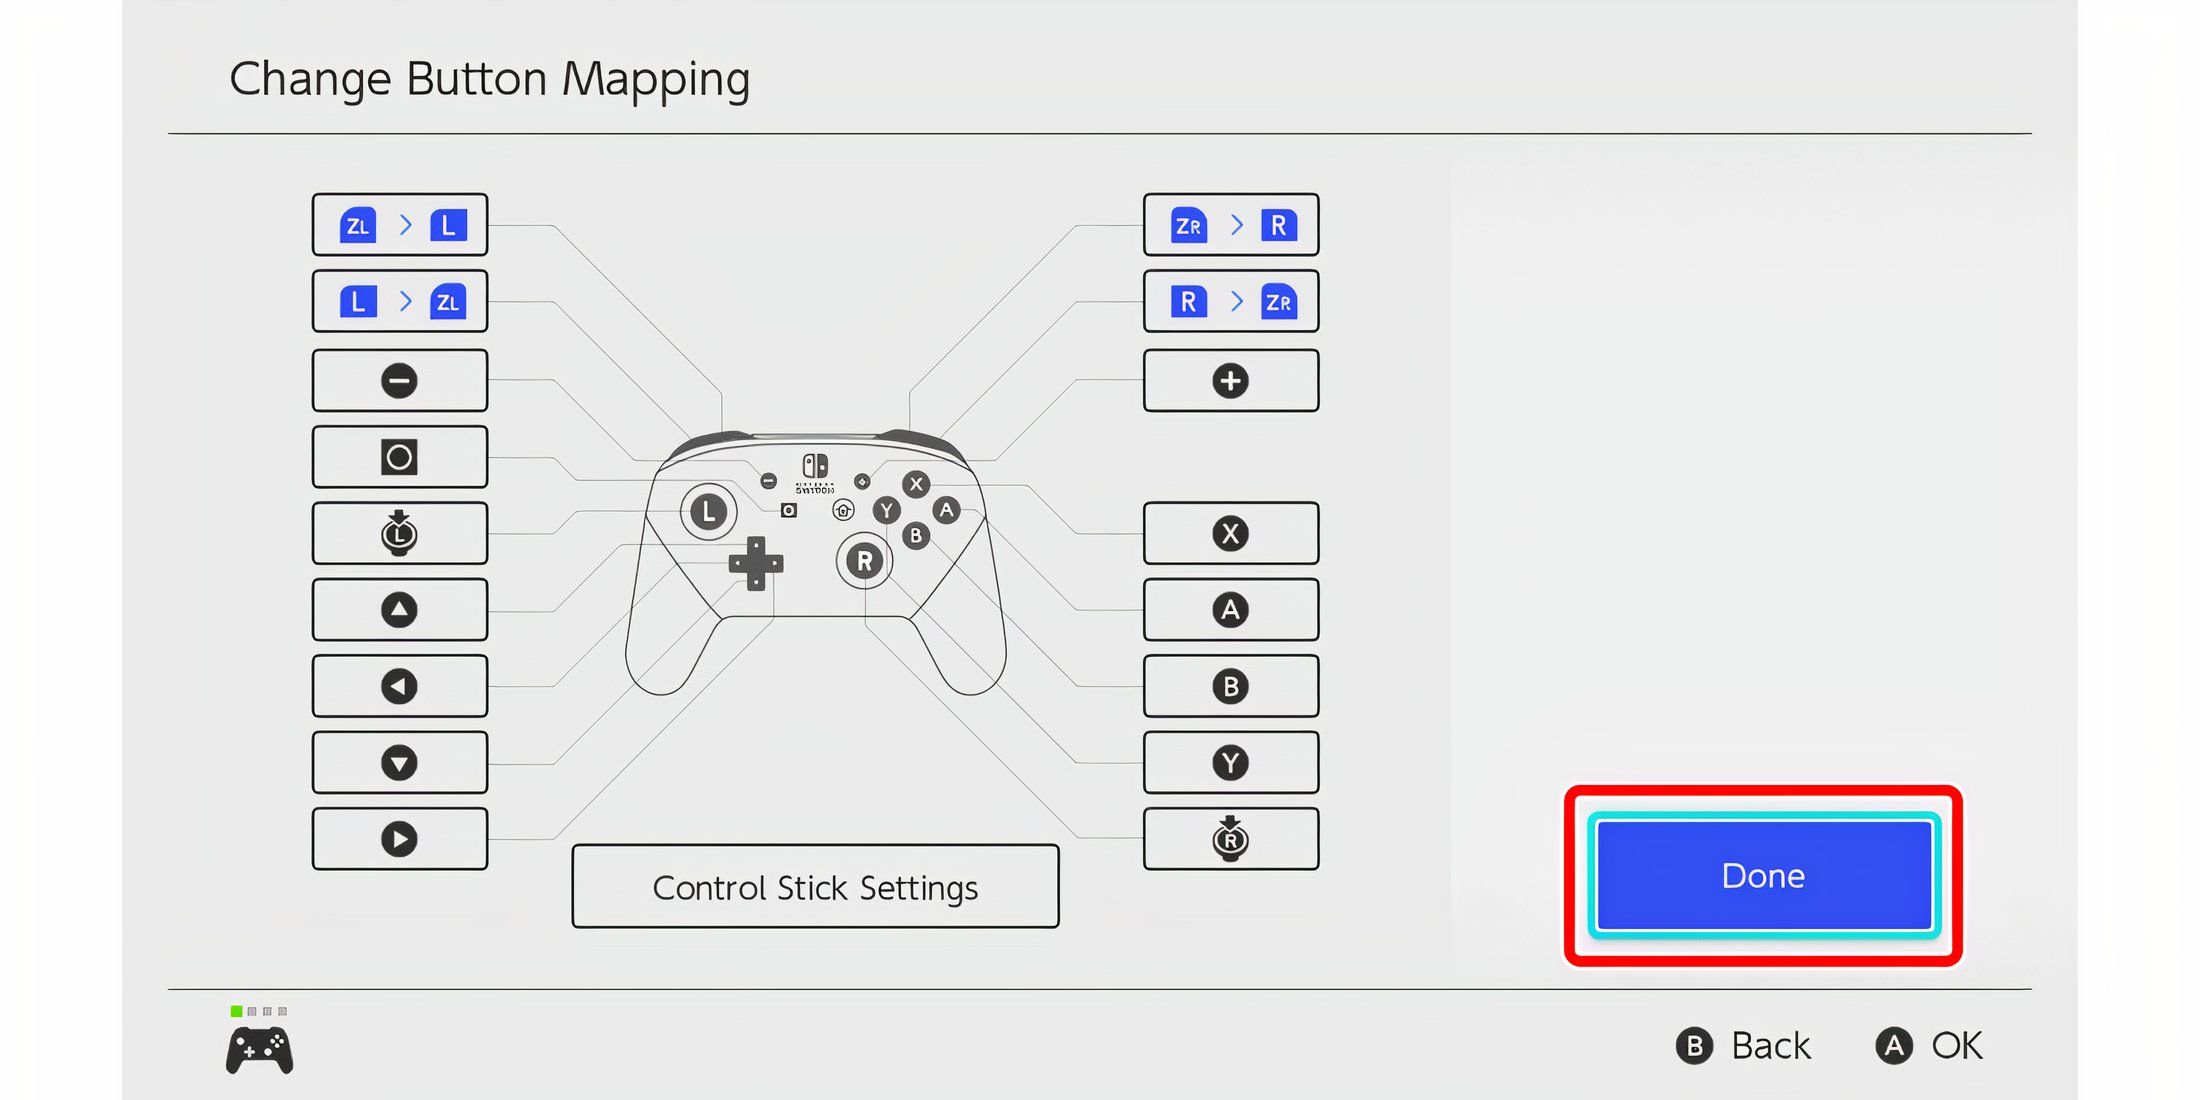
Nintendo has limited the ability to remap controllers to the company’s official left Joy-Con, right-Joycon, and Pro Controller. The system feature will not configure 3rd party controllers. The Nintendo Switch Lite also supports remapped buttons.
More
The Best Controllers for Nintendo Switch
The Nintendo Switch allows gamers to use a variety of controllers, each with its own unique appeal. These are the best options for Switch owners!






Leave a Reply