How do you install a graphics card? Whether you’re planning to build a whole new PC from scratch, or simply swap out your creaky old GPU for a shiny new model, there are several factors to consider. The actual process of physically slotting a graphics card into your motherboard is simple enough, but you also need to think about your chosen card’s power requirements, and even whether there’s room for it in your case. We’re here to help you avoid any pitfalls, though, and you make your GPU upgrade easy.
If you’re new to the whole process of constructing a new game rig, your first stop should be our intricately detailed guide on how to build a gaming PC, where we take you through every single step of the process. For GPU recommendations, you can also check our guide to the best graphics card, where we take you through all the models we recommend at a range of prices, including some of the latest Nvidia GeForce cards, as well as some AMD Radeon options.
If you don’t know what GPU you’re currently using, you can simply press Windows key + R and type “dxdiag” into the search bar. You then just need to click on the Display tab and all the details of your GPU will appear. You can then search for your GPU model online, and see how it compares to other models using online reviews. I recommend checking out my Nvidia GeForce RTX 5090 review if you’re looking for the fastest performance possible, and my Radeon RX 9070 XT review if you’re looking to spend around $600.
1. Check compatibility
This is the most important step, as there are several potential pitfalls that can trap you. Firstly, believe it or not, several graphics cards are too big to fit into some cases, particularly compact ones, so your first job is to find out the maximum size of graphics card your case can accommodate.
This will usually be listed in the specs for your case, sometimes called maximum graphics card clearance, but you can also just use a tape measure to see how much uninterrupted space your case provides internally between its front and back.
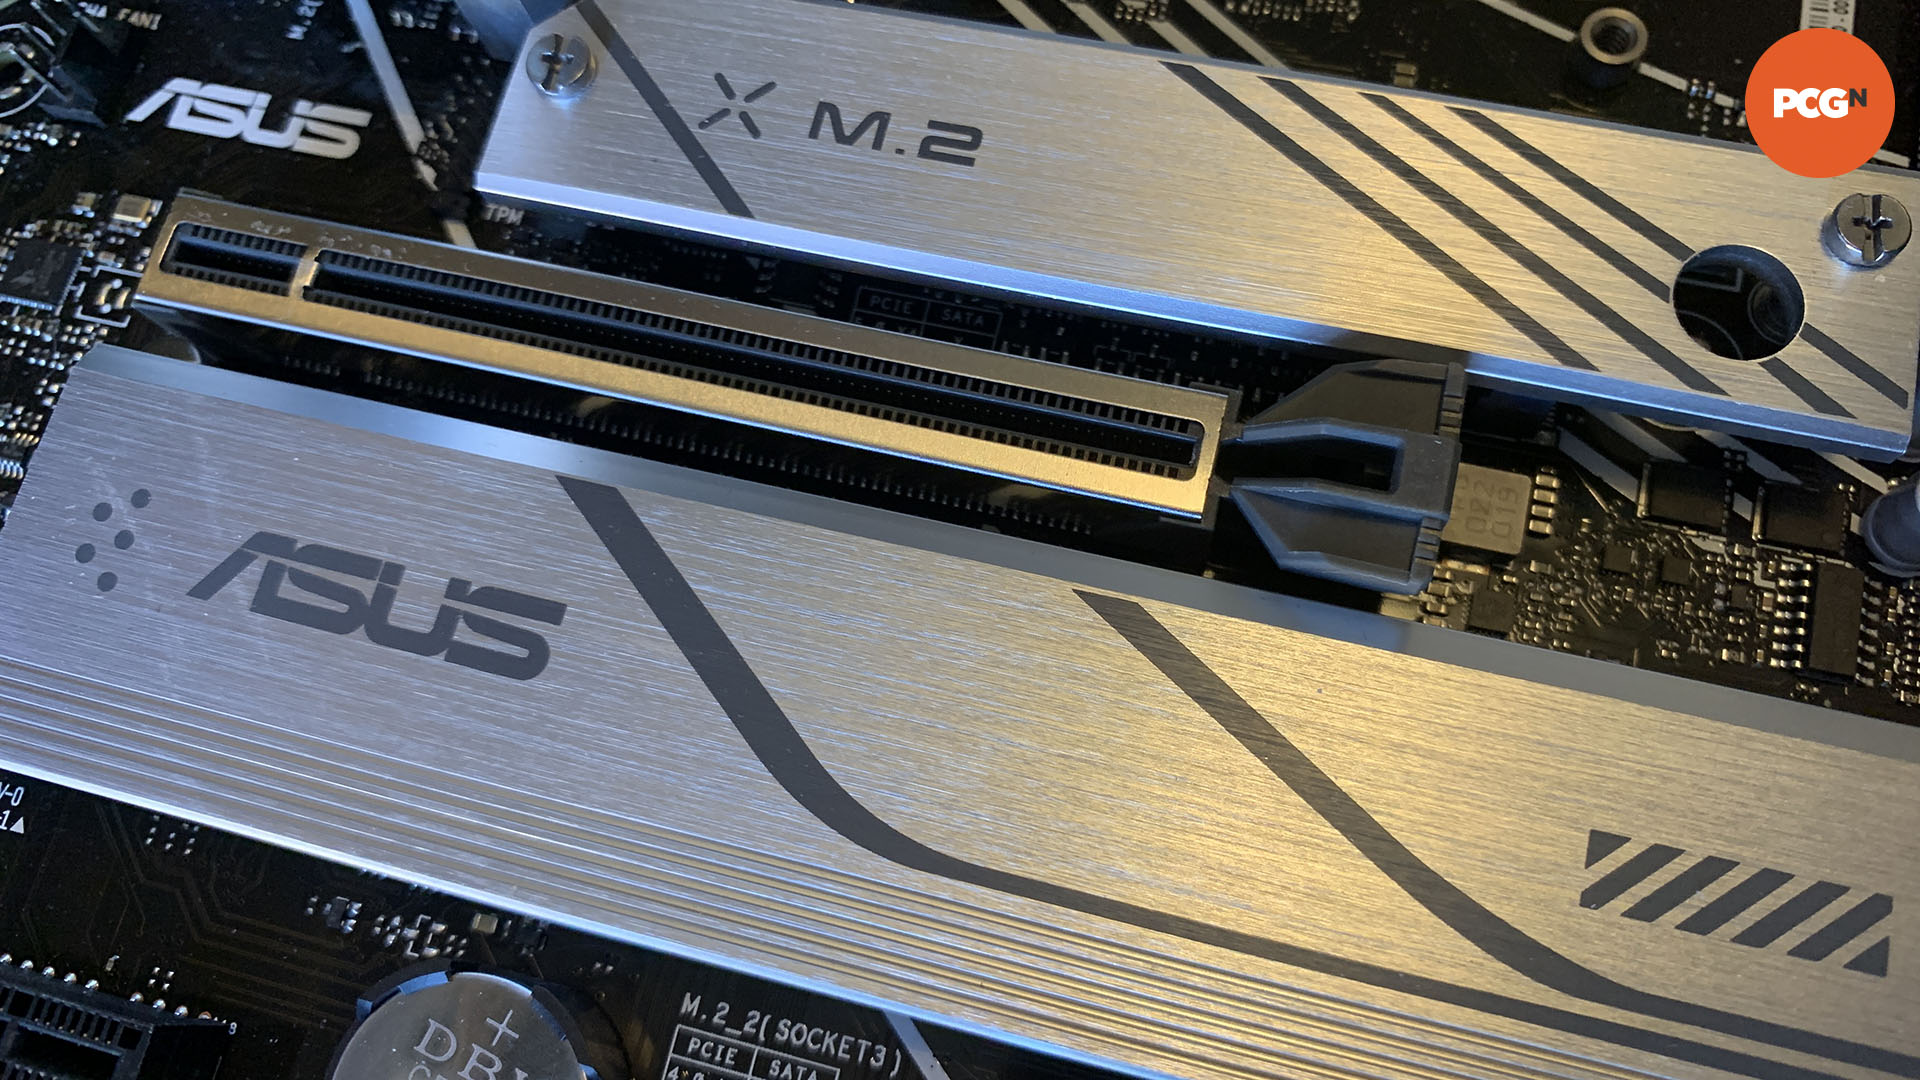
Next, check your motherboard’s PCIe slot compatibility. The latest graphics cards use the PCIe 5.0 interface, and while they’ll work fine in a PCIe 4.0 slot with only a small impact on frame rates, there will be a performance penalty if you install a new RTX 5000 GPU into an old PCIe 3.0 slot. Google the full name of your motherboard (the name is usually also printed on the PCB itself), and check its specs list to see which PCIe standard is supported by the top slot – that’s the full-size slot that’s physically nearest to the top of your motherboard.
Another factor here is if you use a PCIe riser cable in your case to go from the slot to your GPU, perhaps for a horizontally-mounted graphics card, or a small form factor system. Some older cases only have PCIe 3.0 risers (and hardly any have PCIe 5.0 ones right now), and you’ll need to match the standard of the cable with your motherboard.
If you only have a PCIe 3.0 riser, then your motherboard and GPU will also have to be forced down to PCIe 3.0 to work properly, even if you have a PCIe 5.0 motherboard. You can check our guide to the best gaming motherboard if it looks like you need an upgrade.
Finally, and this is the big one, you need to check that your power supply is up to the job. There are two main factors here – capacity and cables. For the former, Nvidia and AMD both recommend the minimum wattage for each of their GPUs. You’ll need at least a 1,000W PSU for an RTX 5090, for example, and an 850W PSU for an RTX 5080. There’s no danger in having too much capacity from your PSU, but if your power supply can’t keep up with your GPU’s power demands then you risk an unstable system, crashes, and possibly a burned-out PSU. Don’t take any risks here – do your research and make sure your PSU can handle your new graphics card before you install it.
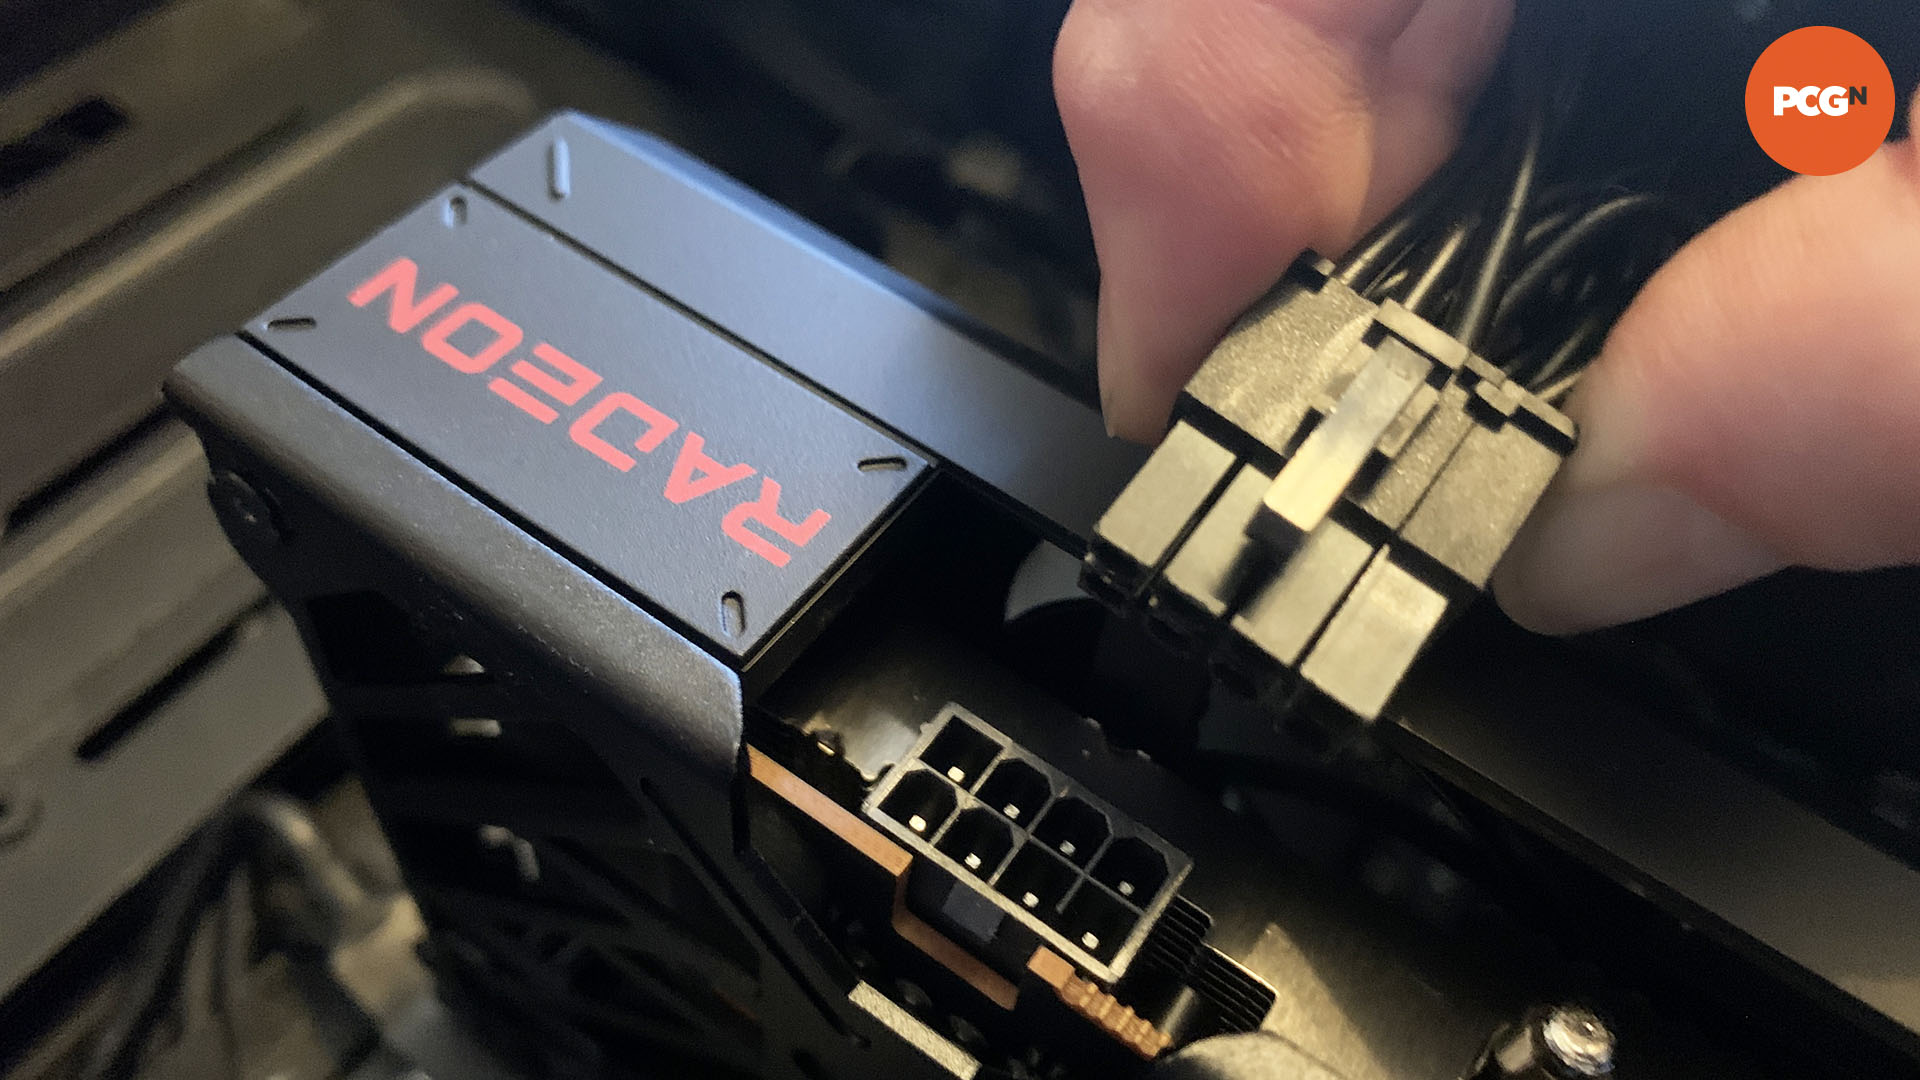
Next, check the power cables plugged into your graphics card right now. There are two main types of GPU power plug, the first is a chunky 8-pin block, sometimes with a part that breaks off to turn it into a 6-pin block. The second is a larger 16-pin plug, with a block of 12 pins followed by four small pins above it, this is a 12VHPWR connector. There are some others too, including a 12-pin plug used by Nvidia for some of its RTX 3000 GPUs, but all the latest GPUs either use 6/8-pin or 16-pin sockets.
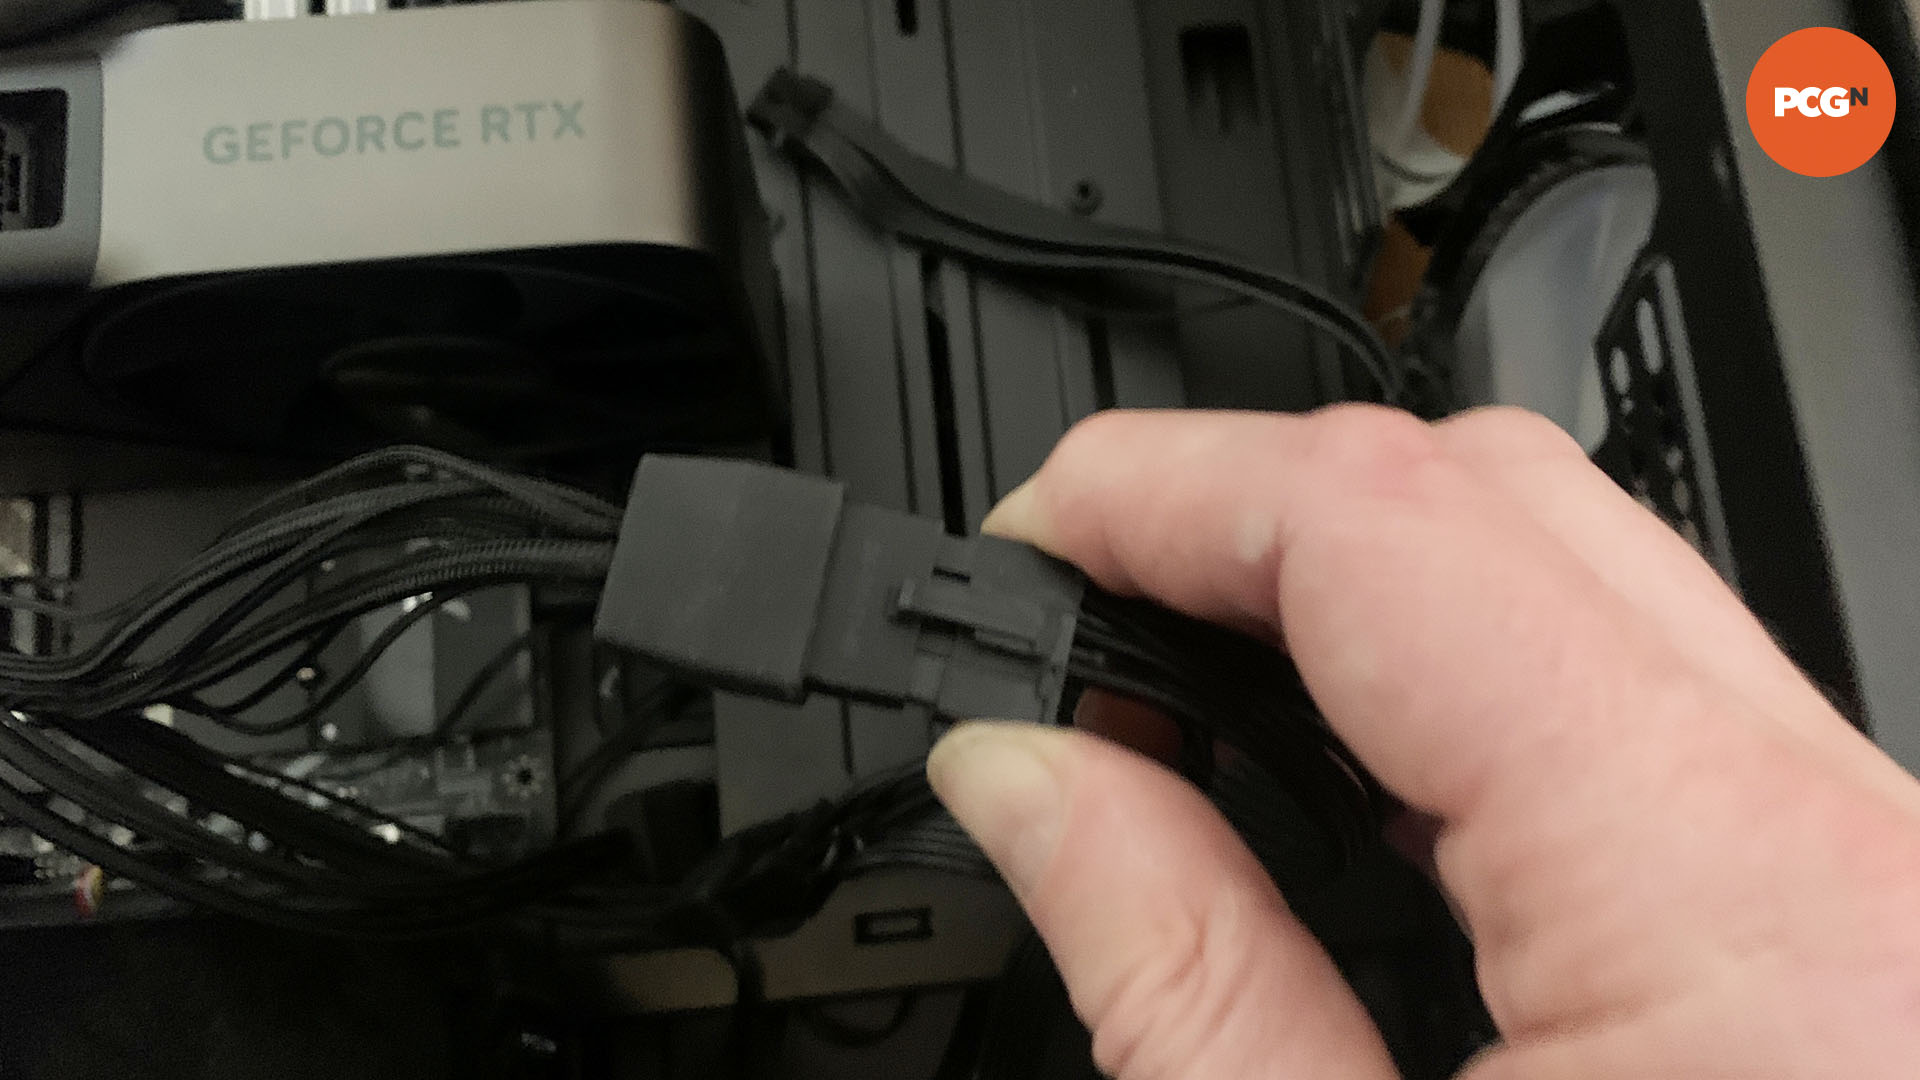
Look at the cables plugged into your existing PSU, and then also look at your power supply to see if it has any other GPU power cables. If your PSU is modular, then there may be extra cables in the box for it, or your PC manufacturer may have tied extra GPU cables out of the way behind the motherboard tray in your case (you can see these by removing the right-hand side panel on your case and looking at the PSU). Have a good look at all your PSU cables to see what you’ve got.
If your PSU doesn’t have any 16-pin cables, don’t worry, as new 16-pin graphics cards always come with an adapter in the box so you can still use them with 8-pin cables, but you’ll need to make sure you have enough of the latter. For example, you need four to plug in an RTX 5090, three for an RTX 5080, and two for an RTX 5070. Count up the 8-pin power plugs for your PSU so you can find the limit of what you can plug into your PSU.
2. Uninstall drivers
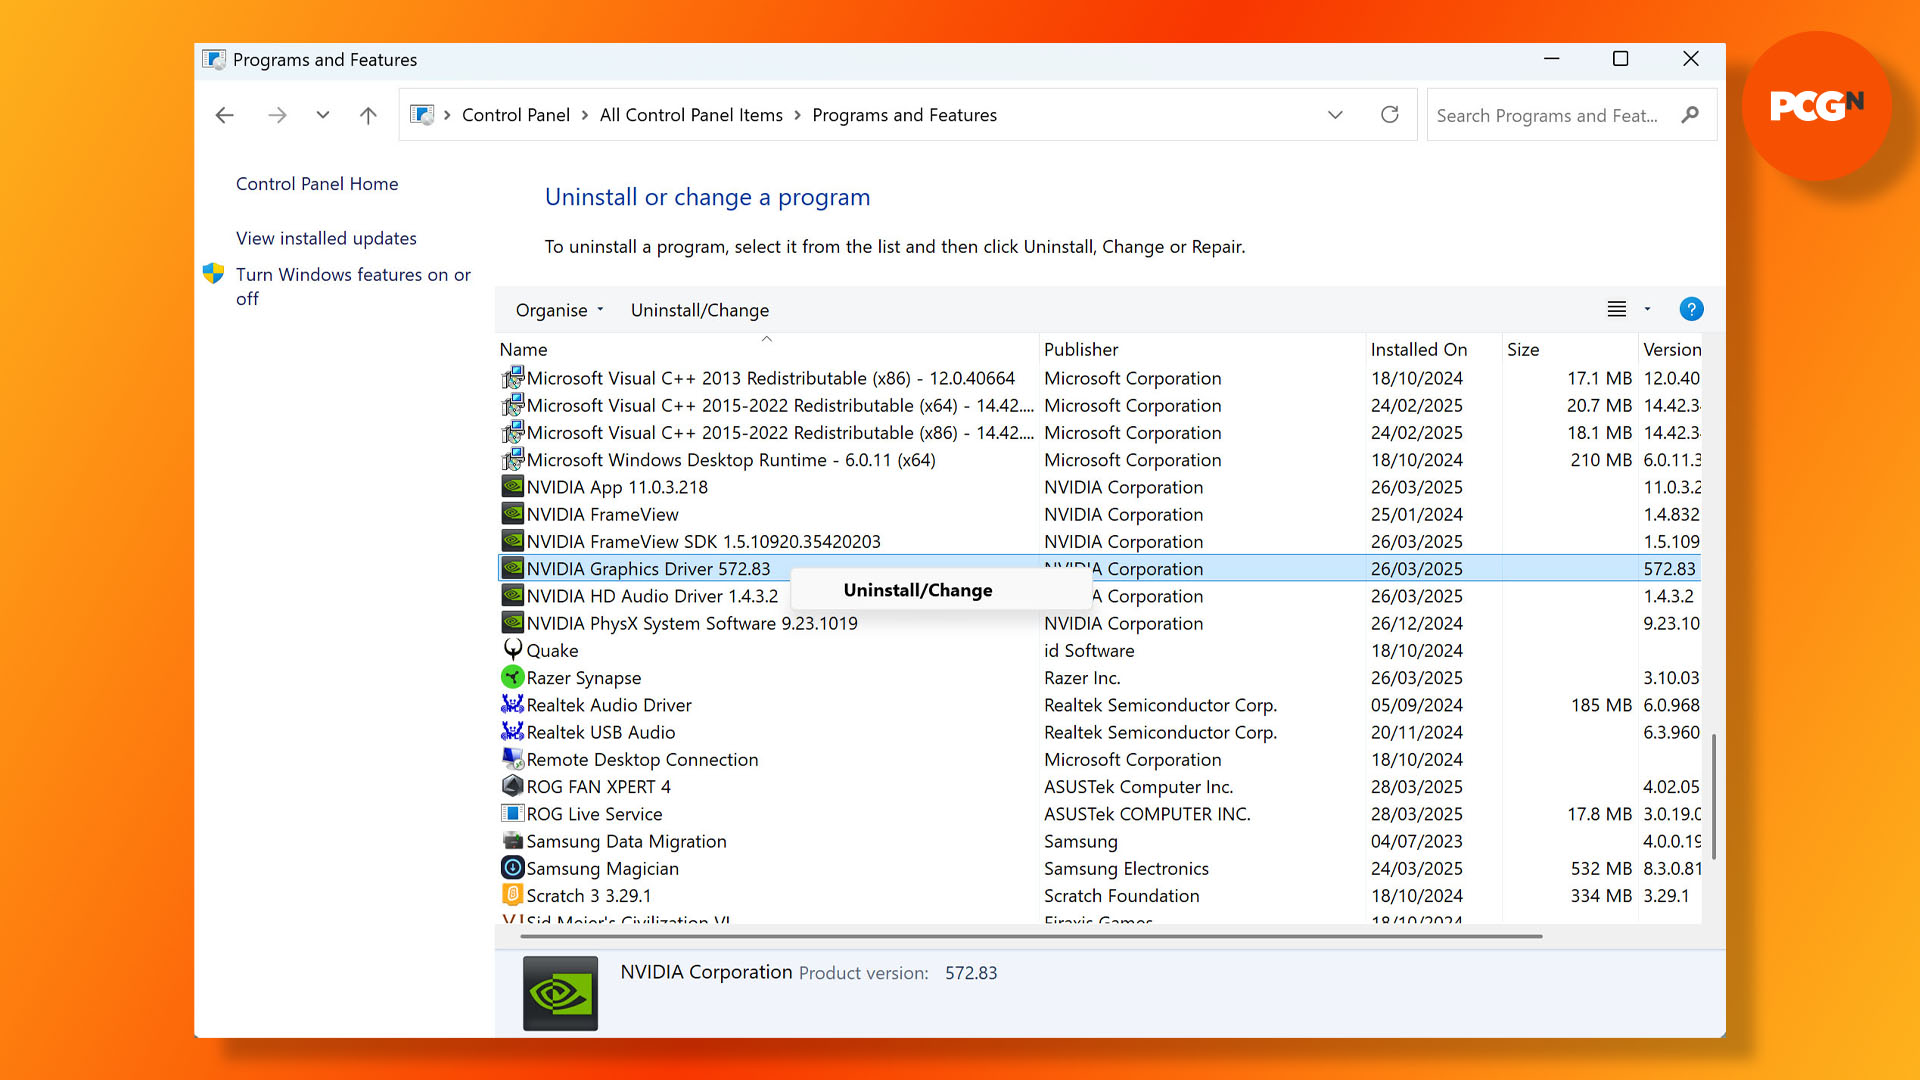
With your new graphics card waiting in its box, it’s now time to go through the process of uninstalling your existing GPU. The simplest method is to press the Windows key + R and type “control panel” into the search bar.
This will open the Windows Control Panel, where you need to click on Programs or Programs and Features. You can then scroll down the list until you found either your AMD or Nvidia graphics driver. Right click on it, select Uninstall, and Windows will remove the driver.
This method can still use residual traces of old GPU drivers in the Windows registry, though, which can sometimes cause compatibility problems, particularly if you’re upgrading from an AMD GPU to an Nvidia one, or vice versa. To be absolutely sure that the old driver has gone, I also recommend downloading DDU, which will remove every last bit of your old GPU driver.
Select GPU from the menu on the right, then the manufacturer of your GPU (Nvidia, AMD, or Intel), then click the Clean and shutdown button. For the best results, you’ll need to boot Windows into Safe Mode before you run it, although Windows 11 has irritatingly added an element of risk to this process that can end up bricking your PC.

If you use a PIN rather than a password to get into Windows, then booting into Windows Safe Mode can sometimes stop you from being able to get into Windows, and then you can’t get past the login screen to get out of Safe Mode unless you know how to use bcdedit at the Windows Command Prompt.
If you’re confident you can get in and out of Windows Safe Mode without getting stuck, press Windows Key + R, and type “msconfig” into the bar. Then click on the Boot tab, select Safe Boot with Network selected, click on Apply, then click OK. You can then restart your PC and will boot into Safe Mode. Once you’re there, run DDU and you’ll be able to thoroughly clean out your GPU driver.
3. Shut down your PC
With your drivers uninstalled, shut down your PC from Windows, and then press the power button on your PC’s power supply to ensure there’s no power going to your system. You can then take the side panel off your PC case, which should come unattached by unscrewing two screws on the back.
4. Unplug cables
Now unplug any cables that go from your graphics card to your monitor, such as DisplayPort or HDMI leads. Then it’s time to unplug your graphics card’s power cables. In all cases, there will be a clip that secures the plug to the socket, and this needs to be pushed down while you tug on the plug (not the cable) to pull it out of the socket.

5. Remove graphics card
It’s now time to take your oil graphics card out of your machine, so start by unscrewing the screws or thumbscrews holding it in place at the back of your case. You’ll need a No.2 Philips screwdriver for this job, even if it’s just to loosen up the thumbscrews so you can then remove them by hand. Put all the screws somewhere safe, as you’ll need them again in a minute.

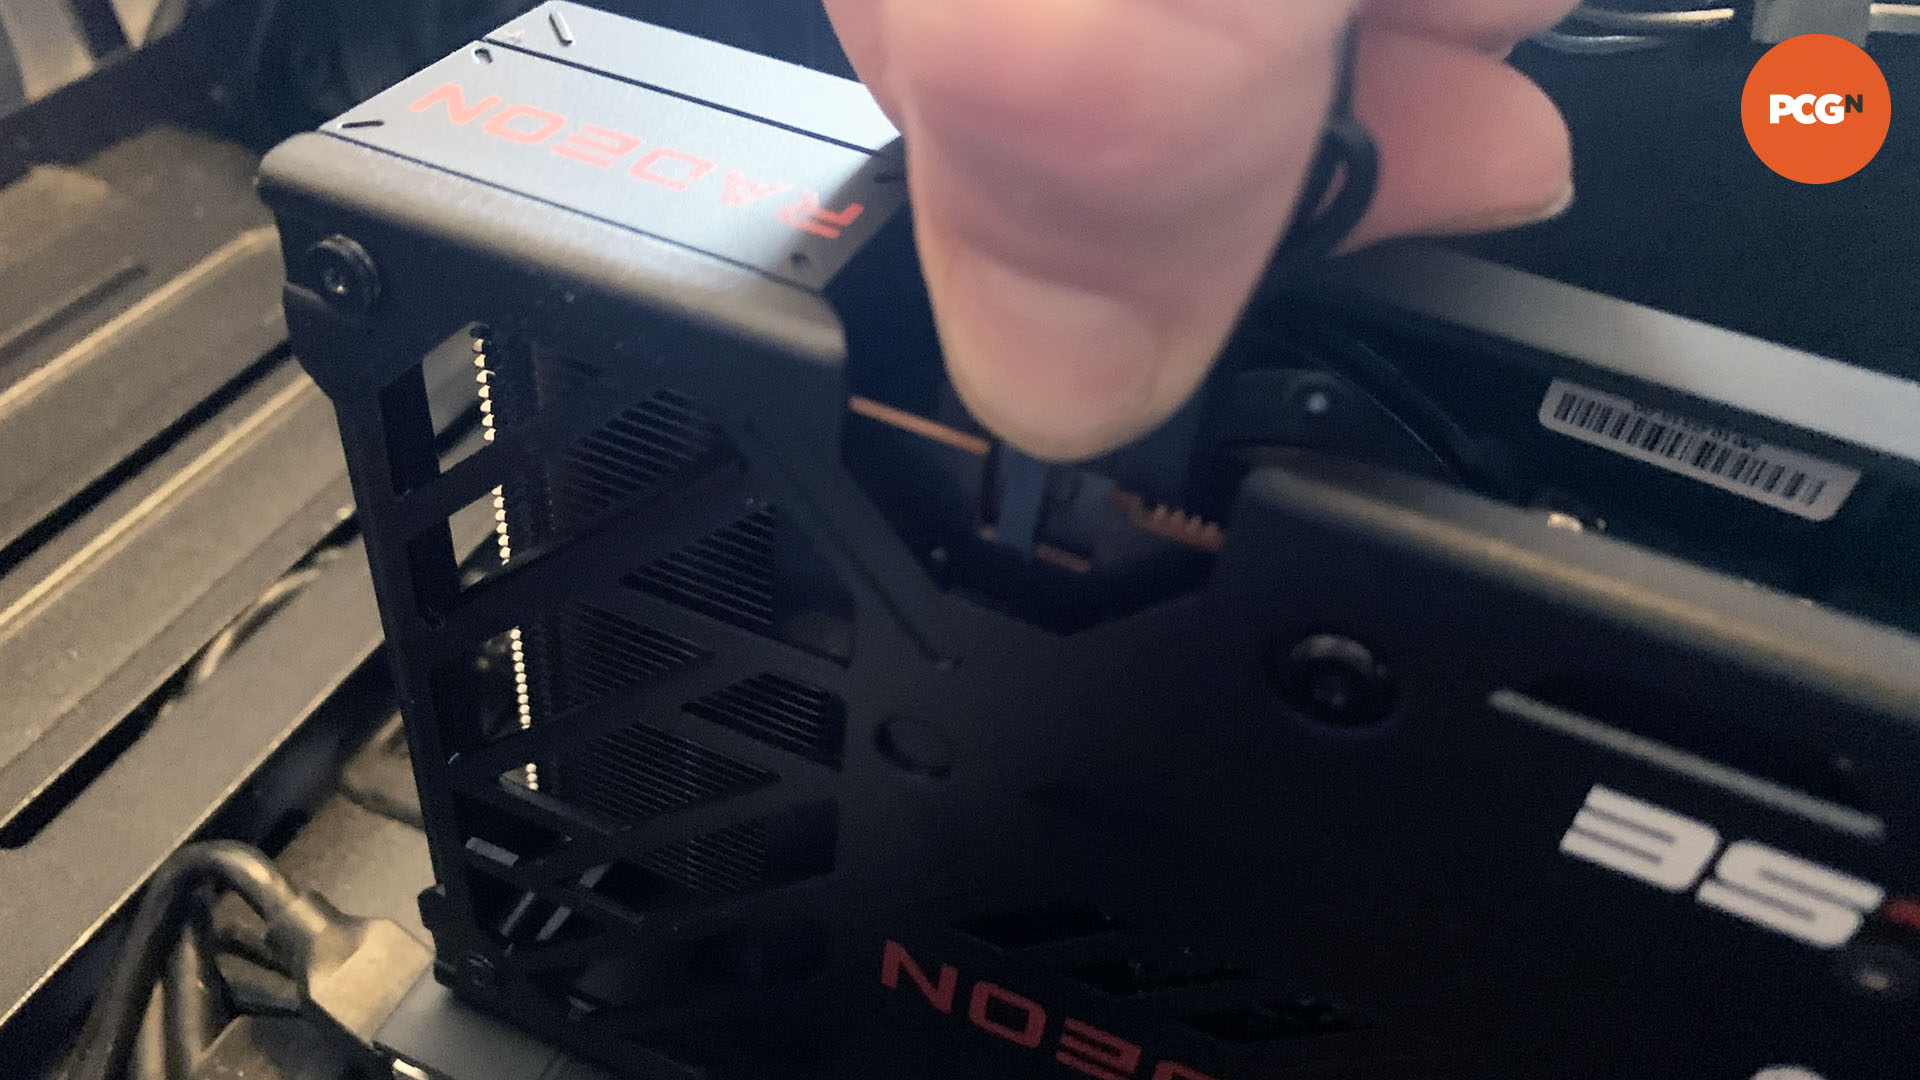
Now you need to unlock the latch on your PCIe slot that’s securing your graphics card in place – don’t be tempted to just wrench it out, or you risk taking the whole slot off your motherboard, or at least damaging it. On older motherboards, the latch will be on the slot itself, and it may be difficult to access. In these cases, the latch will be at the end of the slot, as shown in the above image, underneath your graphics card, and you’ll need to hold it down while you remove the card.

On some newer boards, there’s a quick-release system that makes life much easier. In these cases, you usually need to push a button next to the slot on the right of the board, as shown in the image above. Whichever system your motherboard uses, keep one finger pushing down on the latch to keep your slot unlocked, and then carefully lift your graphics card out of the slot – it’s fine to give it a gentle wiggle to help it out. Once it’s out of the slot, put it somewhere safe, ideally back in its original box.
6. Swap cables
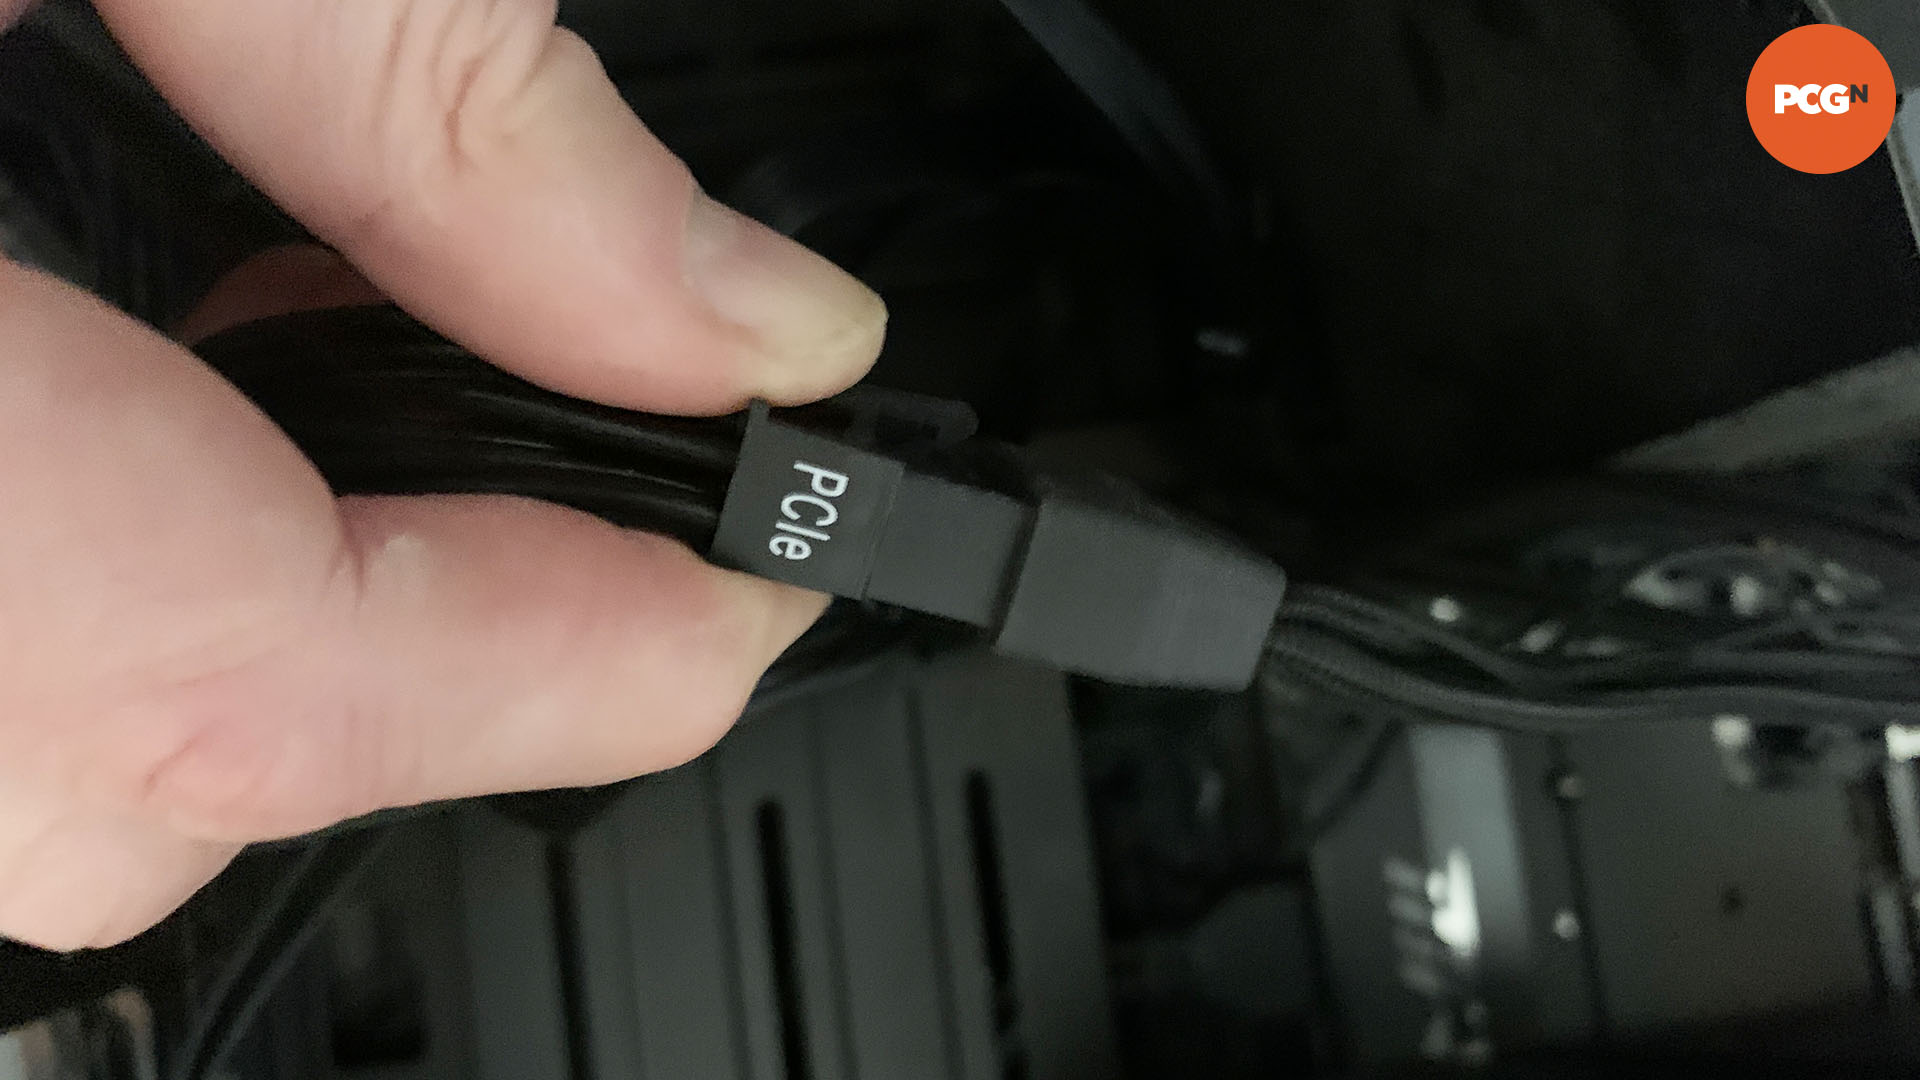
Now you need to make sure you have all the cables for your new graphics card, which you identified in the first step. If you’re upgrading to a new Nvidia GPU, and you have 8-pin cables, then hook up the adapter in the box to your existing cables, making sure that each socket is filled. If you need another 8-pin adapter then plug a new one into your PSU and route it through your case’s cable routing holes next to your graphics card. Once you have the right cables ready for your graphics card, move to the next step.
7. Fit new graphics card
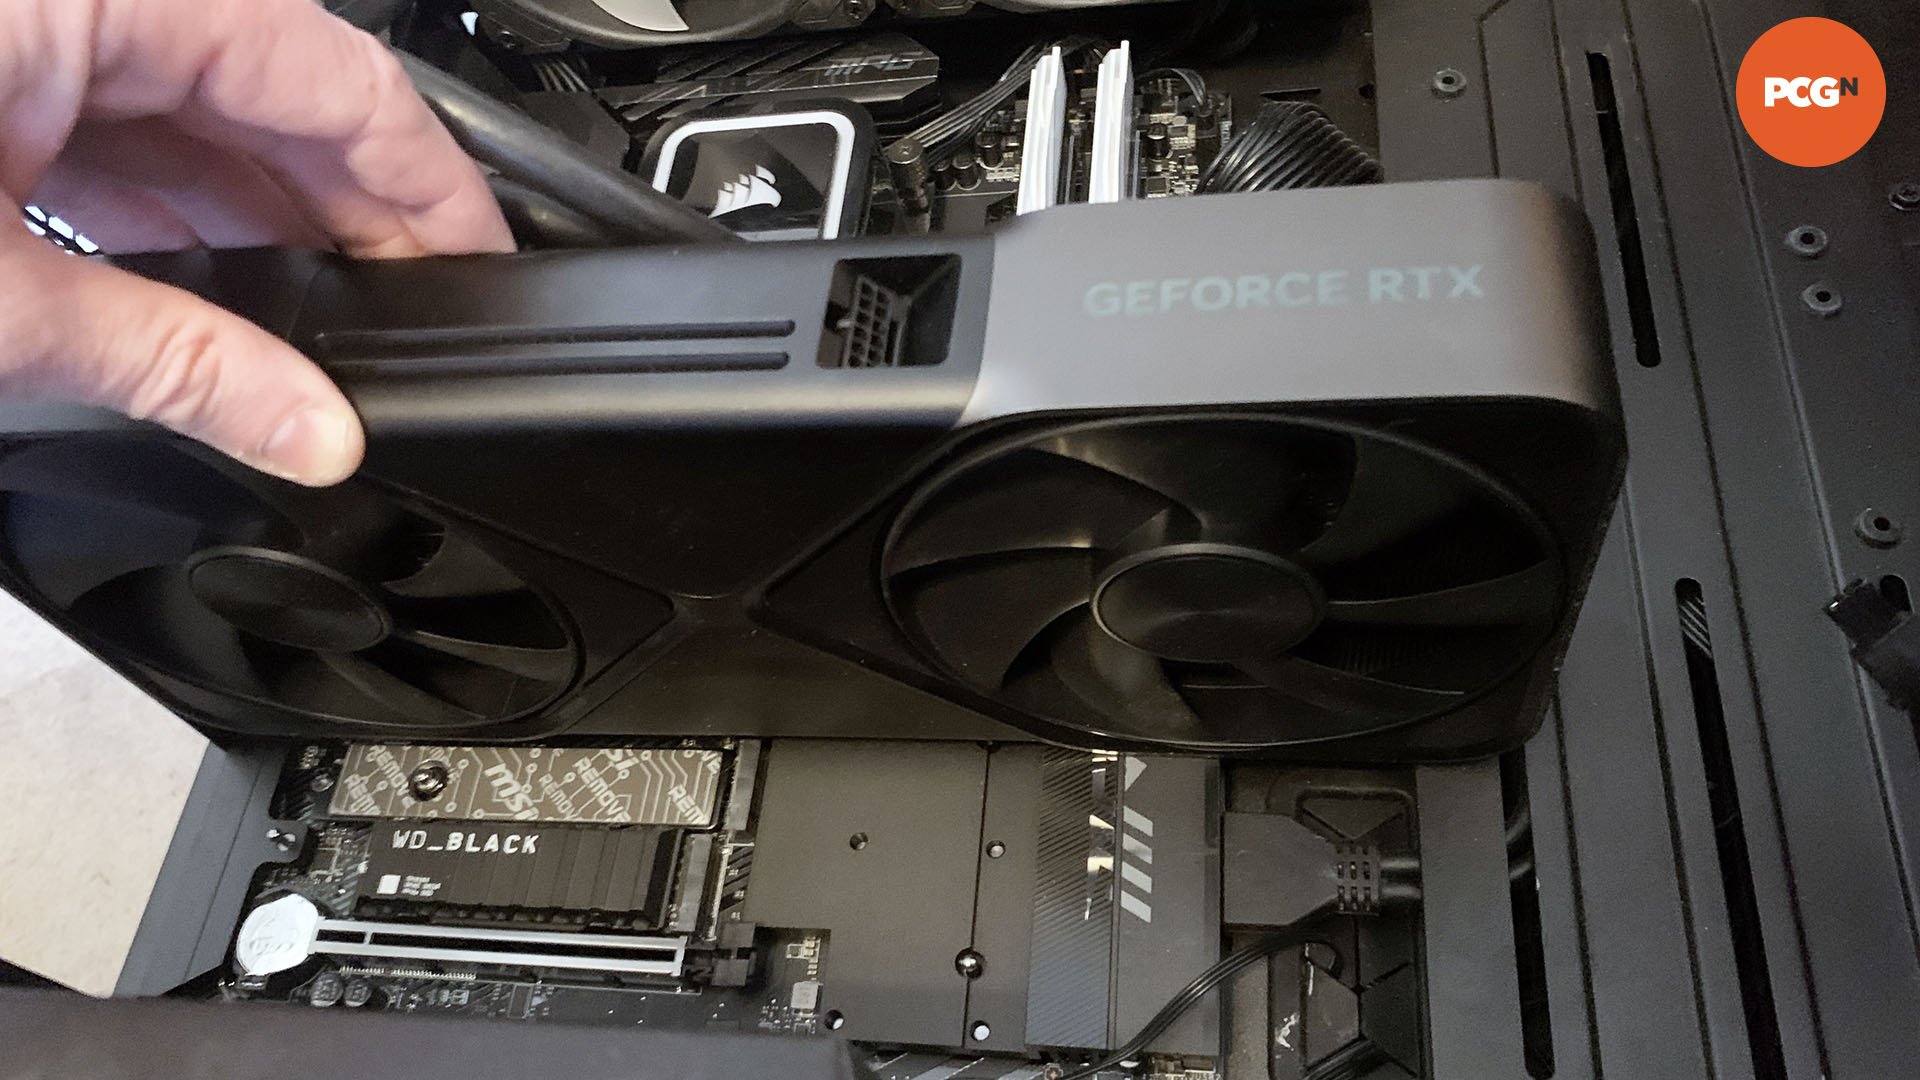
There’s no need to push down the latch to install your new graphics card, as the mechanism will snap it into place automatically. Gently line up the connector on your graphics card with the top PCIe slot on your motherboard, place the ends of the metal I/O plate on the back in the space between your motherboard and the back of your case, and then firmly push the graphics card into its slot.
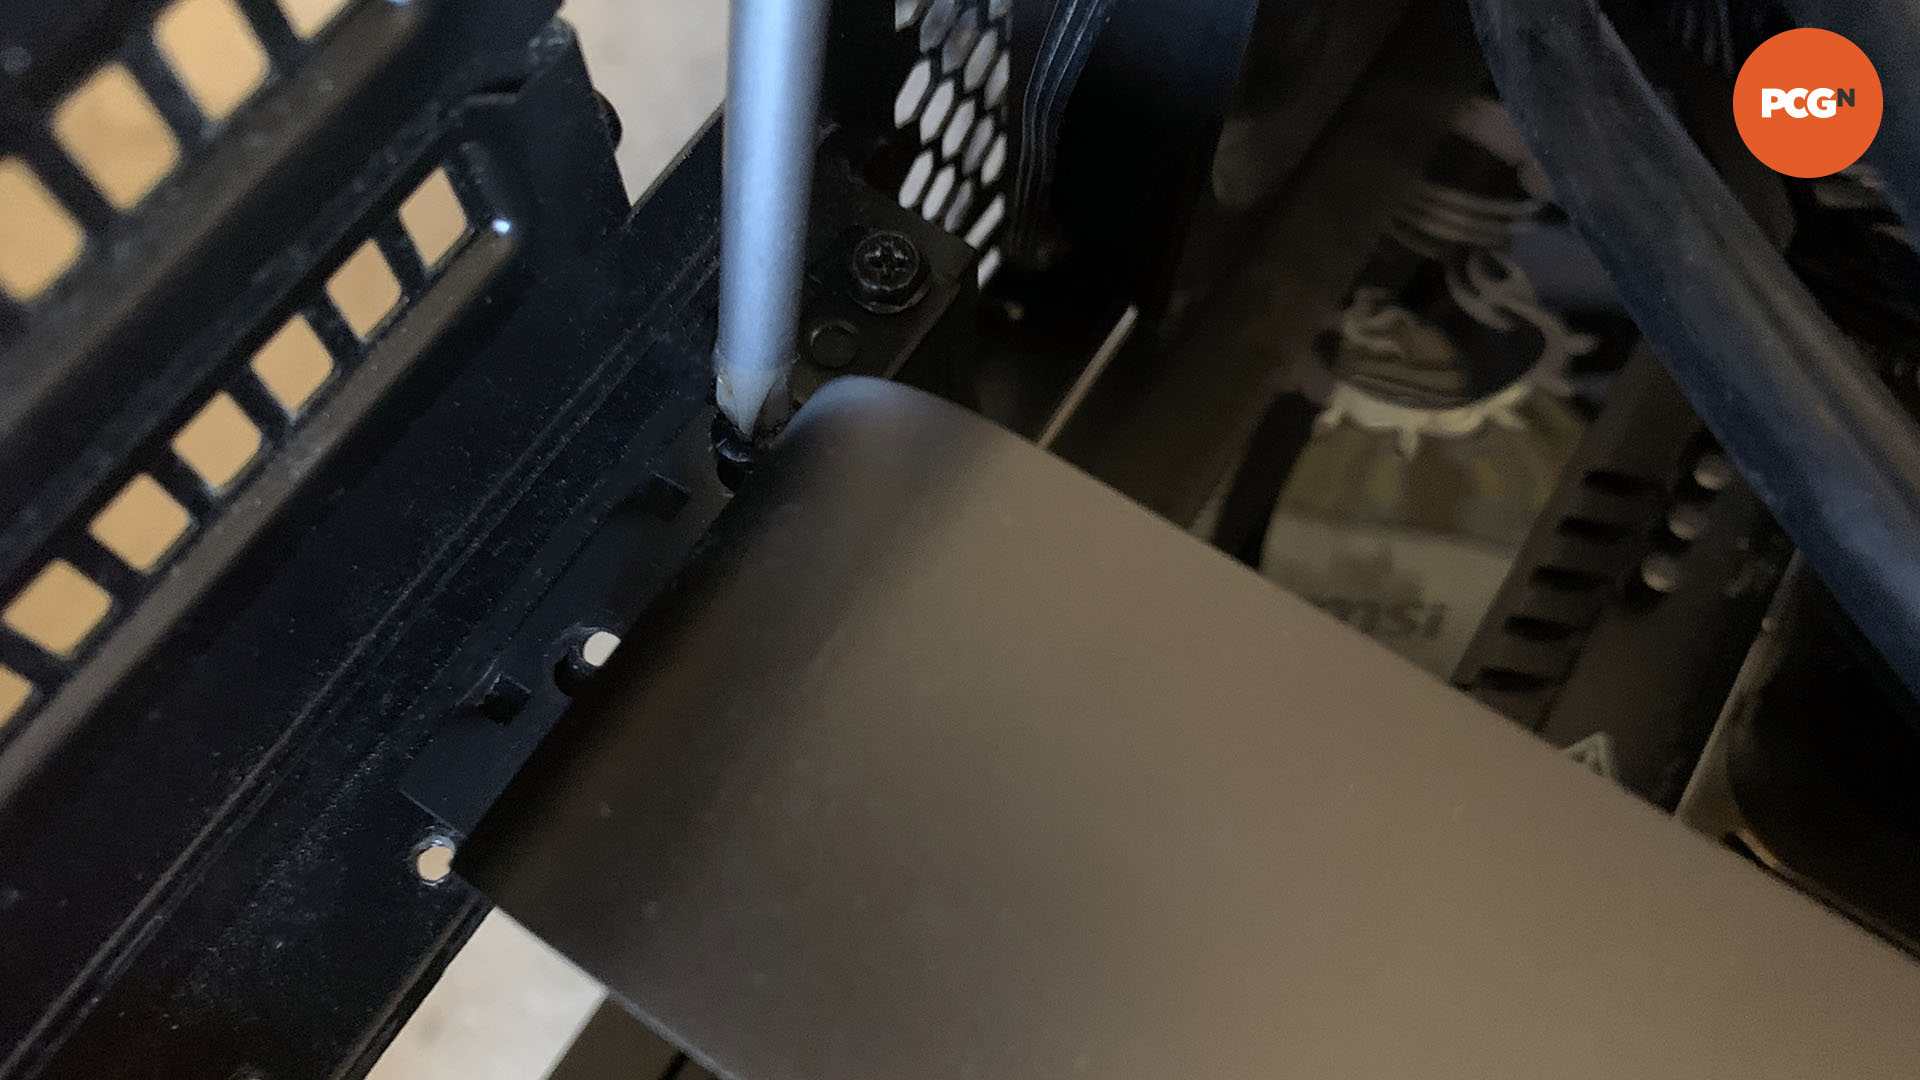
Once it’s fully in the slot, and the latch has locked it in place, screw it into your case using the screws or thumbscrews used to secure your old graphics card. You may need to remove another slot cover from your case first if your new card is bigger than your last one.
8. Plug in new cables
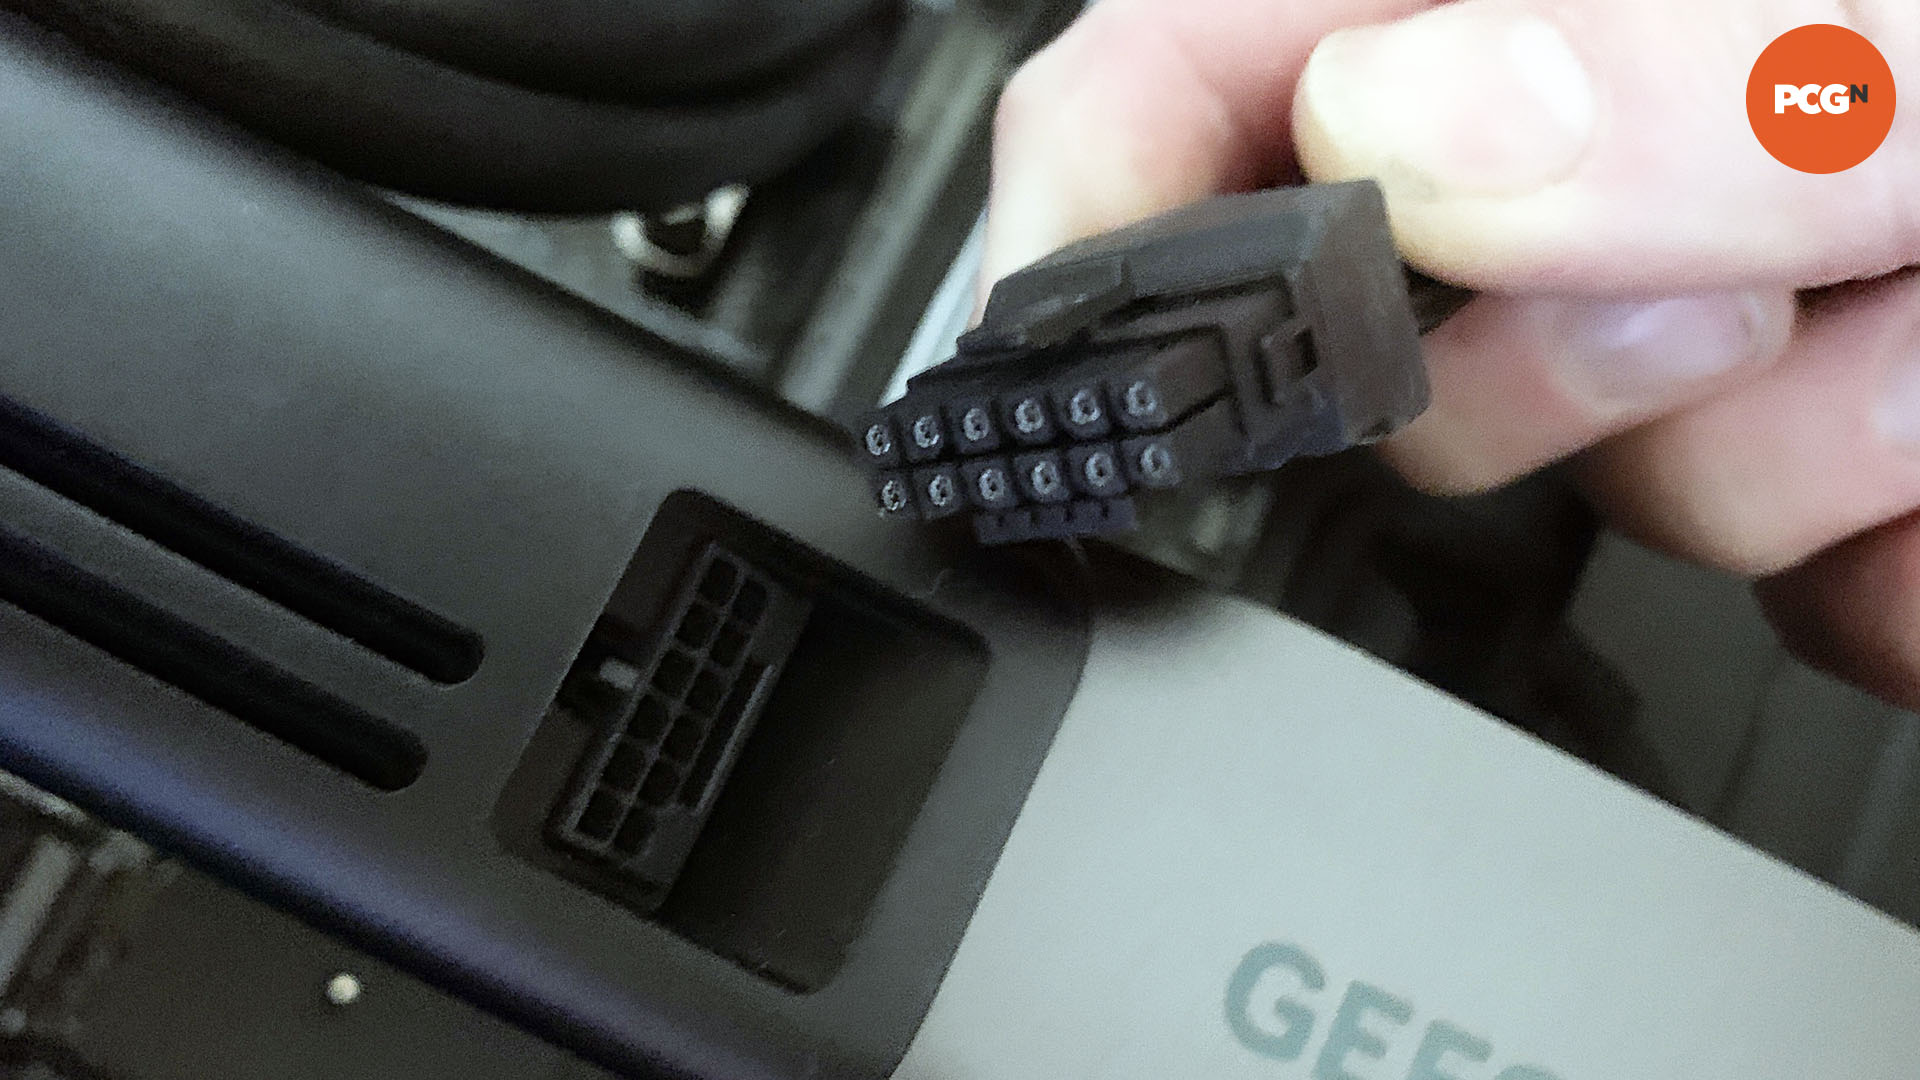
With your graphics card securely installed, it’s now time to plug all the power cables into your new card. You may have read various horror stories about power cables melting, so this is a step you need to make sure you get absolutely right. If your card uses six/eight-pin power connectors, then you just need to make sure the two-pin part is right next to the six-pin part for each eight-pin plug (there should be a notch to line it up), and then push it all the way into the socket, until the clip on the plug is securely over the notch on the socket.
If you’re installing a 16-pin 12VHPWR cable, perhaps on a new Nvidia GPU, then you need to make sure that every single eight-pin power connector attached to the adapter is absolutely fully plugged in, if you’re using one. Then, orientate the plug so that it’s the correct way up for your graphics card’s socket – it will only go in one way, and you can look at the position of the four small pins on the top of the plug to match it up with your graphics card.
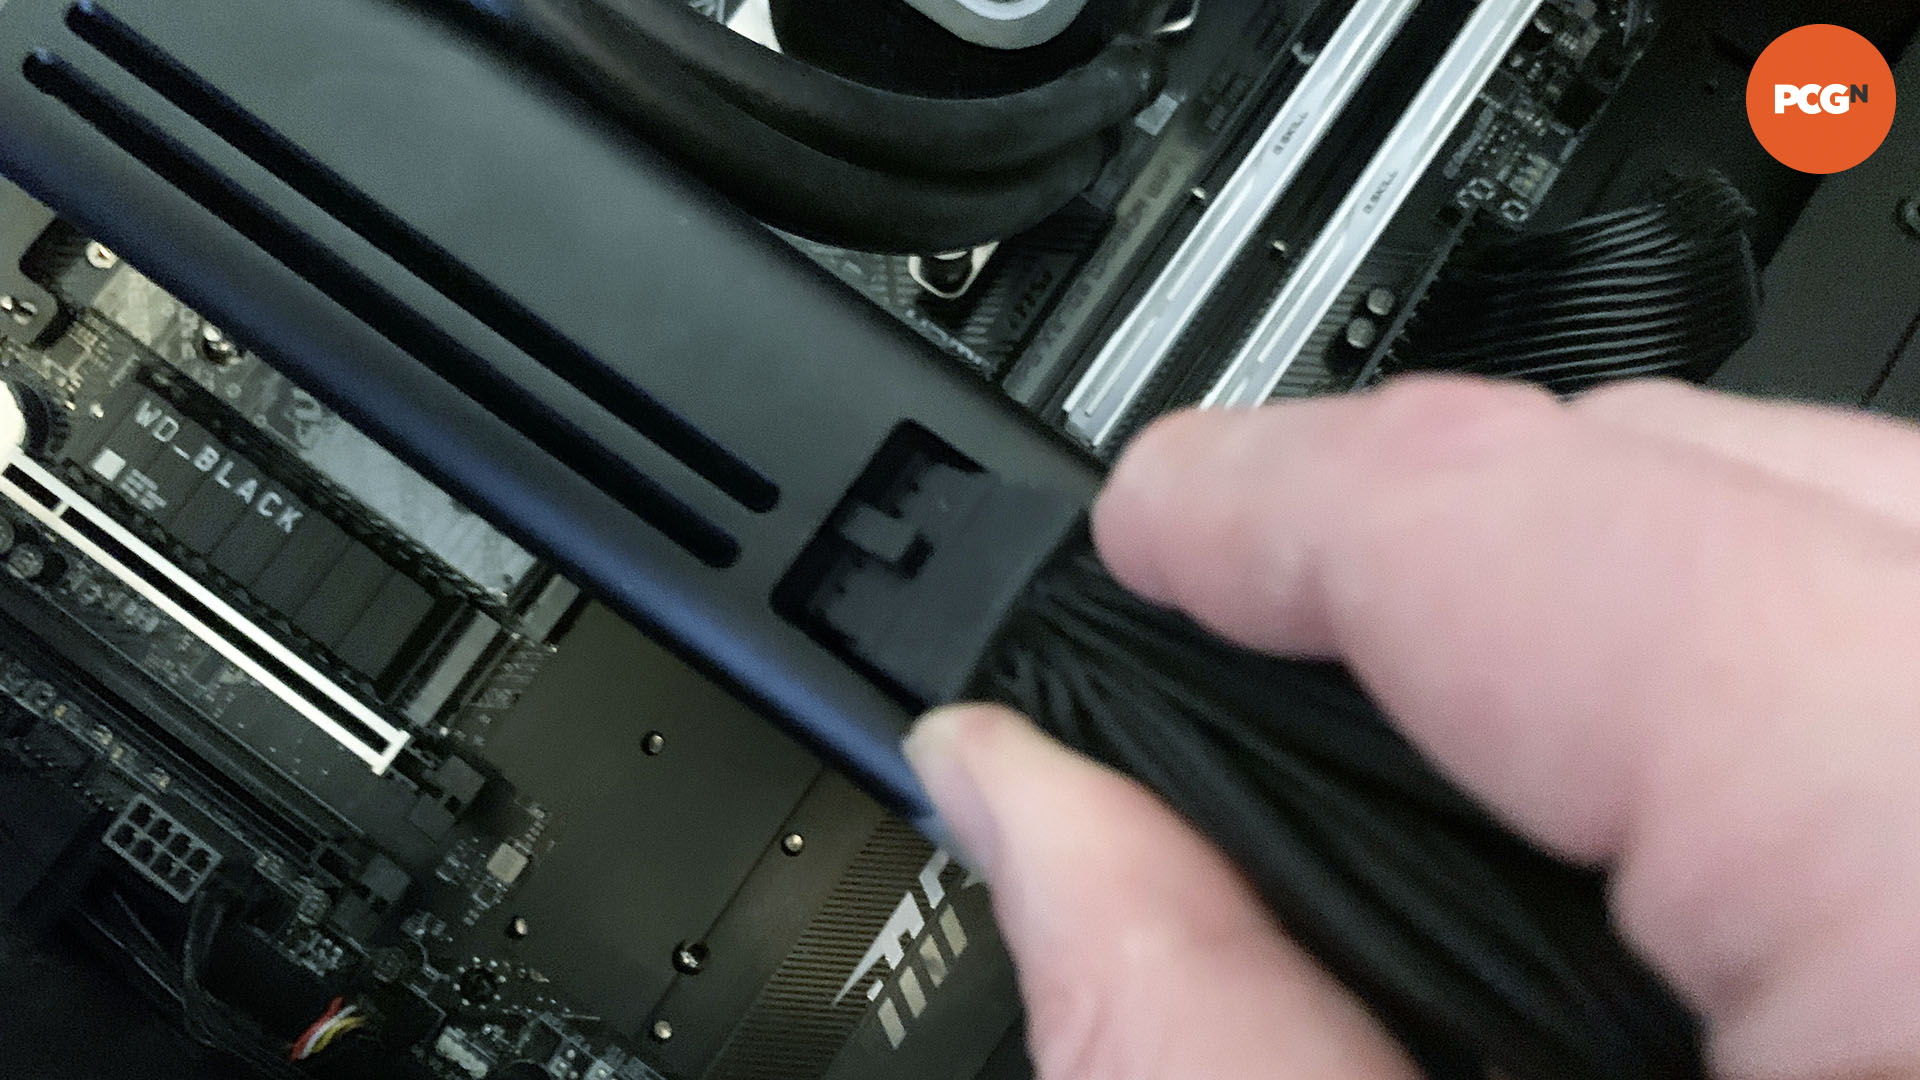
Avoid any unnecessary twists and sharp bends with these cables – you want it to just go directly to your graphics card without any chance of pressure being put on it that might cause it to come unplugged. Push the plug firmly into the socket, and make sure that it’s pushed absolutely all the way in, making a click when the notch on the socket is gripped by the clip on the plug. You shouldn’t be able to see any of the inner parts of the plug protruding from the socket, so check it all the way around, and then check it again.
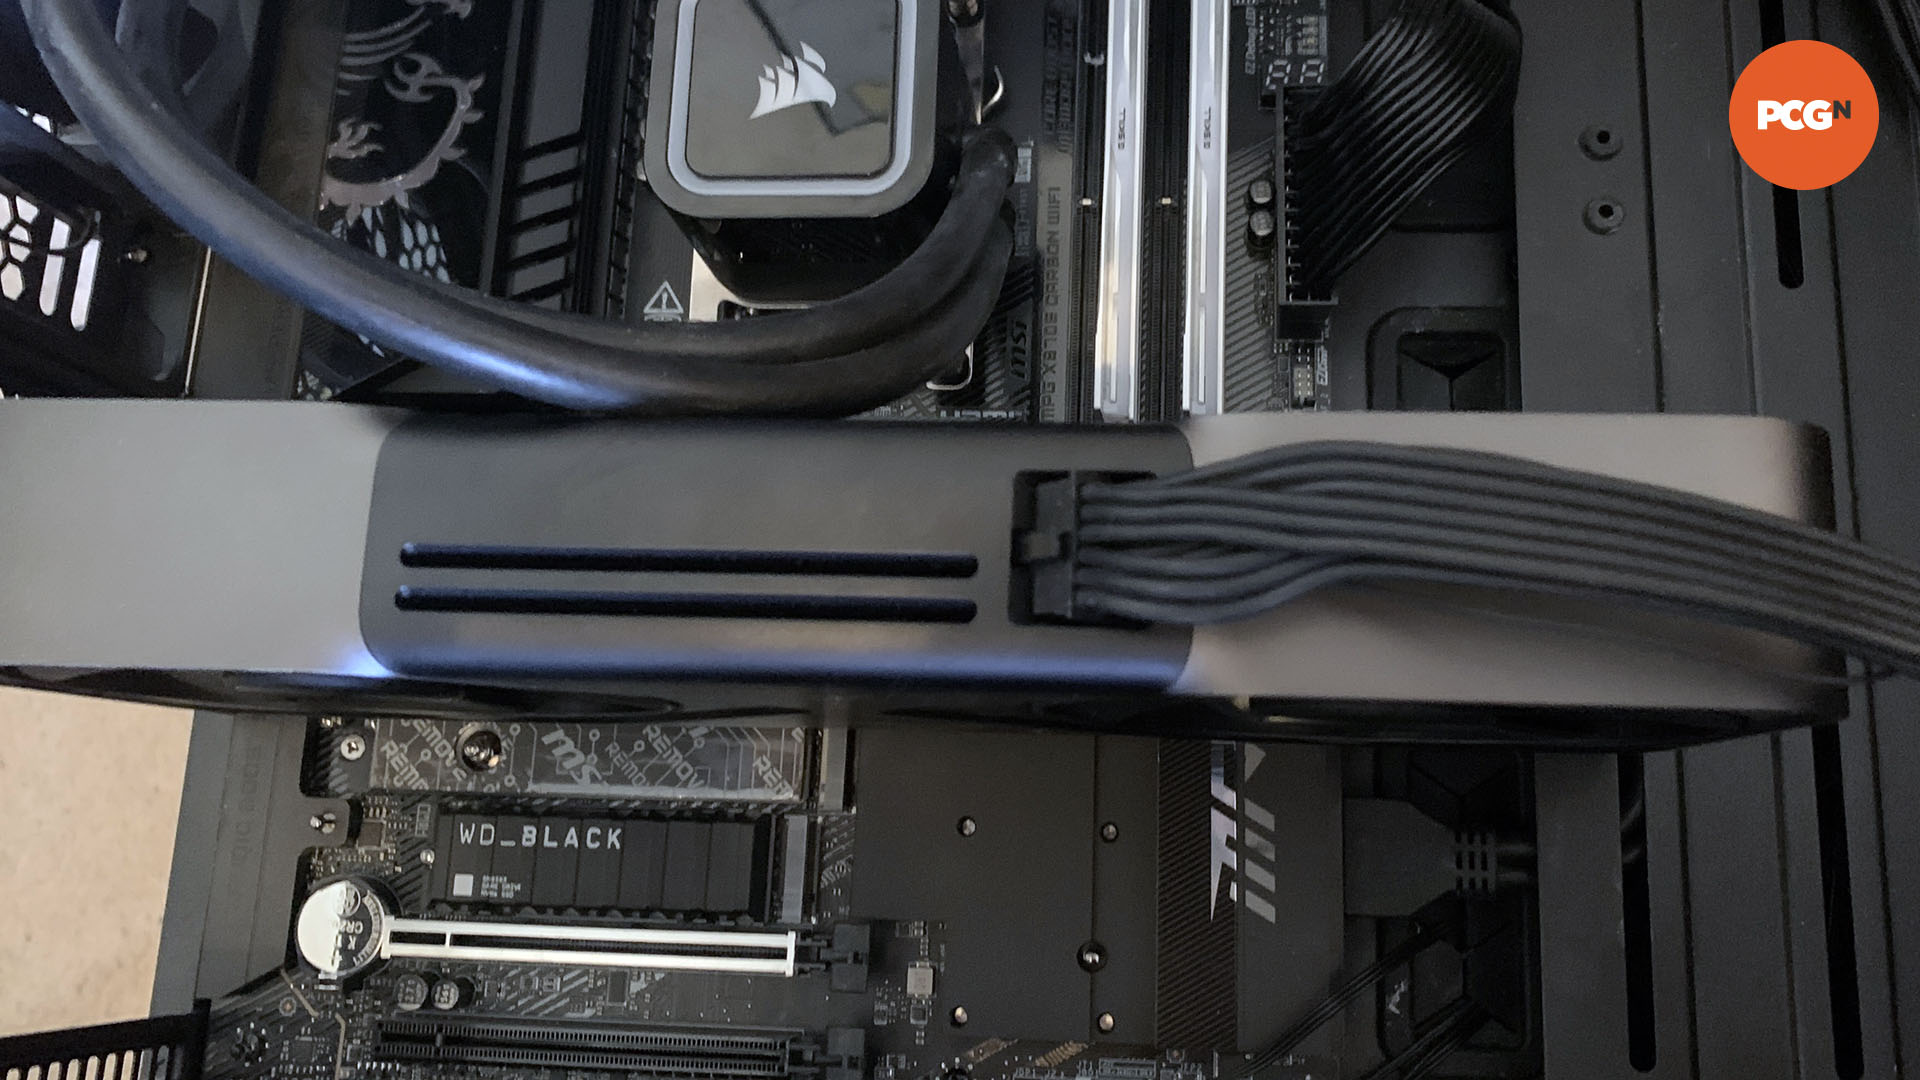
Finally, give it one last push to make sure it’s absolutely plugged all the way into the socket – you don’t want to take any risks here. Likewise, check that the other end of the cable is plugged securely into your power supply and any cables plugged into adapters. Once all the power cables are installed, make sure that none of them obstruct the fans on your graphics card (or indeed any other fans in your PC). plug your monitor’s DisplayPort or HDMI cable into the back of the graphics card, and refit your case’s side panel.
9. Power on PC
Flip the switch on your PSU so it’s on again, and then push your PC’s power button. As you’ve just changed your hardware, it may take a little while to boot while your motherboard detects the changes. Press the Del key on your keyboard continually while your PC is booting, and eventually, your PC will take you into your motherboard’s BIOS/EFI setup system.
10. Enable resizable BAR
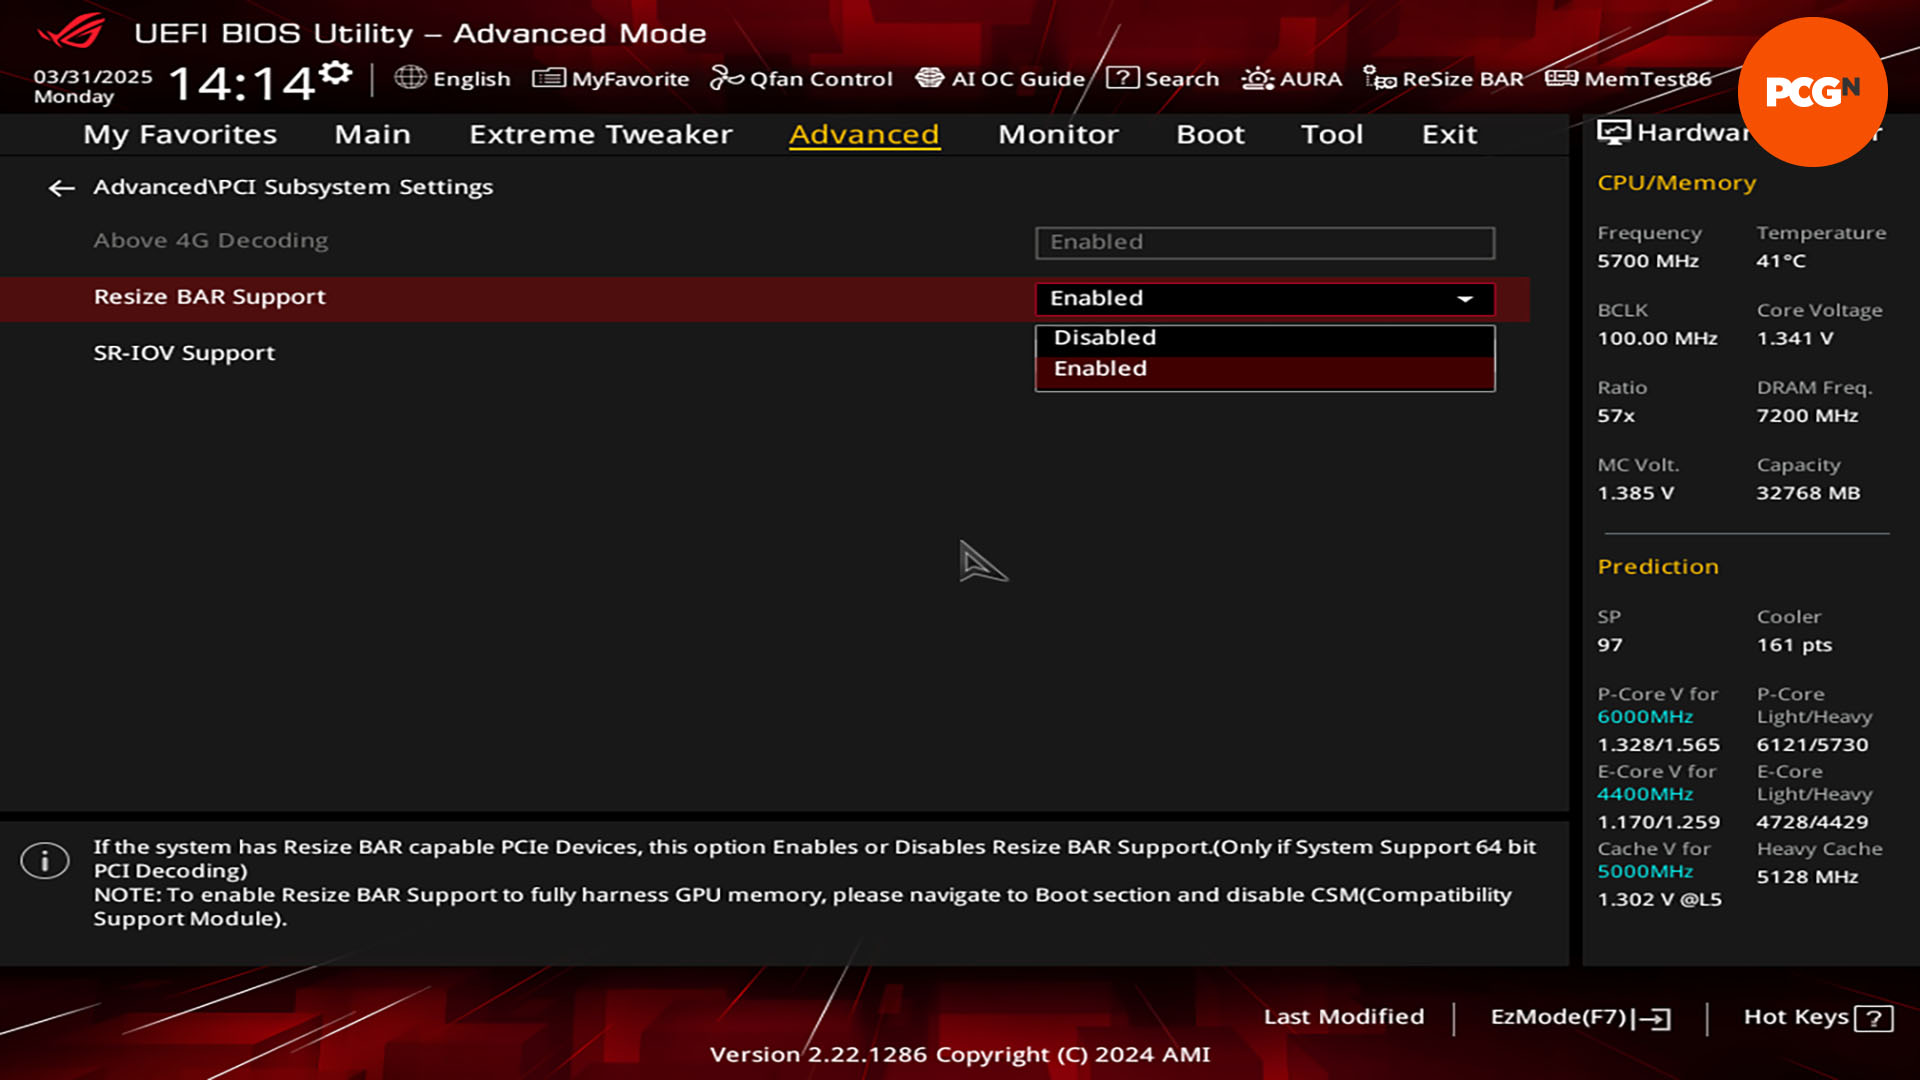
From here, there are two features to check in the Advanced/PCIe settings. Firstly, make sure that the top PCIe slot on your motherboard is set to use the latest PCIe version possible, preferably PCIe 5.0 if it’s available, PCIe 4.0 if not. Secondly, check that resizable BAR is enabled – you may need to enable above 4G encoding in the PCIe settings before this option appears. For more detail, you can check our full guide on how to enable resizable BAR. Save your settings and exit the EFI (usually by pressing F10), and your PC will reboot.
If nothing happens when you switch on your PC, then hold down the power button on your PC so it switches off and try again. If you still get no joy, power down your PC, switch off the PSU again, remove the graphics card from its slot, and fully install it again, making sure it’s securely in place before trying to power it on again.

11. Install drivers
Your PC will now boot back into Windows, and you’ll need to open your browser to get the latest driver for your new GPU. If it’s an Nvidia GPU, then go here, if it’s an AMD GPU go to this link, and if it’s an Intel GPU click on this link. All the GPU manufacturers’ driver pages will prompt you for the name of your GPU and your operating system, so put in these details, and then download the latest driver for your GPU. I
f there’s a choice of versions, for example for gaming or studio, pick the gaming one (the GeForce one for Nvidia GPUs). Install the driver (it’s fine to use the Express install for these ones), and then restart your PC.
12. Check GPU-Z
When your PC reboots, download GPU-Z and run it to make sure your GPU is running fine. It should detect your new graphics card’s details, and also tell you if resizable BAR is enabled or not. Go to the Sensors tab and you’ll also be able to see the temperature of your GPU and its fan speeds.
13. Get gaming
Now you just need to enjoy your improved frame rates and visuals from your new graphics card, so run a demanding game, such as Cyberpunk 2077, push up the settings ,and give your new GPU a full workout. Run a game with a built-in benchmark, such as Cyberpunk 2077, and you’ll be able to see how the full capabilities of your new GPU in action, and also make sure that its frame rates are within expectations. Keep GPU-Z running in the background while you’re doing this, and you can then go back to the Sensors tab and make sure that your graphics card isn’t overheating.
Can I upgrade my laptop GPU?
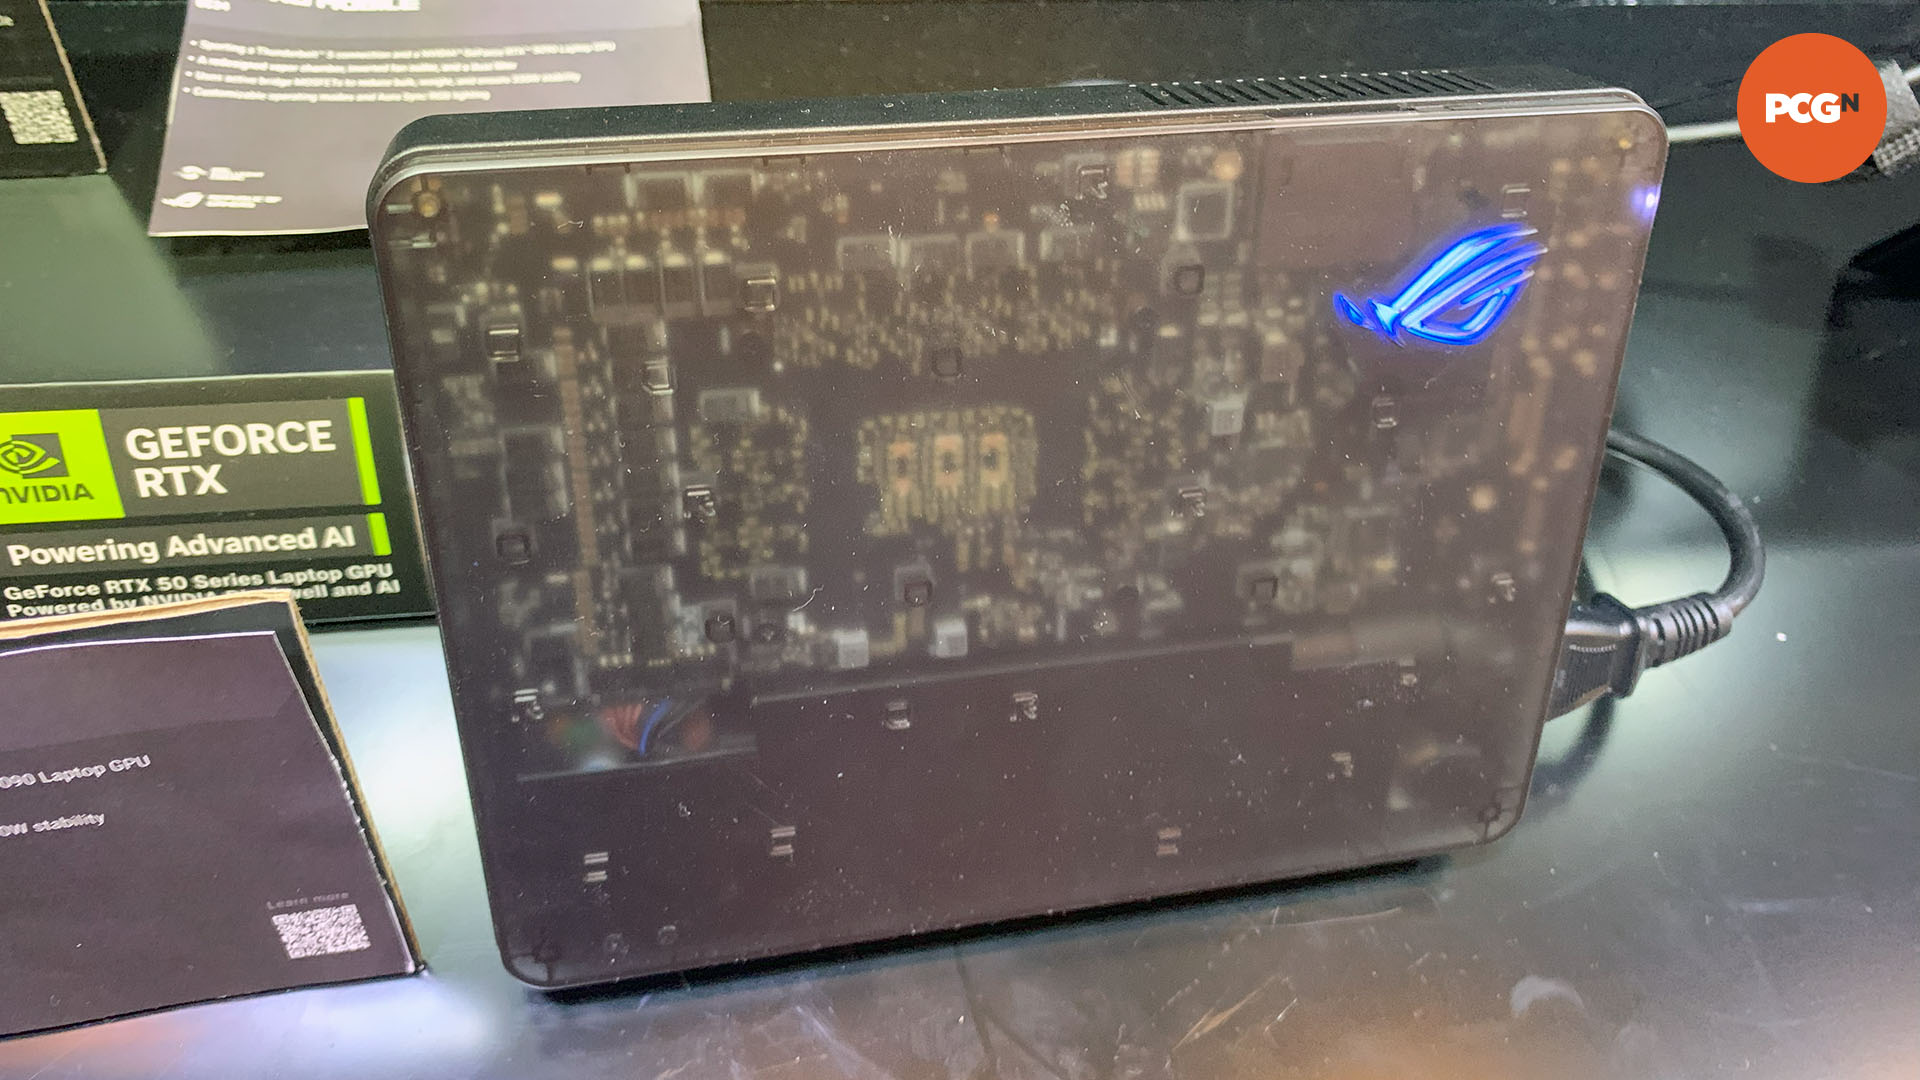
You can’t upgrade the GPU inside your laptop, as it will be fitted to a proprietary graphics card for that specific machine and its cooling system. However, you may well be able to upgrade your laptop GPU by using an external GPU box that connects via USB 4 or Thunderbolt, such as this Asus RTX 5090 box.
Check that your laptop has a USB C port that’s up to the job, and you can give it a big GPU boost. However, bear in mind that these boxes usually require an external PSU, so you can’t really use them for gaming on the move – they’re more for plugging into your laptop when you’re at home.
Does my PSU need a dedicated 12VHPWR cable?
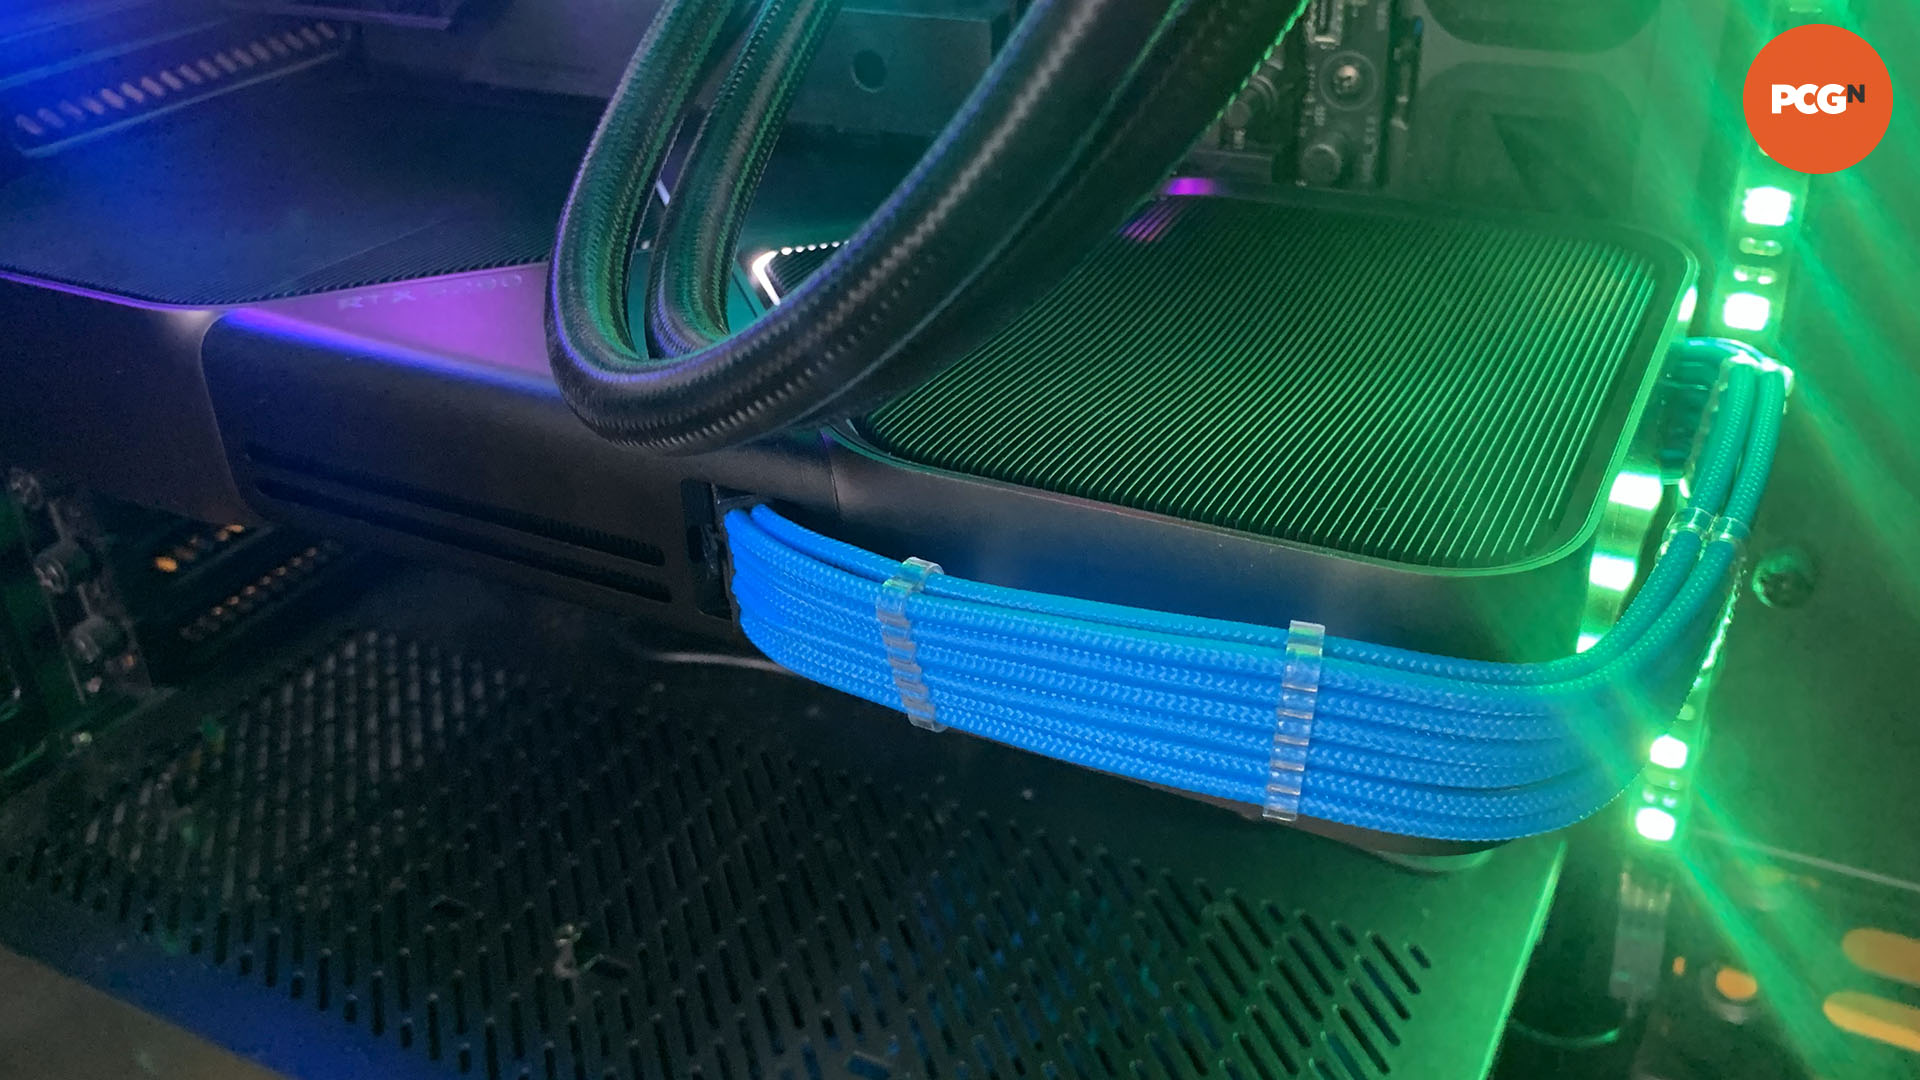
No, any PSU with 8-pin power plugs can hook up to your graphics card with a 16-pin 12VHPWR socket using an adapter, which will be supplied with your graphics card. You can also buy separate 16-pin 12VHPWR cables that will either plug directly into your PSU, or work as extension cables that plug into the 8-pin power cables from your PSU.
If you plan to buy one of the former cables, check (and double-check) that it’s made for your manufacturer and model of PSU – you can’t use an EVGA cable with a Corsair PSU, for example. PSU manufacturers often make specific cables 12VHPWR for their PSUs, and some such as Corsair even provide them in a range of colors.
Alternative options are also available from the likes of CableMod, but again, make sure you buy a version that’s definitely made for your PSU, ensure it’s plugged firmly into both your PSU and your graphics card, and avoid making any tight bends with it.
That’s a wrap for our guide on how to install your graphics card. For more PC building tips, check out our full guide on how to install a CPU, and our detailed how to install an SSD tutorial.


Leave a Reply