
There are a lot of systems at play in Xenoblade Chronicles X that you never need to touch, and FrontierNet is one such system. You can complete the entire game without interacting with most of its pieces, but you really should take the time to invest in them. FrontierNet has some amazing bonsues associated with it that will help you get the best items in the game, faster.

Related
Xenoblade Chronicles X: Definitive Edition – Soul Voices, Explained
Soul Voices is an important mechanic in Xenoblade Chronicles X: Definitive Edition. Learn how to perform it and be successful with your party.
A lot of that specifically requires the use of Data Probes, and the tactical placement of them. There are a lot of different probes in the game, all with different effects and efficiency based on where you place them. It’s a complex system, but well worth wrapping your head around. Here’s everything you could possibly need to understand Data Probes.
What Are Data Probes?
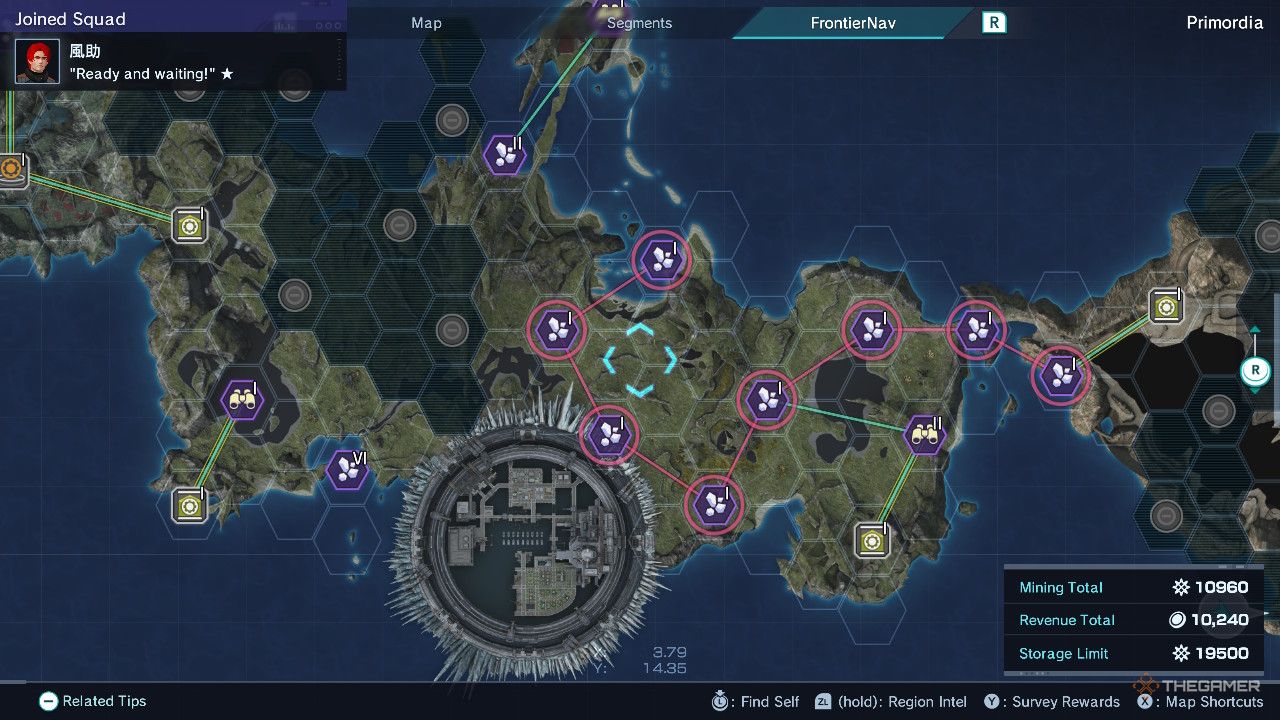
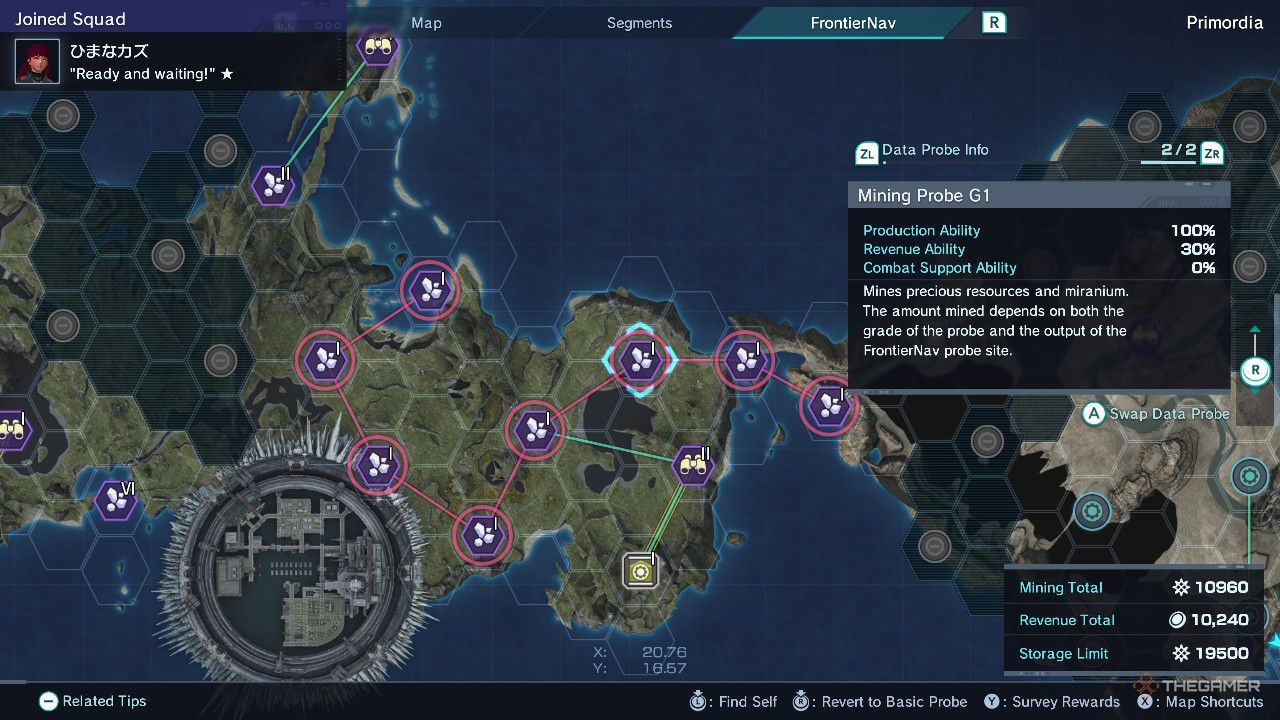
Data Probes are those big spikes you place into the ground at each FrontierNet site. It’s what unveils more of the Segment Recon sites around you, letting you know what items, enemies, and activities are hiding in the immediate vicinity. Once a Data Probe is placed, it also becomes a fast travel point for you, allowing you to return to this area whenever you want.
FrontierNet is a much more than a one-and-done affair, however. It is incredibly active. Once you place a Data Probe, you will then begin to get a small income or Miranium and Credits every now-and-then. The exact time it takes for these to update is a little random, approximately 10-15 minutes, and it doesn’t update when you’re standing still, either. You can’t just idle and let the rewards roll in. Which is also why you should invest in FrontierNet early on.
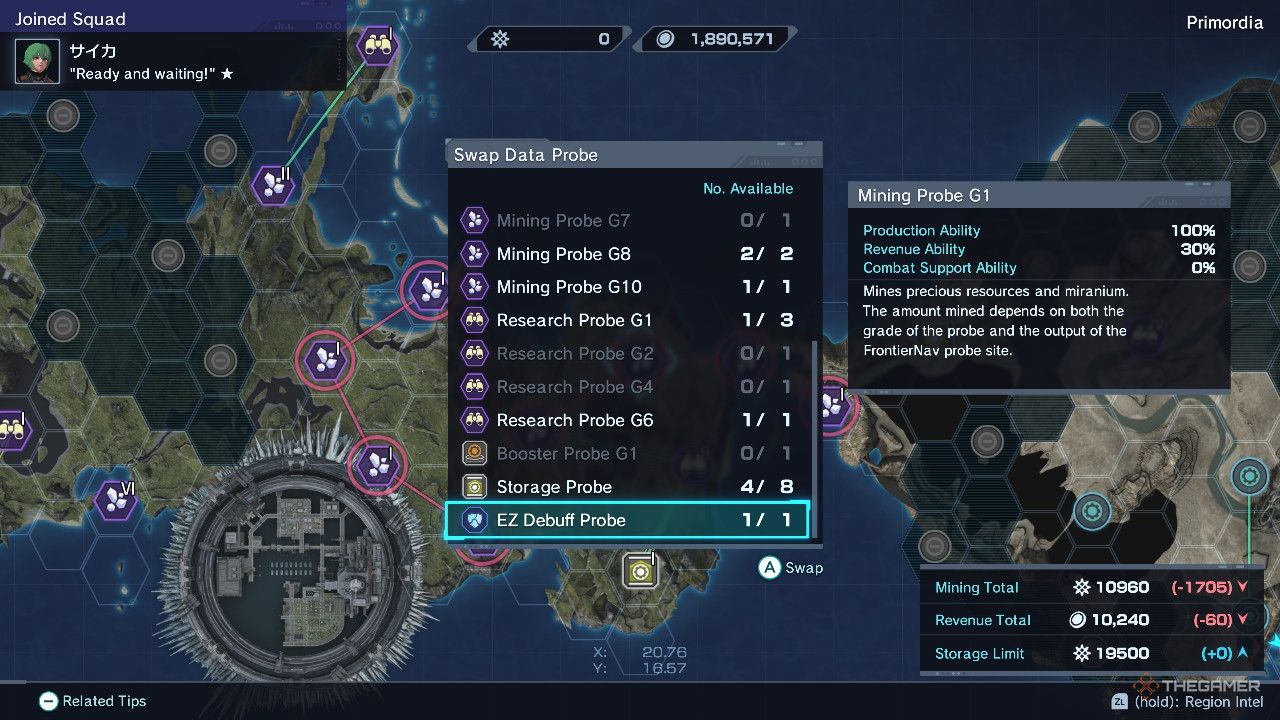
These Data Probes are just the default, with there being plenty more to increase the Miranium and Revenue you receive every time it ticks, but also to provide many other effects as well. It is always worth putting in these more specialised probes over the default Data Probes, as the increase they give is a dramatic improvement over the loss.
You can open FrontierNet at anytime from the map menu and simply tab over to it. From here, you can see every FrontierNet site you have discovered, the Data Probes you have placed, and the benefits you are getting from all of them. From here, you can change your placed probes whenever you would like.
Placing a probe costs money, becoming more expensive the more powerful the probe is. You can change them whenever, but be careful not to run through all of your money placing them.
Probes are only acquired from specific sources, and are thus finite. However, a probe doesn’t get used up when it’s placed, and can be removed and placed somewhere else whenever you want.
Every Data Probe And What It Does
Probes fit into a few different categories in Xenoblade, though they can approximately be defined as those that improve your Miranium and Revenue income, and those that affect combat. The majority of the former also come in multiple levels, while the latter are just a single level. We’ve listed all of them below, and what they do.
-
General Probes
Probe
What It Does
How Many Levels
Mining Probe
Increases the amount of Miranium mined, but reduces the Revenue.
10
Research Probe
Increases the Revenue gained, but reduces the Miranium.
6
Storage Probe
Increases the maximum Miranium you can store, but reduces Revenue and Miranium.
1
Booster Probe
Increases the efficiency of each probe it is connected to, but generates very little Revenue and Income itself.
2
Duplicator Probe
Mimics the effect of every probe it is connected to, effectively doubling what they each do.
1
-
Battle Probes
Probe
What It Does
Fuel Recovery
Increases the speed at which Skells passively regain fuel.
Melee Attack
Boosts melee attack of characters and Skells.
Ranged Attack
Boosts the ranged attack of characters and Skells.
EZ Debuff
Boosts the chance of a Debuff activating on an enemy.
Attribute Resistance
Boosts the attribute resistance of the respective attribute of the probe.
By and large, you’ll want to focus on increasing your Miranium and Revenue first and foremost, as these will be incredibly helpful in the early game. On top of that, Battle Probes don’t start to become common until later anyway, so it’s not worth using them until you’re looking for an extra boost in combat.
Probes cannot be bought in shops, and must instead be found across the world. They are spread across the length and breadth of Mira without any real rhyme or reason. Some will be given as rewards to quests and story missions, though the majority are acquired from treasure around the world, such as by examining Skell wreckages and White Whale Debris.
As such, that means you do have to actually explore the world to find these more powerful probes. Seeing as you need to explore to unlock new FrontierNet sites anyway, these objectives go hand-in-hand. As such, if you see a yellow square on the map, don’t hesitate to run towards it. It just might be the next probe you need.
Should You Use Battle Probes?
Battle Probes are interesting because they operate quite differently than the general probes. They only come in a single level, and are not capable of creating chains due to how few of them there are. However, they are still affected by the scaling on respective FrontierNet sites, meaning the bonus they provide can still have quite a wide range.
Overall, Battle Probes aren’t particularly worth it over probes that increase your Miranium and Revenue. However, they can still serve a useful purpose. For one, if you are struggling against a certain enemy, it doesn’t hurt to swap out another probe for a Battle Probe to give you that boost you need. If you also are sufficiently stocked on Miranium and Credits, then there is no harm in popping down a Battle Probe to make combat a bit easier.
Once a Battle Probe is placed, it functions for the entire region it is placed in, so you need not place any more unless you want to boost its effect.
Tips When Placing Data Probes
Just placing probes is well and dandy, as no matter what, they will increase the amount of Miranium and Revenue you get, though it pays to be more efficient. As Kirsty teaches you in the Probe-fessional mission, you need to be tactical with your placement of probes if you want to maximise your gains.
For one, it is a massive boost to build chains. Any probes of the same type and level that follow along a single path will gain boosts at three, five, and eight probes in a chain. This gives a 30%, 50%, and 80% respectively. If the chain exceeds eight probes, any subsequent probes in the chain will receive the 80% boost as well.
However, it is only in a single line. If the chain splits off in multiple directions, it will only count to each end, rather than all of those that are connected.
Don’t be afraid to put newer probes in after you discover them, especially if you have enough to build a chain effect. Sometimes a smaller chain of stronger probes can give a dramatically improved effect over a long chain of weaker ones. The cost is quite small in the grand scheme of things.
Duplicator Probes are especially interesting, since they copy the effects of any probe they are connected to. This means if it were to be connected to three other Research Probes all around it, it would function as if three Research Probes were placed in its position. This lets you make obscenely high numbers, and if you pair this with a Booster Probe, you can get astronomically improved returns.

Next
Do You Need To Play The Other Xenoblade Games Before Xenoblade Chronicles X?
Xenoblade Chronicles X: Definitive Edition benefits a bit from prior knowledge, but not a ton.
Source link