As you begin progressing through The First Berserker: Khazan, you will notice that the levels not only get longer but are much more involved as well, having branching paths, multiple Elite Enemies to take down, and a plethora of riches for you to discover and loot. And, of course, they will culminate with a challenging boss encounter to test your might.

Related
The First Berserker: Khazan – 8 Beginner Tips
Here’s everything you should know before diving into the formidable world of The First Berserker: Khazan!
The Traitor Revealed mission is no exception. It is one of the longest missions in the game, with many routes leading to various hazards, which can make things a bit overwhelming at times. Still, it could be worse. You could be in another poison swamp. So, there’s that at least!
How To Complete Traitor Revealed
At the mission start, follow the path straight ahead, turn left to find a lift, and take it down to the next area. Once here, you will see a Blade Nexus, marking your first checkpoint of the mission. Elamein will be nearby, so make your way to her and speak with her.
She will ask, “What makes someone a hero?” prompting a rare dialogue choice response from Khazan. As far as we know, this choice doesn’t change much of anything, so choose whatever resonates with you most. Exhaust the rest of the dialogue with Elamein, then continue onward!
Crossing The Bridge
After speaking with Elamein, walk directly behind her and look down and to the right to see some Soldiers and Wild Dogs. Drop down and begin fighting them to have another Soldier burst through the nearby door. Defeat the enemies and enter the house to find an item on the ground. Pick it up to receive a Water Enhancer.
Next, follow the wooden walkway out until you reach more Wild Dogs and a Soldier. Eliminate them and then head toward the bridge. Begin crossing the bridge, having you fall through it about halfway across. Drop down into the area below to continue moving forward!
Closer To The City
Continue moving forward until you run into a pack of Wild Dogs and Soldiers on the left. Defeat the Dogs and run up the ramp to the right, following it behind a house. There will be a Wild Dog and Soldier here. Take them both out and proceed until you reach a rooftop on fire.
To the left of the flames will be x2 Fire Cleanse Potion and a Fire Disruption Parchment. Grab these items, then look straight ahead. Use your Javelin to take out the Soldiers in front of you. Eliminate any stragglers that come after you, then proceed up the pathway and through the gate!
Fighting Through
Pass under the gate and follow the pathway until you reach the cart. Interact with it to kick it down, opening the route into the square. You will see a Knivesveil Slayer patrolling the streets. Throw a Javelin at them to lure them toward you, and take them down behind the wall to avoid pulling aggro from the Archers.
With the Kniveveil Slayer defeated, round the corner and look at the rooftop in the distance. Use your Javelin to pick off the Archers. From here, walk up the square until you see a room opened on the left and enter it. As soon as you enter, a Soldier will attempt to ambush you. Defeat the Soldier and Absorb the corpse for Lacrima and Soul Tear Dust!
Exploring The Square
From there, continue up the square, take the first left, and head behind the house you were ambushed in. There will be an Earth’s Spirit Fuel on the ground at the far end of the pathway. After grabbing this, run up to where the Archers were earlier to find a Chest against the wall on the right.
Open the Chest to find that it’s rigged with explosives. Run away from it to avoid getting caught in the explosion, then loot the item left behind to obtain the Guardian Knight’s Ring and x25 Treated Gem!
Further Exploration
Follow the main pathway until you reach an elbow with a staircase beside it. Make your way up the stairs and use your Javelin to take out one of the Soldiers at the top. There will be another one there that will rush you, swiftly eliminate them, and continue to the top of the stairs.
A closed door will be at the top, but you can open it. Head inside the house to find a Chest in the back left corner. Open it to obtain the Imperial Soldier’s Dual Wield, Wanderer’s Shoes, Necklace of Grace, and Small Spirit Ore!
Reaching The City
Head down the ramp until a few Wild Dogs run at you and take them down. Once you reach the bottom of the ramp, take a hard left and head down the narrow alleyway. Grab the x7 Spirit Orb off the ground and then continue forward. You will eventually reach a Blade Nexus. Activate the checkpoint and spend your Lacrima.
To the left of the Blade Nexus will be a pathway that leads to another alleyway. Head down it to find several Soldiers and another Knivesveil Slayer. Take them down and loot the item in the area to obtain a Fire Cleanse Potion!
Navigating The Burning City
From the Blade Nexus, head right and down the street until you’re suddenly ambushed by Wild Dogs and Soldiers. After defeating them, move slightly forward to have another Soldier burst through a door and begin attacking you. Eliminate them as well, then head inside the building he emerged from!
How To Obtain The Ghost Relic
Once inside the building, climb the ladder into the area above. There will be two Soldiers here, one by the door and an Archer by the second ladder. Eliminate both of them, then head out onto the deck from the opened doorway where the first guard was sitting.
As you step out on the deck, another Soldier will rush you. Drop them as well, and continue walking around the front of the deck. Look up to see a pulley with an orange item on it. Use your Javeling to knock it down and loot the item to receive the Ghost Relic. You can now unlock Adelhaide the Philanthropic next time you rest at a Blade Nexus.
Head back inside the building and climb up the second ladder onto the rooftop. There will be a Chest here. Throw it open to obtain the Mysterious Glyph Dual Wield, Butcher’s Helm, Butcher’s Gauntlet, and x3 Fire Cleanse Potion!
Deeper In The Burning City
Exit the building and head to the right to find another ladder and take it up. Once here, run along the rooftops until you reach a bridge that overlooks several Wild Dogs and Soldiers. Use your Javelin to pick some off, then drop down and finish the rest.
Follow the pathway up until you reach several more Soldiers sitting around a bonfire. Eliminate the Soldiers and look to the right to see a corpse. Absorb it for some free Lacrima and Soul Tear Dust. Do not climb the ladder just yet, as it’s time to take on a formidable foe!
Defeat The Elite Knivesveil Slayer
Head up the path from where the Soldiers at the bonfire were and take a left. You will see an Elite Knivesveil Slayer standing beside Archers. Use your Javelin to land a headshot on the Elite Knivesveil Slayer, luring them toward you. Head back to where you fought the previous Soldiers, as the area is clear, and the Archers won’t chase after you.
This encounter is quite challenging, so be prepared. Since they attack often, you must land Reflections to save your own Stamina, and you will rely heavily on Counterattacking their Burst Attacks. One wrong move could be the end, so don’t get careless with your actions.
Defeating the Elite Knivesveil Slayer will reward you with the Deep Shadow Pauldrons, Deep Shadow Leggings, Devourer of Darkness Pants, and Concentrated Water Essence!
Exploring The Central Area
With the Elite Elite Knivesveil Slayer taken down, head back up the street but to the right this time to find an item behind a statue. Pick it up to obtain a Lightning Enhancer. From here, head to the left and into the dilapidated building to find a Soldier and a Chest.
Swiftly take care of the Soldier and open the Chest to get the Imperial Soldier’s Greatsword, Hound Helm, Archbishop’s Ring, and Water Spirit’s Fuel!
Exploring The Lower Area
Return to the room where you Absorbed the body and take the ladder in this room up. From here, head to the right and drop down into the area below. There will be some Wild Dogs and Soldiers here; eliminate them as usual and proceed forward. There will be a purple item. Loot it to obtain Transmutation Mist.
Behind the item will be a large house. On its roof is a Mysterious Ore. Use your Javelin to smash it, making it the first one of the mission so far. But don’t worry, there’s still lots more to go!
Back On The Main Path
Climb back up the ladder and head to the stairs directly across from you. There will be a few Soldiers sitting around a bonfire. Use your Javelin to target the Archer, then take out the remaining ones. Follow the walkway through until you reach a ladder and take it down to the area below. More Soldiers and Wild Dogs will be here. Swiftly deal with them and loot the blue item on the ground for x2 Willpower Orb!
Lowering The Drawbridge
Stick to the left side of the area and begin following the main path until you see an alleyway on your left. Enter it to reach a lot with Wild Dogs. As you start attacking the Wild Dogs, a Soldier will burst through the door of the house behind you. Eliminate all the enemies and enter the house.
Once inside the house, climb the ladder to reach the platform above, then follow it around to find another Mysterious Ore and smash it with your weapon. Make your way through the open doorway onto the deck and follow it until you reach a raised drawbridge.
Hit the chain of the drawbridge with your weapon to lower it, revealing a Soldier on the other side of it. Run across the bridge and eliminate the Soldier, then reach the top of the scaffolding!
More Exploration
Look down from the scaffolding to see a group of Wild Dogs and a few Soldiers. Climb down the ladder and eliminate them, then head into the area on your left. More Soldiers and Wild Dogs will be here, so deal with them as well. Loot the item in the area to obtain x2 Small Spirit Ore.
Across from the item will be a ramp that leads up to a platform. Make your way up the ramp to find a corpse at the top and Absorb it for Lacrima and Soul Tear Dust. After grabbing all the goodies, climb back up the long ladder and back onto the scaffolding!
Into The Citadel
Once back on the scaffolding, enter the gigantic hole that leads into the Citadel, then drop into the area below. Once here, loot the purple item for a Water Spirit’s Fuel, then take the stairs up to the Blade Nexus. Cash in your stacks of Lacrima and get ready to explore the Fallen Citadel with this as your new checkpoint!
The Fallen Citadel
From the Blade Nexus, head left and follow the hallway down until you reach another narrow hallway on your right. There will be several Archers here, so pick them off with your Javelin, then continue through the hallway and up the stairs into the next room.
Enter the door into a long, dark hallway, where there will be a Flame Archer and a Soldier. Focus on the Flame Archer first, then eliminate the Soldier. Run straight through the hallway, then take a sharp right to find a Wild Dog. Defeat the Wild Dog and prepare to fight a formidable opponent!
Defeat Elite Knivesveil Shredder
Around the corner will be two sleeping Wild Dogs and an Elite Knivesveil Shredder. Use your Javelin to eliminate one of the Dogs, then focus on the other. With both Dogs eliminated, you can focus all your attention on the Elite Knivesveil Shredder. Like the previous Elite enemy in this mission, your Stamina is everything.
Bait Burst Attacks and punish them with a Counterattack, sprinkling in Skills when they leave themselves open. Reflecting their attacks is also crucial to success. Defeating the Elite Knivesveil Shredder will get you the Bard’s Headband, Soul Eater’s Top, Bard’s Shoes, Fire Cleanse Potion, and Inner Essence.
To the left of where the powerful enemy was is a Chest. Loot it to obtain the Palemion Citadel Key. A locked gate will be at the end of the hallway. Use the key to open the gate, leading you to a Chest. Open it to obtain the Contorted Spear, Hound Gaiters, Necklace of Commitment, and Concentrated Water Essence. From here, head straight from the Chest, turn right, and drop down to the start of the Citadel!
Unlocking The Citadel
With the Palemion Citedel Key in your possession, head left from the Blade Nexus and then take the first right to go down a hallway with a gate at the end. Use the key to unlock the gate, then enter the room. Several Soldiers will be in this room, so be prepared to take them down and loot the item on the floor for x3 Vitality Spheres.
Run into the room on the right to find a Flame Archer and a Soldier. After eliminating them, there will be a staircase that leads down into another area and a room directly across from you. Head into the room straight across to find more Soldiers. Eliminate them and Absorb the corpse for even more Lacrima and Soul Tear Dust!
Down Into The Prison
Head down into the prison section of the Citadel, take a left, and walk down the hallway. There will be an open room on the left. Enter it to find an item on the far side of the room. As you approach it, a Soldier will attempt to ambush you. Take them out and loot the item for x3 Assassin’s Elixir.
Go back into the hallway and follow it to the end, then take a right, then another right to be in another lengthy hallway. A Soldier and a Wild Dog will be at the end of it; use your Javelin to eliminate both of them. Afterward, look on your left to see a room blocked off by rubble.
Hit the large stones with your weapon to break into the room. A Mysterious Ore will be inside. Smash it with your weapon, making it the third one you’ve found so far!
Descending Further In The Citadel
Exit the room with the Mysterious Ore, take a left, and head to the end of the hallway where the Soldier was earlier. There will be an open room on the right. Enter the room and look instantly to the right to find a Soldier and a Wild Dog. Eliminate both and open the gate in the room for a nice shortcut.
From here, look for a door on the opposite end of the room, unlock it with the Palemion Citadel Key, and push further inside. Follow the ramp down until you reach a ladder leading to the Citadel’s cellar!
Exploring The Citadel’s Cellar
Climb down the ladder and into the cellar. As you begin trudging through the water, an Undead Assassin will approach you while remaining completely invisible. It will reveal itself when it gets close to you, allowing you to begin attacking it. You’ve dealt with these before, so it shouldn’t be too challenging.
There will be a path to the left and another straight ahead. Take the left path to find x2 Fire Resistance Elixir on the ground, then proceed to the main pathway. Eventually, the path will split, leading to the left and right!
Right Pathway
Follow the path on the right to enter a room filled with Undead. As always, after defeating them, you must hit their body on the ground to prevent the soul from rebinding with them, bringing them back to life. After defeating all the Undead, loot the item in the room for the Earth Summon Scroll and Earth Enhancer!
Opening The Shortcut
Now, follow the left path until you reach a lever. Pull it to open the gate directly beside it. Go through the gate and look to the left to find a group of Undead waiting to ambush you and eliminate them. From here, head right and follow the pathway until you reach a dead end.
Look down to see platforms you can drop onto, then carefully make your way to the bottom. There will be a closed door here. Open it with your Palemion Citadel Key and head inside to find a lift leading you back to the Blade Nexus at the beginning of the Citadel, making it an excellent shortcut!
The Final Stretch
Take the shortcut lift back down and head into the large room directly across from it. Andell will be here. Speak with him for more lore bits, then head over to the dead end in front of him. Peek over the edge to find a platform below you and drop down onto it, beginning your descent further underneath the Citadel!
Dropping Further Down
After dropping down to the platform, there will be a ladder that leads even further down. Slide down the ladder and prepare to battle two Soldiers. From here, walk to the edge of the platform and look over the edge. A small platform will be below you that you must drop down on to continue.
There will be Soldiers below you, so perform a plunging attack to eliminate one of them instantly, then finish off the other. Turn around and walk slightly forward to see some Soldiers in the distance. Use your Javelin to pick off the Archers, as they will try to snipe you off if they see you.
Following that, drop down onto another platform, then follow it around until you find a ladder. A Soldier will be standing beside the ladder. Climb down the ladder and take them out before advancing!
Navigating The Underground
Walk forward from the ladder to find a ramp that leads to an elevated area with another ladder. There will be several Soldiers here and an item on the ground. Eliminate the Soldiers and loot the item to obtain the Ring of Sealed Earth and equip it as it will be helpful for the upcoming encounter.
From here, climb the ladder and walk to the right to see another Soldier. Take them down and proceed up the stairs. Another Knivesveil Slayer will be here, so be prepared. Take them down as you’ve been this entire mission, then walk down the stairs and take a right to find a Willpower Orb on the ground!
Reaching The Escape Route
Walk straight ahead from where the Willpower Orb was and look to the left just before the lift to see a Mysterious Ore resting on the edge of a platform. Use your Javelin to smash it. This is the last one of the mission, so you should get a notification stating you’ve found all of them.
Hop on the lift and take it to the top of the cave. From here, follow the staircase and tunnels until you reach a Blade Nexus. Spend all your Lacrima and prepare for battle, as this checkpoint will be used often with the upcoming boss encounter!
Defeat Rangkus
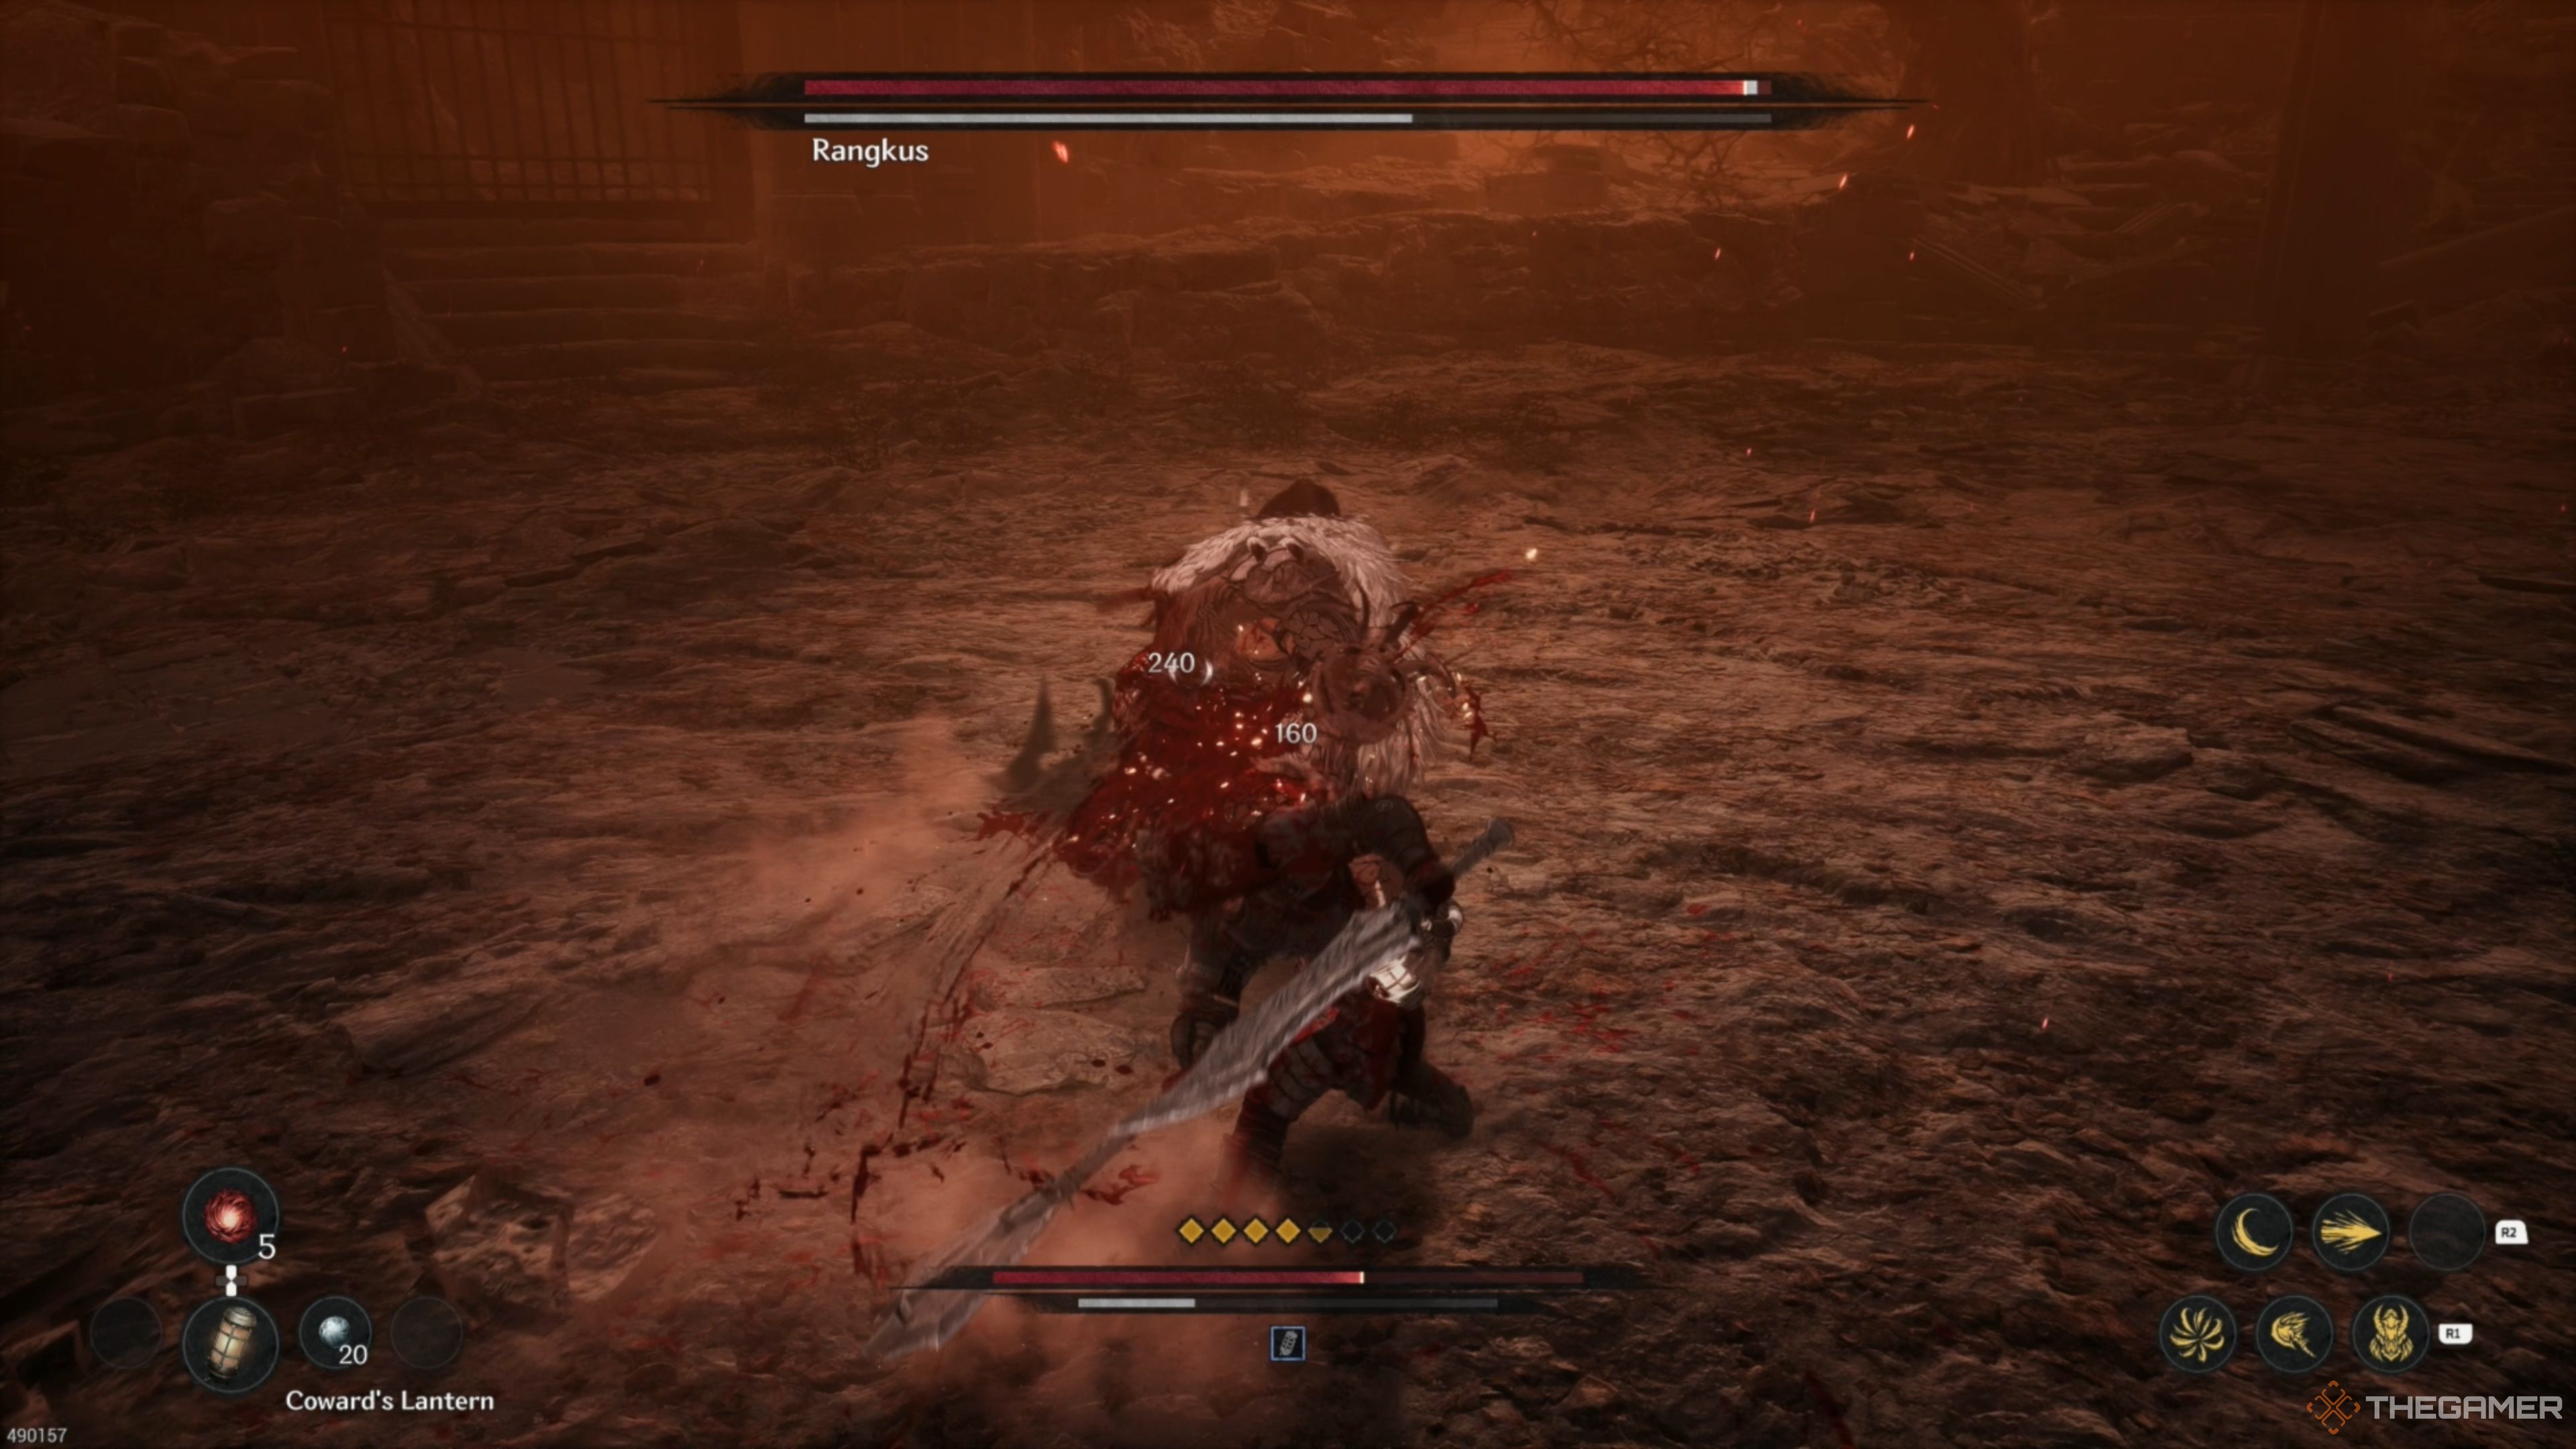
Finally, you’re primed and ready to take on Rangkus, who serves as this mission’s boss encounter. This fight is no joke and is easily one of the more intense ones in the game. Particularly because of his second phase. However, if you’ve made it this far, you are more than ready.
If you’re struggling against Rangkus (understandable), we have his entire move list mapped out, complete with how to evade them and punish them, allowing you to capitalize on your damage output while remaining strong on defense. This encounter won’t be easy, but it is more than doable once you learn what he’s capable of!

Next
The First Berserker: Khazan – 7 Combat Tips
Here’s how to take full advantage of the many systems and mechanics at play in The First Berserker: Khazan!










Leave a Reply