Assassin’s Creed Shadows has an open world that’s utterly huge, but filled with the right amount of stuff. It’s got many of the things that you’ve come to expect in an Assassin’s Creed open world, but it’s also hiding some surprises that a bit more unique to this entry in the series.

Related
Assassin’s Creed Shadows – How To Complete Path Of Silence
The Path of Silence is the hidden trail you can find in the Tamba province, and here’s how you can easily get the chest in it.
One of those things that’s more unique to AC: Shadows is the different paths that can be found throughout the game. Little is done to point you toward these paths, but upon finding them, there’s a parkour challenge that contains rewards for getting to the end of it.
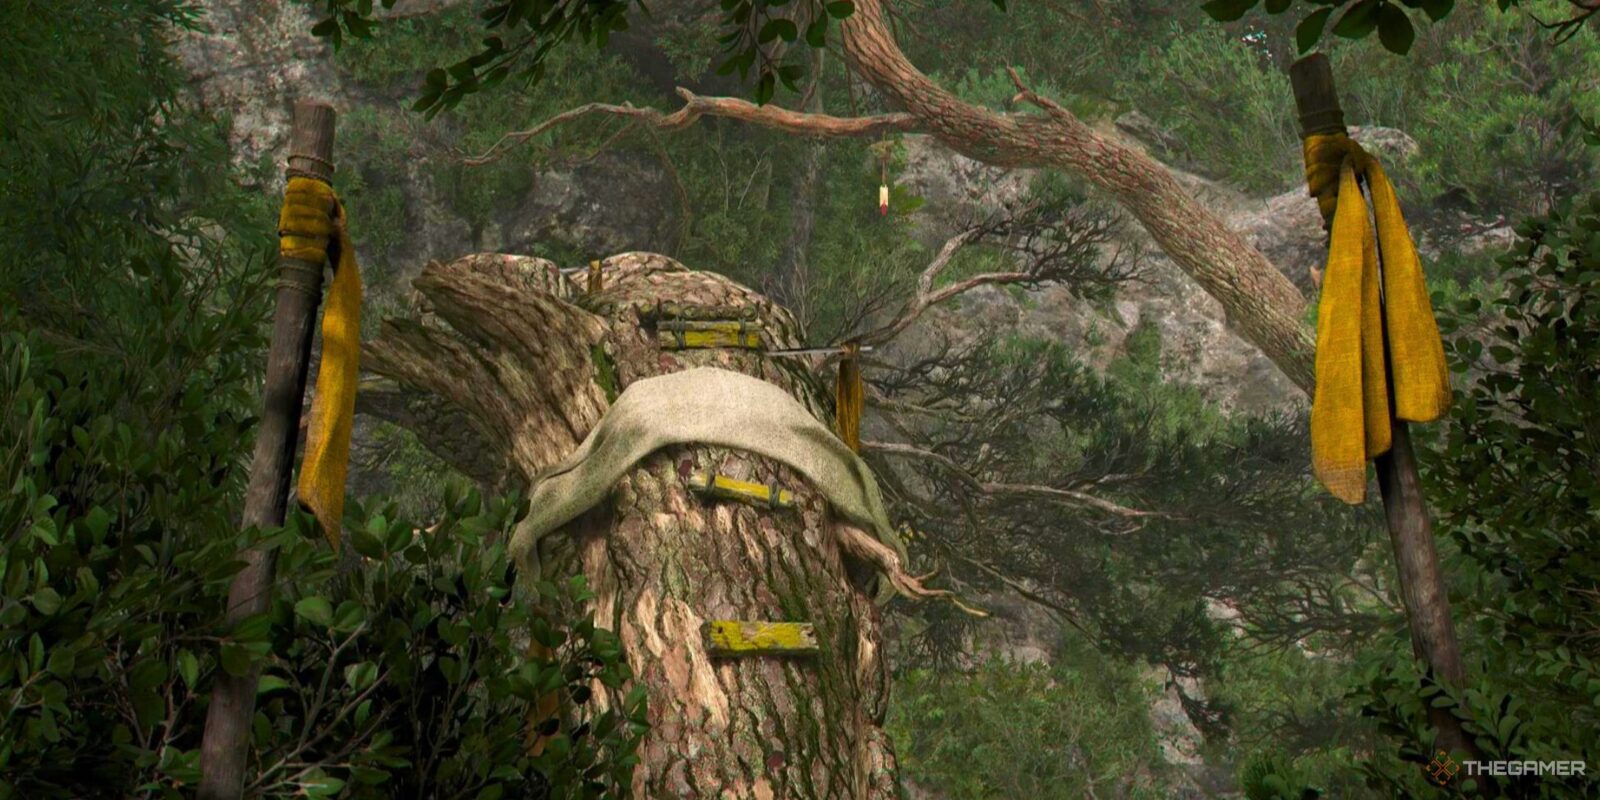
Where To Find The Path Of The Brave
The Path of the Brave is one of these paths, and this one can be found in the Yamashiro region. Specifically, this is found just south of the Eagle’s Nest label on the map, and west of Shoryuji and Yamazaki.
There’s a pass heading up the hill; on the right of that pass, if you’re heading uphill, are going to be sticks poking out of the ground with yellow ribbons tied to the top. Head in the direction of these, and you’ll find the start of the Path.
How To Complete The Path Of The Brave
The Path of the Brave is not difficult, provided you keep in mind that this isn’t a time trial. It does not matter how quickly you complete this Path, it only matters that you get to the end of the Path. Take your time, and make sure you know exactly where you’re meant to go, or you might end up taking a fall, and needing to head back to the start.
You also do not have to complete the Path from start to finish in order to obtain the rewards. The chest at the end can be opened whether you tread the Path or not; the Path is just an easy way to find the chest.
This Path starts with a twisted tree. Climb up this tree to where it branches out level with the ground, all the way to the end of the tree.

From here, you’ll need to use your grapple to swing from the tree hanging above and in front of you to the cliff edge. You’ll need to maintain your momentum when you jump here, otherwise you’re not going to have the distance.
You’ll need to get familiar with this mechanic, because this Path is going to have you swinging and jumping multiple times before this is over, in more difficult and dangerous circumstances.

From here, keep moving forward, all the way across the log that stretches between a gap in the cliff. You’ll need to jump from this log onto a branch on the other side.

This next step is similar, simply moving you forward across a rope that’s been tied to a branch extending over the gap.

Leap from that branch onto the next smaller branch, and then use your grapple line to swing from the branch above you onto the small platform ahead of you. This jump looks scarier than it is, but don’t overshoot it, or you’re going to be heading into the next step before you might be ready.

This next step has an incline; you’ll need to slide down the incline, jumping at the right point so that you catch the branch near the bottom of it. You’ll want to jump about two-thirds of the way down the ramp.
It’s not all that important that you don’t mess this part up; you can simply climb up the next wall from the ground. But, this does teach you this mechanic, which we’re going to use soon in a more dangerous situation.

Climb the wall in front of the branch, and then get ready to do this again. This time, if you fall, you’ll end up in the water, and need to do at least part of this Path over again. Jump from the incline to the branch at the end.

From that branch, follow the rocks to the wall in front of you, and climb it.

At the edge of this section, a waterfall is going to be on the left of a gap. Jump across the gap onto the branch at the other end, and climb that wall to the top.

At the end of this cliff, there’s going to be a small gap in a rock wall in front of you. You’ll need to go prone to crawl through that gap to the other end.

Lastly, we have a double-swinging section. You’ll need to use your grapple to swing from one branch, jump, and then immediately use your grapple to do it again on the next branch, ending up on the cliff at the other end.
You can fail this section with absolutely no penalty, since you can simply climb the cliff at the end. But, it certainly feels much cooler to do it correctly.
This section can give you the Hook, Line, and Swinger trophy if you haven’t already gotten it, which is gained by swinging from one grappling point to another.

From there, walk down and to the right, and you’ll find a cracked spherical stone with a chest next to it, and a beautiful view.

Rewards For Completing The Path Of The Brave
The chest at the end of the Path of the Brave gives you Hibiki’s Gear for Naoe, which is a Light Armor piece that restores her health when she gains a critical hit. You can also engrave another perk on it if you choose to, as long as you’ve got an upgraded Forge in your Hideout.

Next
Assassin’s Creed Shadows – Amagasaki Castle Exploration Guide
Defeat every Samurai and find every item in Amagasaki Castle with this guide.