An Untimely End is a main quest in Avowed. It begins after completing Message From Afar and traveling to Paradis. Upon arrival, your character will be struck by an unknown arrow and lose consciousness. You’ll wake up in an astral plane where The Voice appears, telling you that you have died. However, The Voice offers to send you back in exchange for a favor.

When you regain consciousness, you’ll find yourself next to Kai and Liviana. After speaking with them, Liviana suggests that talking to the Watcher might help with your condition, officially starting the An Untimely End quest.
Report To The Ambassador
At the beginning of the quest, you have two objectives: you can either go directly to the Watcher or report to the Ambassador first. The order doesn’t matter, but speaking to the Ambassador first will allow you to unlock a second companion.
The Ambassador is located in the Aedyran Embassy, which can be found northwest of Liviana’s Clinic on your map. To reach it, exit Liviana’s Clinic, take the stairs to your left, and enter the Administration District. From there, head straight west and enter the small gate guarded by two soldiers. Inside, you’ll find the Ambassador and also encounter Garryck again.
Speaking with the Ambassador about the incident will prompt him to accept your request to track down and punish the assassin. He also mentions that Kai can seek help from a dwarf named Marius, an expert tracker. Your next step is to visit the Grinning Balarok tavern.
Recruit Marius
To get there quickly, return to Liviana’s Clinic and take the stairs on the right. Ahead, you’ll see a dragon-shaped hanging sign where the path splits. Take the left staircase down and enter the building with the sign—this is Grinning Balarok.
Inside, you’ll meet Marius, who will officially become your companion and join your party. Your quest objective will then update to investigate the crime scene—meaning you need to return to the place where you were attacked.
Investigate The Scene Of The Crime
Head to the main gate in the southern part of the Administration District. Open the Command Menu and select Marius’ Hunter’s Sense ability. Use it directly on the bloodstain in front of the gate. This is your blood, and after Kai inspects it, you’ll need to climb onto the roof of the Aedyran Embassy.
Stand at the southern entrance of the embassy building and face west. Climb onto the ivy-covered building’s balcony, then use the wooden platforms to reach the embassy’s roof. Finally, use more wooden platforms to climb up the tower-like structure on the roof.
On the tower’s balcony, you’ll find a Backpack containing a unique accessory called Blackwing Gloves, which increases your critical hit chance.

There’s also a Flask of Poison on the balcony and you need to interact with it. If you look at the view, you’ll notice it’s an excellent vantage point for an ambush. After Marius examines the area, he’ll suggest gathering more information at the Apothecary’s Shop by speaking with the Apothecarist.
Speak With The Apothecarist
Travel to southeastern Paradis. From the Eastern Paradis Gate Beacon, take the stairs to the north to reach Pearl District. Follow the main road and ascend the northern stairs.
Once you arrive in the red-decorated area with an East Asian-inspired aesthetic, turn left to find the Apothecary’s Shop. However, you’ll encounter a problem—Wetenu and his men are threatening the Apothecarist. No matter what you say, they will attack.
If your equipment isn’t strong enough, consider upgrading before this fight, as you’ll have to battle Thalla the Taskmaster, a boss enemy.

After defeating Wetenu and his men, as well as the arriving Thalla the Taskmaster, speak with Apothecarist Grysca. This conversation will reveal more information about your assassin, but it won’t be enough. At this stage, you’ll need to investigate one of two locations for further details:
- Temple of Ondra
- Claviger’s Estate
Since you’ll have to visit the Temple eventually, heading to Claviger’s Estate first is the more strategic choice.
If you plan to leave Pearl District on foot, be prepared for additional combat—Sparrowhawks will be furious about Thalla’s defeat and won’t let you leave unchallenged.
Search Around The Claviger’s Estate
Visiting Claviger’s Estate first is recommended to collect valuable loot and easily obtain the Cistern Key.
Fast travel to the Administration District Beacon. Be cautious—some Rebels here won’t hesitate to attack. Paradis is becoming increasingly dangerous! Climb the stairs above the Beacon, open the northern gate, and proceed to Paradis Hightown.
From High Market Beacon, take the northwestern street. At the end of the street, head east. When you reach the end of this path, go up the northern stairs to arrive at Claviger Eamund’s Estate.
Explore The Estate
In the courtyard, look to the north of the fountain—you’ll find a narrow passage leading behind the courtyard. There, you’ll discover a chest and a Paradisan Ladder.
Return to the fountain and open the large western gate. Inside, a group of bandits will be waiting for a fight. After dealing with them, turn right on the first floor and enter a kitchen-like room. Behind the crates and barrels, you’ll find another chest.

The right-hand staircase leads to the second floor, but aside from books, there’s nothing of note since the door here is locked. You can use a lockpick or find the Claviger’s Estate Key to open it. Do not waste a lockpick, as you’ll soon access this area without one.
Another staircase on the opposite side of this floor will lead outside the estate. Climb the ladder and continue forward to find a weapon rack in the tower. Afterward, turn your back to the weapon rack and enter the balcony ahead.

Inside, near the door, you’ll find Claviger’s Estate Key—though by now, you might not need it. After spending some time here, Kai will discover the secret page of Claviger’s Journal. This will update your next objective: traveling to the Temple of Ondra.
If you climb to the upper floor of the room where you found the secret journal page, you’ll find a chest containing a unique amulet called White Key Cameo.
Enter The Cistern Beneath The Temple Of Ondra

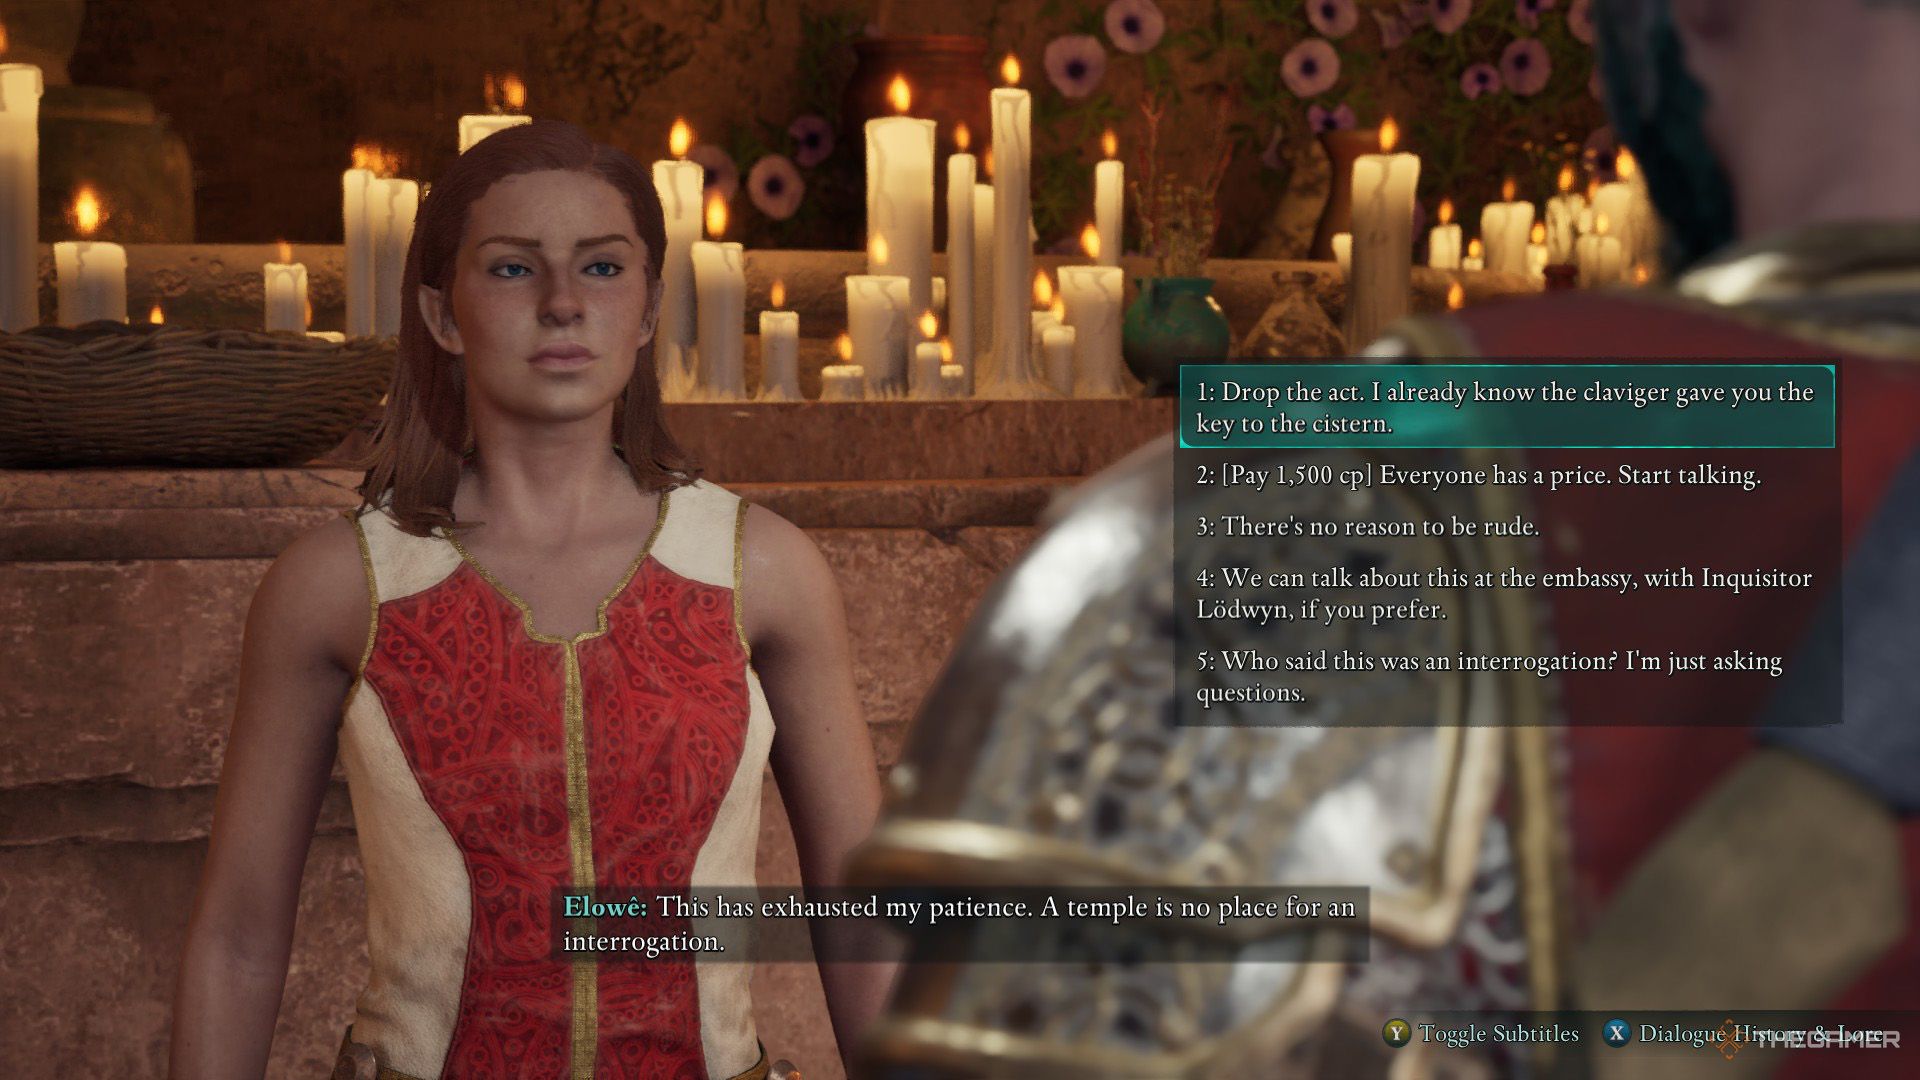
The Temple of Ondra is east of the building you’re currently in. Stand in front of the large central statue, then turn left. Head past the street vendors, ascend the stone stairs, and open the large wooden door. Inside, you’ll meet Elowe. If you don’t already have the Cistern Key, there are several ways to obtain it from her:
- Use the clues found in Claviger’s Estate to persuade her.
- If your Resolve is five, you can intimidate her.
- Bribe her with 1,500 coins to make her talk.
- If you’ve completed the “A Lady Never Tells” or “The Escape Plan” quests, you can mention that you’re here to help, and she’ll be convinced.
After the conversation, you must decide Elowe’s fate:
- If you have a Ranger background and four Strength, you can recruit him as a spy, which will be useful later.
- You can let her escape.
- You can kill her, reclaim the bribe money, and obtain the Cistern Key (if you haven’t already).
Track Down Your Killer

Use the Cistern Key to open the door on the left inside the Temple, go down the stairs, and unlock the door that allows you to travel to the Cistern. After descending, you’ll reach a sewer-like area—turn left from here. You will encounter some rebels, and they are not friendly.
After dealing with them, break the wooden planks blocking the grated passage and crouch to get through. In the room you reach, there will be pressure plates that trigger dart traps from the walls when stepped on.
Stand next to the spider-like corpse in the room—this is a blind spot where the darts won’t hit you. Then, move diagonally across the room and interact with the switch on the wall to deactivate the traps. Continue forward and burn the cobwebs; spiders will be waiting for you in the next room.
After eliminating them, burn the webs blocking the hole in the corner of the room and proceed. More spiders will be in this area as well—take care of them.
Before passing through the barred gate, check the other side of the room for a breakable wall. Destroy it to find a Paradisan Ladder. Additionally, there is a chest behind the cobwebs that can be unlocked with a lockpick.
Return to the room where you fought the spiders and pass through the barred gate. Since the floor is covered in water, you must climb to the other side. Either use the Eye of Rymrgand on the wall or cast any ice spell on the water to create a platform and cross.
You will reach a large room with a deep pool of water in one section. Again, use an ice spell or the Eye of Rymrgand you collected to freeze the water. Climb onto the rock above and find the Lower Cistern Key next to the corpse.
Keep climbing over the rocks, crouch through the stone tunnel, and use the newly acquired key on the door ahead. This square-shaped room has a flooded center—use the Eyes of Rymrgand from the wall to freeze the water and cross. Then, use ice to break the circular iron grates on the wall and move forward.
Jump down from the illuminated ledge to the braziers below and use the Lower Cistern Key to open the double doors. You will enter a trap-filled corridor, where you must cross without getting hit by the guillotine traps. Use the lever next to the archer to disable the traps, then proceed through the door to face more rebels.
First, eliminate the healer, then take care of the others. In this room, you will find a lockpickable chest on the lower level and another chest on the wooden platform above. Open the next door to enter another large room, where more rebels await.
Deal with them, then climb the stairs and follow the wooden platforms to a columned area, where two more rebels are stationed. After dealing with them, don’t forget to loot the chest here. Follow the wooden platform path, and you will reach a corridor. Climb the stairs, open the wooden door, and you will finally face your assassin, Ygwulf.

Spare Ygwulf
This option has two variations:
- If you turn him in to the Steel Garrote and their Inquisitor, they will favor you, but the rebels will remain hostile.
- If you let him escape, the Aedyrans and the Inquisitor will not react well. However, he will reward you with 625 gold coins and Adra, and the rebels will react differently in future encounters.
Kill Ygwulf

If you decide to kill him, you can loot the Blackwing Armor from his corpse. However, this will put you in bad standing with the Paradisan Rebels, and they will threaten you later. If you choose to fight him, Ygwulf, along with the other rebels in the room, will attack you, and this will not be an easy battle.
His ability to turn invisible and strike quickly will make the fight challenging, so focusing on eliminating the other rebels first will be to your advantage. Poison, bleeding, and burn effects will help you end the fight more quickly. Additionally, using Marius’s ability from the command menu to root him will make the fight easier.

When his health reaches half, more rebels will enter the room—make sure to take them out first. Also, once his health is low, he will use a potion to fully heal himself.
Regardless of whether you kill or spare Ygwulf, you will obtain Ygwulf’s Key. After the battle, you can find a lockpickable chest at the top of the stairs in the room. Once the fight is over, only one objective remains—finding the Watcher. Use Ygwulf’s key to unlock the door and leave the sewer.
Find The Watcher
To find the Watcher, head to the northeasternmost part of Dawnshore. Here, you will find Runyd’s House. If you have already discovered The Rise Party Camp nearby, travel northeast from there, where you will come across a broken bridge. Use an ice spell or the Eye of Rymrgand to freeze the lake and cross to the other side.
Follow the path, and you will arrive at Runyd’s House—enter inside. After speaking with the Watcher and having her examine your soul, this objective will be complete. Before leaving her house, unlock the lockbox on the second floor to obtain an Adra.
Additionally, if you speak with the Perturbed Patron sitting in front of the house, he will give you a coin and ask you to throw it into the lake behind the Watcher’s house for good luck. You can either toss the coin in or collect the coins from the lake instead—but don’t expect to get rich… You’ll just be destroying other people’s wishes.

The last thing to do is return to the Ambassador. He will inform you that he is sending you to Fior mes Iverno, where the animancers may have methods to deal with the Dreamscourge. After finally meeting Inquisitor Lodwyn face to face, your main quest will come to an end, and it will be time to leave Dawnshore.
