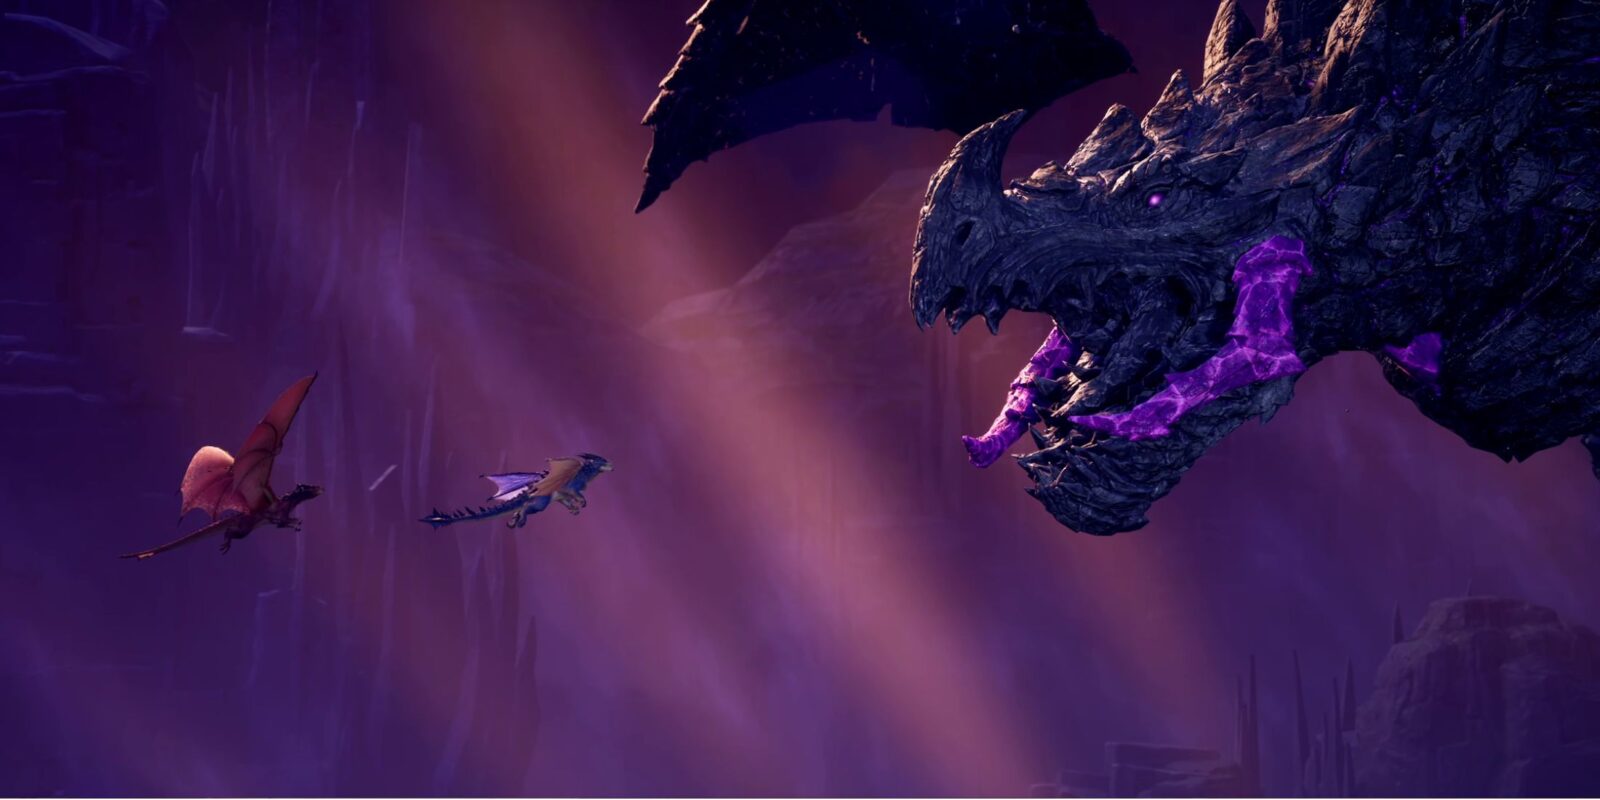
After completing the fourth chapter of Split Fiction, players are whisked back to a fantasy world of Zoe’s creation rife with dragons and wonder. The Rise of the Dragon Realm Split Fiction level sees Mio and Zoe raise a dragon from an egg to a whelping to a full-fledged drake to get revenge on the Megalith – a colossal beast responsible for almost eradicating all dragonkind.

Related
6 Best Multiplayer Games That Reward Creativity, Ranked
The following multiplayer games reward players who want to experiment and think outside the box.
This Rise of the Dragon Realm walkthrough takes players through the entire fifth chapter of Split Fiction from start to finish. Use this guide to learn how to complete all Rise of the Dragon Realm puzzles, find all Side Stories, beat all bosses, and overcome other challenges in this lengthy, complex level.
Subchapter 1: A Serpentine Path

After the opening cutscene to the Rise of the Dragon Realm Split Fiction level ends, Mio and Zoe both receive a dragon egg to take care of. The egg can be used to solve various puzzles – walk down the path until you reach two pedestals, which must be activated with the eggs to reveal the path forward.
Follow the path as it winds and reaches a cliff area. Continue along the path, use your grapple hook to get across gaps, and jump across the outstretched hands of a stone dragon statue to reach the first puzzle.
Stone Dragon Wing Puzzles

In this room, you will see a stone dragon statue with its wings lowered. Place an egg into the pedestal to make the right wing raise up into a platform. The other player should jump across this gap, then place their egg into the pedestal on the other side to let both players progress.

Walk to the left to find another statue with two pedestals in front of it this time. The right pedestal makes the dragon raise its wings, while the left makes it rotate. Raise the wings up, then rotate the dragon so its wings span across the gap. Take the egg out of the left pedestal when the dragon’s wings span the gap, then jump across. The player whose egg is on the right pedestal must stay.
Whichever player walks across the wings must place their egg into a pedestal on the other side to keep the dragon’s wings up and allow the other player to cross, too.

Continuing forward, have both players grapple to the sides of the outdoor dragon statue at the same time. This statue is weighted, so communicate with your partner to successfully get across this gap without falling. Follow the path, then place your eggs into the pedestals to open the way forth once again.
7:03

Related
Best Cooperative Games Perfect For Date Nights
Games can be a great social outlet, and these co-op games, in particular, are the perfect addition to a fun date night.
After being shown the egg that the mother of all dragons supposedly hatched out of, turn to the right and follow the path down. Grapple across the back-to-back dragon puzzles at the same time, then place your eggs into the pedestals at the end of the path.
This will activate the first encounter with the Megalith, which leads to a sidescrolling escape section. Run to the left and get ready to take on a fast-paced platforming challenge.
Water Temple Egg Puzzle
After escaping, you must solve a puzzle to gain entrance to the Water Temple. There are four pedestals you must activate in a certain order.
The first, closest one to the entrance, will send a pulse up the tail of the serpent’s tail. As it progresses up the tail, players must activate each pedestal as the pulse passes through to keep it going all the way to the head.
- Player 1 should initiate the pulse while player 2 activates the first pedestal.
- Once the pulse has been activated, player 1 should run to the third pedestal.
- When the pulse passes the first pedestal, player 2 should run to the last pedestal on the serpent’s head.
- Place your egg down onto a pedestal about two seconds before the pulse arrives to make it continue all the way to the top.

At the end, there are two pedestals side by side. Ensure you both reach the end before the pulse reaches it, and place your eggs down to send the pulse out and open the giant floating egg outside the door. Jump across the shards of this egg, and across some boulders inside the Water Temple, to reach a dragon pool.

Place your eggs down here and they will hatch into baby dragons. Mio’s dragon can glide a short distance, while Zoe’s dragon can latch onto certain terrain.
Subchapter 2: Water Temple
After the cutscene ends, you will both be on a rowing boat. Try to control the boat as best as possible, understanding that paddling on the right will turn you left, and vice versa, as you navigate through several river obstacles. Eventually, the Megalith will show up again and cause you to launch out of the boat. Here you are introduced to the mechanics of each dragon as you make it across a large gap.
After this, both players need to use their dragon’s powers to follow a relatively linear path. Mio must glide across several gaps, while Zoe must use her dragon’s sharp tail to leap up vertical surfaces on her way up. Eventually you will reconvene together outside of a gate.

First, whoever is playing Mio must stand on the red platform. Then, Zoe must jump and latch onto the column covered in ivy next to it. This raises the platform up so that Mio can glide over to a lever and open the door.
Head inside and navigate past several rising columns and water mills to reach a zipline with a gear to its right. As Mio, jump onto the top of a platform attached to the gear. Then, Zoe needs to latch onto the ivy, wind it backward, and jump off to launch Mio halfway across the gap onto a climbable pole.

Related
Co-Op Games That Require The Most Teamwork
By default, co-op games are based on the idea of teamwork. However, the following co-op games become downright impossible without a functional team.
Jump off the pole to the platform ahead, activate the lever to give Zoe a hook to latch onto, then activate the lever again to bring her up. Raise the platform up the column together, then continue across the golden balls to the right to continue forward in the level.
Side Story: Slopes of War

You may notice a Side Story orb on a cliff above the area just before the two golden balls. Head across the wooden bridge to the left instead of over the balls to find another lever puzzle. Both players must stand on the moving platform, then activate the lever. On the other side, one player must re-activate the same platform, then jump off, to bring a different one back. Both players must activate the two levers on this platform to get to the Slopes of War side story location.
This side story is an homage to extreme snowboarding games like the SSX series. It’s a very straightforward side story in which players perform tricks as they race to the finish.
Continuing Through The Water Temple
After jumping across the golden balls (and getting distracted by skipping stones), continue heading upward until you see a geyser. Take the geyser up and either glide or grapple hook onto a wallrunning segment to continue forth. Mio and Zoe will split up momentarily as each progresses through areas suited to their dragons’ abilities.
As Zoe, follow the ivy-covered areas and climb up the wheels until you reach a wheel with thorns blocking your jump. As Mio, reach the end of your platforming segment to find two columns you can jump onto. Jump onto the left one to rotate the wheel counter-clockwise, and the right one to rotate it clockwise.
As Zoe, jump onto the wheel and communicate with your partner to turn the wheel so you aren’t hit by thorns. Mio must make the first wheel turn counter-clockwise and the second wheel turn clockwise to reach the top.

Once Zoe has reached the top, latch onto an ivy-covered column to lower a Hook that Mio can grapple onto. Jump off the column to raise it up again and bring Mio up.
In the next area, Mio must jump onto the distant red platform, then Zoe must latch onto the ivy columns to raise it upward.
As Mio, jump off to the right when this platform reaches its max height, while Zoe should latch and jump to the right until she reaches the next ivy column. This one lowers the platform behind it so Mio can get across.
Mio must activate the lever up here to open a grapple hook location that leads forward.
Water Temple Symbol Match Puzzle

Continue along the path until you reach another interior area. Jump onto the geysers to be launched up, grapple onto the dragon statues’ hands, then wallrun to the end of the room to find the symbol matching puzzle.
As Mio, step onto the smiley symbol on the ground to activate the geyser from the matching smiley symbol below. Zoe must jump onto this geyser to be launched to a platform containing six symbols. Zoe must then launch Mio across each wall by activating the correct symbol for each geyser at the right time.
- First, step on the symbol that looks like a boomerang. Mio must jump onto this geyser, then glide slowly to the next submerged geyser across the wall.
- Zoe must then jump onto the symbol that looks like a golf club before Mio falls in the water to launch her forward.
- In then next quadrant Mio will see a smiley symbol and what looks like a bowl with some things being tossed around in it. Because the smiley activation is back where you started, Zoe must stand on the bowl symbol to send Mio into the last quadrant.
- In third area, a contraption will cover two of the symbols at the same time. Communicate with your partner to time a geyser that won’t be covered by the time Mio glides over to it. If successful, you will both be reunited atop the Water Temple and be able to progress forward.
Follow the path, platform and grapple your way forward, then place your eggs into the second dragon pool.
Subchapter 3: Dragon Riders Unite

This second dragon pool turns your once-cute tiny dragons into full-fledged riding dragons. Mio’s dragon has the ability to soar (but not fly) and armor-melting acid breath, while Zoe’s dragon can climb up ivy-covered vertical surfaces and roll into a ball to travel faster and hit obstacles out of the way.

Continue along the path separately. At the end, Mio must breathe poison breath onto the guard holding the door, and Zoe must smash it open by rolling into a ball. In the next room, Mio must melt the chains holding a golden ball above, then Zoe must roll into it to hit the ball onto a stone platform nearby.

This activates a wind gust Mio can use to soar to the other side, while Zoe can climb up a revealed ivy wall. Continue through the next room filled with crystals to find another puzzle. Zoe must head to the right and climb up the ivy wall, while Mio must go to the left and glide to reach a dropping-off point.
Rotating Platform & Chains Puzzle

As Zoe, roll into the central rotating mechanism to give Mio a platform she can jump onto. Then, one by one, rotate this platform so that Mio can glide onto nearby cliffs and melt the chains holding up two weights on either side of a gigantic stone dragon statue.

There is one on each side, and Mio will have to go back to the starting point to get to the second.
This will create a platform that Zoe can roll down to continue past the stone dragon statue. Mio can simply glide down, while Zoe must roll and smash into the symbol at the end of the path. This raises an acid statue that Mio must shoot acid breath into to open the way forward.
8:46

Related
The 10 Best Local Co-Op & Split-Screen Games You Can Play On Steam
Couch co-op and split-screen isn’t just for consoles – PC players can also have fun with their friends while being in the same room.
In the next section, the Megalith will fly by, and you will both split up once again. Zoe must roll and jump across various bouncy flowers to reach the end of this path, while Mio must glide through boosting hoops to glide to the end.
Launcher Puzzle
Continue along the path together until you reach another acid breath puzzle. As Zoe, roll into the launcher block on the raised ramp behind the acid snake. Mio must breathe into the acid snake to lift the two arms of the two stone dragons. When the arms are raised, Zoe must headbutt it one more time, then Mio must stop breathing acid so the hands can grab hold of the launcher block.
Zoe must stand on top of the block while it is being held in place. Then, Mio must lift the arms with her acid breath once more to launch Zoe through the doors above. Zoe must then roll down and into a symbol which will cause a chain reaction of falling columns that creates a path for Mio to catch up.
Matching Symbols Door Puzzle
Continue along the path until you reach another barred door with six symbols on it: three on Mio’s side, three on Zoe’s. To get past, you must activate the symbols in order, separately at first, then together.
For the first row, Zoe must headbutt the symbol that looks like a bowl with cereal flying out of it while Mio does nothing. For the second row, Mio must breathe poison onto the symbol that looks like a golf club while Zoe does nothing. Finally, both players must activate the corresponding symbols at the same time twice in a row to open the door. Zoe must headbutt the cross symbol and then the guitar pick, while Mio must breathe poison into the smiley face symbol, and then the boomerang symbol.
Subchapter 4: The Dragon Slayer
After opening this door and progressing through to the next room, you will face the first boss of this Rise of the Dragon Realm Split Fiction level walkthrough. Zoe’s goal is to roll into the crystal formation at the dragon slayer’s base, while Mio’s goal is to spray poison onto the dragon slayer’s armor. Both of these attacks deal damage.
In the first phase, jump over the Dragon Slayer’s radiating flame attack, which can be chained three times, and try to avoid his plunging move. After dealing enough damage to the boss, it will summon minions and begin to perform ranged attacks.

Watch out for the AoE area on the ground to avoid being hit by the aerial spears, and charge with Zoe or use Mio’s acid breath to deal with the adds. You can delete spear and crystal obstacles with these attacks, too. Watch out for ground waves and lighting columns that will spread throughout the whole arena, and keep an eye out for the barrage move when the dragon slayer summons dozens of orbs that track players’ locations.
When the boss’ health gets low enough it will enter a frenzy and perform several powerful lightning attacks in a row. Once again, look for the lightning areas on the ground and move out of the way to avoid taking damage in this phase. The boss will also radiate damage waves which must be jumped over. Eventually it will revert back to its normal rotation and you can whittle down its HP until you have defeated the dragon slayer boss..
Chapter 5: Craft Temple

After beating the Dragon Slayer, continue on the path forward. In the area immediately after the boss fight, you will see a Side Story orb off to the right.
Side Story: Space Escape
To get to the Space Escape Side Story, the second Side Story of this Rise of the Dragon Realm Split Fiction level walkthrough, Mio must glide across the chasm as Zoe activates a geyser (by rolling into the smiley face gong on the right side). The air blast is temporary, so be sure to time it perfectly. Once Mio makes it across, she must spray acid onto the chain holding a weight up, which will lower a column that Zoe can climb up.
The Space Escape Side Story sees Mio and Zoe back in one of Mio’s old stories: a zero-g space station that’s about to be destroyed.
- For a more detailed explanation of this Side Story, check out our full guide to the Space Escape Side Story here!
Megalith Ambush & Exploding Balls
After you complete the Space Escape Side Story, head down the other path to reach a two-person pulley. Once both players are down here, pull back to lower a bridge that leads forward. The Megalith will appear and destroy the bridge, sending you both on a frantic escape segment once again.
Like a Crash Bandicoot level, run away from the boss until you get out of its reach.
Subchapter 6: Dragon Souls

Once back in third-person mode, Mio must melt a guard sitting under a snake head statue. Then, Zoe must headbutt the symbol to produce a golden ball, then headbutt the golden ball so it lands next to the cracked door. Then, after Mio sprays it with acid, it will explode after a few seconds.
Four Eggs & A Dragon Statue

Continue through the door and across the river full of spirit fish to find a room with an enormous statue of four dragons with four corresponding eggs.
To solve this puzzle, you must spray each egg as Mio and then roll into the crystal left behind as Zoe. There are four in total, starting with the first dragon soul egg in the middle of the room. Spray this with acid, then roll into it, to launch one a dragon spirit into the colossal quad-dragon statue.

- On the far right, Zoe must roll into the boomerang symbol to get a golden ball. Then, Mio must activate platforms with acid breath so Zoe can guide the ball over to a ledge on the other side. Blow up the door with this ball, then continue into the next room. Get another golden ball from the statue here, and follow the same process to get the ball across the chasm: spray the acid statues as Mio, and push the ball across before the platforms disappear as Zoe. At the end, activate the ball to blow it up and reveal the second dragon soul egg.

- In the center-right, a rolling ramp leads down to a suspended bell. Mio must jump off of the flower on the right, then glide across the chasm. Zoe must roll into the bell at different angles to create a platform that Mio can land on before she runs out of gliding time. After you headbutt the bell, it will create a platform at its apex which lasts for about one second. Aim to create a platform just before the first dragon head, then another in between the two dragon heads, so Mio can get across safely. Mio can then melt a chain holding a flower, which Zoe can use to jump across and get the third dragon soul egg.

- On the far left side, Zoe must climb up an ivy-covered wall while Mio gets in position in front of a series of horns to the right of this wall. Spray acid into the fist horn and wait for Zoe to cross. Then, spray acid into the second horn, wait until Zoe is about halfway across, then quickly swap to the third horn to create the last platform. Zoe will have to roll and jump over the spines of an obstacle dragon statue as the second platform is created. After crossing, Zoe must roll into a symbol to create a platform so Mio can catch up and get the last egg together.

Related
8 Best Local Co-Op Multiplayer Games for Low-End PCs
A high-end PC isn’t necessary to enjoy excellent couch co-op multiplayer games with friends. Here are the best that work even on low-end PCs.
Subchapter 7: Treasure Temple

After completing the Dragon Soul egg puzzle, take a ride on a spirit dragon, then continue forward toward a volcano in the distance. As you follow the path, you will see the third and final Side Story for this Rise of the Dragon Realm level walkthrough in Split Fiction on the left.
Side Story: Birthday Cake
To find the Birthday Cake side story, simply walk forward on the main path after the Dragon Soul chapter, then jump on a bouncy gummy bear suspended in mid-air on the left side of this path. This candy and cake-filled realm sees Zoe and Mio turn into teeth of all things as they wander through a colorful, vibrant, and utterly bizarre world from Mio’s childhood that’s not entirely what it seems.
- For a more detailed explanation of this Side Story, check out our full guide to the Birthday Cake Side Story here!
To The Treasure Temple

After you complete the Birthday Cake side story, head down the main path to find an ornate, overgrown, deep indigo-colored temple. Mio must melt the metal snakes coiled around two crystals outside the entrance, while Zoe must roll into the crystals to destroy them. Blow into the horns together to open the door into the Treasure Temple.
The Treasure Traitor

Immediately, Zoe and Mio are faced against the Treasure Traitor, an armored turtle that will launch obstacles at you both. Use Mio’s breath to melt the steel portion of these rolling columns (typically on the right), while Zoe can smash through the crystal portions (typically on the left). Climb up the stairs, melt the swords with Mio, then crash through the crystals as Zoe.
On the next platform, jump over the Treasure Traitor boss’ flame wave attacks and keep moving forward. Once again, break through the sword and crystal barrier, then continue forward. You will fall into an underground area filled with gold as the camera angle shifts to an isometric top-down view.
Subchapter 8: Royal Palace
At the top end of this room, spray the acid statues as Mio, to create platforms, then smash through the door with Zoe to continue forward. Travel a bit further upon the path, then melt the metal guard holding a giant wheel in place with Mio’s acid. Jump into the wheel as Zoe and roll continuously to the right to move the wheel down the hill and through the door.

Continue along the revealed path until you are barred into a fight against two floating, armored hands. Use Mio’s acid to melt away the armor so Zoe can roll through and destroy their crystalline bodies.
Boat & Panel Puzzles

Continue to the top-right along the path, and across a wheel and some platforms, to reach a floating boat. Melt the metal baring the controls with Mio, then charge into the front panel as Zoe to move it. Jump off onto the ledge, then do the same for the second boat immediately after. At the end of its path, melt the chain holding a weight up to reveal a bridge forward.

In the next room, there are three columns with three golden dragon face panels. On the back of the panel is a crystal. As Zoe, charge into each of these crystals quickly, one after the other, to open the gate and continue forward.

Enter the next room and position Mio on the center tile so she can easily aim at the top-left, top, and top-right. Use Zoe to flip each panel and reveal an acid statue in each of these locations. Quickly spray each statue with Mio’s acid breath so that they are all active at the same time, which will open the door on the right.
4:33

Related
Story-Driven Games You Can Play In Co-Op
Playing with friends used to be reserved for action games with minimal story, but these games prove that doesn’t have to be the case anymore.
Continue through the door, then stand on both pressure plates at the same time to lower the boat at the end of the path.
Continue along the route and defeat two more armored limb enemies (this time, two feet) by combining Mio’s acid breath and Zoe’s charge. Defeating these two enemies makes the giant dragon skull’s mouth open up.

Follow this path until you reach a purple orb. Jump onto it as Zoe to get up the cliff, then glide up the geyser burst as Mio to catch up. Break the dead knight, then charge into the back of the jade dragon statue to fire a laser forward, opening the way to the right.
Continue along the path to the right, and dodge the swinging axes, then break through the dead knight and crystals to get to another purple orb. Use this to climb up the next set of cliffs.
This next room features platforms that will lower if you stand on them too long, three panels that Zoe must smash into, and three acid statues that are hidden behind walls for Mio to spray. Like before, you must roll into all three panels quickly, then Mio must breathe acid on all three statues quickly, to open the path forward – but this time, the ground will sink as you stand for too long. Jump from platform to platform to avoid falling, then continue forward.

Melt the chains that are holding up two weights on the top and bottom of the main path to lower a dragon statue. Then, Zoe must roll into the back of it to blast a laser forward and break a wall.
In the next room, you will face off against four armored crystal limb enemies at once. Melt each enemy’s armor, and quickly roll into their exposed crystal bodies to destroy each one.

Continue along the path to get to the temple entrance and meet the Treasure Traitor once again. Melt the metal portions of rolling columns with Mio, smash through the crystal portions with Mio, and avoid rolling golden balls as you progress forward into the Treasure Traitor boss room.
Subchapter 9: Treasure Traitor

In this top-down view boss fight, Mio must melt the armor from bombs that the Treasure Traitor throws at you, while Zoe must bump them into the boss to deal damage. Avoid the aerial bullet hell and lasers around the room as you focus on returning these bombs back to sender.

Once the Treasure Traitor has taken enough damage it will transition into phase two and spin around the arena violently while occasionally blasting off waves of damage. Try to stay out of the way of its path, and jump over the waves of damage, while you continue to melt and repel the bombs the boss leaves behind. This part of the fight is tricky and has a lot of moving parts, but you can hit the bombs from any direction to deal damage to them.
The boss will eventually be stunned – melt its face armor off with Mio’s acid breath, then roll into it to deal a huge chunk of damage. It will regrow its head, so repeat this phase of the boss fight until you deal the final blow and take out the Treasure Traitor once and for all.
Mio and Zoe will carry the treasure traitor to its firey demise in a magma bucket, where it will be melted down into a pool of gold in the next room.
Subchapter 10: Might of Dragons

In the next room, Mio and Zoe’s dragons jump into the melted gold as two swords rise out of the liquid metal pool. After Zoe and Mio equip their new swords, their dragons will fly out of the golden pool significantly larger and with the newfound ability to fly.
After the cutscene ends, you will enter a segment where you can get used to flying with your dragons. Use Zoe’s dragon to zoom through crystals, and Mio’s dragon to shoot out any acid obstacles in your way.
After about a minute-long segment, you will encounter the Megalith and begin the final boss fight as Mio and Zoe charge down through the clouds.

Related
Most Chaotic Multiplayer Games
Playing with friends or strangers, these multiplayer games embrace the chaos, allowing for all kinds of hilarity.
Follow the Megalith, destroying crystal barriers with Zoe’s charge and metal barriers with Mio’s acid breath. Avoid its long-range laser attacks and environmental obstacles, like collapsing pillars, and eventually you will enter a gigantic, lava-filled maw.
Watch out once again for crystal and metal doors, which must be destroyed by Zoe or Mio respectively, and watch out for lava pillars from the magma below.
Subchapter 11: Into The Storm

Eventually, you will reach a giant temple with a huge glowing magic sphere on the top, which triggers a cutscene after either player reaches it. The penultimate chapter in this Split Fiction Rise of the Dragon Realm chapter walkthrough sees players navigate a tricky platforming segment while avoiding the megalith.
After reaching this temple, players are knocked off of their dragon and must slide, grapple, and jump their way down a collapsing ruin floating in the sky as the Megalith chases them down. Continue parkouring your way through this segment until you reach the final chapter of the Rise Of the Dragon Realm walkthrough: Megalith’s Wrath and the Megalith boss fight.
Subchapter 12: Megalith’s Wrath

Like something out of a Monster Hunter game or Shadow of the Colossus, this final section of the Rise of the Dragon Realm level in Split Fiction sees players mount the Megalith as it tears through the world. Platform across the spines and ridges of this gargantuan dragon-eater and use your sword to slash away at any crystals barring the way forward.
Keep traveling until you reach a large glowing pink crystal. Mio’s dragon will appear and destroy the vines growing over it, allowing Zoe and Mio to attack the crystal directly. Slash at it over and over, and kill the small crystal enemies that appear, to be whisked away by Mio’s dragon as the Megalith takes damage.

Mio’s dragon will drop you both off at another section of the Megalith. Once again, platform across the ledges, avoid getting spiked, and make your way to the next glowing crystal cluster. This time, Zoe’s dragon appears and destroys the vines. Damage the crystal, kill the adds, and you will enter the final phase of this boss fight.
Move forward and slash at all of the crystals in your path moving up the Megalith’s back. Then, jump up the ledges, wait for each dragon to destroy their respective obstacles, and you will reach another pink crystal. Destroy this one, then Mio’s dragon will soar down and gouge out the eye of the Megalith, sending it careening wildly into the storm.
In this final section, hold down the right trigger to cling onto the Megalith’s back if it starts to shake you off. The timing for this can be somewhat precise, so as soon as the boss starts to shift, hold down that trigger. As soon as it starts settling down again, continue moving forward.
Eventually, you will reach the front of the dragon and find a final pink crystal embedded in its forehead. To destroy this, Mio and Zoe must stab it at the exact same time. Communicate with your partner to slam your swords into its brain at the same moment, and you will end the boss fight, trigger the final cutscene of the level, and beat Rise of the Dragon Realm!
After watching the cutscene, continue onto the next chapter (‘Isolation’) which delves into Mio’s subconscious and features a very fun Pinball-like mechanic.

Action
Adventure
Sci-Fi
Fantasy
- Released
-
March 6, 2025
- Publisher(s)
-
Electronic Arts
- Engine
-
Unreal Engine 5
- ESRB
-
T For Teen // Blood and Gore, Crude Humor, Language, Violence