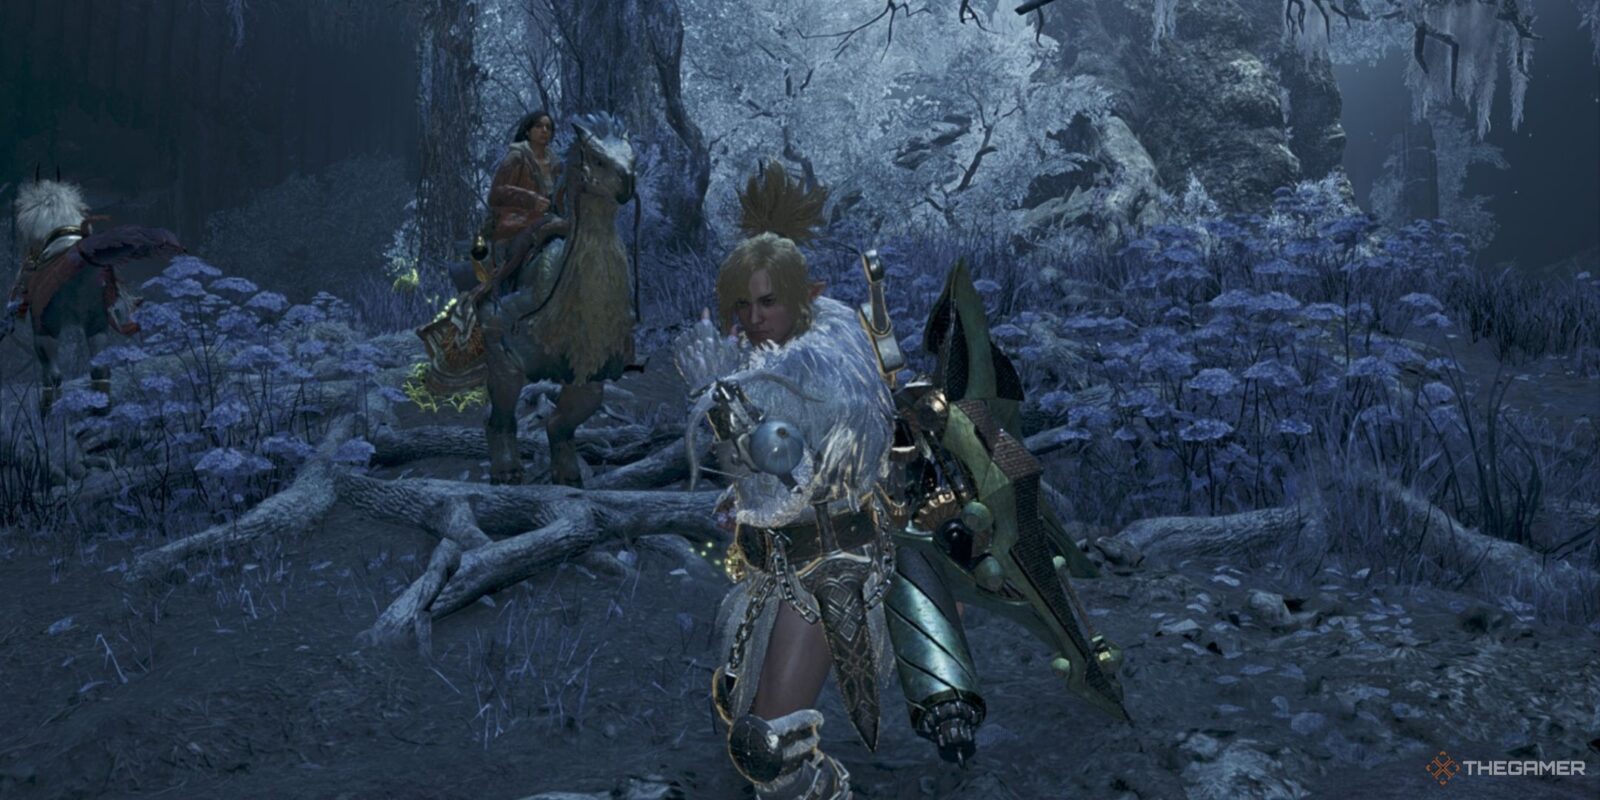
The Slinger debuted in Monster Hunter World as a handy way to interact with the environment and give you some constant ranged options against monsters. It returns in Monster Hunter Wilds, and this time it is greatly expanded. It comes with just about every feature it had on World, and then some on top.

Related
Monster Hunter Wilds: How To Claim Twitch Drops
If you’re after the Monster Hunter Wilds Twitch drops, you’ll need to… watch Twitch!
While the Slinger is a constant companion to you throughout the game, it doesn’t ever get too much of an explanation beyond the basics, and there really is quite a bit to it. It’s more than just a monster-fighting tool, but a time-saver and an extension of how you can interact with the environment. Here’s everything it can do.
What Can The Slinger Do?
The Slinger has a few different functions to it, though it overall falls into three distinct categories. Those are the pods you can equip to it that are used on combat, its ability to gather items at range, and the way it helps you interact with and manipulate the environment. Let’s look at each of them in detail.
Firing Pods
This is the most fundamental aspect of the Slinger. It comes with some default, infinite items you can use, such as the Paint Pod and Throwing Knife, though its real power shines in the different pods you can use. These range from utility items to pure damage-dealing, and are just as helpful in the hunt as any other item.
Pods give you the means of attacking a monster at range no matter what weapon you choose, and using an elemental pod against a monster has a good chance of briefly staggering them. They’re not especially powerful, but they can be useful when giving chase as a means to slow them down.
Damage pods deal even more damage if they hit a monster in an open wound, so aim carefully.
But then we have utility pods, as well. Flash and Screamer Pods fill the same role as Sonic and Flash Bombs, though they give you much more control over where they land. The Slinger offers uniformity to all these items, giving you a standardised system in which to use them rather than having to get right in front of a monster and hope you’re aiming correctly.
Gathering At Range
Though an overall simple system, it’s likely the one you’ve used the most with the Slinger. Wilds is filled with materials to collect, and it’s a pretty big world you’re moving through. To make all that gathering a bit smoother, you can grab items at a distance with the Slinger. This is as simple as aiming at the item in question with LT/L2, and then pressing B/Circle to pick it up.
Items are automatically added to your Item Pouch if they can be used, and shifted to the Field Pouch if not. There are plenty of items that can only be reached with the Slinger too, so make sure to look around thoroughly for items that are otherwise out-of-reach.
There are some items, such as Mining Outcrops, that do still require you get up-close to get their materials.
Environmental Interactions
The most exciting but contextual ability of the Slinger is the way in which it lets you change the environment. The world is a major part of Wilds, and the wide open areas have plenty of traps that you can take advantage of. This is where the Slinger excels.
All around the world are a variety of hazards, from precariously dangling boulders to vines to entrap enemies hidden above trees. Same as you would when picking up items at a distance, simply aim and fire to bring down these traps to catch enemies. Some environmental hazards are particularly strong, and require a second pull after grabbing them to bring them down.
Certain environmental hazards can also be knocked down by firing at them with a ranged weapon, like the Bow or a Slinger Pod.
Every Type Of Ammo For The Slinger
The Slinger in Wilds, like its rendition in Monster Hunter World, has quite a lot of ammo you can use. However, not all of them can be crafted and are contextual in how you acquire them. Some can be kept in your inventory, some can’t. It’s a wide system, so here’s each of them in more detail.
Permanent Pods
These pods are the ones that are kept in your inventory and can be crafted. These are mainly focused around utility.
|
Name |
Effect |
|---|---|
|
Flash Pod |
Triggers a flash that briefly blinds monsters. |
|
Screamer Pod |
Unleashes a piercing sound that stuns monsters that rely on hearing. |
|
Dung Pod |
Causes the monster it hits to flee the area. Particularly effective on smaller monsters. |
|
Large Dung Pod |
Causes any monsters in the area-of-effect to flee the area. Effective on all monsters. |
|
Luring Pod |
The hit monster will follow you for a brief while. Great for bringing monsters towards traps. |
|
Tranq Blade |
Acts identical to a Tranq Bomb, but can be used at a distance with a smaller area-of-effect. |
|
Throwing Knife |
An infinite pod that does a small amount of damage. |
|
Paint Pod |
Anything this pod hits, be it a monster of the environment, becomes marked on the map for a brief while so it is easier to find. |
Screamer Pods can also be acquired in the world from Baunos in the Windward Plains and are kept afterwards.
The Throwing Knife and Paint Pod are both infinite, though the rest must be crafted. Thankfully, they’re pretty easy to create, needing only to use the infinite Throwing Knife and one other material, like Flashbug Phosphor. These ones can be kept in your inventory, letting you swap between them at will depending on the situation.
Environmental Pods
These pods are those that are found in the world as you’re out exploring. As such, exploring is the only way to get them. Here’s each of them:
|
Name |
Effect |
|---|---|
|
Torch Pod |
A damaging pod that deals Fire damage. |
|
Puddle Pod |
A damaging pod that deals Water damage. |
|
Thunder Pod |
A damaging pod that deals Thunder damage. |
|
Frost Pod |
A damaging pod that deals Ice damage. |
|
Dragon Pod |
A damaging pod that deals Dragon damage. |
|
Brightmoss |
A pod that shines light wherever it lands. |
|
Para Pod |
A pod that causes a large build-up of Paralysis. |
|
Bleeding Pod |
A pod that causes a large build-up of Bleed. |
The Para and Bleeding Pods are acquired from Small Monsters, though you can pick them up like any other pod rather than having to defeat the monsters.
As you can see, the majority of them fil the gaps that the permanent pods lack, letting you deal a variety of elemental damage types. Brightmoss functions as more of a utility pod, though it doesn’t really have much of a use case. Para Pods in particular are incredibly powerful, though they are mostly found in the Iceshard Cliffs.
These pods cannot be kept in your inventory, nor can you bring them back with you. As such, picking up another will drop the current one you have equipped. Be tactical when picking up these pods since you can’t swap between them at will like the permanent pods.
Monster Pods
These pods are more specific, and only start to drop as you advance through harder monsters in Low Rank, and become much more common once you hit High Rank. They are dropped from monsters as you fight them, and can be picked up like an Environmental Pod and used against them. Here are all of them:
|
Name |
Effect |
|---|---|
|
Poison Pod |
Causes a build-up of Poison. |
|
(Heavy) Slicing Pod |
Deals Severing damage to the hit monster part. |
|
(Heavy) Piercing Pod |
Pierces the monster’s body depending on where you hit. |
|
(Heavy) Blunt Pod |
Deals Blunt damage to the hit monster part. |
|
(Heavy) Explosion Pod |
Deals Blast damage to the hit monster. |
Poison Pods are dropped exclusively from Nerscylla, and can also be picked up near their nest in the Iceshard Cliffs.
Each monster has a certain set of pods they will drop. For example, Nu Udra will drop Explosion Pods, while Odogaron can drop Severing and Piercing Pods. As such, a monster like Chatacabra would never drop an Explosion Pod, while Ajarakan would never drop a Poison Pod. These pods can be great to make up for the weaknesses of your own weapons, such as being able to sever tails if you’re using a blunt weapon like the Hammer.
Tips And Tricks To Use The Slinger
Overall, the Slinger is a pretty self-explanatory mechanic, though there are some smaller features that go mostly unmentioned. There are some good standards to adhere to so you have an easier time on your hunts.
- The Slinger can be used even with your weapon drawn. While in Focus Mode, just press the left stick to fire off whatever pod you have equipped. This can be great when it would take too long to put away your weapon just to shoot.
- When gathering items in the environment, you don’t have to look at the item. Rather, you can use the D-pad to scroll through any items in range while aiming to Slinger and then press B/Circle to pick it up even without looking.
- Always bring some Dung Pods. While herds of Large Monsters are rare, they can still occur and it’s great to have these pods at hand to make them disperse. Monsters really do prefer fighting you over each other this time around.
And that’s really it. The Slinger is a great companion tool, and one that is always with you. So make sure to take full advantage of it.

Next
Monster Hunter Wilds: How To Use The Wishlist
Monster Hunter Wilds makes grinding for resources much easier with the wishlist system.


Leave a Reply