Quick Links
The latest addition to Call of Duty: Black Ops 6
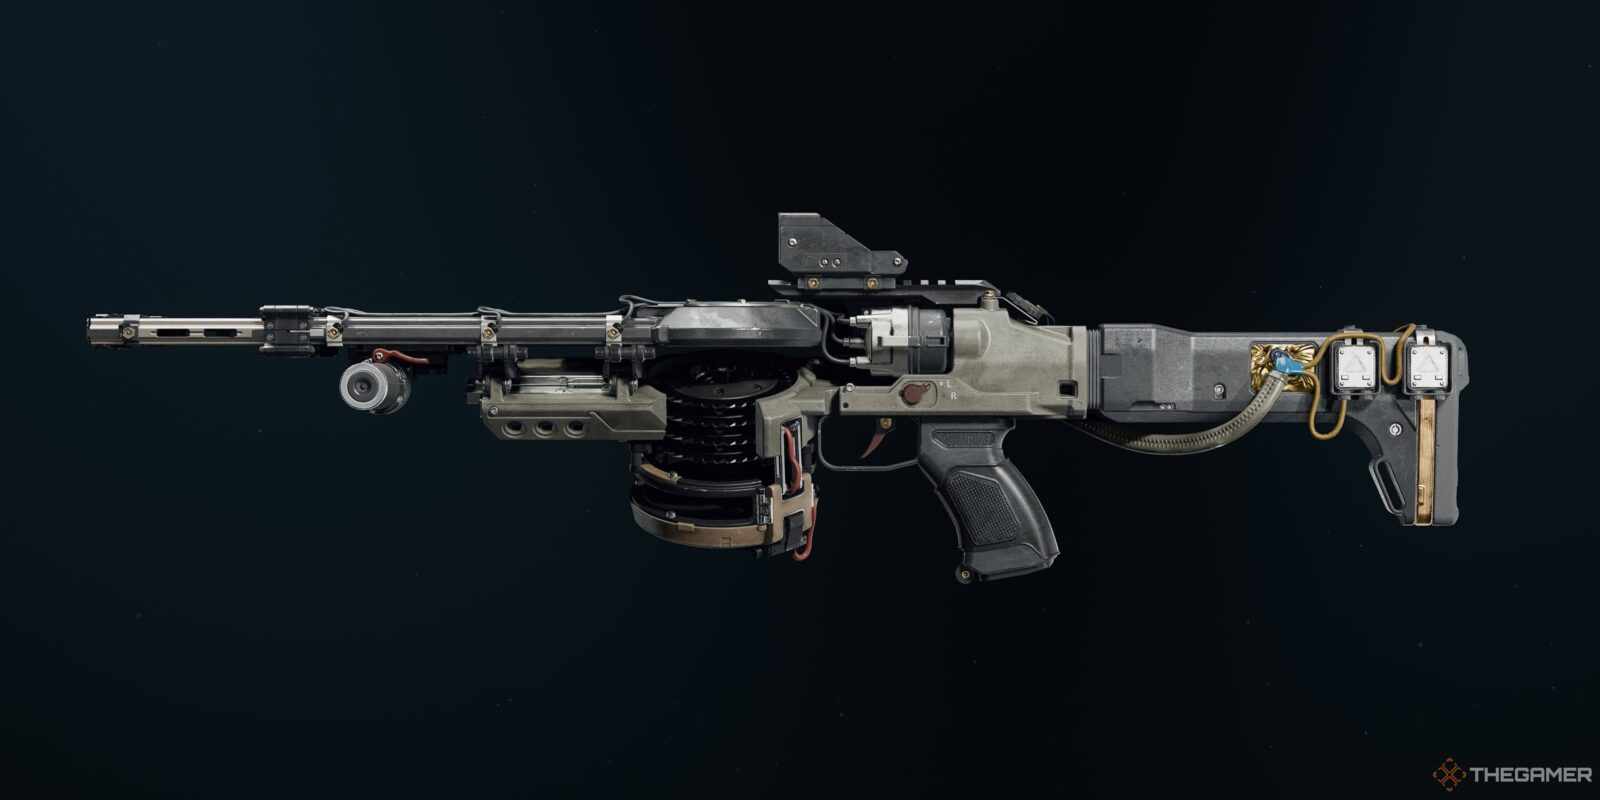
weapon roster is the D1.3 Sector, a sawblade launcher that was previously seen in Black Ops 4. It returns with a set of customization options, including unique ammo types that suit certain game types. Fire hard-hitting sawblades, ricochet projectiles off walls, or turn targets into dust with explosive projectiles.

Related
Call Of Duty: Black Ops 6 Zombies – Every Hidden Easter Egg On The Tomb
Here’s your go-to list for every hidden easter egg available on the Tomb.
While it isn’t as strong as some secondary options, it’s a fun weapon that can prove incredibly strong in Zombies and a fun distraction in competitive modes. Today, we’ll be looking at how to unlock the D1.3 Sector, briefly explain how its attachments work, and give some strong build recommendations for Multiplayer and Zombies.
How To Unlock The D1.3 Sector

The D1.3 Sector is tied to the
TMNT
event, which runs from February 27 to March 13. It is the final reward from the event’s reward track, requiring 370,000 XP to access. Playing Multiplayer, Zombies, or Warzone grants progress.
Once the TMNT event ends, the D1.3 Sector will be moved to the Armory Unlocks system.
Found in the secondary slot, the D1.3 Sector is a sawblade launcher with a handful of attachments to choose from, most of which are major upsides for the weapon. It’s a one-hit kill to the torso in Multiplayer and deals heavy damage in Warzone, although not enough to outright down a player. Zombies users will want to use its explosive ammo attachment to make the D1.3 Sector viable.

Related
Call Of Duty: Black Ops 6 – How To Unlock Every Zombies Weapon Camo
Complete these Zombies challenges to unlock the prestigious Nebula camo in Black Ops 6.
Best D1.3 Sector Build
|
D1.3 Sector Build |
||
|---|---|---|
|
Attachment |
Pros And Cons |
Advanced Stats |
|
Long Barrel (Barrel) |
|
|
|
Crossbar (Underbarrel) |
|
|
|
Explosive Blades (Magazine) |
|
|
|
Overclocked Stock (Stock) |
|
|
Most of the attachments for the D1.3 Sector are straight upgrades for all builds. The Long Barrel drastically increases your ADS speed, while the Crossbar and Overclocked Stock make you strafe nearly as fast as your sprint speed. You’ll want these three attachments equipped at all times.
Your main choice is in which ammo type you run. You have three options with this weapon:
- Default: Blades have moderate travel time. One-hit kill on direct impact.
- Ricochet: Blades travel faster and bounce off hard surfaces, featuring a faster fire rate. Two-hit kill on direct impact.
- Explosive: Blades explode on contact. One-hit kill on direct impact, but suffers from slower fire rate.
Default is your best choice for Multiplayer. It’s a one-hit kill with good travel speed, although there is no forgiveness if you slightly miss it. Explosive is better on paper, but opponents can survive explosive shots with Flak Jacket.
Ricochet is terrible and should never be used. The ricochet behavior doesn’t have any form of forgiveness, cuts the weapon’s damage in half, and only provides a 15 percent fire rate bonus to compensate. Don’t use this ammo type until it gets buffed.
Explosive is ideal in Zombies. Sawblades will explode in a wide area on impact, dealing most of its damage through the AoE explosion. It’s a monstrous weapon in Zombies once Pack-A-Punched, although you’ll want
PhD Flopper
active to ensure you don’t accidentally turn yourself into confetti.
Loadout Recommendations
| Perks | |
|---|---|
| Specialty | Strategist |
| Column One | Flak Jacket |
| Column Two | Fast Hands |
| Column Three | Quartermaster |
| Equipment | |
| Wildcard | Preference |
| Lethal | Preference |
| Tactical | Stim |
| Field Upgrade | Assault Pack |
There aren’t any perks you need for the D1.3 Sector to excel, so most of your loadout is down to preference. That said, we do recommend a Strategist specialty for this weapon, as this sawblade launcher cannot proc Enforcer’s healing effect on kill. If that ever changes, we’ll recommend Enforcer instead.
Flak Jacket is a great perk and downright mandatory on small maps, significantly reducing the damage you receive from all explosive damage. That includes the D1.3 Sector’s explosive sawblades if you’re unfortunate enough to face an opponent running that loadout. Fast Hands makes swapping to your primary instantaneous, and Quartermaster speeds up the recharge rate of your Stims. Everything else is dealer’s choice.

Next
Call Of Duty: Black Ops 6 Zombies – Weapons Tier List
This tier list covers every usable weapon in Black Ops 6 Zombies.