Summary
- Queen’s Blood mini-game in Final Fantasy 7 Rebirth introduces addictive card gameplay.
- Best Queen’s Blood cards fluctuate based on game progression, allowing early decks to remain viable.
- Cards like Security Officer, Crystalline Crab, and Midgardsormr are essential for effective gameplay.
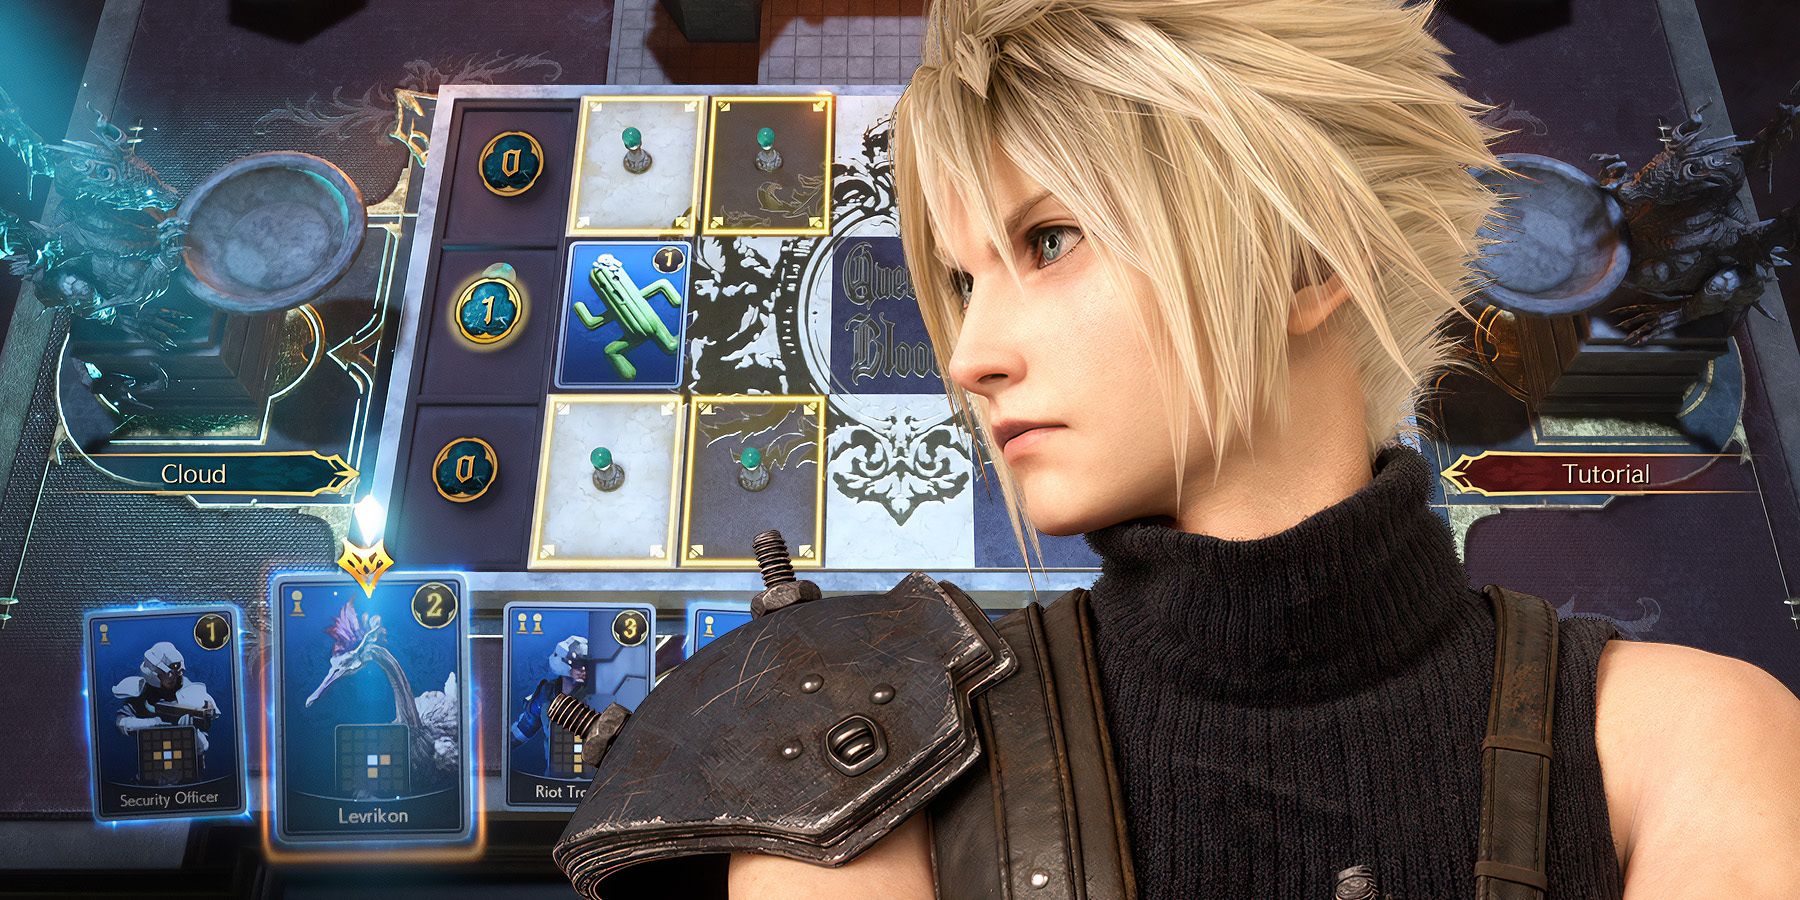
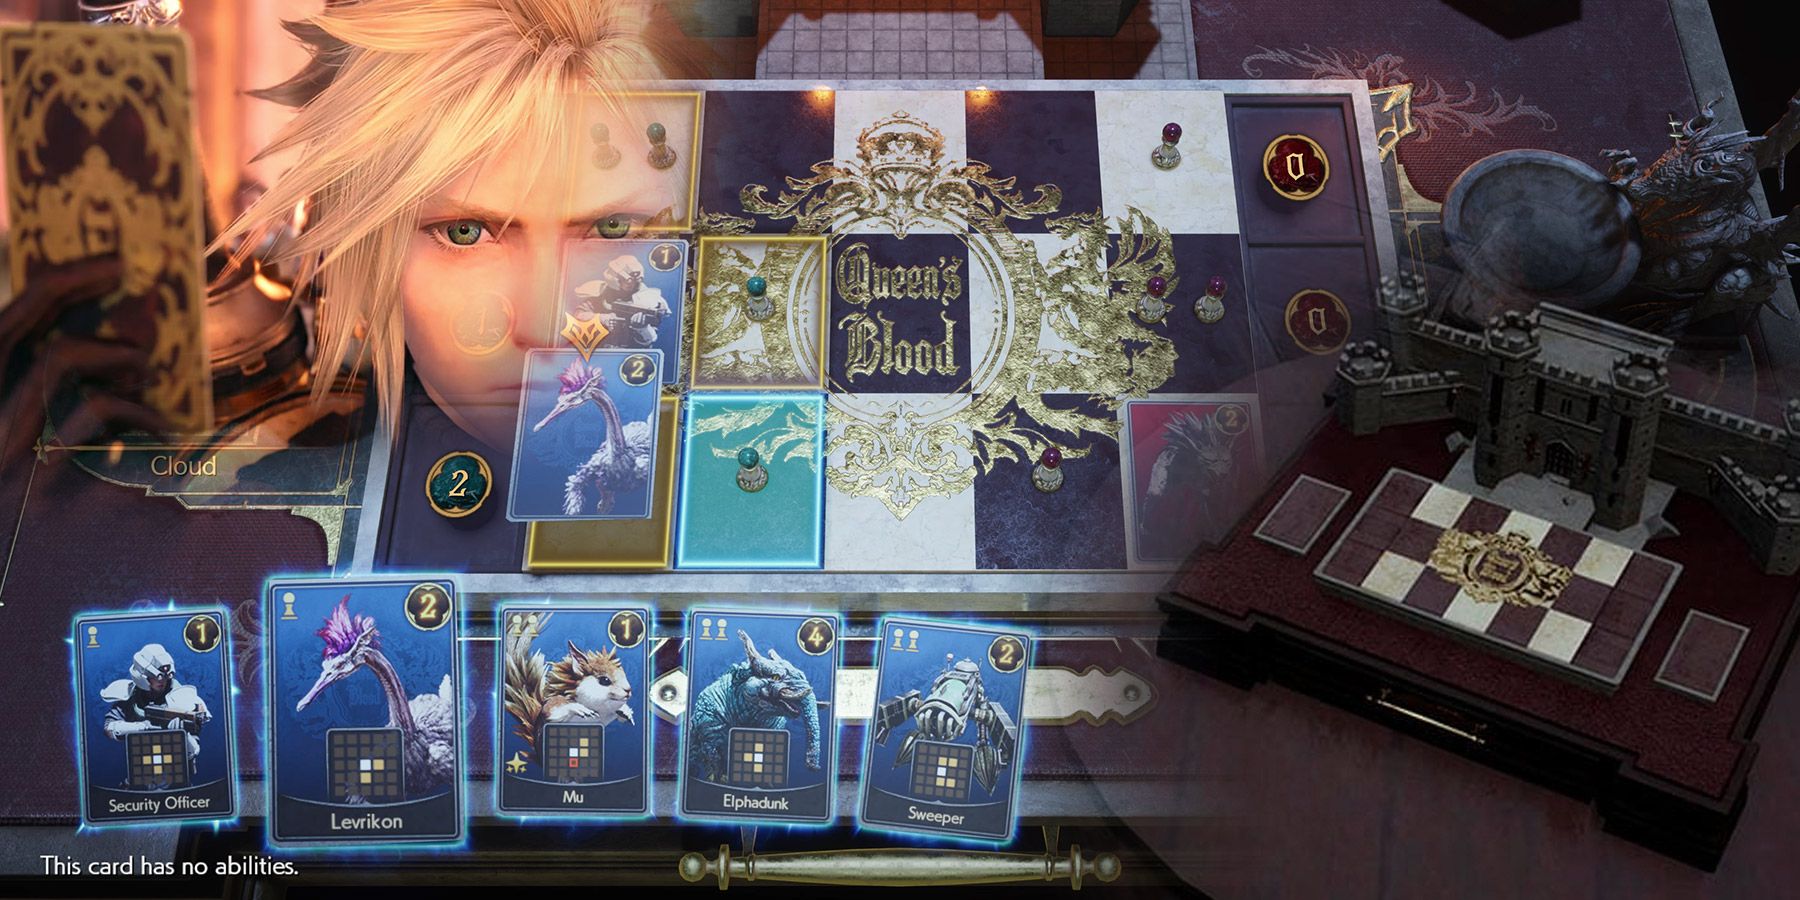
Final Fantasy 7 Rebirth is truly a spectacle to behold. Remaking a foundational game is a no-brainer, but rivaling the original would be impossible for a worse developer. Square Enix’s follow-up to their 2020 success, Final Fantasy 7 Remake, perfectly re-imagines the remaining content of Final Fantasy 7’s disc one. This title also introduced Queen’s Blood, which has become addictive for fans. The mini-game is one of the few in Rebirth to dodge the criticism of gamers, and in anticipation of a potential standalone release, many fans are searching for the best cards to bolster their decks.
Related
Final Fantasy 7 Rebirth Queen’s Blood DLC Wish List
Queen’s Blood is one of Final Fantasy 7 Rebirth’s most endearing and addictive activities, and there are ways an expansion could enhance it.
The best Queen’s Blood cards fluctuate depending on where the player is in the game. The best cards in Chapter 2 will not be the best in Chapter 10. This is expected, especially since Queen’s Blood cards are locked behind progression, and as gamers progress, their decks will get stronger along with them. But a major part of the genius of Queen’s Blood is that it allows for early-game decks to still be viable in the end game. All in all, these are the best Queen’s Blood cards in Final Fantasy 7 Rebirth.
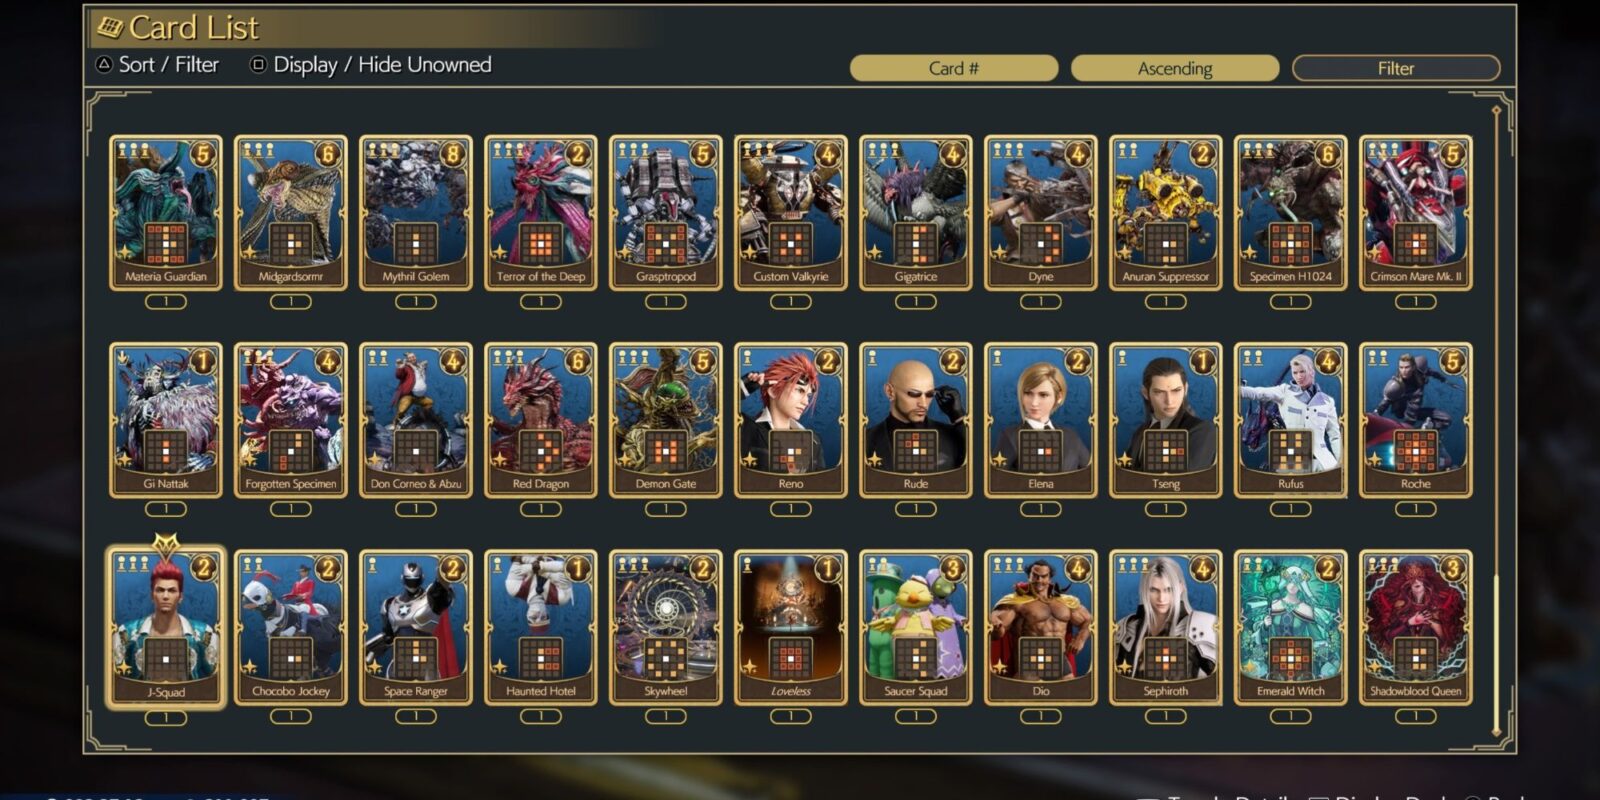
Updated on February 27, 2025, by Mehrdad Khayyat: With an abundance of cards available to collect for Queen’s Blood in Final Fantasy 7: Rebirth, a wide variety of decks can be created. Each card adds more depth to the gameplay, and the synergy between them opens up new opportunities.
Exploring new decks, of course, requires the player to obtain all the cards. So, it’s safe to say that Queen’s Blood will get better and better as the main campaign gets closer to its finale. But, only a good combination of worthy cards can still win the games.
13
Security Officer
A Great Filler Card
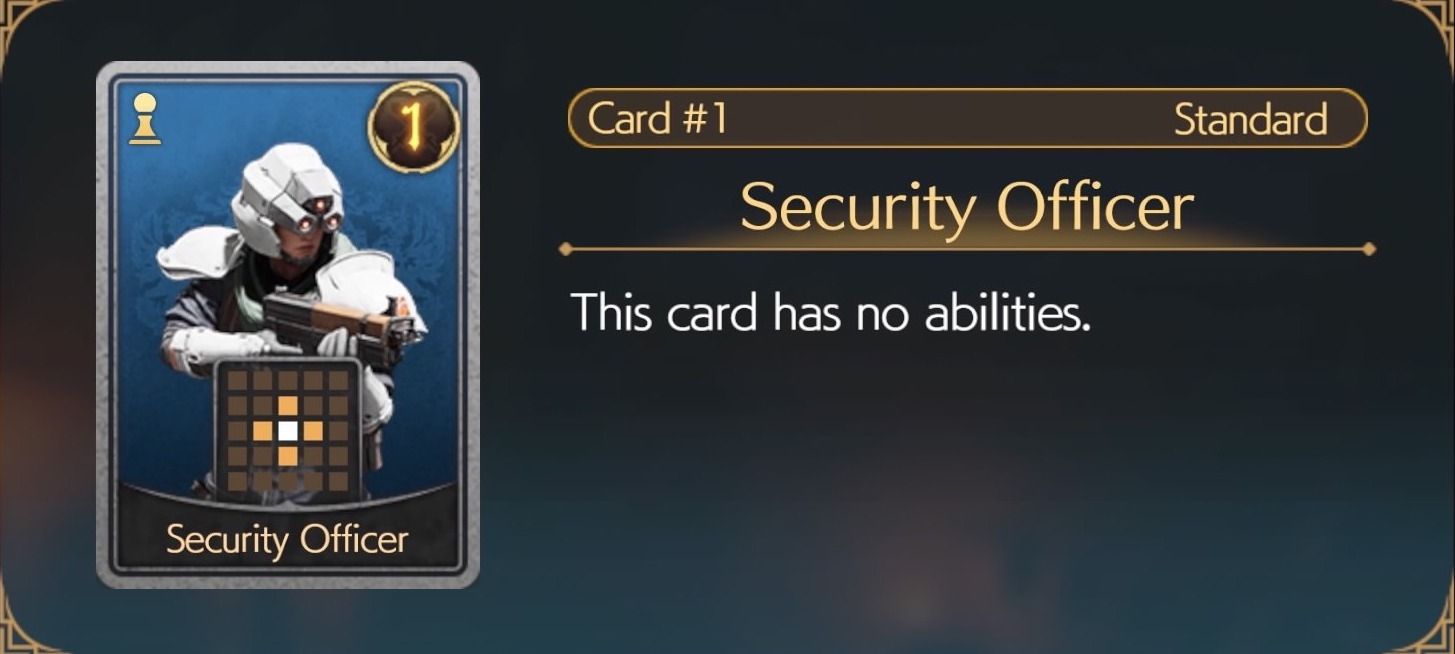
- Pawn Cost – 1
- Card Power – 1
- Card Effect – N/A
Security Officer is a card players will receive with their starter deck. It’s a phenomenal filler card and should be included if needed. The card can be played in the middle lane to push and set up the sidelines, and it is pivotal in those early matches.
Players need to include cards that cost 1 Pawn in their decks. Cards like Security Officer, Mandragora, and Crystalline Crabs are all good examples of these low-cost cards, and players that prefer these other cards can swap out Security Officer for them.
12
Crystalline Crab
A Useful Card For Any Playstyle
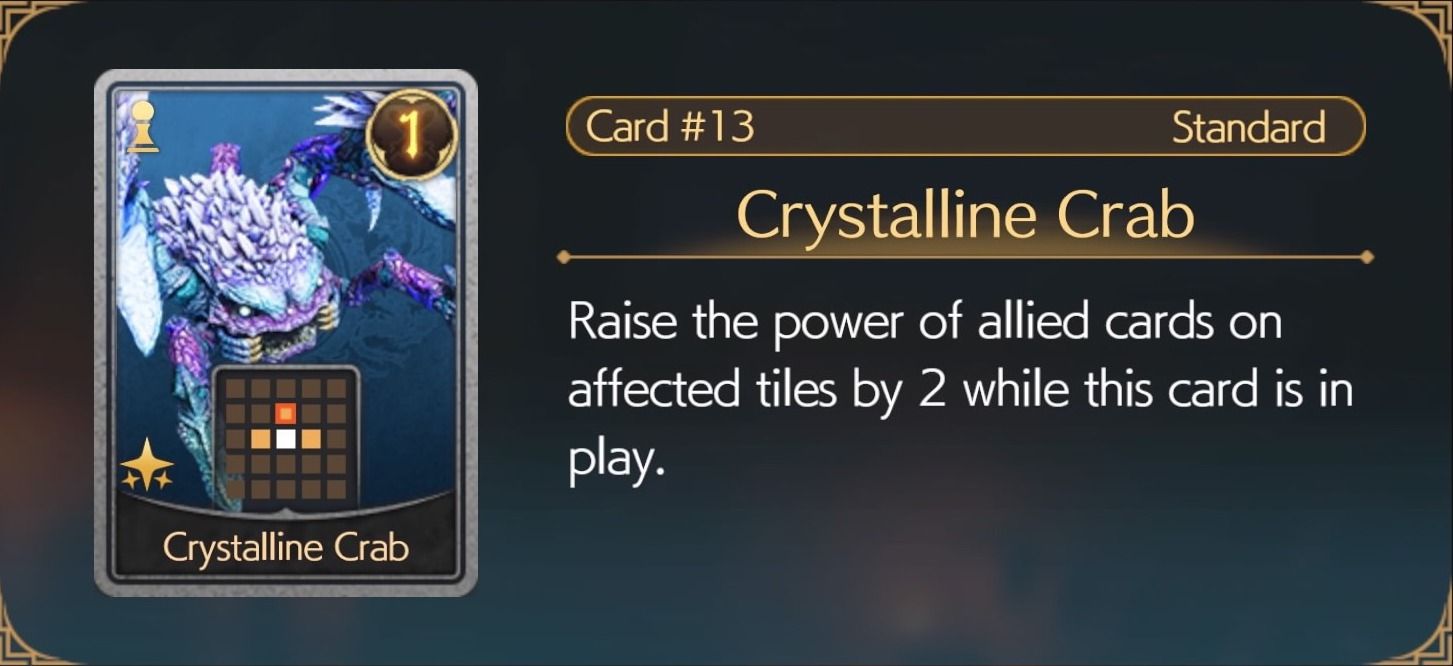
- Pawn Cost – 1
- Card Power – 1
- Card Effect – Grants +2 Power to the card above.
Regardless of what deck the player runs, Crystalline Crab is a card that comes in handy almost everywhere, especially knowing that it only requires one pawn and can be placed earlier in the game.
While it does add a pawn to its top, right, and left adjacent tiles, the +2 Power buff is only applied to the tile above this card. So, it’s best to always place Crystalline Crab on the mid or bottom lanes, as placing it on top lane will simply waste its buff. It’s worth noting that even if the top tile is empty, the buff will be reserved in that spot for any incoming card.
11
Midgardsormr
A Must-Have For Blight Decks
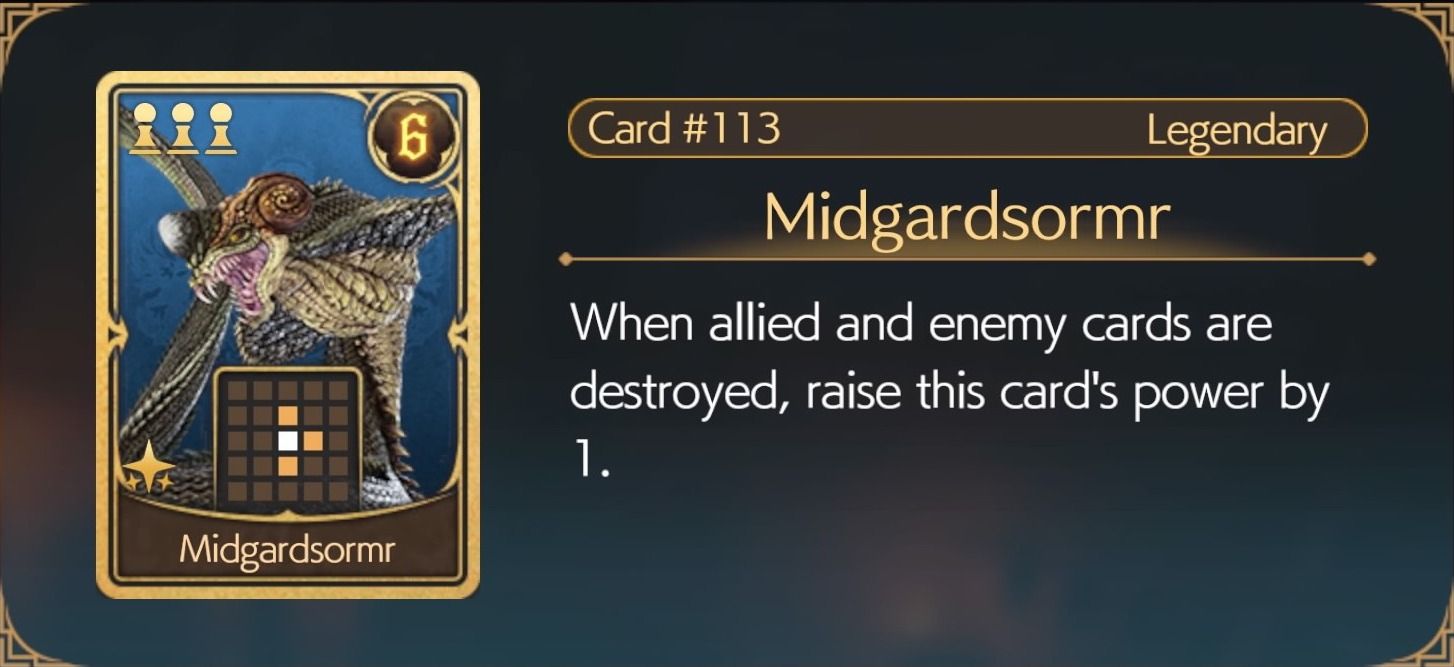
- Pawn Cost – 3
- Card Power – 6
- Card Effect – When allied and enemy cards are destroyed, raise this card’s power by 1
This card is pivotal for Blight decks, and Blight players will want to primarily focus on Midgardsormr’s card effect. If the player can start the match with Capparwire, Crawler, and Midgardsormr early, they’ll be in a good position to win the match.
Midgardsormr can easily take over a lane with its great scaling abilities, and patient players will dominate the other lanes safely with this card. It can be found by defeating Cameron in Chapter 4.
10
Mindflayer
A Card To Alter The Shape Of The Battlefield
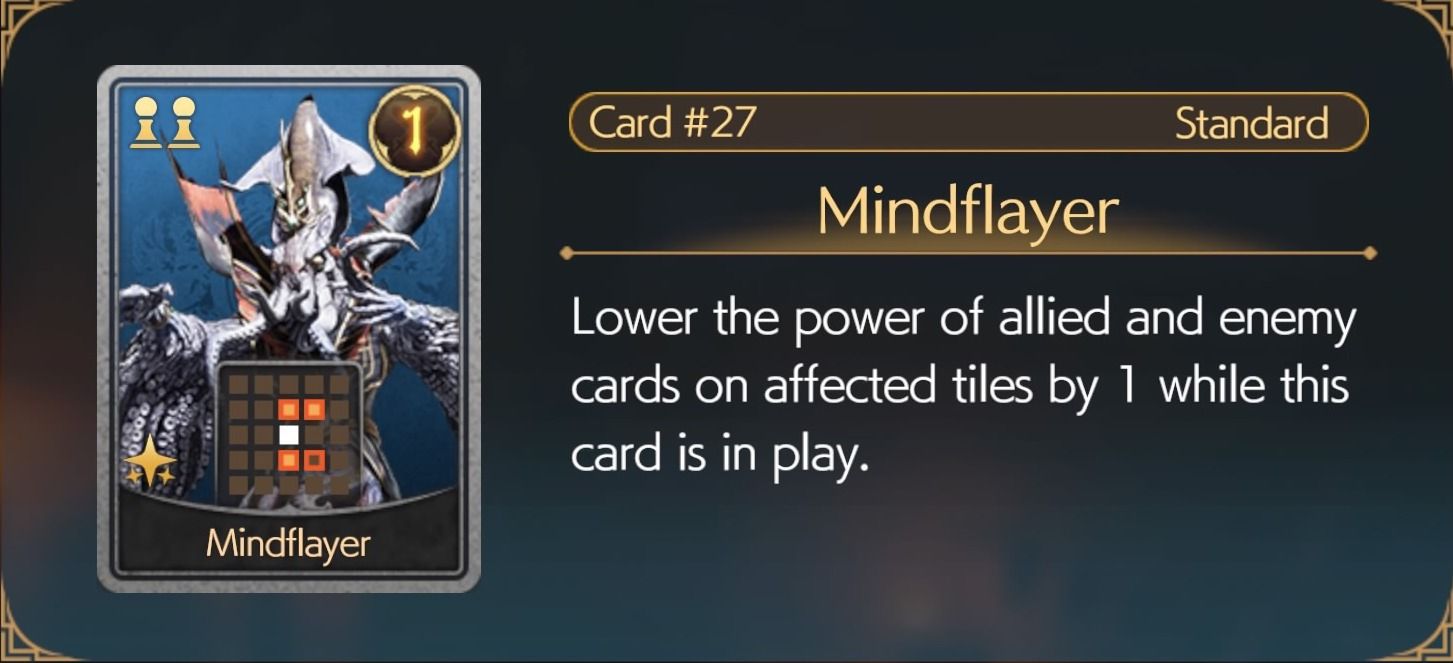
- Pawn Cost – 2
- Card Power – 1
- Card Effect – Lower the power of allied and enemy cards on affected tiles by 1, while the card is in play.
Mindflayer is one of those cards that doesn’t receive the attention it deserves. At first glance, the card’s power seems to be quite offensive, working only based on a mistake from the opponent, but Mindflayer shows its true value when accompanied by cards like Tonberry King or Midgardsormr.
It’s always best to play this card in the middle lane, but the player is strongly recommended to place a Tonberry King or Midgardsormr before playing Mindflayer. Afterward, everytime that the player places 1-Power cards on the affected tiles, it actually benefits Tonberry King or Midgardsormr. So, Mindflayer creates an easy point printer for the lanes.
9
Fat Chocobo
Situational, But Effective
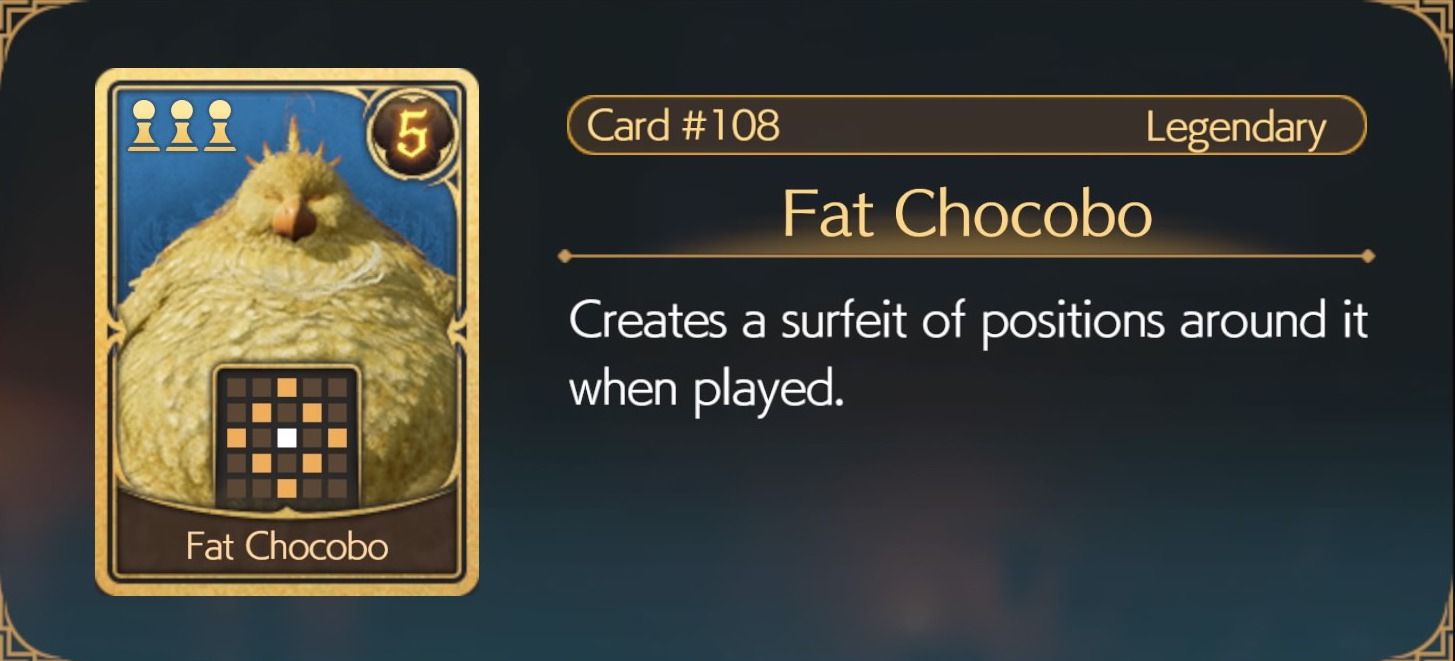
- Pawn Cost – 3
- Card Power – 5
- Card Effect – Creates a surfeit of positions around it when played
While Fat Chocobo doesn’t fit into any deck as neatly as other cards, it allows for a great setup for players willing to build around it. Fat Chocobo players can easily set up three pawns while utilizing other set-up cards; Cactuar and Crystalline Crab.
This card is powerful in early-game decks for Queen’s Blood. It can be found in Thorin’s Shop after the Side Mission “A Rare Card Lost.” Players interested in building one of the best early-game decks should use two Fat Chocobos and 3 Izana’s.
8
Spearhawk
A Staple For Buff Decks
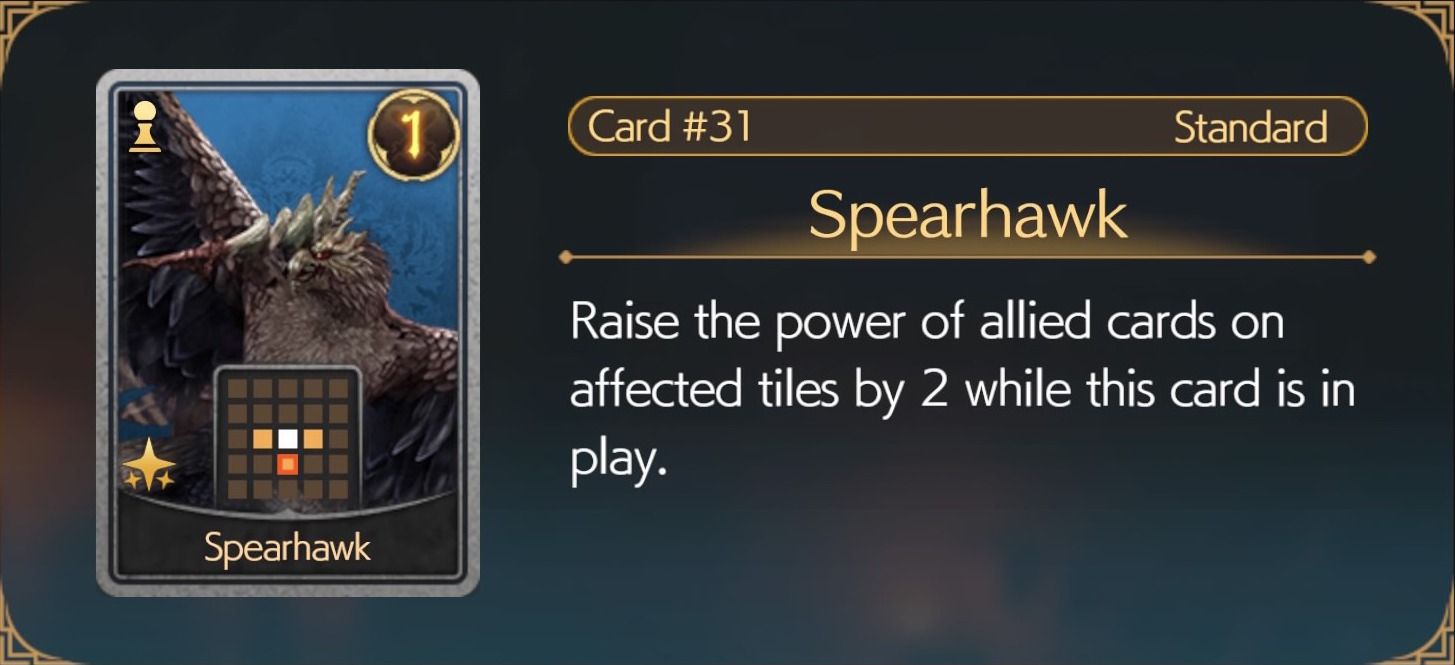
- Pawn Cost – 1
- Card Power – 1
- Card Effect – Raise the power of allied cards on affected tiles by 2 while this card is in play
Fans of buff decks will rejoice after adding Spearhawk to their deck. The card is similar to Crystalline Crab but is better in the middle and top lanes. Gamers will receive this card after completing the “Spears and Needles” Puzzle at Costa del Sol in Chapter 6.
Related
Final Fantasy 7 Rebirth Confirms Fix For Platinum Trophy Issue
Final Fantasy 7 Rebirth acknowledges and confirms that a fix is coming for a bug that is preventing players from acquiring the platinum trophy.
Spearhawk is a staple card that some gamers are even using to counter the hard card challenges of Final Fantasy 7 Rebirth. This card works wonders with Space Ranger, Chocobo and Moogle, and Cactuar.
7
Emerald Witch
A Low-Cost Card With Amazing Buff Pattern
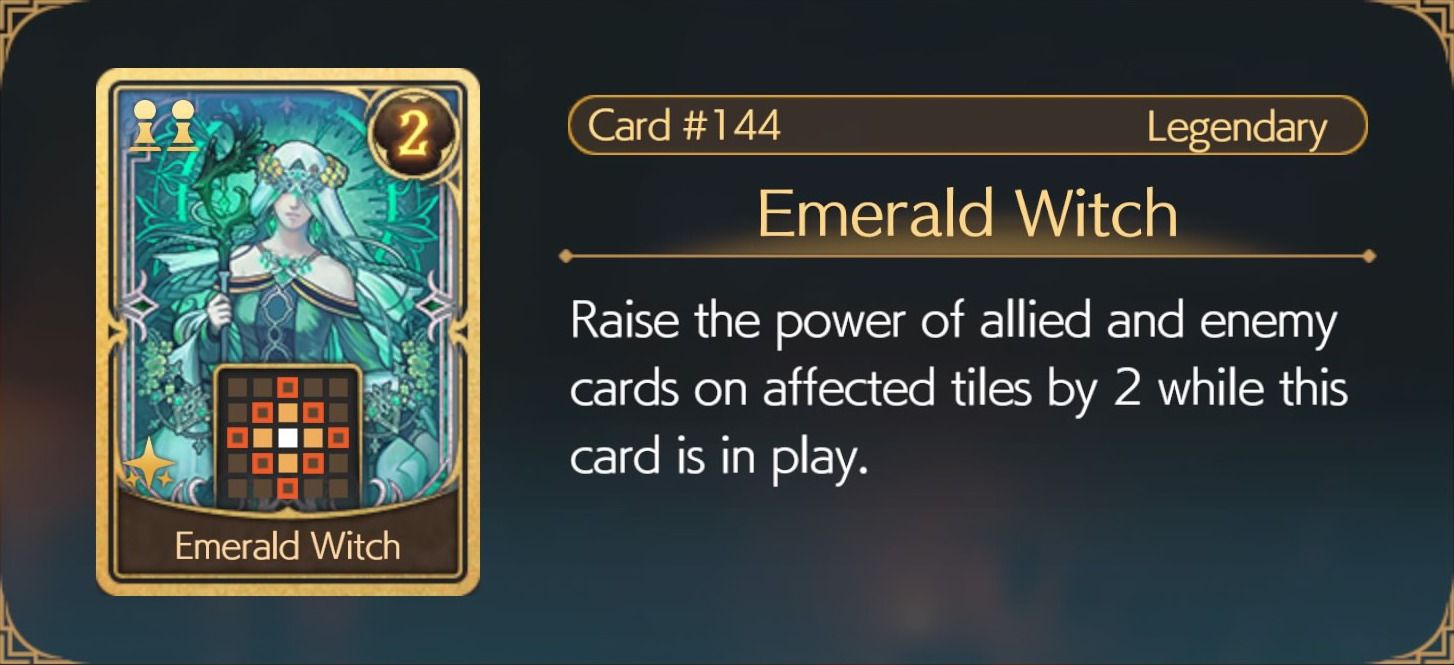
- Pawn Cost – 2
- Card Power – 2
- Card Effect – Raise the power of allied and enemy cards on affected tiles by 2 while this card is in play.
Emerald Witch is one of the late-game cards to achieve in Final Fantasy 7: Rebirth, and it does deliver a significant buff with an expansive pattern, capable of adding +2 Power to up to 8 cards if placed at the center of the board.
While that sounds like an ideal placement for the Emerald Witch, if the player has control of the middle column, a safer placement for this card is anywhere on the first column of the board, to ensure that most or all of the buffs will only affect the allied cards rather than enemy cards.
6
Death Claw
Can Take A Deck To The Next Level
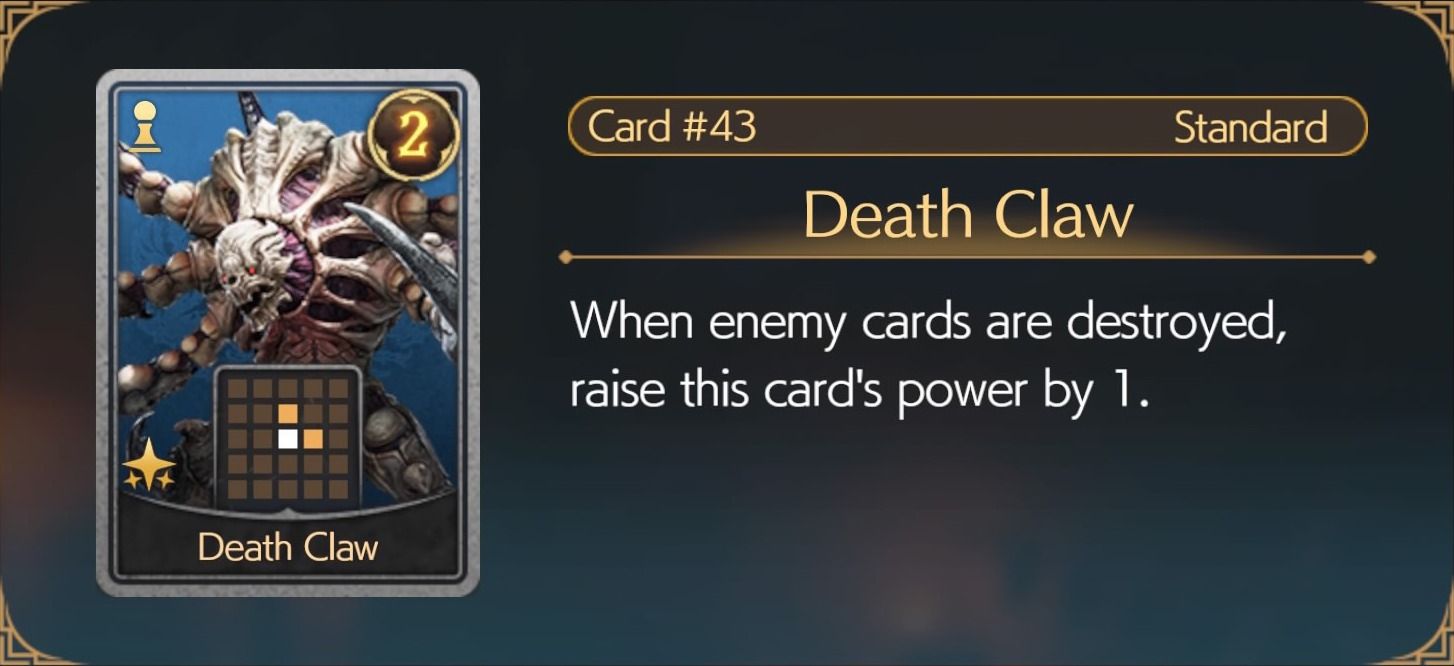
- Pawn Cost – 1
- Card Power – 2
- Card Effect – When enemy cards are destroyed, raise this card’s power by 1
Death Claw is another staple for Blight decks. Being a 1-Pawn card, it can push the lane above it and scale each time the player destroys an enemy card, making it a cut above the rest. This card is received after defeating Mary in The Dust Bowl in Chapter 8.
When paired with other high-quality cards and built into a Blight deck, players can create some of the best all-around decks in the game.
5
Yuffie
Arguably The Best Hero Card
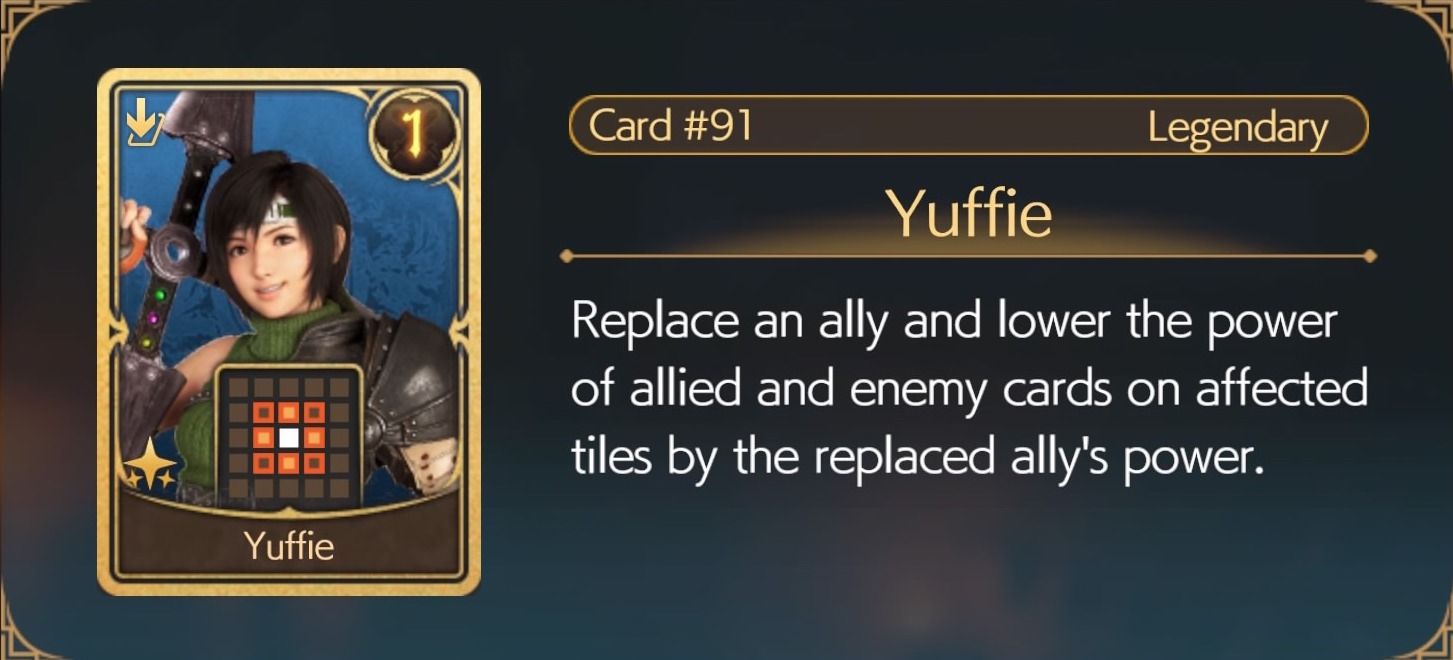
- Pawn Cost – N/A
- Card Power – 1
- Card Effect – Replace an ally and lower the power of allied and enemy cards on affected tiles by the replaced ally’s power
Yuffie is one of the best support cards in the game. Her ability to enable self-enfeeble effects for lower power cards is pivotal for Enfeeble decks. When paired with high-power cards, Yuffie can pretty much wipe the board.
Related
Square Enix Already Has a Perfect Blueprint To Follow To Keep Queen’s Blood Alive Outside FF7 Rebirth
Final Fantasy 7 Rebirth is home to one of best card games around, and it already has the perfect blueprint to follow for success outside of Rebirth.
Yuffie takes advantage of the Replace ability very well, and fits well with other cards that do the same. Vincent, Heatseeker, and Bomb can bring out hidden synergies with this card. Yuffie’s card can be found at the Puzzle of Card Carnival in Chapter 12.
4
Gi Nattak
Sets Up Other Cards For Victory
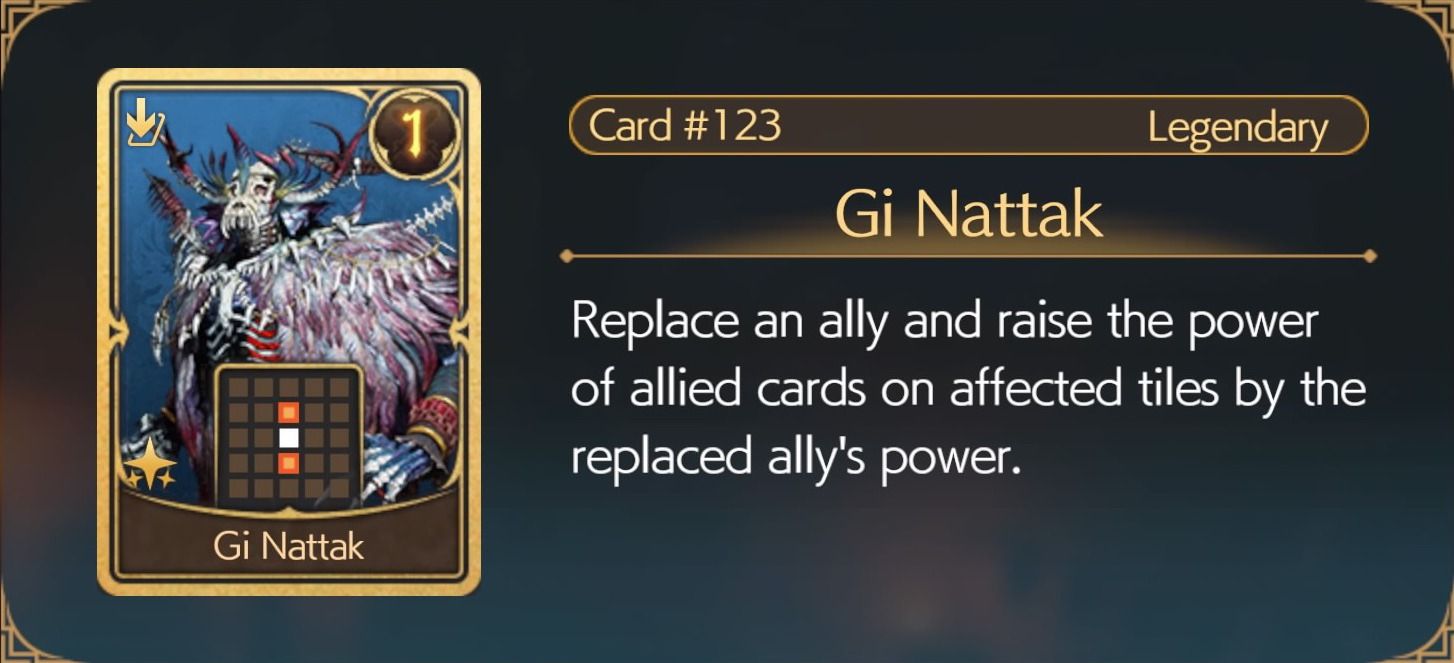
- Pawn Cost – N/A
- Card Power – 1
- Card Effect – Replace an ally and raise the power of allied cards on affected tiles by the replaced ally’s power
Gi Nattak sets up high-power cards in the middle lane. This card, when used with cards like Shadowblood Queen, can dominate both top and bottom lanes. This card can be found in the Puzzle of Card Carnival in Chapter 12.
Gi Nattak can be used offensively or defensively due to its overpowered card effect. Self-destroying cards and decks tend to be the best decks in the game, and fans of that playstyle should make sure to have multiple Gi Nattaks in their decks.
3
Bahamut
The Comeback Card
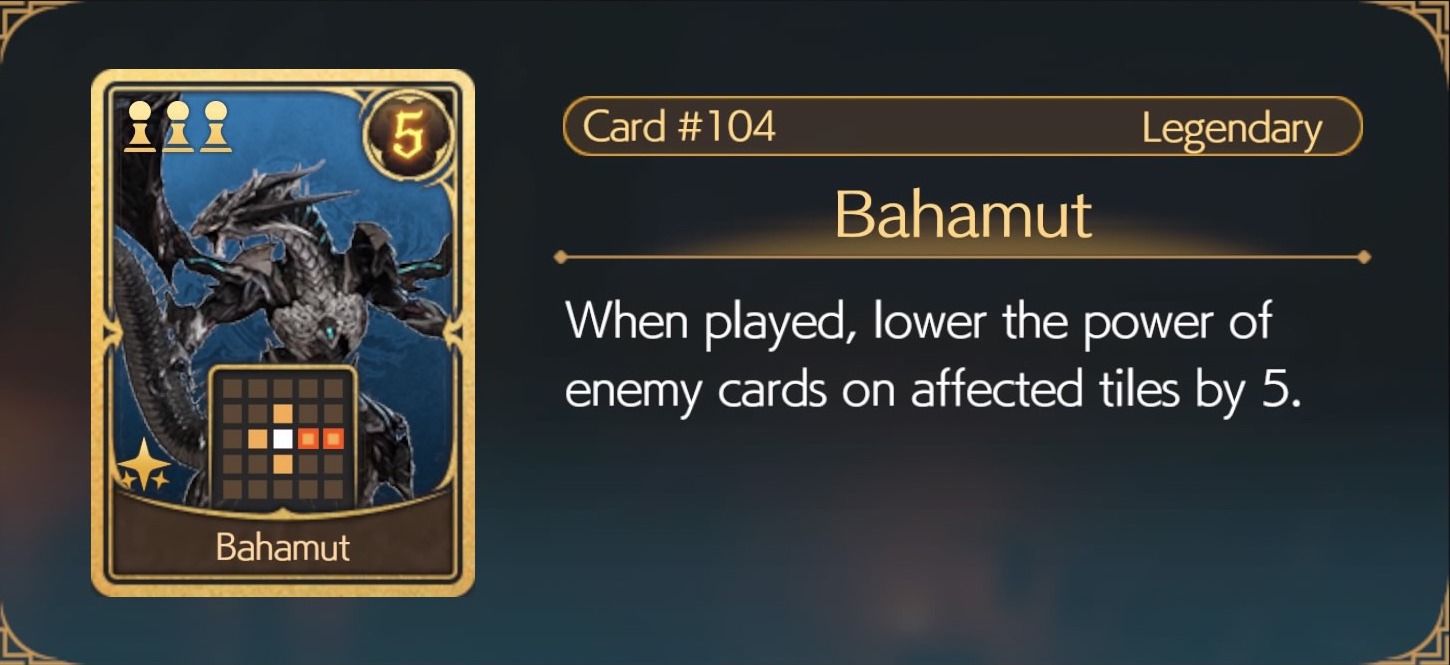
- Pawn Cost – 3
- Card Power – 5
- Card Effect – When played, lower the power of enemy cards on affected tiles by 5
Bahamut can turn a game around with its card effect. It’s a consistent card and, when played optimally, it can wipe a lane and give access to Pawns afterward. Players who want to add Bahamut to their decks must complete the “Nightmare” challenge at The Gold Saucer in Chapter 12.
Dyne can be used to support Bahamut’s game plan of removing enemy cards from the board. Cid and Disgorgon are good for this role as well, and when used in synergy, these cards can quickly turn the tide of a battle.
2
Tseng
Every Deck Is Better With This Card

- Pawn Cost – 1
- Card Power – 1
- Card Effect – The first time this card is enhanced, raise the power of allied cards on affected tiles by 4
Tseng is not only a consistent card, but it also allows for other cards to become consistent as well. Tseng’s Pawn placement and buffing effect make hindering enemy cards much more reliable. Queen’s Blood players who want to quickly empower a single lane should make sure to have Tseng in their deck.
He can be purchased in the QB Booster Pack: The Turks. Players can find the booster pack at the Queen’s Blood Vendor in Costa del Sol in Chapter 12.
1
Maloceros / Chocobo Jockey
The Best Cards In The Game
- Pawn Cost – 3 (Maloceros) / 2 (Chocobo Jockey)
- Card Power – 5 (Maloceros) / 2 (Chocobo Jockey)
- Card Effect – When you win the lane, receive a score bonus of 10
Gamers could argue that these two are the best cards in the game due to their insane card effects. These cards are strong individually, but decks with both are forces to be reckoned with. Chocobo Jockey specifically can be used to create a very basic yet consistent game plan. With these two cards, players can prioritize winning one lane. With their card effects, the extra points players receive can easily outnumber their opponent’s points in the other two lanes. Chocobo Jockey is better in some decks because of its lower Pawn cost, whereas Maloceros is better in others with its greater Card Power. If there is space in the deck for both cards, they should be prioritized.
Maloceros is received after defeating Regina in Gongana during Chapter 10. Meanwhile, Chocobo Jockey is received by exchanging GP at the Gold Saucer in Chapter 8.

- Released
-
February 29, 2024
- OpenCritic Rating
-
Mighty
Source link