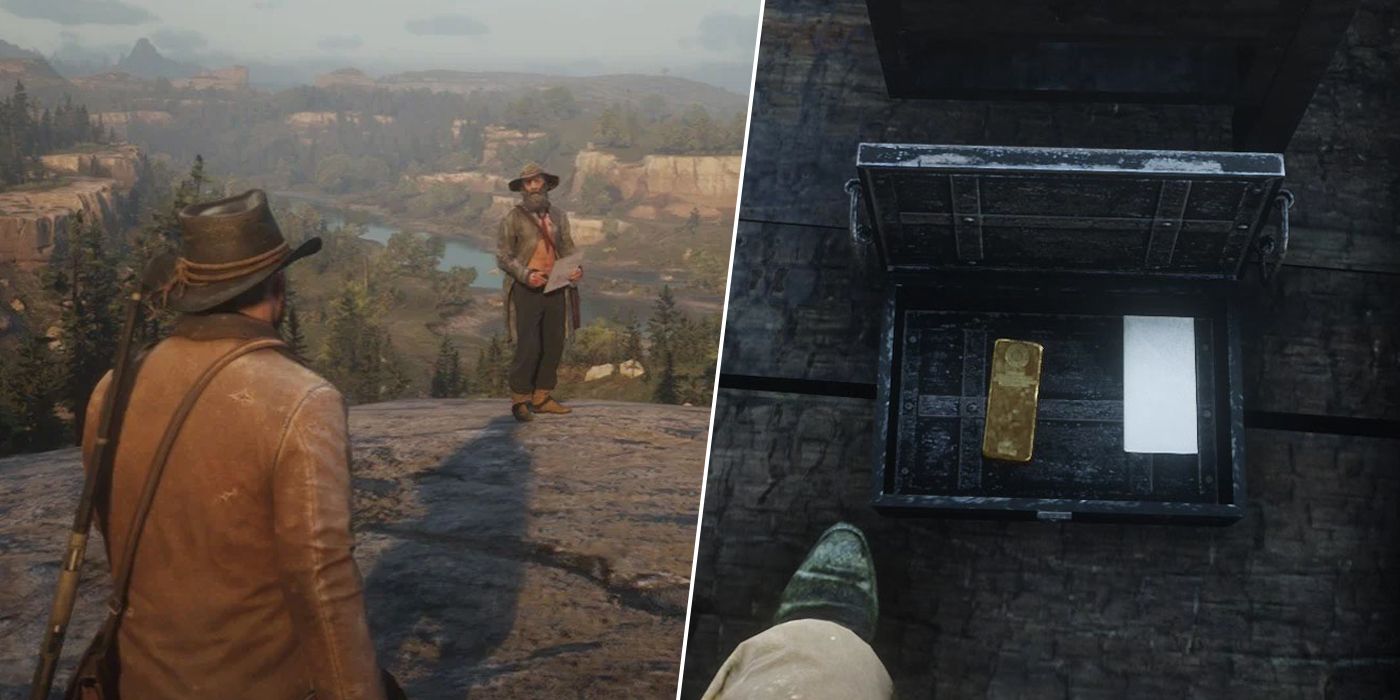
Red Dead Redemption 2 features an abundance of Treasure Maps that players can find to source some Gold Bars and further riches so that they can become one of the richest outlaws in America. Every Treasure Map in Red Dead Redemption 2 can be found below, along with the location of the actual treasure itself so that players don’t have such a hard time translating and deciphering the puzzling maps.

Related
Red Dead Redemption 2: All Bounty Hunting Targets (& Where to Find Them)
Knowing every bounty in Red Dead Redemption 2 will help Arthur Morgan secure some easy dollars and bring some outlaws to justice.
All Treasure Maps in RDR2 will take players on quite the chase across a multitude of states, but it’s always worth it for the great prize that awaits that final loot box, where Arthur Morgan can be swimming in enough gold to go to Tahiti a thousand times over.
21
Jack Hall Gang Map 1
- Loot: Pearl Necklace, Jack Hall Gang Map 2
To obtain the Jack Hall Gang Map 1, players must first meet Maximo Cristobal Valdespino in the All That Glitters stranger side-mission. Maximo can be found West of Flatneck Station in The Heartlands, and the map he holds can be purchased off of him for $10 (or robbed from him).
To solve Jack Hall Gang Map 1, head to Caliban’s Seat, South of Valentine, and follow the rock path that leads through a few gaps and jumps and ends with a granite hole where players can find the Jack Hall Gang Map 2.
20
Jack Hall Gang Map 2
- Loot: $15, Jack Hall Gang Map 3
After solving Jack Hall Gang Map 1, players will have Jack Hall Gang Map 2, and they can solve this map by heading to Cotorra Springs. which is North of Fort Wallace. The treasure itself is found within a central rock, surrounded by a circle of other rocks, which is easily found by heading to the map and going to the first ‘r’ in ‘Cotorra Springs’. With this treasure, players are rewarded with Jack Hall Gang Map 3.
19
Jack Hall Gang Map 3
Jack Hall Gang Map 3 is the final map of the Jack Hall Gang chain, and the solution to this map is found at the center island in O’Creagh’s Run in the Grizzlies East. Players can swim, or ride their horse to the center island, where the treasure they seek will be waiting underneath a rock on the north area of this island.
18
High Stakes Treasure Map 1
- Loot: $5, High Stakes Treasure Map 2
The High Stakes Treasure Map 1 is found in a random encounter with an elderly treasure hunter. Players can get the old man to spawn by heading to Lenora View, the blue shack just North of Strawberry in West Elizabeth. Here, an older treasure hunter will be standing by a cliff, and players can only obtain the High Stakes Treasure Map 1 by robbing him or looting his body.
Once the High Stakes Treasure Map 1 is claimed, head to Cumberland Falls, which is just East of Wallace Station and West of Downes Ranch. All players need to do to find this treasure is head behind the waterfall at Cumberland Falls and they will have the High Stakes Treasure Map 2.
17
High Stakes Treasure Map 2
- Loot: $15, High Stakes Treasure Map 3
With the High Stakes Treasure Map 2 claimed, venture to Barrow Lagoon, found in the North area of Grizzlies West, Ambarino. To obtain the treasure, climb up the fallen tree that connects the two rock structures atop the frozen lake, where the treasure sits within a hole in the tree bridge itself.

Related
Red Dead Redemption 2: All Legendary Fish (& Where to Find Them)
There are 13 Legendary Fish in Red Dead Redemption 2 to catch, but 15 in total, and here’s where to find them all.
16
High Stakes Treasure Map 3
The final High Stakes Treasure Map is found with the reward of completing High Stakes Treasure Map 2, the location of which can be found just a short walk North of Fort Wallace in Cumberland Forest, where players will need to loop around the cliff and follow the rocky path below to find the final treasure within a crack in the wall. Do be careful, as the trail can be quite steep which will cause Arthur to slip and potentially fall.
15
Landmarks of Riches Map 1
- Loot: Gold Earring, Silver Earring, Landmarks of Riches Map 2
Landmarks of Riches Map 1 is found North West of Owanjila, the lake next to Strawberry in West Elizabeth. The map itself is found by inspecting the Obelisk landmark on the far West of the map, and it can be solved by heading to the Tiny Church in Lakay, Bayou Nwa by investigating the church bell on the rooftop of this small building.
14
Landmarks of Riches Map 2
- Loot: Gold Jointed Bracelet, Landmarks of Riches Map 3
Landmarks of Riches Map 2 will take players to the Mysterious Hill Home, North of Bacchus Station in Ambarino. Players need to climb on top of the Mysterious Hill Home and investigate the crack in the rooftop window to claim the reward from this map.
13
Landmarks of Riches Map 3
- Loot: Silver Chain Bracelet, Landmarks of Riches Map 4
Landmarks of Riches Map 3 takes players to Bolger Blade in Scarlett Meadows, just East of Braithwaite Manor. The treasure itself can be found on a slumped and dead tree, away from the barracks and the abandoned church.
12
Landmarks of Riches Map 4
The final part of the Landmarks of Riches Map requires players to climb Mount Shann in Big Valley, West Elizabeth. On the top of this snowy mountain is an old sundial, and underneath the rock that represents the seventh hand on a clock, players can find the gold stashed away from this set.
11
The Poisonous Trail Map 1
- Loot: $10, The Poisonous Trail Map 2
To find The Poisonous Trail Map 1, head to Cairn Lodge in Cairn Lake, which is just East of Colter in Ambarino. Inside the cabin and underneath the bed, players can pull out a lockbox and open it to find The Poisonous Trail Map 1. To solve The Poisonous Trail Map 1, head to Face Rock in Scarlett Meadows, a location that’s North of Rhodes, and investigate a dead tree stump that sits beside two toppled trees.
10
The Poisonous Trail Map 2
- Loot: Platinum Spring Bracelet, The Poisonous Trail Map 3
The Poisonous Trail Map 2 can be solved by heading South of Van Horn Trading Post, where the solution to this treasure map lurks in the center of a mound made of rocks and ridges, which can be found just between Fort Brennard and Van Horn Mansion.

Related
The 16 Most Difficult Red Dead Redemption 2 Legendary Animals To Hunt
With 16 Legendary Animals to find and hunt in Red Dead Redemption 2, some hunters might find themselves being hunted by these ferocious beasts.
9
The Poisonous Trail Map 3
For the final part of The Poisonous Trail Map, head to the Elysian pool in Roanoke Ridge and climb behind the waterfall. One inside, players are going to be within a cave, so it’s best to bring a Lantern for light. Once inside, climb further up and then follow the trail and drop down to the right, where players will want to crouch and hug the wall until they go even deeper into a small cave entrance. From here at the fork in the road, take a right then an immediate left, and keep following the left path until you reach a drop. Now, jump across the drop on the left and follow the inside of that cave to drop down into a water pool which can be climbed to find a pile of rocks that are searchable for the rewards from The Poisonous Trail Treasure.
8
Sketched Map
The Sketched Map can be found by investigating the fireplace found in Reed Cottage, which is a small cabin that can be found North of Annesburg. To solve the Sketched Map, head to the Kamassa River by the Elysian Pool in New Hanover, where the treasure can be found underneath a small rock beside a large rock on the cliffside.
7
Torn Treasure Map 1
Torn Treasure Map 1 can be found by entering the Hermit’s cabin, Manito Glade, North of Annesburg. Once the Hermit has been subdued or killed, head into the cabin and pick up the Torn Treasure Map 1 which is found in the drawer to the room by the armchair, but players will need Torn Treasure Map 2 to solve this puzzle.
6
Torn Treasure Map 2
Torn Treasure Map 2 is found inside the Hermit Woman’s cabin, which is found in the very North West area of West Elizabeth, following up the stream of Little Creek River. The cabin is protected by the Hermit Woman and her pack of dogs, so be ready to kill them to access the cabin and find Torn Treasure Map 2 in a drawer by the bed. With both parts of the map, players will now have the Mended Map.
5
Mended Map
- Loot: x5 Erotic Photograph, Ottis Miller’s Revolver
With the Mended Map, head to Rattlesnake Hollow, which is a small cave entrance just West of Twin Rocks in New Austin, and also found in the North area of Cholla Springs. However, reaching this area is impossible for players who are not in the Epilogue, as an invisible sniper will always kill them if they risk going to New Austin.
4
The Elemental Trail Map 1
- Loot: Horse Meal, The Elemental Trail Map 2
The Elemental Trail Map 1 can be found in the Epilogue by heading to the South West most corner of New Austin by the Sea of Coronado, where hanging by a rope from a cliff is a man who can be shot down and looted for the treasure map itself. To solve The Elemental Trail Map 1, head to the abandoned cabin of Greenhollow, found East of Lake Don Julio and beside the San Luis River. The loot itself is within the fireplace.
3
The Elemental Trail Map 2
- Loot: Horse Reviver, The Elemental Trail Map 3
The Elemental Trail Map 2 can be solved by heading to Benedict Point, South of Tumbleweed in New Austin. Players will need to climb the wooden structure by the train tracks and go up the wooden boxes to walk across the rickety bridge, where the treasure is found in a gap about halfway across the bridge.
2
The Elemental Trail Map 3
- Loot: Special Horse Stimulant, Special Horse Medicine, Gold Bar, Crow Beak Trinket
The final treasure for The Elemental Trail is located under a rock that sits on top of a wooden gravestone that resides beneath a tree in Coot’s Chapel, a graveyard found South of Armadillo and North of Lake Dun Julio.