The FrameGen plugin harnesses the power of DLSS by enabling FSR 3, allowing you to achieve higher FPS in your games. While the results can vary and may sometimes sacrifice visual clarity, it’s an excellent choice if you prioritize performance over resolution. Before the Decky plugin simplified the process, installing and enabling the FrameGen mod was much more complicated and cumbersome. This guide will show you how to install Decky Loader and activate the FrameGen mod.

Related
Install Decky Loader

To obtain the FrameGen app you’ll need to download and install the Decky Loader program to install plugins like FrameGen. In addition to FrameGen, there are more community-created plugins that can improve the performance of the Steam Deck and your games. Use the following steps to install Decky Loader.
Enable Developer Mode
- Press the Steam button and click System.
- Switch Developer Mode on.

- Scroll through the left menu panel and locate the Developer menu.
- Make sure that CEF Debugging is on and restart the Steam Deck.
- With the Steam Deck on, press the Steam button.
- Open the Power menu and switch to Desktop Mode.
Install Decky Loader
- In Desktop Mode, click the Discovery Store icon at the bottom left of the screen. Type “Google Chrome” or another browser of your choice in the search bar, then install it.
- With a browser launched, open the GitHub page and download Decky Loader.
- After downloading, open the Downloads folder, double-click the Decky Loader installer icon, and select the Recommended Install option.
- Enter your sudo password if required. If not open your Konsole and type passwd in the command box.
- Then type your new password twice to confirm.
- After the installation has finished, click the Return to Gaming Mode icon on your desktop.
Access Decky Loader’s Testing Store

You’ll need access to the Testing Store to locate the FrameGen app. Use the following steps to switch to Testing Mode:
- Press the QAM button.
- Open the plugin icon at the bottom of the menu.
- With Decky Loader open, click on the Settings cogwheel.
- Highlight the General menu and click the Change the Store Channel dropdown to switch on Testing.
- Leave the General menu and click the Store icon. The Decky Loader’s Testing Store will open.
- Locate Decky FrameGen and install it.
FrameGen only works with Direct X12 games.
Running FrameGen On Steam Deck

With the FrameGen installed, follow the next steps to install the mod for your Direct X12 games and activate it within your game’s display and graphical settings.
FrameGen Plugin
- Ensure the Steam Deck is in Gaming Mode.
- Press the QAM button, which is located under the right trackpad with three dots.
- Select the new plugin icon.
- Open the Decky FrameGen plugin.
- Select Install FG Mod.
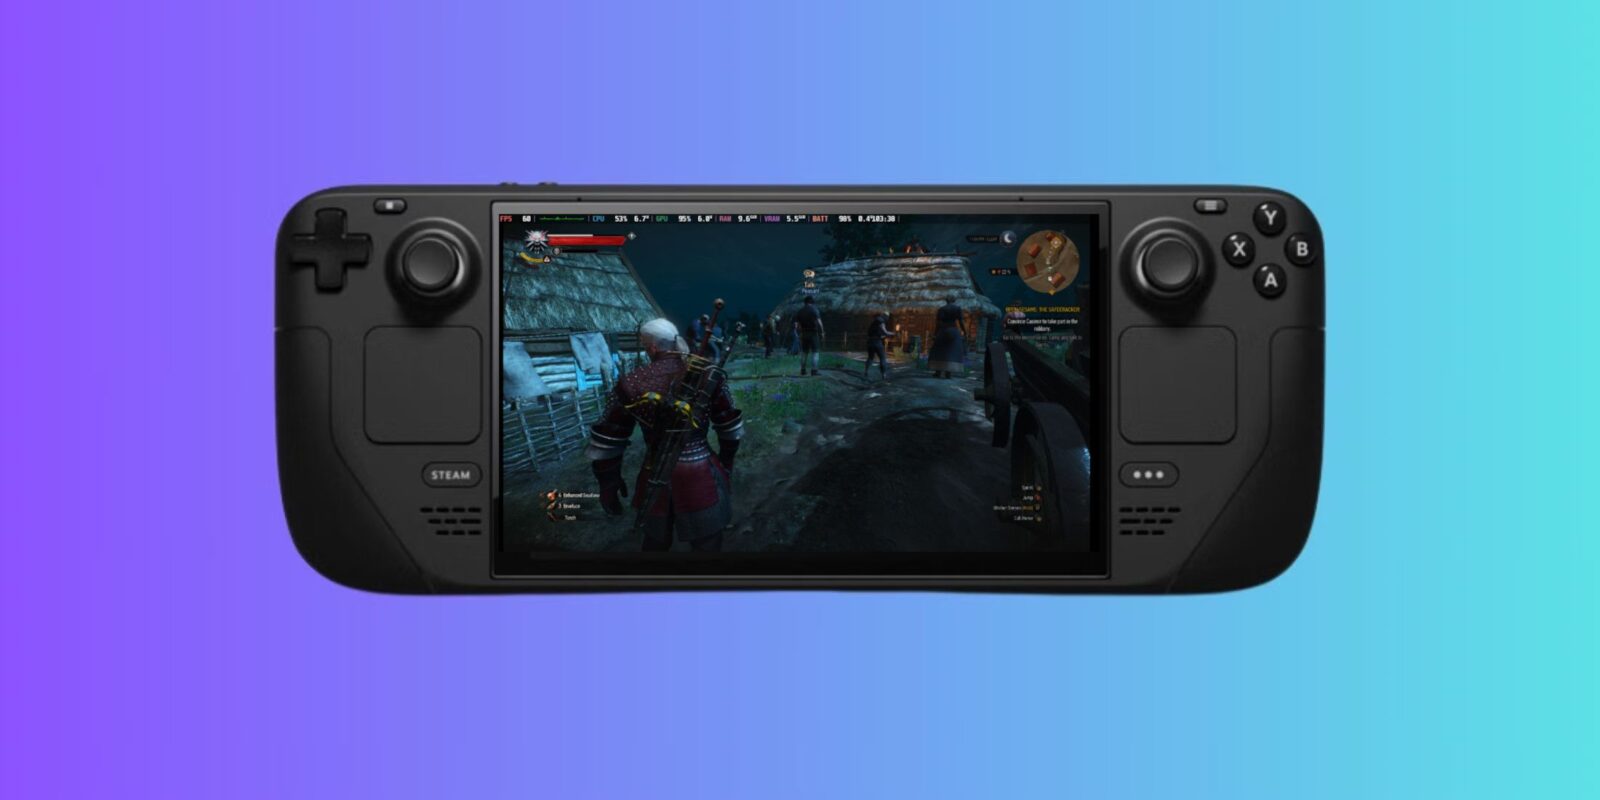
- Then select your DX12 game like The Witcher 3 from the dropdown menu and select Patch.
- Wait for the Patch to install install and launch your game.
Enable DLSS Frame Generation
- Launch your game, open the game’s Options, and select the Display settings to enable DLSS Frame Generation.

- Then open the Graphics menu.
- Look for the Anti-aliasing option and switch DLSS on.
The performance of some games can vary, but experimenting with low to medium settings will yield the best results.

Steam Deck
- Brand
-
Steam (Valve)
- Operating System
-
SteamOS 3 (Arch-based)
- Storage
-
64GB eMMC / 256GB NVMe SSD / 512GB NVMe SSD / 1TB NVMe SSD
- VR Support
-
Technically possible, but not designed or optimized for it.
- Resolution
-
1200 x 800
- App Store
-
Steam
- Wi-Fi
-
Tri-band Wi-Fi 6E radio, 2.4GHz, 5GHz, and 6GHz 2 x 2 MIMO, IEEE 802.11a/b/g/n/ac/ax
- Ports
-
USB-C with Power Delivery/DisplayPort
- HDR Support
-
No
- Original Release Date
-
February 25, 2022
- Original MSRP (USD)
-
$399–$649
- Weight
-
Approx. 640 grams
- Dimensions
-
298mm x 117mm x 49mm
- Processor
-
Zen 2 4c/8t, 2.4-3.5GHz (up to 448 GFlops FP32)