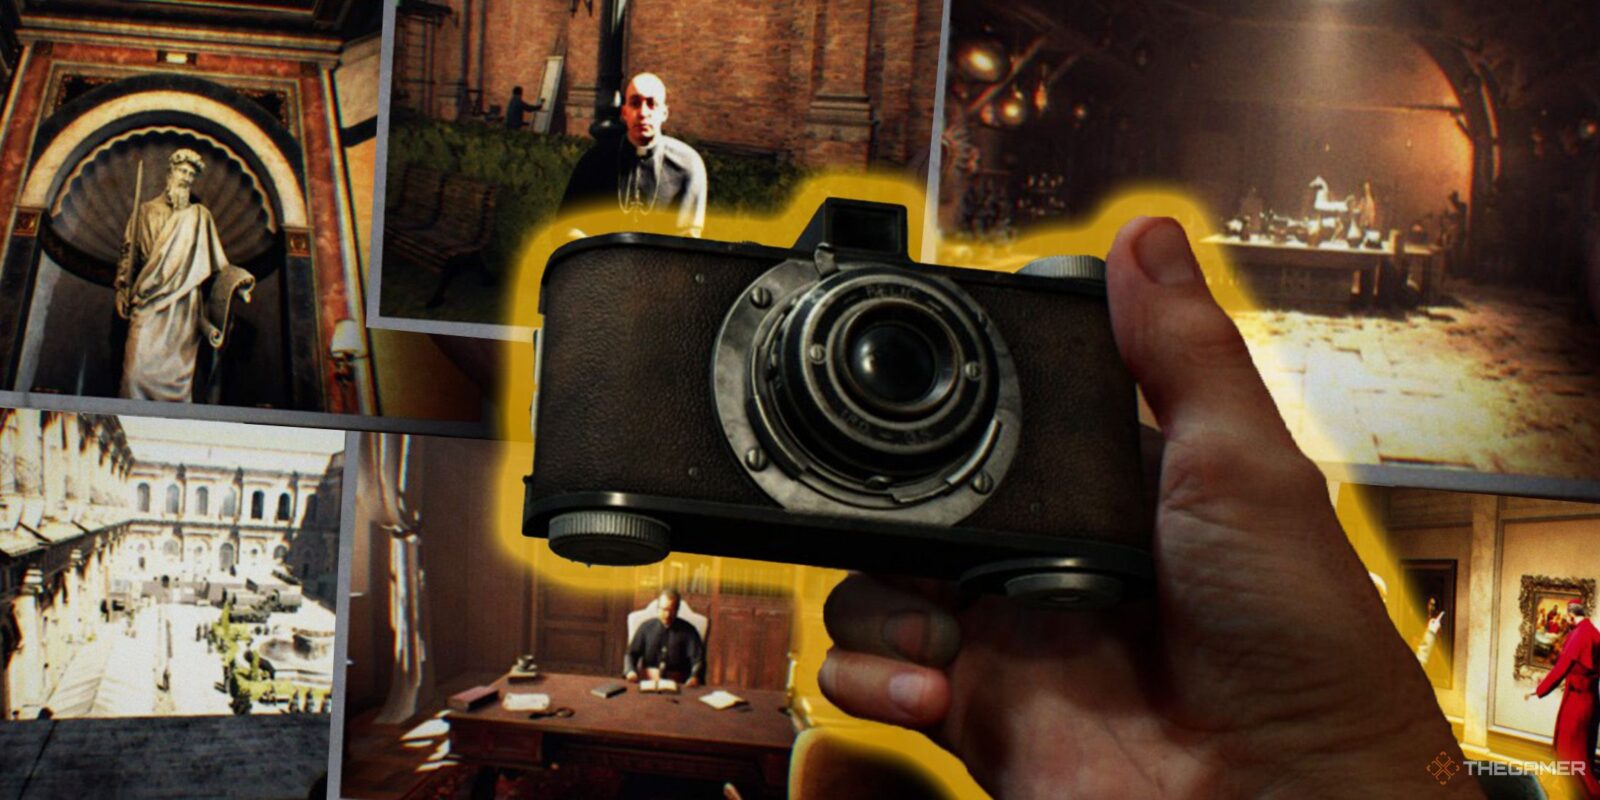
The story of Indiana Jones and the Great Circle takes Indiana Jones far from home. Before you even fully grasp the game mechanics, you find yourself in the Vatican—a place where religious and historical elements blend seamlessly. Here, after meeting Indy’s friendly acquaintance Antonio, you’ll soon need to acquire a camera.

Related
Indiana Jones And The Great Circle: House Of God Mystery Guide
The ornate puzzle box in the Vatican is worth taking a few minutes out of Indiana Jones And The Great Circle to solve.
This camera is a key item that you’ll use throughout the game. Moreover, in a vast location like the Vatican, there are numerous spots that need to be photographed. If you’re having trouble finding them, we’ve put together this guide just for you.
All Vatican Photo Locations

When you first arrive in the Vatican, you will meet Antonio, and after finding the secret passage, you will need to locate the inscriptions. After heading to the post office and meeting Ernesto, he will be reluctant to give you the camera, but you can purchase it from him for 379 Lira. This will allow you to start taking photos.
A photo icon will appear in the top left corner in locations where you can take a picture. Additionally, the photos you take will earn you Adventure Points, which allow you to unlock new skills.
Photos are divided into three types:
- Field Notes: These are primarily related to the game’s collectible aspect. In addition to photos, there are also other objects that can be collected as Field Notes.
- Clues: Taking pictures of key objects can provide hints when solving certain puzzles.
- Strange Inscriptions: These are found exclusively in the Vatican. There are a total of ten Strange Inscriptions. After obtaining the camera, you must find at least four to progress in the main quest. To complete the Secret of Giants side quest, you must find all of them.
|
Photo Location |
Map Image |
Photo Name |
|---|---|---|
|

|

|
Ernesto |
|
Photo Type |
||
|
Field Note |
||
|
Description |
||
|
The first photo you can take is actually Ernesto, the person you bought the camera from. Start by taking his picture. |
||
|
Photo Location |
Map Image |
Photo Name |
|

|

|
Cobblestone Workers |
|
Photo Type |
||
|
Field Note |
||
|
Description |
||
|
Leave the room where Ernesto is and exit through the main door of the post office. Then, if you turn left, you will see a street where soldiers are stationed. Behind the soldiers, you will find the cobblestone workers. |
||
|
Photo Location |
Map Image |
Photo Name |
|

|

|
Valeria |
|
Photo Type |
||
|
Field Note |
||
|
Description |
||
|
After exiting through the main door of the post office, turn right and walk down the street. Turn right at the spot where the military vehicle is located. If you pass through the alley to the right of the worker putting up posters on the wall, you will reach a small garden-like area. From here, go left, and you will see Sister Valeria working behind a wooden window. After speaking with her, you can take her photo. |
||
|
Photo Location |
Map Image |
Photo Name |
|

|

|
Facade Painting |
|
Photo Type |
||
|
Field Note |
||
|
Description |
||
|
Return to the post office and go inside. Exit through the window at the back of the building. Here, you will see a soldier walking with a dog; previously, entering this area was prohibited before accessing the post office. However, you can now freely walk around this street. Climb onto the low-rise building directly across from the window you exited and look back at the post office. You will see workers painting the upper walls of the post office. Take their photo. You won’t be able to capture the right angle unless you climb onto the roof. |
||
|
Photo Location |
Map Image |
Photo Name |
|

|

|
A Strange Inscription (1/10) |
|
Photo Type |
||
|
Strange Inscription |
||
|
Description |
||
|
This photo location is one of the spots marked on your map after obtaining the camera. Head to the Belvedere Courtyard area on the map. Here, you will see a fountain. You need to take a photo of the strange inscription on the fountain. This is one of the Strange Inscriptions you need to bring to Antonio. |
||
|
Photo Location |
Map Image |
Photo Name |
|

|

|
A Strange Inscription (2/10) |
|
Photo Type |
||
|
Strange Inscription |
||
|
Description |
||
|
After taking a photo of the fountain, use the large gate to the east to pass to the other side. From here, turn left and open the iron-barred gate. In the garden, go under the scaffolding, and you will see a fountain-like structure. Take a photo of it to obtain one of the Strange Inscriptions needed for the main quest. |
||
|
Photo Location |
Map Image |
Photo Name |
|

|

|
Bird Feeding |
|
Photo Type |
||
|
Field Note |
||
|
Description |
||
|
In the garden where this Strange Inscription is located, you will see a priest feeding the birds; don’t forget to take his photo as well. |
||
|
Photo Location |
Map Image |
Photo Name |
|

|

|
Coffee Break |
|
Photo Type |
||
|
Field Note |
||
|
Description |
||
|
Climb onto the scaffolding in the same garden, and you will see workers painting the walls on the rooftop. Keep the workers to your left and walk across the roof. Move forward a bit and jump down from the left side. Here, you will see someone having coffee, allowing you to capture the Coffee Break photo. |
||
|
Photo Location |
Map Image |
Photo Name |
|

|

|
Stage Construction |
|
Photo Type |
||
|
Field Note |
||
|
Description |
||
|
Return to the fountain in the Belvedere Courtyard area. Approach the large fascist poster to the south of this area. Take a photo of it from a distance and add it to your notes. |
||
|
Photo Location |
Map Image |
Photo Name |
|

|

|
A Strange Inscription |
|
Photo Type |
||
|
Strange Inscription (3/10) |
||
|
Description |
||
|
Climb to the top of the scaffolding behind the fascist poster in Belvedere Courtyard, and you will reach a balcony-like area. If you turn right, you will see another fountain with a Strange Inscription that you can photograph. |
||
|
Photo Location |
Map Image |
Photo Name |
|

|

|
Belvedere Courtyard |
|
Photo Type |
||
|
Field Note |
||
|
Description |
||
|
After taking a photo of the Strange Inscription, look down at the courtyard where the fountain is located and take a photo of it as well. This will add it to your notes. |
||
|
Photo Location |
Map Image |
Photo Name |
|

|

|
A Strange Inscription |
|
Photo Type |
||
|
Strange Inscription (4/10) |
||
|
Description |
||
|
After taking a photo of the previous Strange Inscription, turn your back to it and walk straight ahead along this balcony-like area. Once you knock out the soldier, climb up the scaffolding next to the area where he occasionally sits. This will lead you to a balcony—enter through the window, and you’ll find yourself in a museum-like room. Exit through the other window and look to your right. Use your whip to climb up to the wooden platform above. Here, you will find another Strange Inscription on the rooftop and can take its photo. If you only want to progress the main quest, these four Inscription photos will be enough, but there are a total of ten in the game. |
||
|
Photo Location |
Map Image |
Photo Name |
|

|

|
Marble Statue |
|
Photo Type |
||
|
Field Note |
||
|
Description |
||
|
Return to the museum-like room you passed through to get the previous Strange Inscription. Use the small iron door in this room, and you will be able to take a photo of one of the statues inside. |
||
|
Photo Location |
Map Image |
Photo Name |
|

|

|
A Strange Inscription |
|
Photo Type |
||
|
A Strange Inscription (5/10) |
||
|
Description |
||
|
Open the other door in the previous statue room to reach an area with stairs; go all the way down to the lowest floor. Open the small wooden door, walk straight ahead, and you’ll enter a room filled with boxes. If you open the door on the left, you will reach the Excavation Site area. This is a restricted zone with many hostile enemies, so be cautious. If you turn left immediately after entering this area, you will find another Strange Inscription in the corner. After collecting this one, progress through the main story to obtain the remaining Strange Inscriptions. |
||
|
Photo Location |
Map Image |
Photo Name |
|

|

|
Vatican Seal |
|
Photo Type |
||
|
Field Note |
||
|
Description |
||
|
After obtaining the previous Strange Inscription, leave the Excavation Site and re-enter the Apostolic Palace building. Move to the right and reach the large room with stairs; you can take a photo of the ceiling here. |
||
|
Photo Location |
Map Image |
Photo Name |
|

|

|
Adjusting Painting |
|
Photo Type |
||
|
Field Note |
||
|
Description |
||
|
Return to the Apostolic Library by passing through Belvedere Courtyard. After entering through the north gate, go up the stairs, and you will see a priest in a red robe trying to adjust a painting. Take his photo. |
||
|
Photo Location |
Map Image |
Photo Name |
|

|

|
Fixture Work |
|
Photo Type |
||
|
Field Note |
||
|
Description |
||
|
Next, go to the top of the stairs in the Apostolic Library. Here, you will see some workers repairing the light bulbs on the wall. You need to take a photo of the female worker on the right. |
||
|
Photo Location |
Map Image |
Photo Name |
|

|

|
Study Group |
|
Photo Type |
||
|
Field Note |
||
|
Description |
||
|
After taking a photo of the female worker, go down one floor and enter the library room. Here, you will find nuns studying—take their photo. |
||
|
Photo Location |
Map Image |
Photo Name |
|

|

|
Vatican Apostolic Library |
|
Photo Type |
||
|
Field Note |
||
|
Description |
||
|
Then, go up to the second floor of the library room. From the spot next to the standing nun, take a photo of the lower floor. |
||
|
Photo Location |
Map Image |
Photo Name |
|

|

|
Antonio |
|
Photo Type |
||
|
Field Note |
||
|
Description |
||
|
After returning to Antonio’s room, you can take his photo. Additionally, you can show him the Strange Inscriptions to progress the main quest. Moreover, by bringing Antonio’s photo to the two nuns conversing on the lowest floor of this building, you can complete the Secret Interaction. |
||
|
Photo Location |
Map Image |
Photo Name |
|

|

|
Strange Mural |
|
Photo Type |
||
|
Clue |
||
|
Description |
||
|
After the main quest requires you to enter the Tower of Nicholas V, take a photo of the mural behind the altar where you need to pour the wine. |
||
|
Photo Location |
Map Image |
Photo Name |
|

|

|
Sacred Wounds Mural |
|
Photo Type |
||
|
Clue |
||
|
Description |
||
|
After solving the mural puzzle and descending the stairs toward the Underworld area, follow the dark tunnels. At the end of the tunnel, you will reach a large room where you will find a massive mural of Jesus Christ. Take a photo of it. |
||
|
Photo Location |
Map Image |
Photo Name |
|

|

|
Walking On The Water |
|
Photo Type |
||
|
Clue |
||
|
Description |
||
|
To the right of the Sacred Wounds Mural you just photographed, there will be another mural. This is another depiction of Jesus Christ, titled Walking on Water. Take a photo of this mural as well. |
||
|
Photo Location |
Map Image |
Photo Name |
|

|

|
Holy Chalice |
|
Photo Type |
||
|
Clue |
||
|
Description |
||
|
This time, take a photo of the Jesus Christ mural to the left of the Sacred Wounds Mural, which has levers on it. This mural is called Holy Chalice. |
||
|
Photo Location |
Map Image |
Photo Name |
|

|

|
Body Of Christ |
|
Photo Type |
||
|
Clue |
||
|
Description |
||
|
Enter the room to the left of the Holy Chalice mural. Once you step inside, the iron-barred door will close behind you. Here, you will be able to take a photo of another Jesus Christ mural, titled Body of Christ. |
||
|
Photo Location |
Map Image |
Photo Name |
|

|

|
Spear of Longinus |
|
Photo Type |
||
|
Clue |
||
|
Description |
||
|
Pass through the opening next to the brazier in the room where you got trapped, and you will enter a room with a soldier statue. Take a photo of this statue as well. |
||
|
Photo Location |
Map Image |
Photo Name |
|

|

|
Jerusalem Cross |
|
Photo Type |
||
|
Field Note |
||
|
Description |
||
|
After solving the puzzle with the switches depicting Jesus Christ, you will enter an area resembling a Necropolis. Here, there will be a large columned room, and you will find a key from a skeleton in this area. Jump to the base of the column, and you will be able to take a photo of the Jerusalem Cross. |
||
|
Photo Location |
Map Image |
Photo Name |
|

|

|
Tomb Fresco |
|
Photo Type |
||
|
Field Note |
||
|
Description |
||
|
Leave the large columned room and head south, then you will need to turn east down a corridor. There will be a pit here. Throw your torch across the pit to the other side and use your whip to grab the plank above, allowing you to cross to the other side. Then, use the torch to light the wooden wall on your right. This will reveal a hidden room. Inside, you will find a faint fresco—take a photo of it. |
||
|
Photo Location |
Map Image |
Photo Name |
|

|

|
Tomb of Warrior Giant |
|
Photo Type |
||
|
Field Note |
||
|
Description |
||
|
After crossing to the other side of the pit, use the key to unlock the iron gate. In the southern part of the room, you will see a knight’s sarcophagus. Take a photo of it to add Tomb of Warrior Giant to your notes. |
||
|
Photo Location |
Map Image |
Photo Name |
|

|

|
Oceanus |
|
Photo Type |
||
|
Field Note |
||
|
Description |
||
|
After interacting with the Giant Warrior’s tomb, a long cutscene will play, and Indy will find himself in the Lower Necropolis. After jumping into the water and swimming through an underwater passage to reach a large room, you will see a sculpture of Oceanus on the wall. Since you can’t take a photo while in the water, climb onto the platform opposite the sculpture, then take a photo of it. |
||
|
Photo Location |
Map Image |
Photo Name |
|

|

|
Lover’s Tomb |
|
Photo Type |
||
|
Field Note |
||
|
Description |
||
|
After reaching the large area in Necropolis where the fascists are stationed, you will eventually approach the exit. Near the exit gate, in an area where a single soldier is sitting on guard, you will find an Antique Bust needed to open the gate. Place it on a pillar, and the gate will open, leading you into a dark area. Once inside, look to the left wall—there will be a crack at the bottom. Pass through it to reach a chamber, where you will find the Lover’s Tomb sculpture. |
||
|
Photo Location |
Map Image |
Photo Name |
|

|

|
Nike Statue |
|
Photo Type |
||
|
Field Note |
||
|
Description |
||
|
After taking a photo of the previous sculpture, continue toward the exit. You will see two planks above. First, use your whip to latch onto the lower one and climb onto it. Then, use your whip again to reach the higher plank. In the room you arrive at, you will find a statue resembling an angel—this is Goddess Nike. Don’t forget to take a photo of it. |
||
|
Photo Location |
Map Image |
Photo Name |
|

|

|
Chapel Altar |
|
Photo Type |
||
|
Field Note |
||
|
Description |
||
|
After emerging from the underground, you will need to follow the lockpicking nun Gina. This will lead you back to Excavation Land. If you haven’t already, make sure to collect the Strange Inscription in this area. Then, as you continue following the nun, you will arrive at a chapel filled with many nuns. Don’t forget to take a photo of the Chapel Altar. |
||
|
Photo Location |
Map Image |
Photo Name |
|

|

|
Anchored Airship |
|
Photo Type |
||
|
Field Note |
||
|
Description |
||
|
After meeting and talking with Gina, while still on the balcony, take a photo of the massive airship you saw in the cutscene. |
||
|
Photo Location |
Map Image |
Photo Name |
|

|

|
A Strange Inscription |
|
Photo Type |
||
|
Strange Inscription (6/10) |
||
|
Description |
||
|
Without leaving the balcony, use the zipline. After landing, crouch and move through the hole beneath the fence. Below, you’ll encounter several fascists with underwears. After dealing with them, you’ll find another Strange Inscription in this area. |
||
|
Photo Location |
Map Image |
Photo Name |
|

|

|
Washing Tent |
|
Photo Type |
||
|
Field Note |
||
|
Description |
||
|
Go to the area where you found the Strange Inscription, stand across from the entrance of the green Washing Tent, and take a picture of it. |
||
|
Photo Location |
Map Image |
Photo Name |
|

|

|
Fountain of Confession |
|
Photo Type |
||
|
Clue |
||
|
Description |
||
|
After talking to Antonio, your main objective will be updated to go to the Fountain of Confession. When you arrive, don’t forget to take a picture of the fountain. |
||
|
Photo Location |
Map Image |
Photo Name |
|

|

|
Left Tower Inscription |
|
Photo Type |
||
|
Clue |
||
|
Description |
||
|
To get a clue, take a picture of the tower inscription to the left of the Fountain of Confession. |
||
|
Photo Location |
Map Image |
Photo Name |
|

|

|
Right Tower Inscription |
|
Photo Type |
||
|
Clue |
||
|
Description |
||
|
To get a clue, take a picture of the tower inscription to the right of the Fountain of Confession. |
||
|
Photo Location |
Map Image |
Photo Name |
|

|

|
A Strange Inscription |
|
Photo Type |
||
|
Strange Inscription (7/10) |
||
|
Description |
||
|
Take the Fountain of Confession to your left and climb the stairs next to the military vehicle. This will lead you to another Strange Inscription. |
||
|
Photo Location |
Map Image |
Photo Name |
|

|

|
Boxing Ring |
|
Photo Type |
||
|
Field Note |
||
|
Description |
||
|
Turn your back to the Fountain of Confession, go down the stairs, and turn right to descend the ramp. When you reach the soldiers, take the door to your left that leads to Belvedere Courtyard and continue straight ahead. When you look to your right, you’ll see a door covered in ivy. If you go down from here, you’ll find the Underground Boxing Ring. Take a picture of the ring. |
||
|
Photo Location |
Map Image |
Photo Name |
|

|

|
Window Cleaning |
|
Photo Type |
||
|
Field Note |
||
|
Description |
||
|
Leave the Boxing Ring and head out to the street, continuing straight south. Enter through the door to the left of the vehicle next to the direction sign. Continue straight, and when you reach the stairs, turn right. Go up the stairs again and turn right, entering a building under restoration with workers inside. Here, hold onto the balcony above and climb onto the construction scaffold at the edge. Then, take a picture of the workers cleaning in front of the window. |
||
|
Photo Location |
Map Image |
Photo Name |
|

|

|
A Strange Inscription |
|
Photo Type |
||
|
Strange Inscription (8/10) |
||
|
Description |
||
|
If you haven’t done so already, now is the perfect time to complete the ‘A Savage Discovery’ side quest. If you have obtained the Black Shirt uniform, use it to rescue Sidney. Then, find Giuseppe at the Excavation Site, defeat him, and take the Cellar Key. Once you have the Cellar Key, head to the lower part of the post office building where you’ll find a door with the number three on it. Use the Cellar Key to open it. Inside the room, you’ll find another Strange Inscription. |
||
|
Photo Location |
Map Image |
Photo Name |
|

|

|
Teacher and Apprentice |
|
Photo Type |
||
|
Field Note |
||
|
Description |
||
|
After completing the Savage Discovery side quest, take a photo of the Professor and his apprentice at the Apostolic Library. |
||
|
Photo Location |
Map Image |
Photo Name |
|

|

|
Great Tower Hall |
|
Photo Type |
||
|
Field Note |
||
|
Description |
||
|
Enter the Tower of Nicholas V, climb to the second floor with your whip, and take a photo of the large stacked boxes in the middle. |
||
|
Photo Location |
Map Image |
Photo Name |
|

|

|
Sewer Bridge |
|
Photo Type |
||
|
Field Note |
||
|
Description |
||
|
In ‘The Mad Priest’ side quest, speak to Sister Catherine in the Sistine Chapel, then take the Sewers key from her. Head down to the Sewers from below the Tower of Nicholas V. When you first enter, you will see a fascist sitting. Take a photo of the Sewer Bridge in the area where he is located from a distance. |
||
|
Photo Location |
Map Image |
Photo Name |
|

|

|
A Strange Inscription |
|
Photo Type |
||
|
Strange Inscription (9/10) |
||
|
Description |
||
|
When you reach the top of the climbing course in the Sewers, you will find one of the Strange Inscriptions. |
||
|
Photo Location |
Map Image |
Photo Name |
|

|

|
Stolen Artifacts |
|
Photo Type |
||
|
Field Note |
||
|
Description |
||
|
When you arrive at the Apostolic Palace, you will find a warehouse-like room where the Diary required for ‘The Mad Priest’ quest is located. Stand in the middle of the room and take a photo of the Stolen Artifacts. |
||
|
Photo Location |
Map Image |
Photo Name |
|

|

|
Dragon Statue |
|
Photo Type |
||
|
Field Note |
||
|
Description |
||
|
Climb to the highest floor of the Apostolic Palace and you will find a room with green walls. In this room, there will be a Dragon Statue. Take a photo of it as well. |
||
|
Photo Location |
Map Image |
Photo Name |
|

|

|
Vatican Excavation |
|
Photo Type |
||
|
Field Note |
||
|
Description |
||
|
Exit the room with the Dragon Statue in the Apostolic Palace, turn left, and you will see a soldier standing between two statues. Exit through the window across from him and take a photo of the Vatican Excavation below. |
||
|
Photo Location |
Map Image |
Photo Name |
|

|

|
Sister Catherine |
|
Photo Type |
||
|
Field Note |
||
|
Description |
||
|
Go to Sister Catherine, where you received the Mad Priest quest, and take her photo. |
||
|
Photo Location |
Map Image |
Photo Name |
|

|

|
Sistine Chapel Ceiling |
|
Photo Type |
||
|
Field Note |
||
|
Description |
||
|
You should take a photo of the illustrations on the ceiling of the Sistine Chapel, where Sister Catherine is located. |
||
|
Photo Location |
Map Image |
Photo Name |
|

|

|
Ornate Door |
|
Photo Type |
||
|
Field Note |
||
|
Description |
||
|
Take the ‘A Nun in Trouble’ side quest from Gina. When heading to meet Gina, now that you have the Blackshirt Uniform, enter the area surrounded by fences to the north of Belvedere Courtyard, where fascists are present. Alternatively, you can also squeeze through the boxes to the left of this area to reach it. Normally, the soldier standing there won’t allow you to enter. In this area, you can take a photo of the Ornate Door. |
||
|
Photo Location |
Map Image |
Photo Name |
|

|

|
A Strange Inscription |
|
Photo Type |
||
|
A Strange Inscription (10/10) |
||
|
Description |
||
|
While doing the ‘A Nun in Trouble’ side quest, you will reach a garden-like area called the Museum Wing. Here, you will find one of the Strange Inscriptions on the wall at the top of the stairs. |
||
|
Photo Location |
Map Image |
Photo Name |
|

|

|
Roman Murals |
|
Photo Type |
||
|
Field Note |
||
|
Description |
||
|
While completing the ‘A Nun in Trouble’ quest, you will enter an area in the museum with two men. In this room, in front of two statues and a vase, you will find Roman murals on the floor. Take a photo of them. |
||
|
Photo Location |
Map Image |
Photo Name |
|

|

|
Handprint |
|
Photo Type |
||
|
Clue |
||
|
Description |
||
|
In the ‘A Nun in Trouble’ side quest, while searching with Gina for five clues, you will notice blood stains on the wall next to a tilted painting. This is one of the clues you need to find. |
||
|
Photo Location |
Map Image |
Photo Name |
|

|

|
Blood |
|
Photo Type |
||
|
Clue |
||
|
Description |
||
|
After finding all five clues with Gina, you need to proceed and take a photo of the blood stain on the floor. This is required to complete the side quest. |
||
|
Photo Location |
Map Image |
Photo Name |
|

|

|
Secret Room |
|
Photo Type |
||
|
Field Note |
||
|
Description |
||
|
After completing the ‘A Nun in Trouble’ side quest and rescuing Giuliana, take the pickaxe from the corner of the room where you saved her and break the wall. This will reveal a corridor filled with skeletons. You can now take a photo of the Secret Room. |
||
|
Photo Location |
Map Image |
Photo Name |
|

|

|
Fountain Gate |
|
Photo Type |
||
|
Clue |
||
|
Description |
||
|
Return to the main quest and go back to the Fountain of Confession. After solving the dragon puzzle here, the fountain will turn, allowing you to take a photo of the fountain gate with three statues. |
||
|
Photo Location |
Map Image |
Photo Name |
|

|
|
Baptism |
|
Photo Type |
||
|
Clue |
||
|
Description |
||
|
After turning the handle with Gina, the entrance with three statues will rotate, revealing other statues. Take a photo of them to obtain Baptism. |
||
|
Photo Location |
Map Image |
Photo Name |
|

|
|
Ark of Bulrushes |
|
Photo Type |
||
|
Clue |
||
|
Description |
||
|
After solving the Baptism puzzle, turn the switch at the base of the fountain again, and the Baptism scene will rotate, revealing the Ark of Bulrushes puzzle. Take a photo of it as well. |
||
|
Photo Location |
Map Image |
Photo Name |
|

|

|
Trials of Augur |
|
Photo Type |
||
|
Clue |
||
|
Description |
||
|
After solving all the Fountain puzzles, you will descend underground. Once you go down the stairs, pull the switch, and the flames will activate. You will see three statues here; take a photo of the Trials of Augur. |
||
|
Photo Location |
Map Image |
Photo Name |
|

|

|
Pendulum Trap |
|
Photo Type |
||
|
Field Note |
||
|
Description |
||
|
After Indy falls down, climb up through the swamp-like corridor. You will reach a room with guillotines hanging in the air. After climbing up, take a photo of them. |
||
|
Photo Location |
Map Image |
Photo Name |
|

|

|
Ornamented Gate |
|
Photo Type |
||
|
Field Note |
||
|
Description |
||
|
After passing the Pendulum Trap chamber, you will reach the Monastery Courtyard. Take a photo of the Ornate Gate here. |
||
|
Photo Location |
Map Image |
Photo Name |
|

|

|
Courtyard Plaque |
|
Photo Type |
||
|
Clue |
||
|
Description |
||
|
If you climb the stairs opposite the Ornamented Gate, you will find the Courtyard Plaque. Take a photo of it as well. |
||
|
Photo Location |
Map Image |
Photo Name |
|

|

|
Silver Plaque |
|
Photo Type |
||
|
Clue |
||
|
Description |
||
|
After activating the switch next to the Courtyard Plaque, you will be able to go to the section behind the shield-bearing dragon. There, you will find the Silver Plaque. Don’t forget to take a photo of it. |
||
|
Photo Location |
Map Image |
Photo Name |
|

|

|
Silver Path Forge |
|
Photo Type |
||
|
Clue |
||
|
Description |
||
|
After completing the Silver Path challenge and escaping the fire trap, you will reach the forge. Take a photo of it to obtain the Silver Path Forge. |
||
|
Photo Location |
Map Image |
Photo Name |
|

|

|
Gold Plaque |
|
Photo Type |
||
|
Clue |
||
|
Description |
||
|
After completing the Silver Path, you must enter the Gold Path. Here, take a photo of the Gold Plaque at the beginning of the puzzle. |
||
|
Photo Location |
Map Image |
Photo Name |
|

|

|
Gold Path Forge |
|
Photo Type |
||
|
Clue |
||
|
Description |
||
|
After completing the Gold Path Challenge, you will arrive at a Forge similar to the one in the Silver Path. Be sure to take a photo of it. |
||
|
Photo Location |
Map Image |
Photo Name |
|

|

|
Metatron Statue |
|
Photo Type |
||
|
Field Note |
||
|
Description |
||
|
After placing the Silver Key and Gold Key on the main door, you will arrive at the Secret Monastery. The first thing to do is take a photo of the impressive Metatron Statue here. |
||
|
Photo Location |
Map Image |
Photo Name |
|

|

|
Treasure Chamber |
|
Photo Type |
||
|
Field Note |
||
|
Description |
||
|
After using the Giant’s Pendant and arriving at the Treasure Chamber, you can also take a photo here. |
||

Next
Indiana Jones And The Great Circle: Vatican Key Location Guide
There will be no locked doors at the Vatican with Indy on the case!