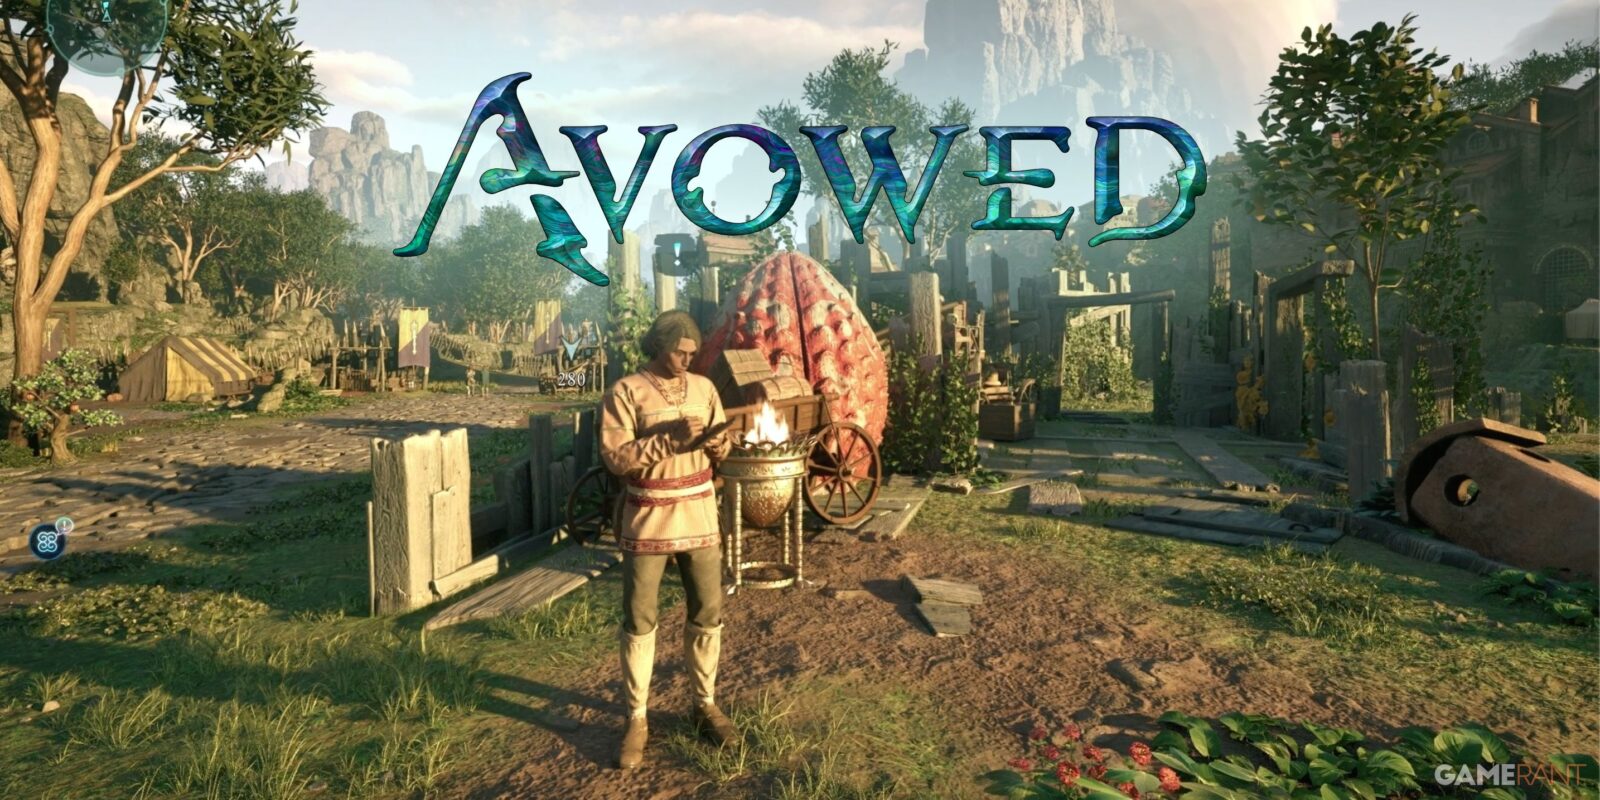
“Mapping the Living Lands” is a game-wide side quest that takes players through all four of Avowed‘s major regions. Very early in the game, players will encounter Sanza, a merchant looking to map the entire Living Lands. He informs the Godlike that he previously sent a cartographer to each region, but has not heard back from them since. In this guide, we’ll show you where to find every cartographer in Avowed, and the rewards you’ll get for completing the quest.
Related
There are three classes in Avowed, which take the form of three class ability trees that grant Fighter, Ranger, or Wizard skills.
How to Start Mapping the Living Lands in Avowed
Locate Sanza in Dawnshore:
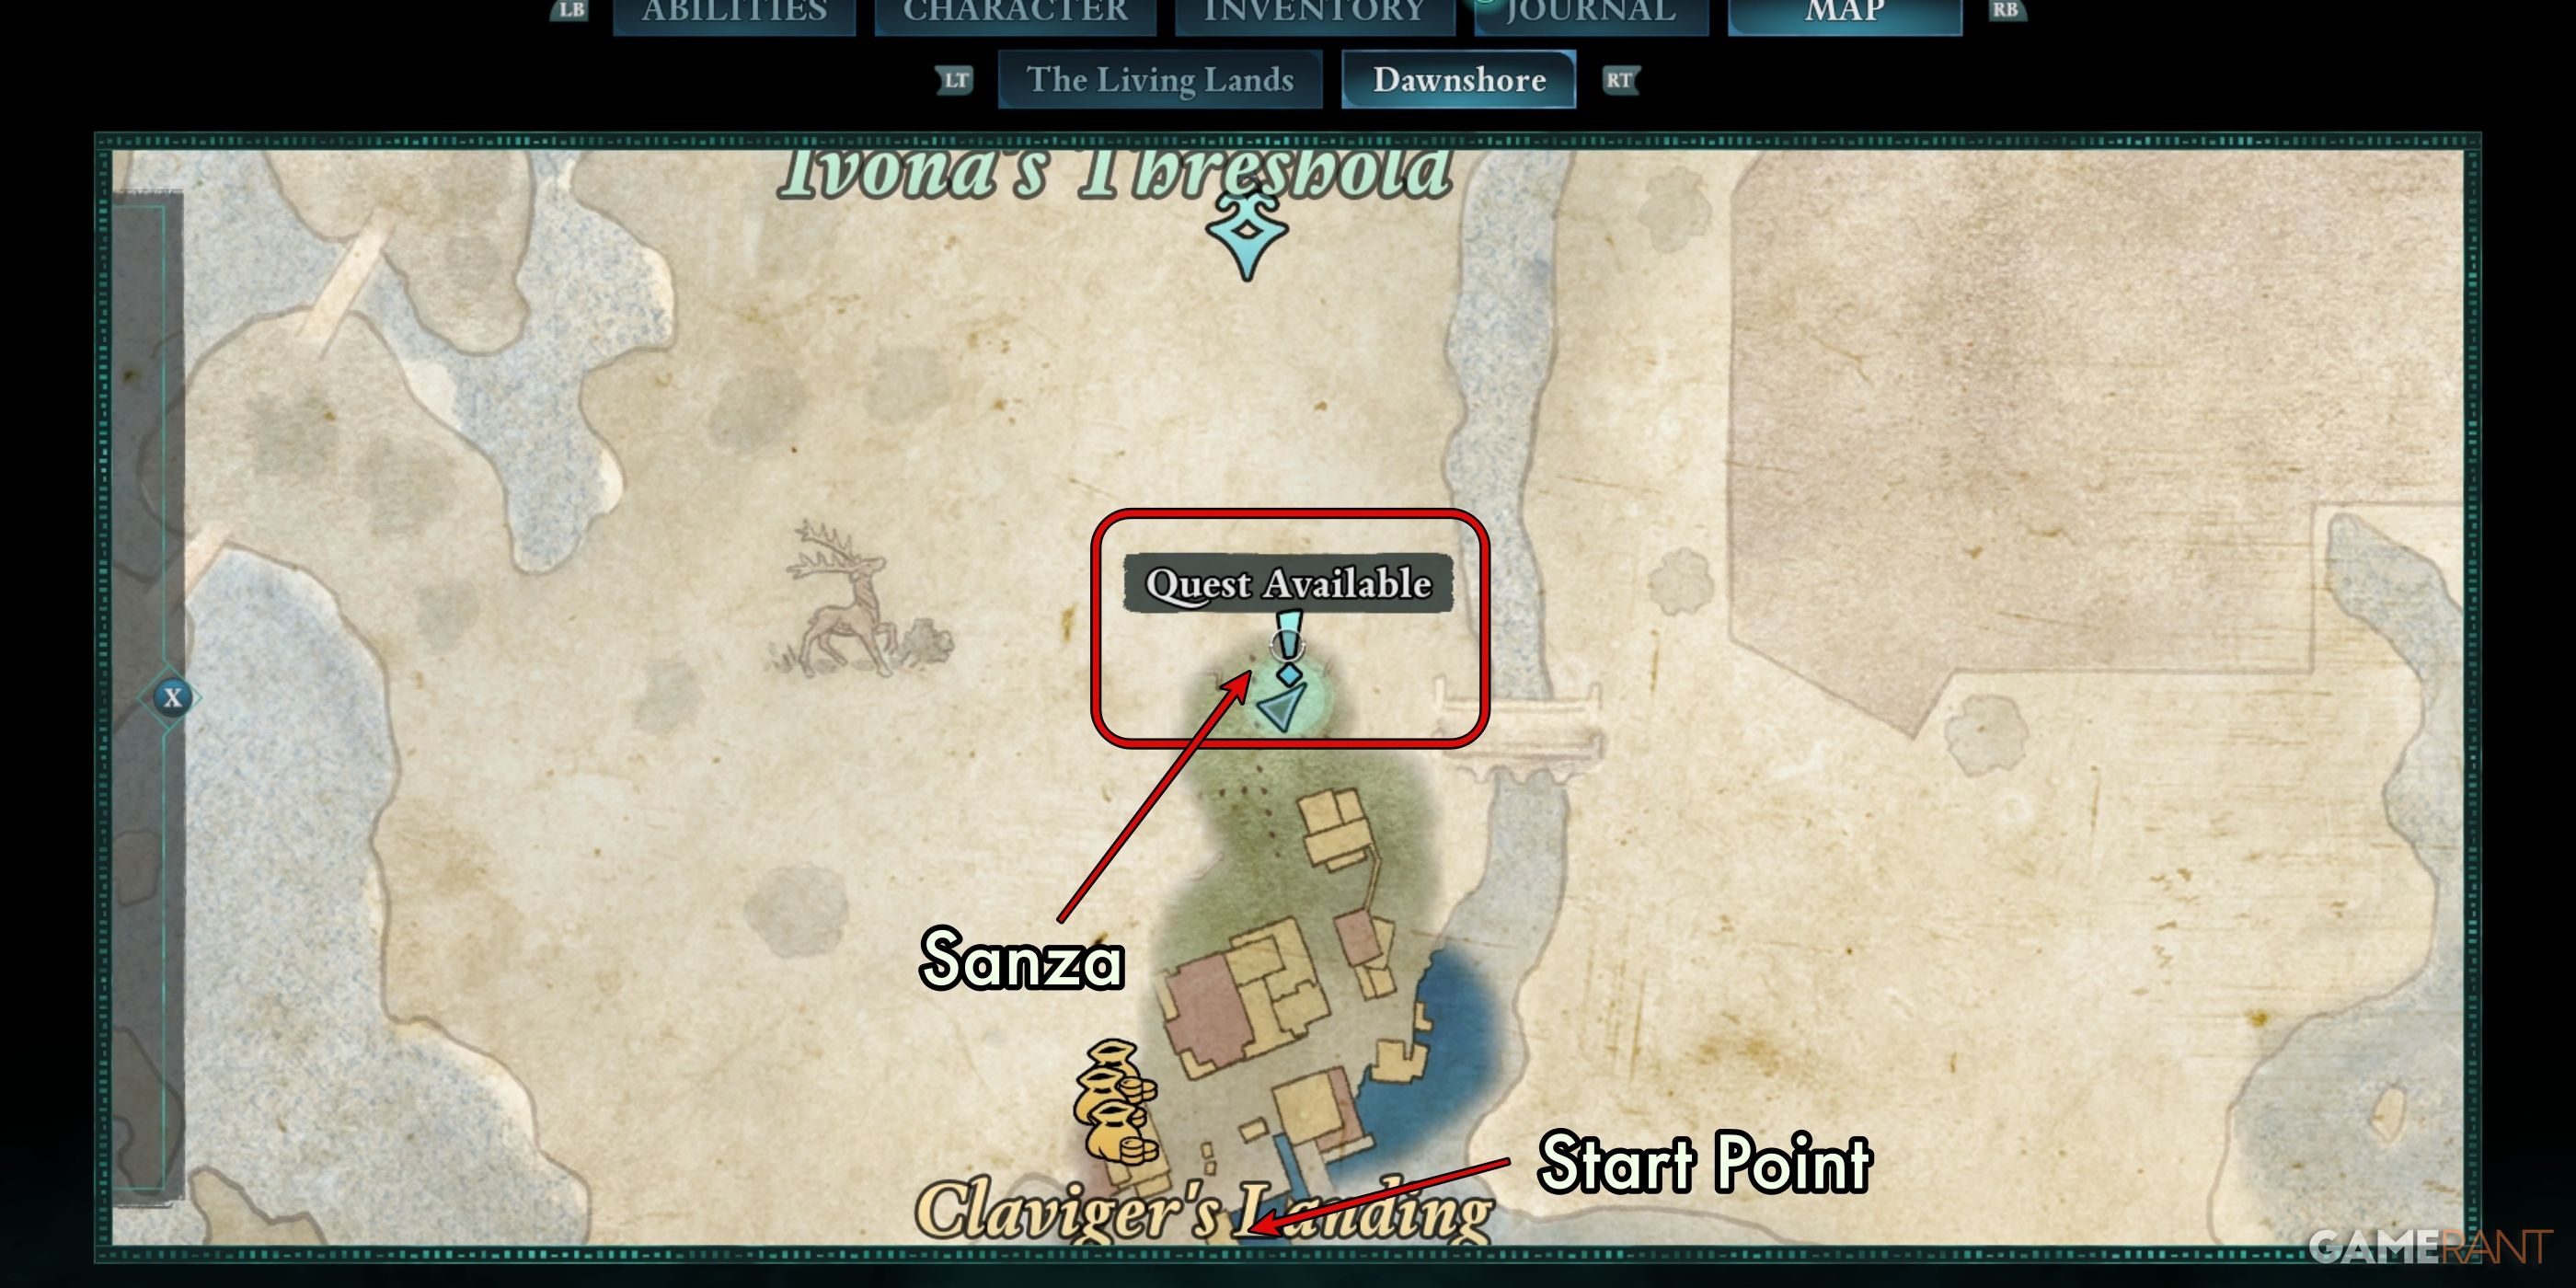
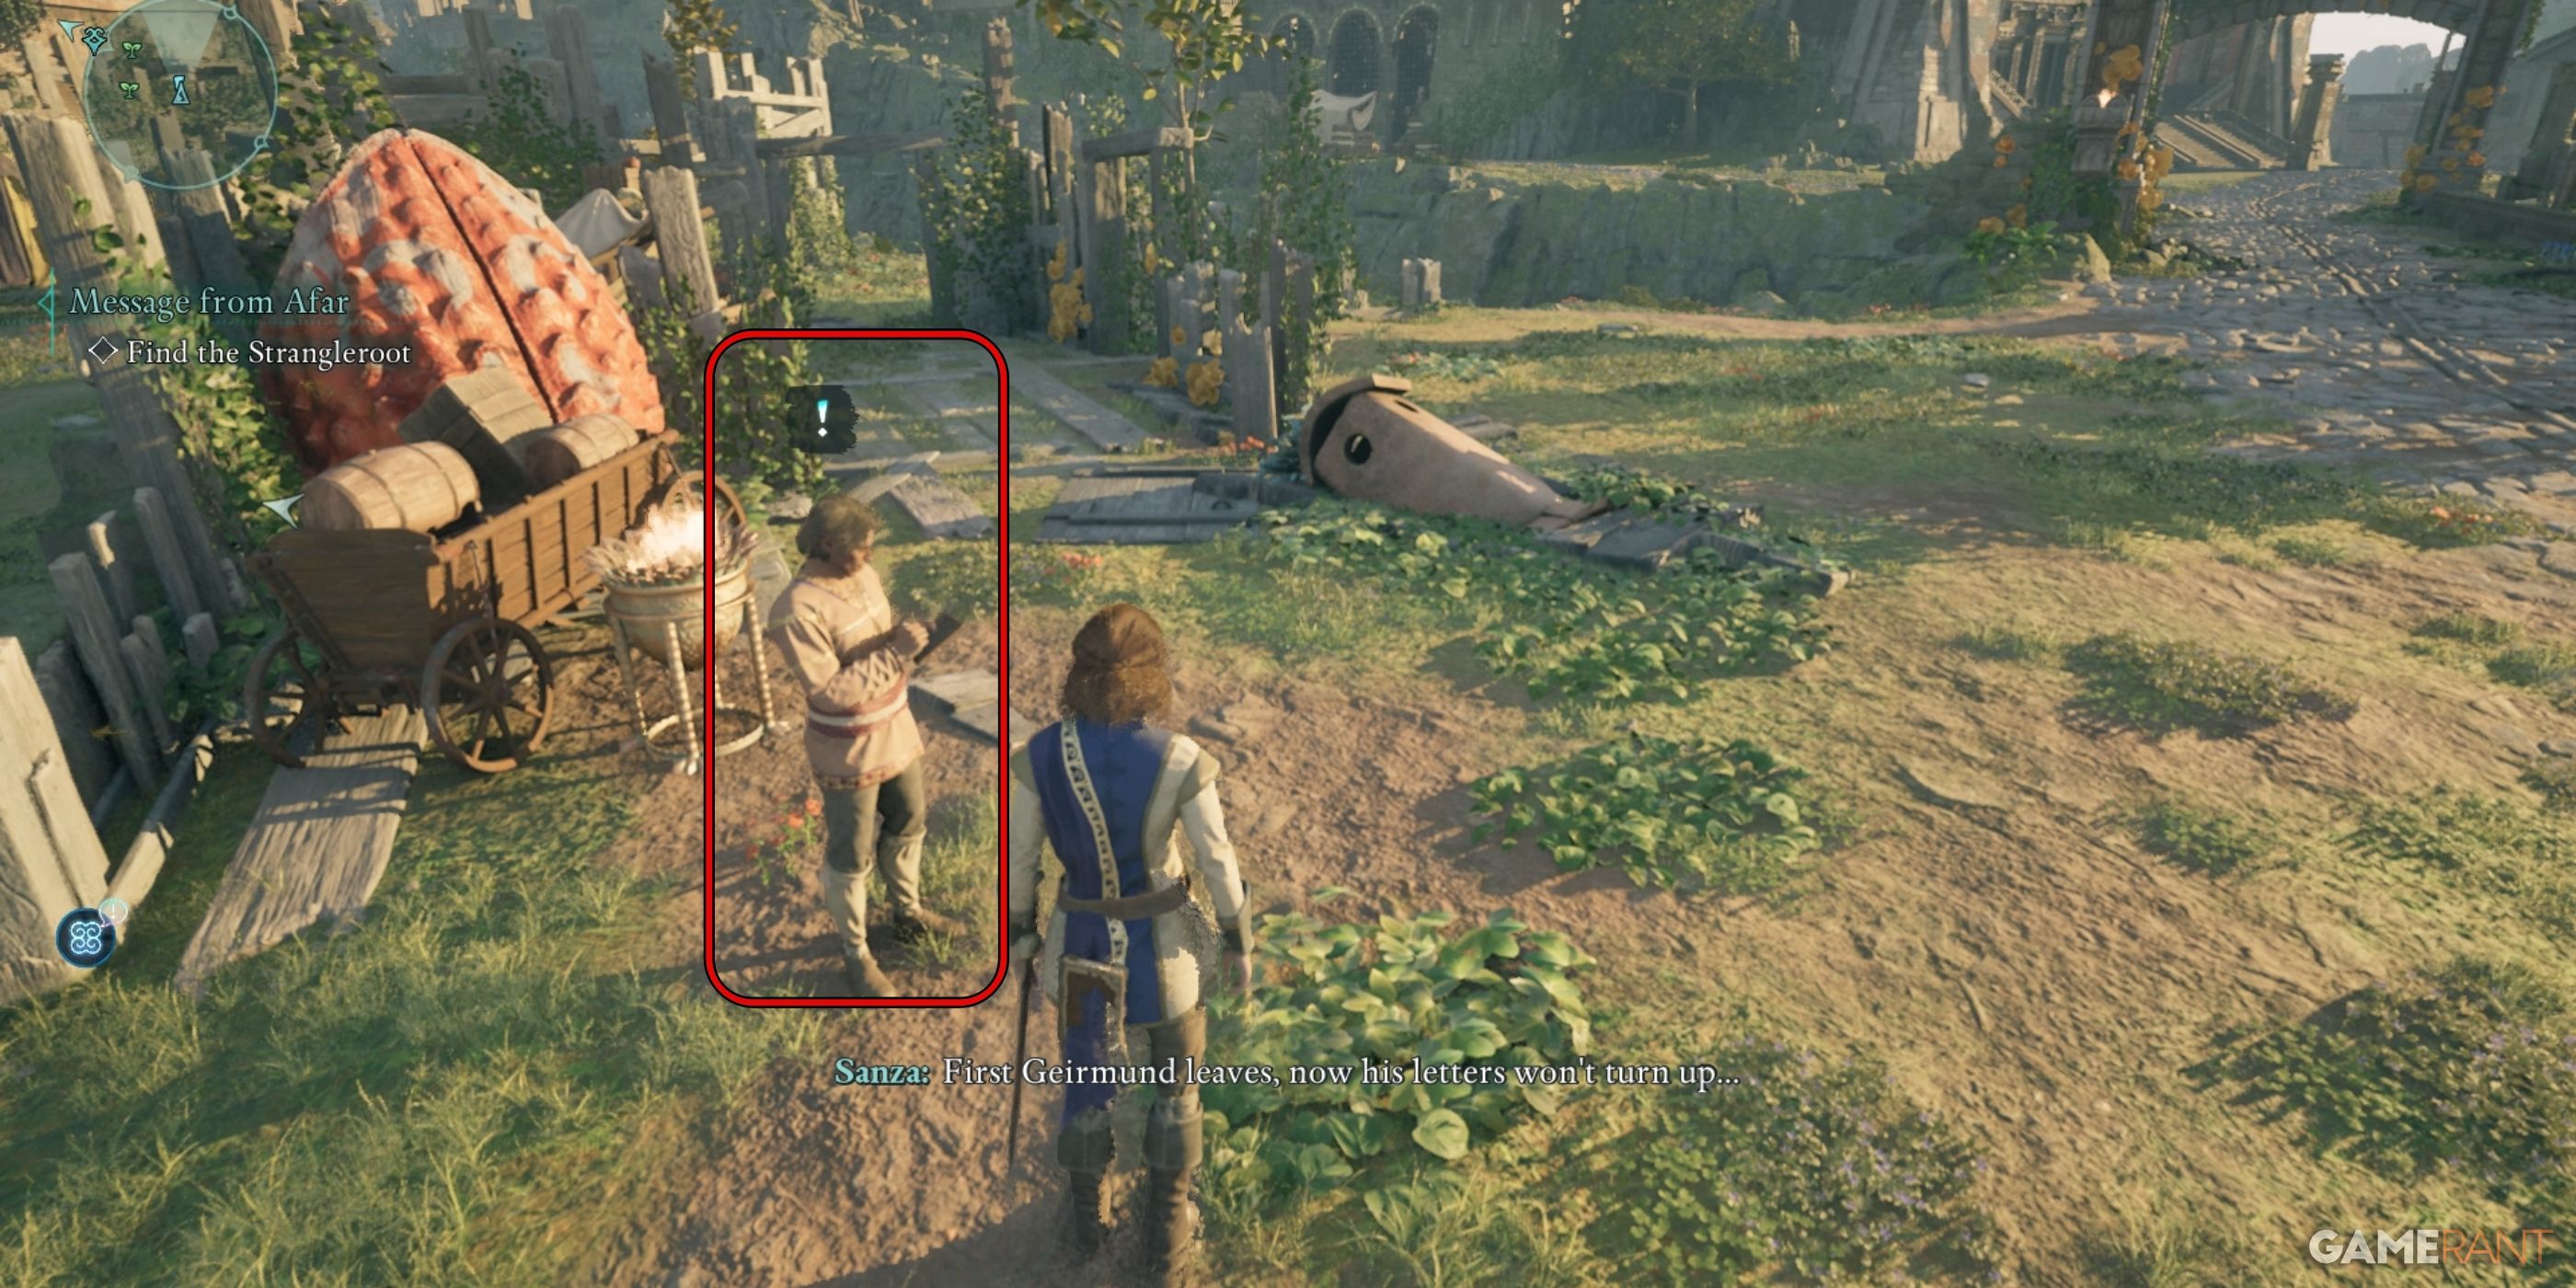
After completing Avowed‘s prologue, you’ll enter Dawnshore and have access to the entire region. With this freedom, it is actually easy to miss Sanza, the NPC that initiates “Mapping the Living Lands.” He is found directly north of the docks where you enter Dawnshore, in the area called Claviger’s Landing.
Head north from the collection of merchants near the docks, and you’ll find Sanza just west of the bridge that crosses the nearby river. You’ll easily notice him, as he’s got the quest exclamation marker hovering over his head. When you speak with Sanza, he will introduce the overall concept of the mission, which is that he sent several cartographers out into the Living Lands to map the island.
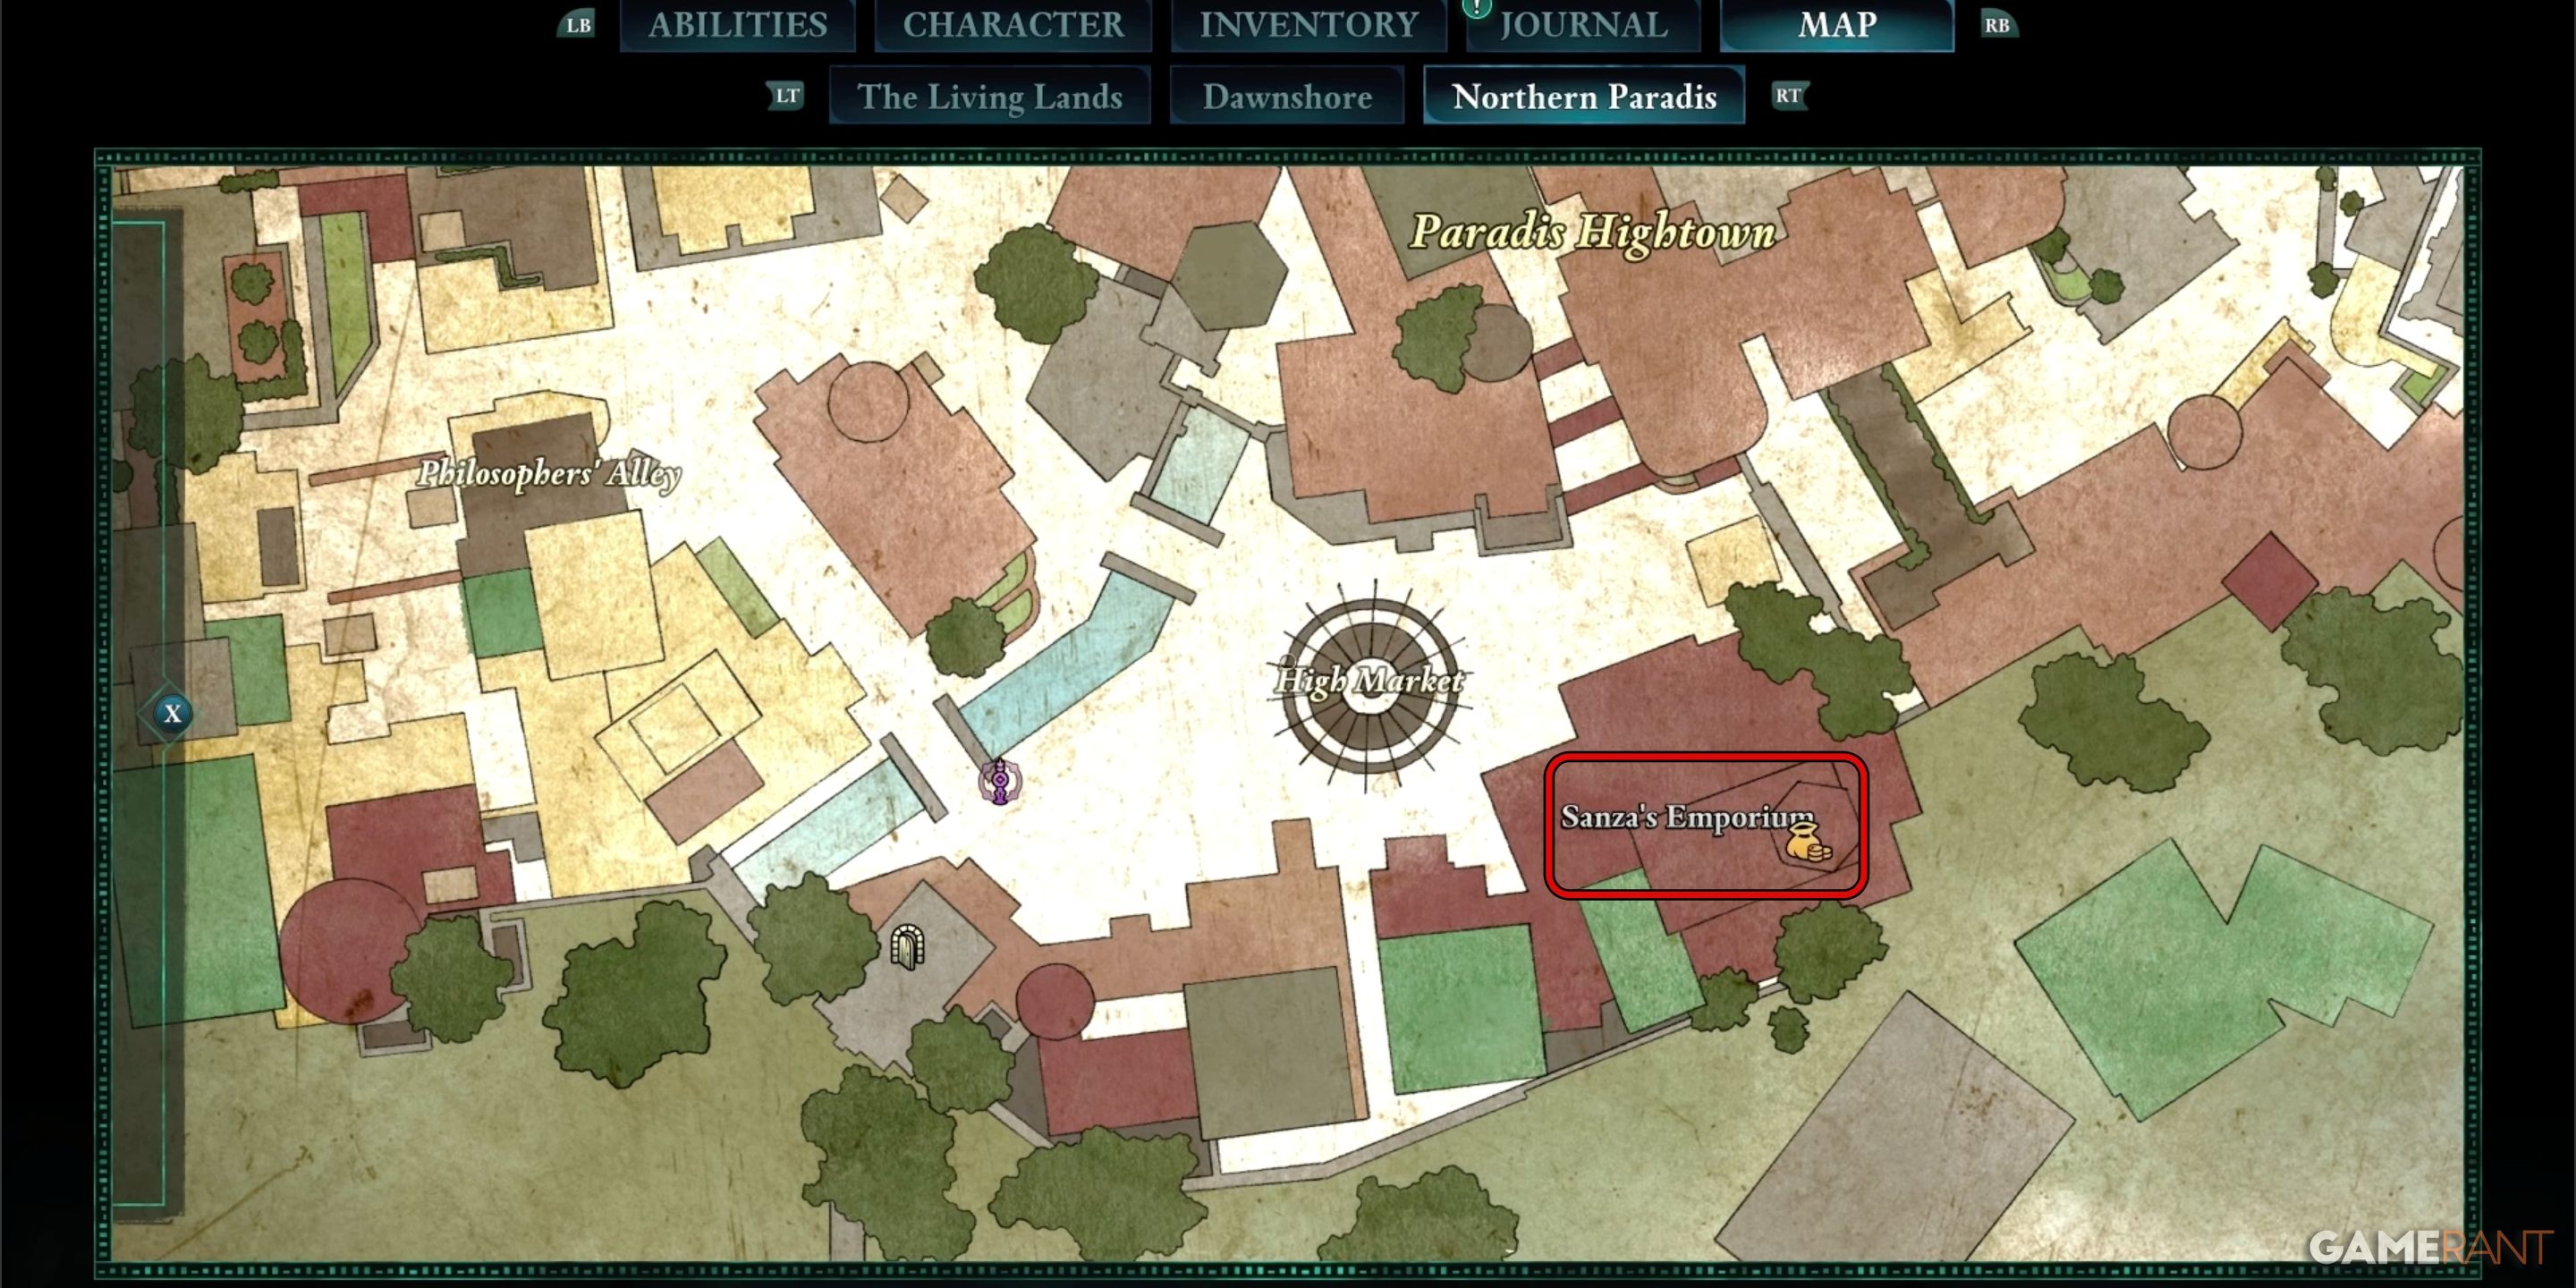
The goal of this quest will be to find the cartographer in each region, then return the maps they carry to Sanza’s Emporium, in Northern Paradis. The quest will not give you an exact location for each cartographer, so you’d normally have to
Dawnshore Cartographer – Avowed
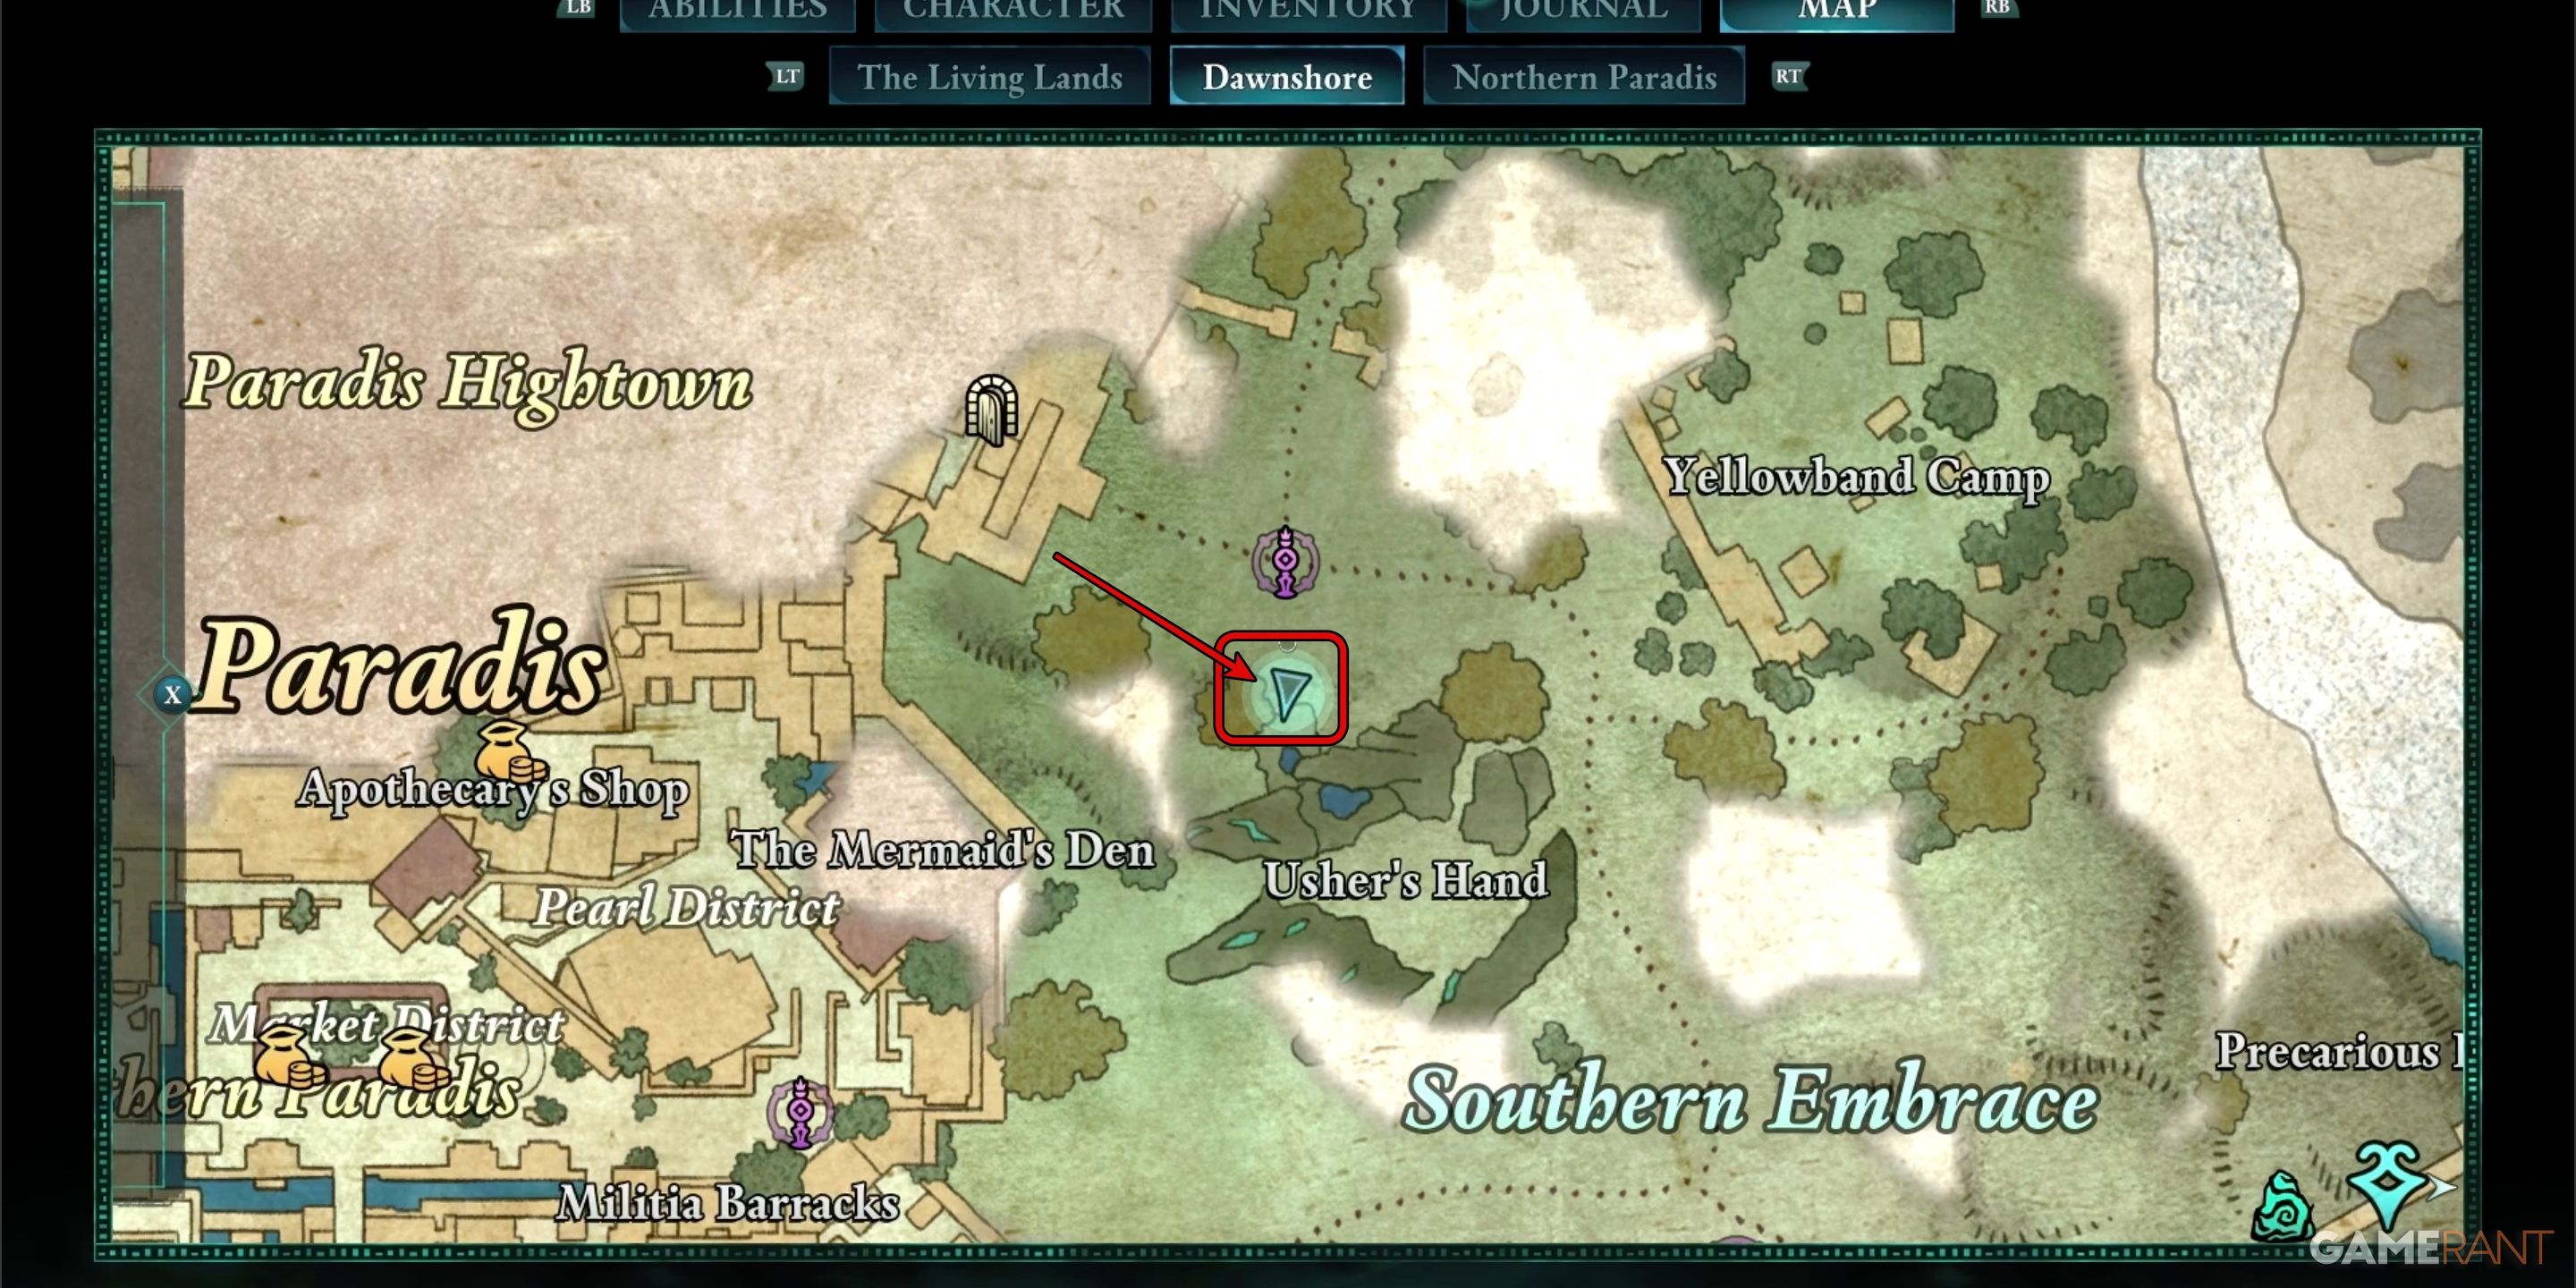
The first cartographer is found in the eastern region of Dawnshore, in the Southern Embrace. Your exact destination in the Usher’s Hand POI. This location also contains one of the pieces of Woedica’s Totem for the Totem Shrine at camp.
You want to reach the northwest corner of Usher’s Hand, where there is a large tree visible on the map. Look for a dead body on the ground that has had its head crushed by a large stone pillar. This body is Avowed‘s first cartographer. You’ll find the map document on the ground next to the dead body.
Once you collect the map, make sure to return it to Sanza’s Emporium. While you won’t get a reward until the second map, turning in the first map will advance the quest.
Emerald Stair Cartographer – Avowed
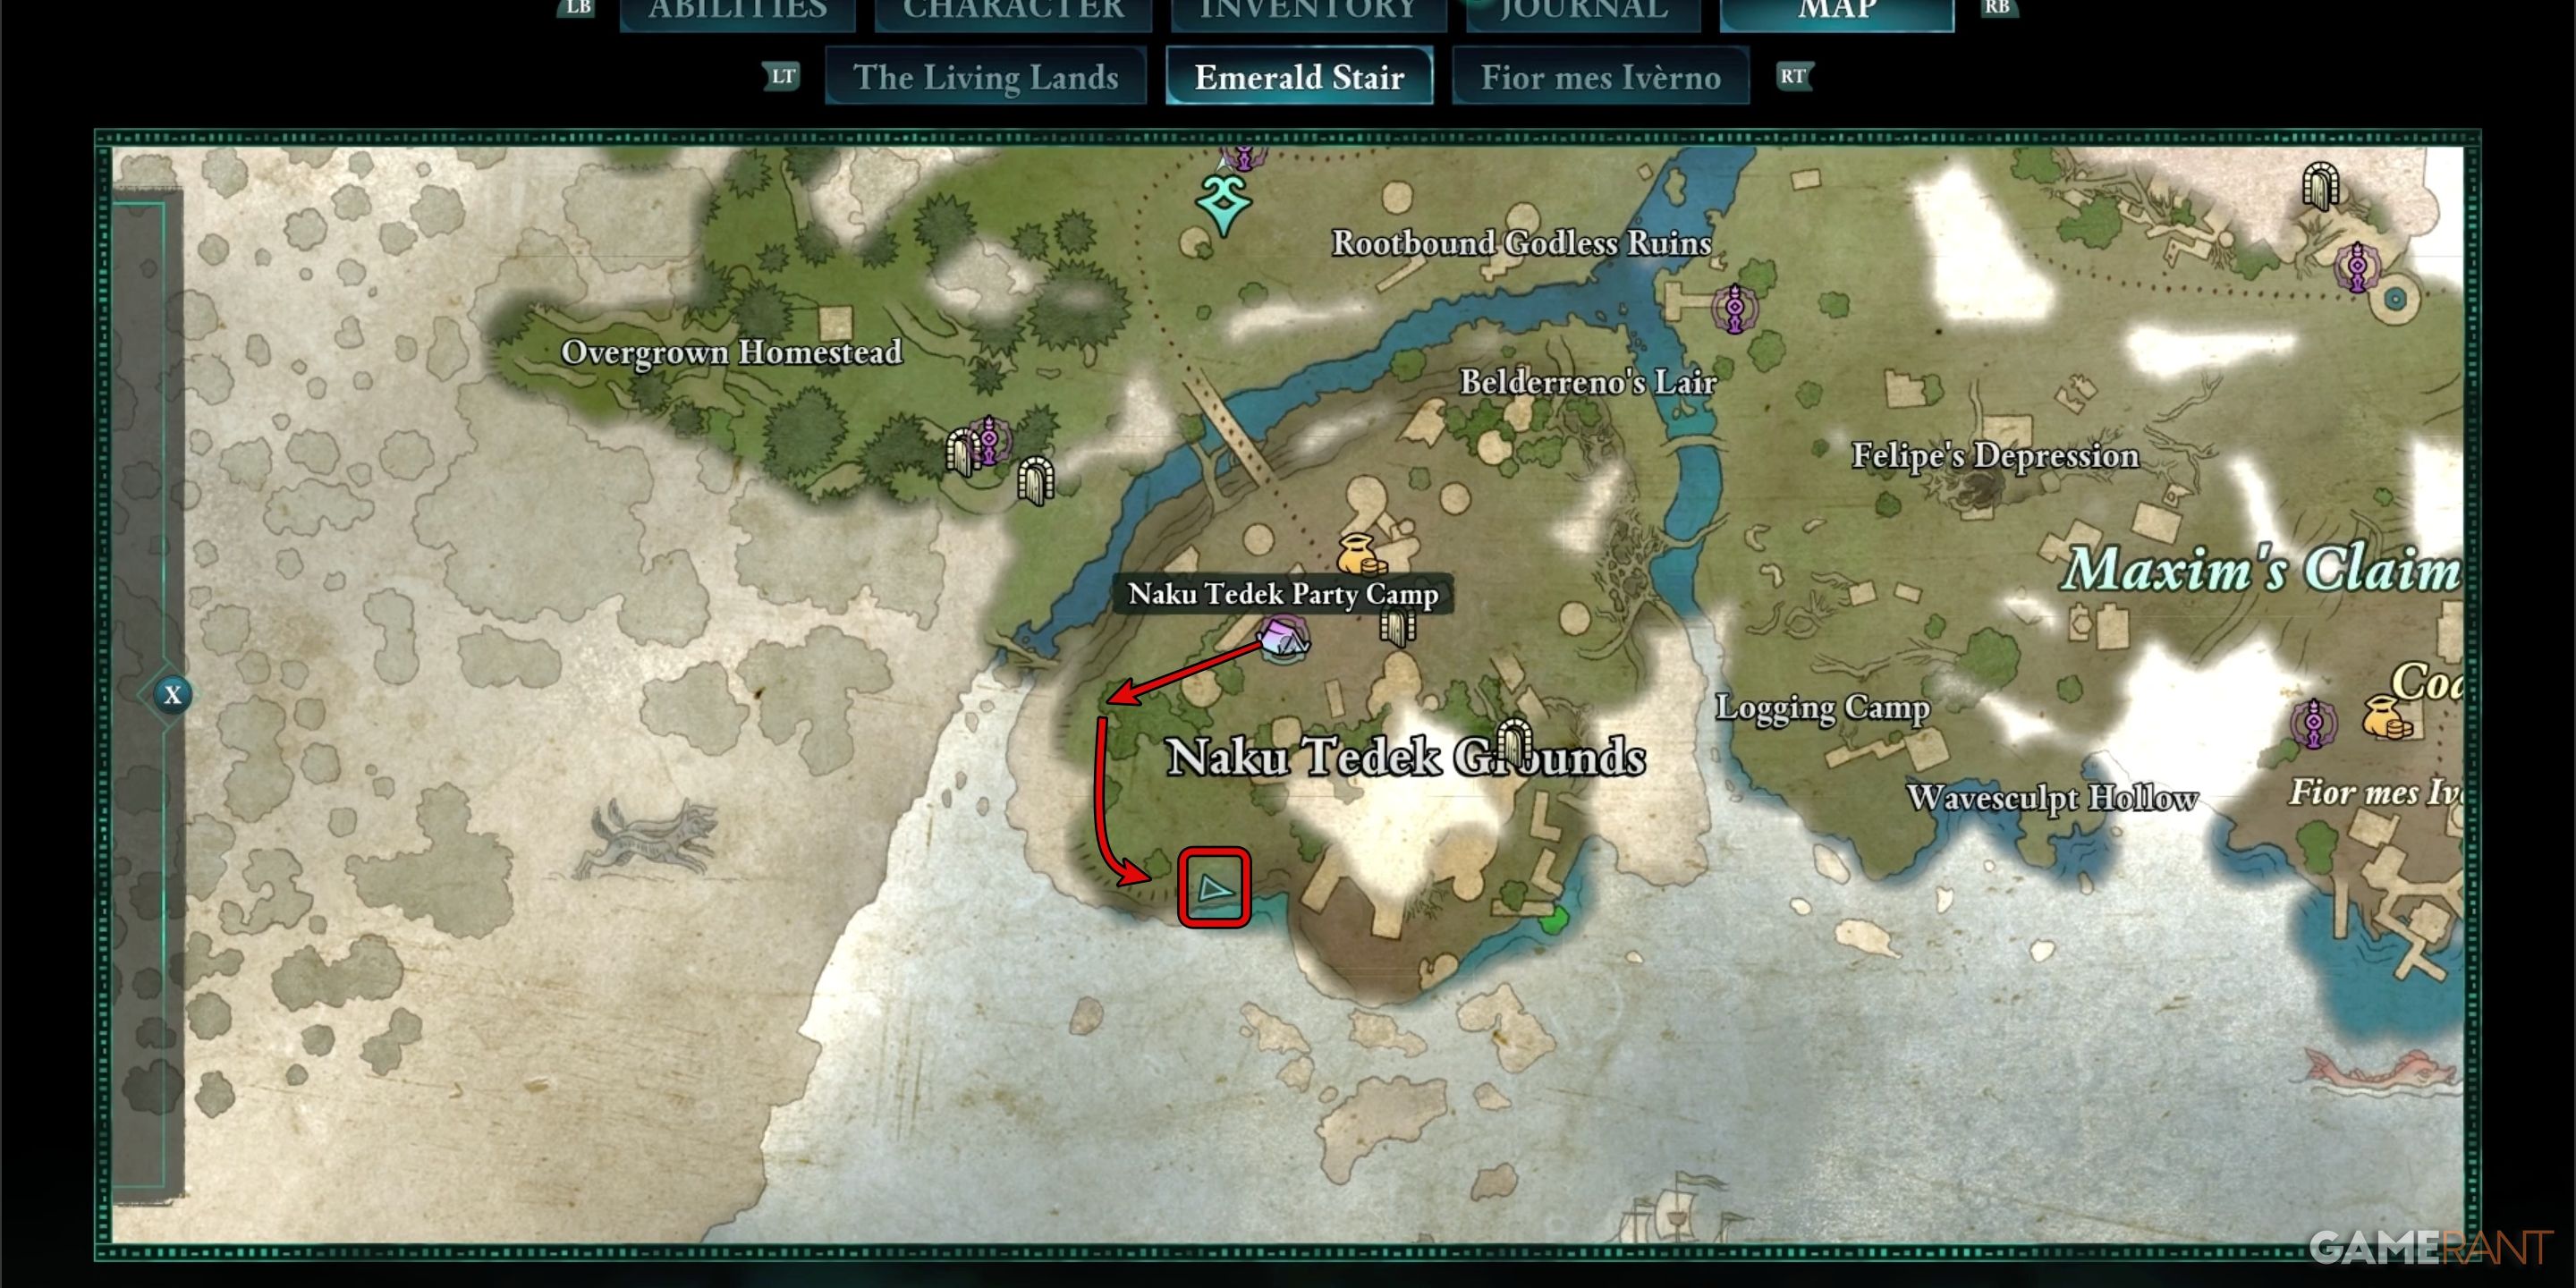
The second cartographer is located on the grounds of the Naku Tedek temple. The best place to start is the Naku Tedek Party Camp. From there, head west down the hill to the path that runs along the edge of the cliff. Turn south until the path ends. There, you’ll find Fleecia’s Map on the ground next to Fleecia’s dead body.
When you return the map to Sanza, he’ll give you an Awakened Adra as a reward.
6:49

Related
Avowed: All Emerald Stair Totem Piece (Schemer’s Offering)
Players will have to search high and low if they wish to collect all of the fragments and complete the Scheming’s Defiance Totem in Avowed.
Shatterscarp Cartographer – Avowed
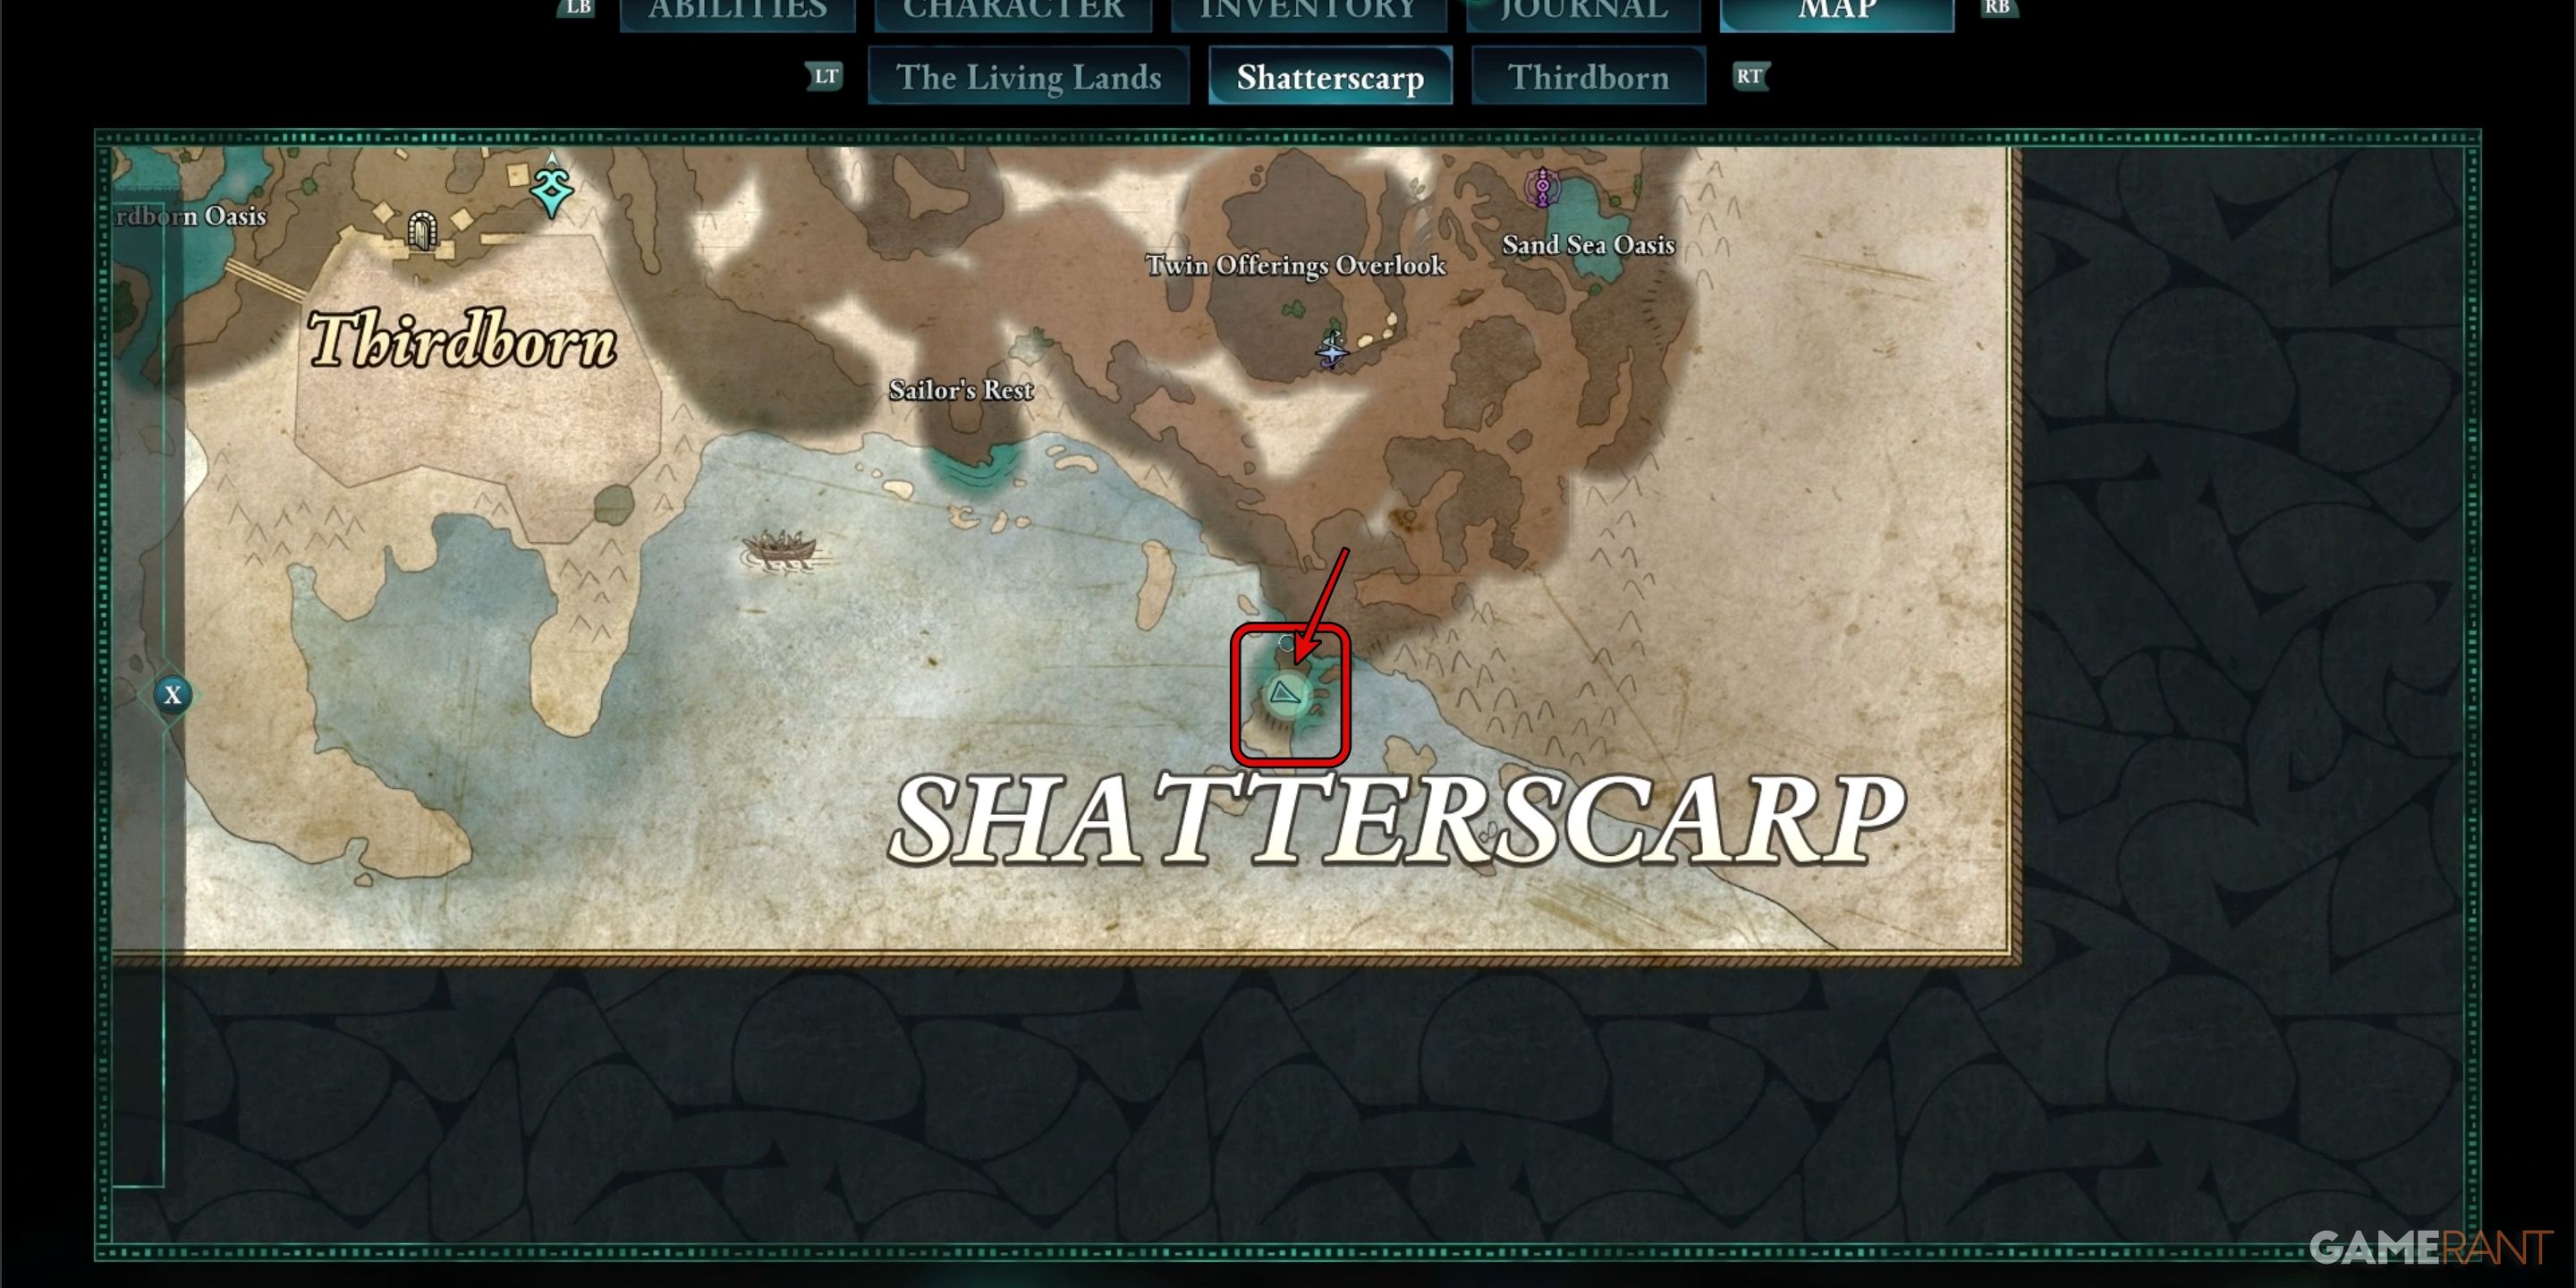
The third cartographer in Avowed is located way down in the southeastern corner of Shatterscarp. Head south from the Twin Offerings Overlook, and you’ll find a long section of broken rock cliff that leads out into the ocean like a peninsula.
Follow the rocky path south, jumping from ledge to ledge. At the end of the path, you’ll find the body of the third cartographer against a rock wall. The map is on the ground at their side.
Galawain’s Tusk Cartographer – Avowed
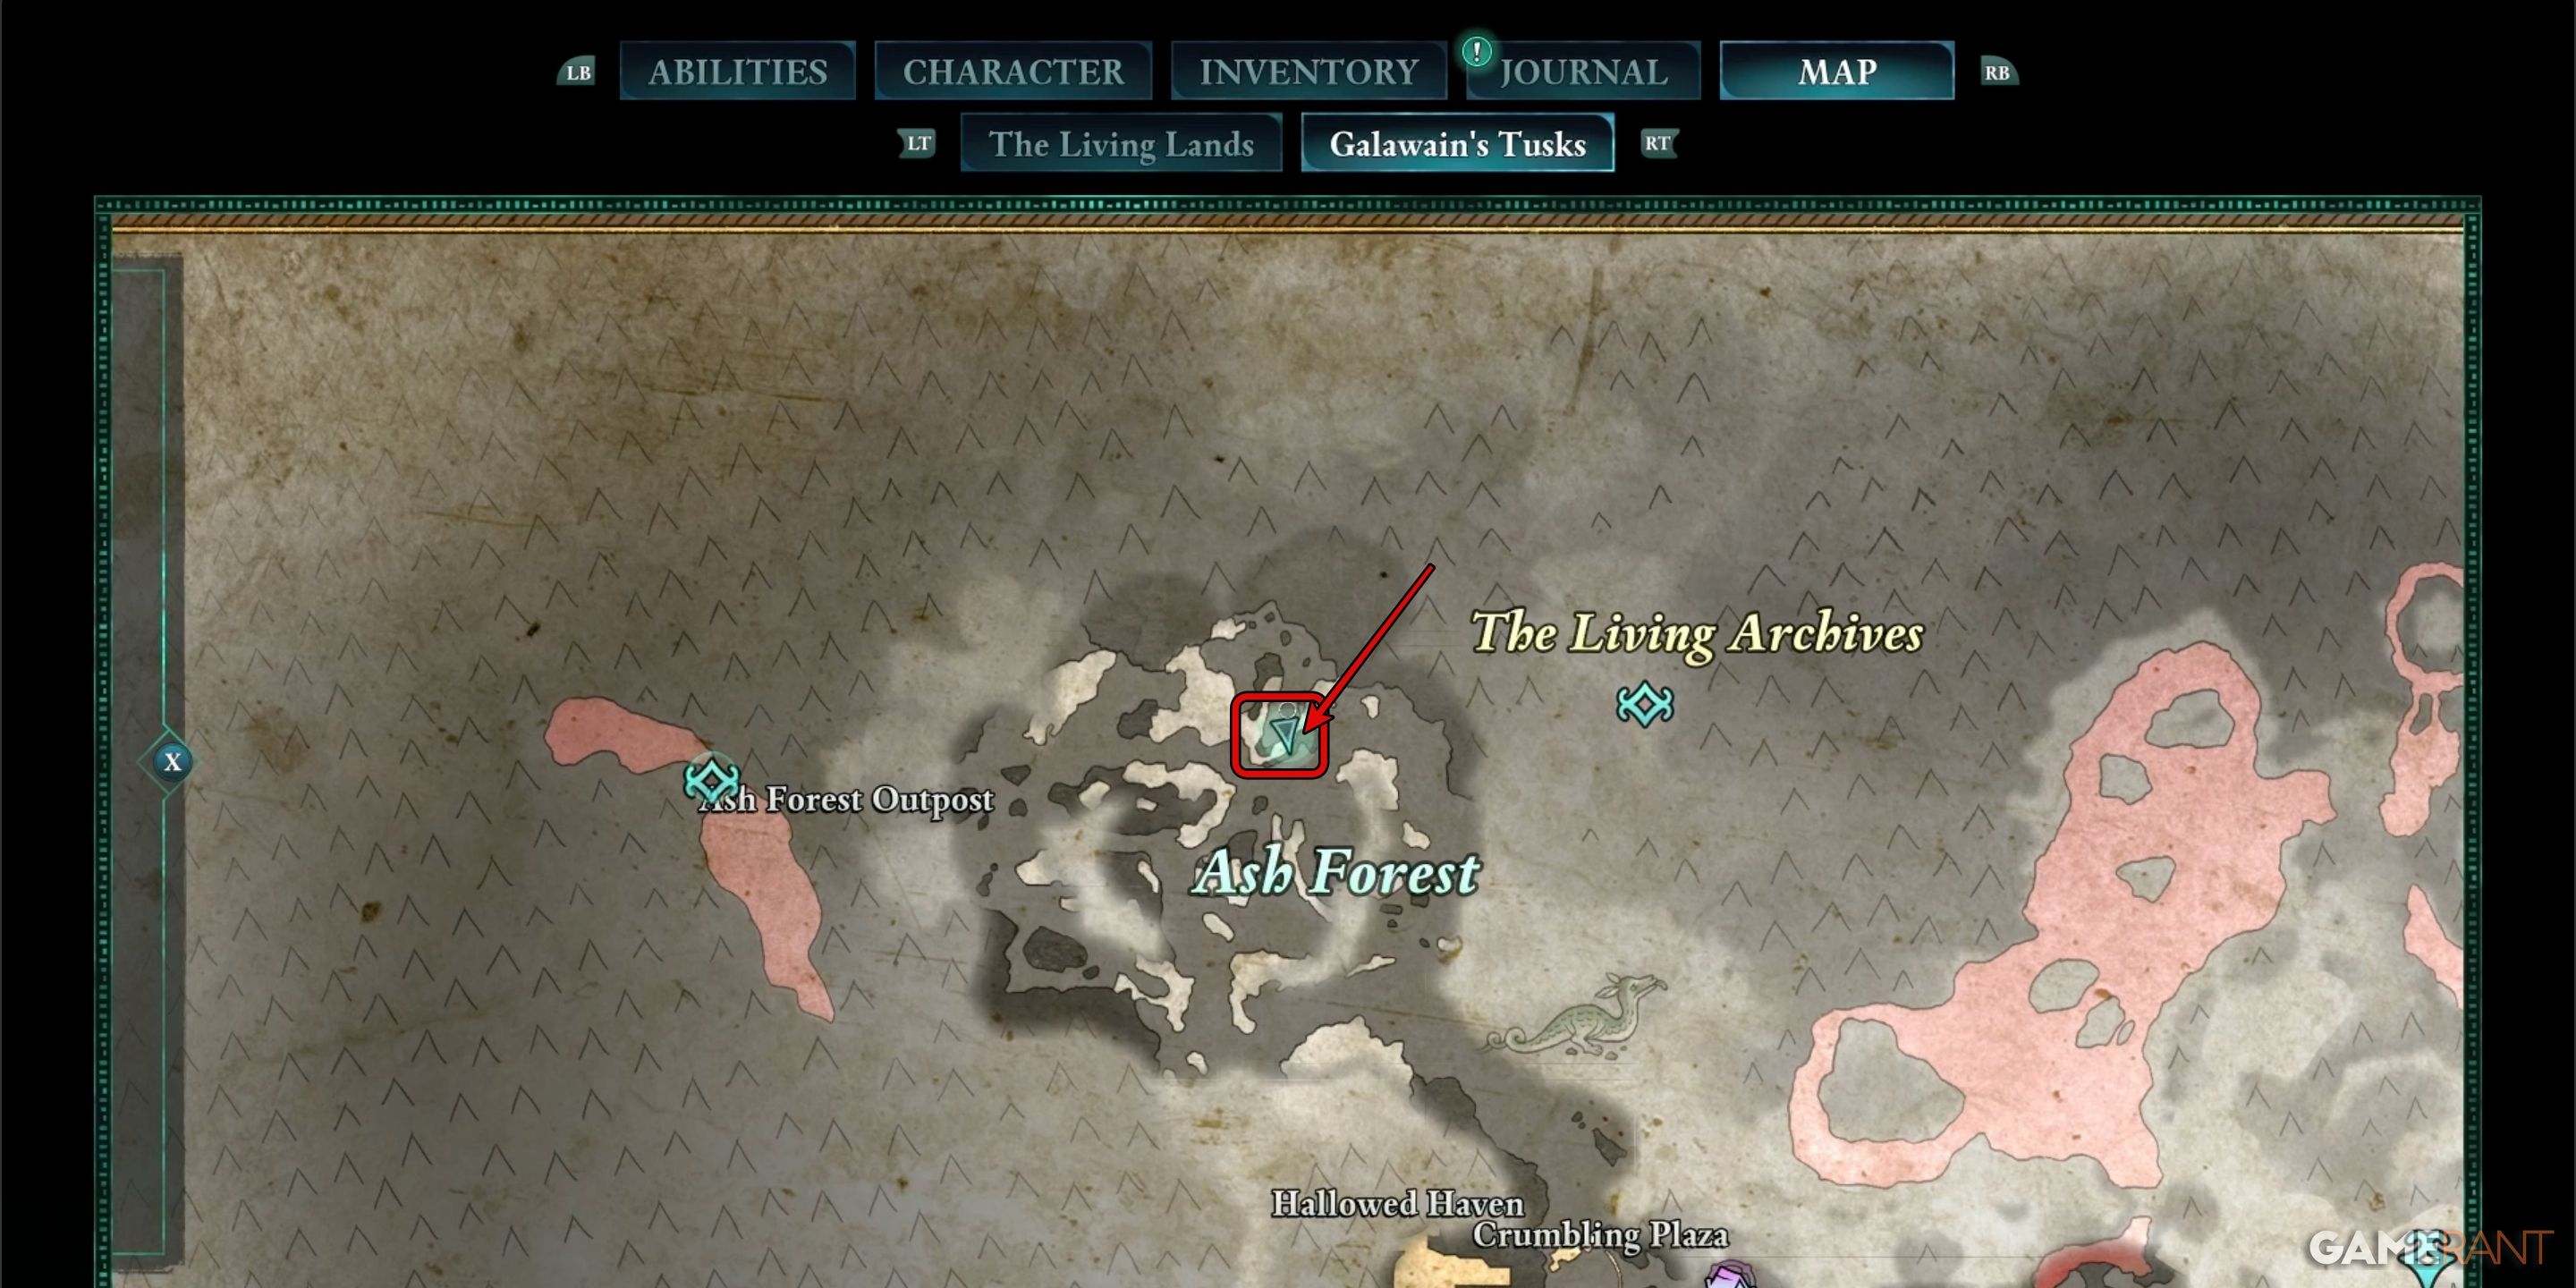
The final map is a bit more complicated to acquire. First, you’ll need to head to the Ash Forest, in the northwestern corner of Galawain’s Tusk.
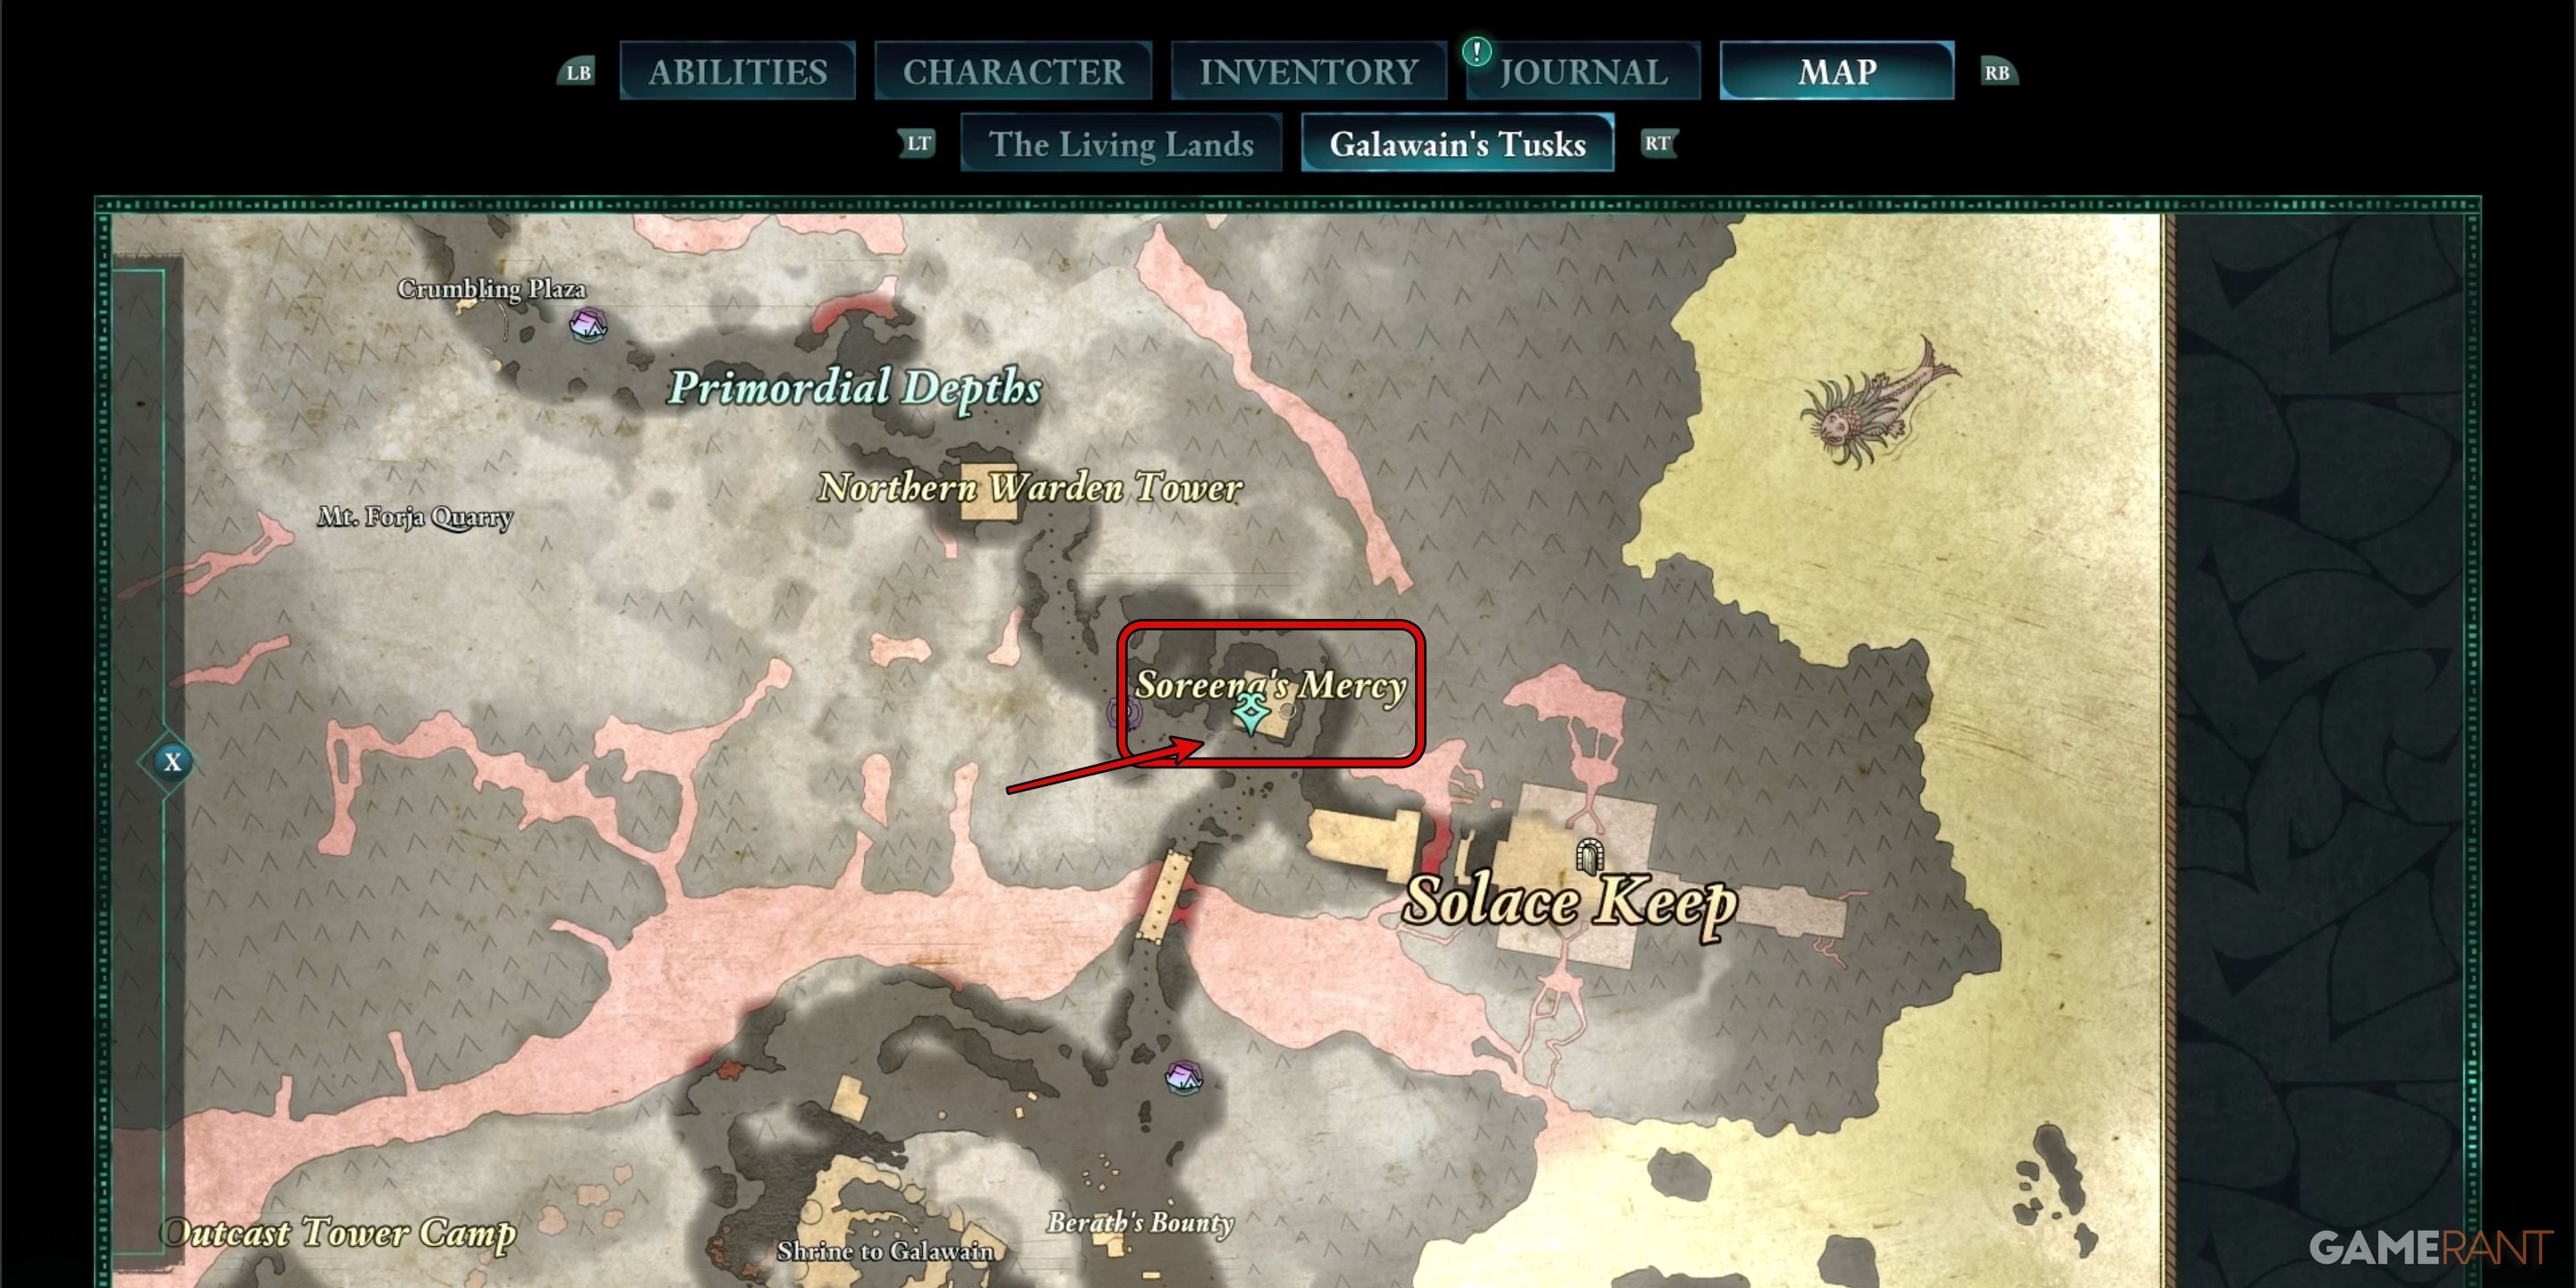
At the location marked on the map, you’ll find a small abandoned camp. Look for a wooden post in the ground with a note attached to it. Reading the note will reveal the cartographer was arrested and taken to Soreena’s Mercy.
Head to the upper level of Soreena’s Mercy and you’ll find Renato Varga – the fourth cartographer – being guarded in a jail cell.
If you speak to the jailer, you can either choose to make Renato stay and pay for the crime, or convince them to let Renato go. Either way, you’ll be given the final map as a reward. Return to Sanza to turn in the final map and end the “Mapping the Living Lands” quest chain.
There may be a glitch with the reward system in “Mapping the Living Lands.” In our playthrough, we received Adra once, when we turned-in the second map. However, some players have claimed they received Adra for each map. We will update the guide with a definitive answer as we learn more.









Leave a Reply