Whimpering Wastes is a brand new game mode introduced in the Wuthering Waves 2.1 patch. This game mode revolves around using two teams of six different resonators to complete time-trial-based challenges. The quicker you can defeat the enemies in each stage, the more points you are able to procure.
Collecting points will help you get bountiful rewards, such as Astrite, Resonance Potion, Shell Credits, Energy Core, Sealed Tubes, and more. Whimpering Wastes serves as a good alternative to the Tower of Adversity game mode for endgame players to showcase their best teams. Here is a quick rundown of everything you can expect in Whimpering Wastes and a brief guide on how to unlock the game mode, along with the best teams to use.

Related
All Active Wuthering Waves Codes (February 2025)
Gamers can use these Wuthering Waves codes to snag free goodies, like Astrite, Shell Credits, and more.
How To Unlock Whimpering Wastes
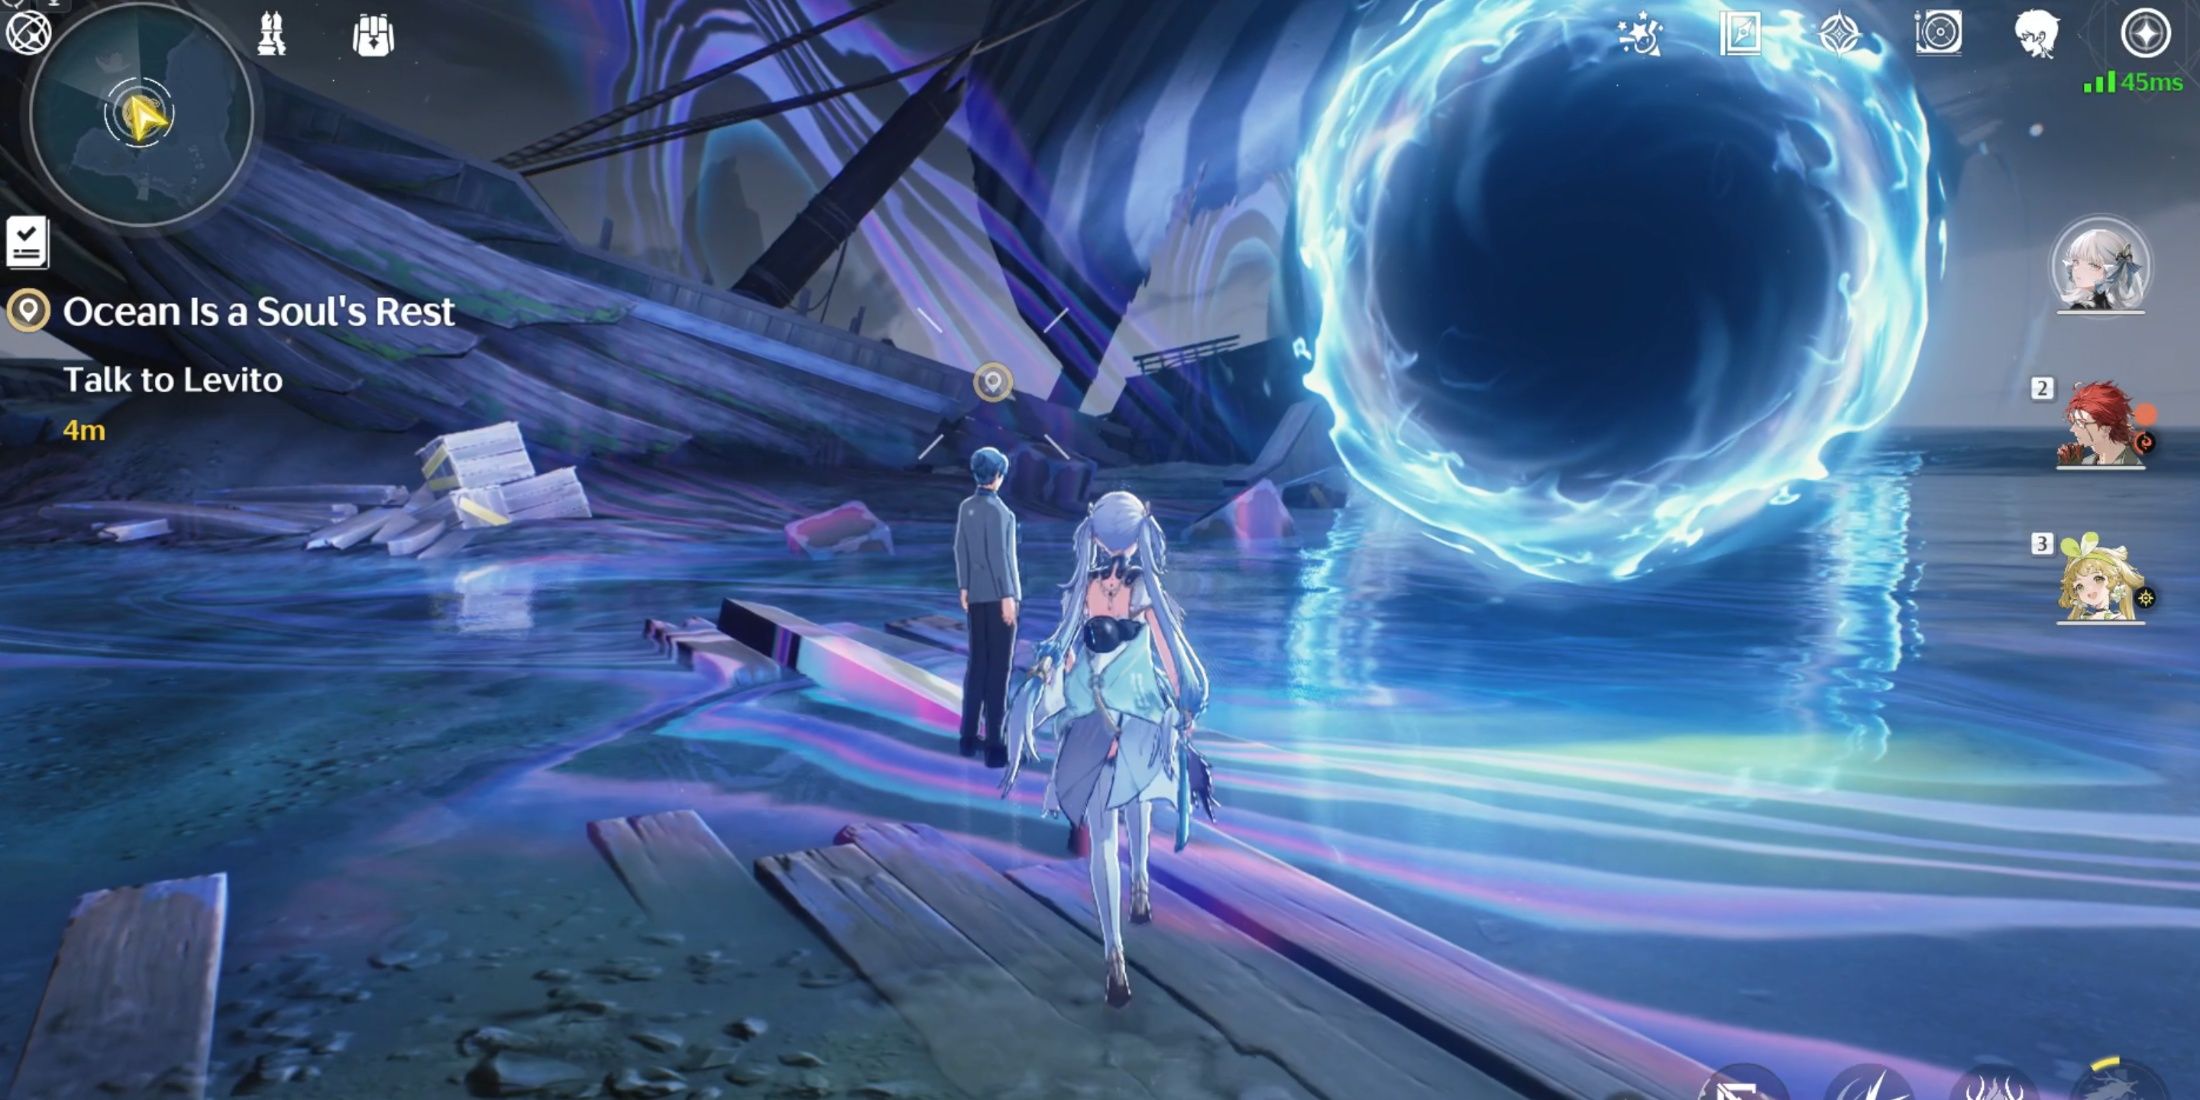
To access the Whimpering Wastes game mode in Wuthering Waves, you can track the tutorial quest named “Ocean is a Soul’s Rest”, which will teleport you to a Sonoro Sphere at the edge of Penitent’s End. Talk to Levito and learn more about the backstory of this unique phenomenon to kick things off.
Once you enter the Sonoro Sphere, you will be greeted with a multitude of mechanics which can be a bit overwhelming at first glance. However, this game mode is very simple. Deploy two parties of six unique Resonators and pair a Token that meshes well with each party’s playstyle. There are currently 12 stages in Whimpering Wastes divided into three sections. These include:
Forbidden Waters
- Stage 1: Siren’s Bonyard
- Stage 2: Darkblight Ruins
- Stage 3: Mistbound Lair
- Stage 4: Weeping Walkway
- Stage 5: Starfall Expanse
- Stage 6: Burial Bay
Respawning Waters: Chasm
- Stage 7: Doomstrand
- Stage 8: Whirlpool
- Stage 9: Riptide
- Stage 10: Tempest
- Stage 11: Seabane
Respawning Waters: Torrents
- Stage 12: Infinite Torrents
All stages (except Infinite Torrents) require you to reach a specific number of points to unlock the next stage. You can gain additional points to unlock rewards much quicker. To obtain the maximum number of points, you will have to eliminate multiple waves of enemies before the timer runs out.
While the stages in Forbidden Waters are quite easy to get past, things start to get more difficult from Stage 7. This is where equipping the right token for each party can make a big difference in clearing tough stages. Each stage also has a specific “Environment Report” that can help certain Resonators perform better.
9:59

Related
Wuthering Waves: Averardo Vault Sonance Casket: Ragunna Locations
Collect all Sonance Casket: Ragunna at Averardo Vault in Wuthering Waves and redeem various rewards from Teensy Weensy.
All Tokens in Whimpering Wastes
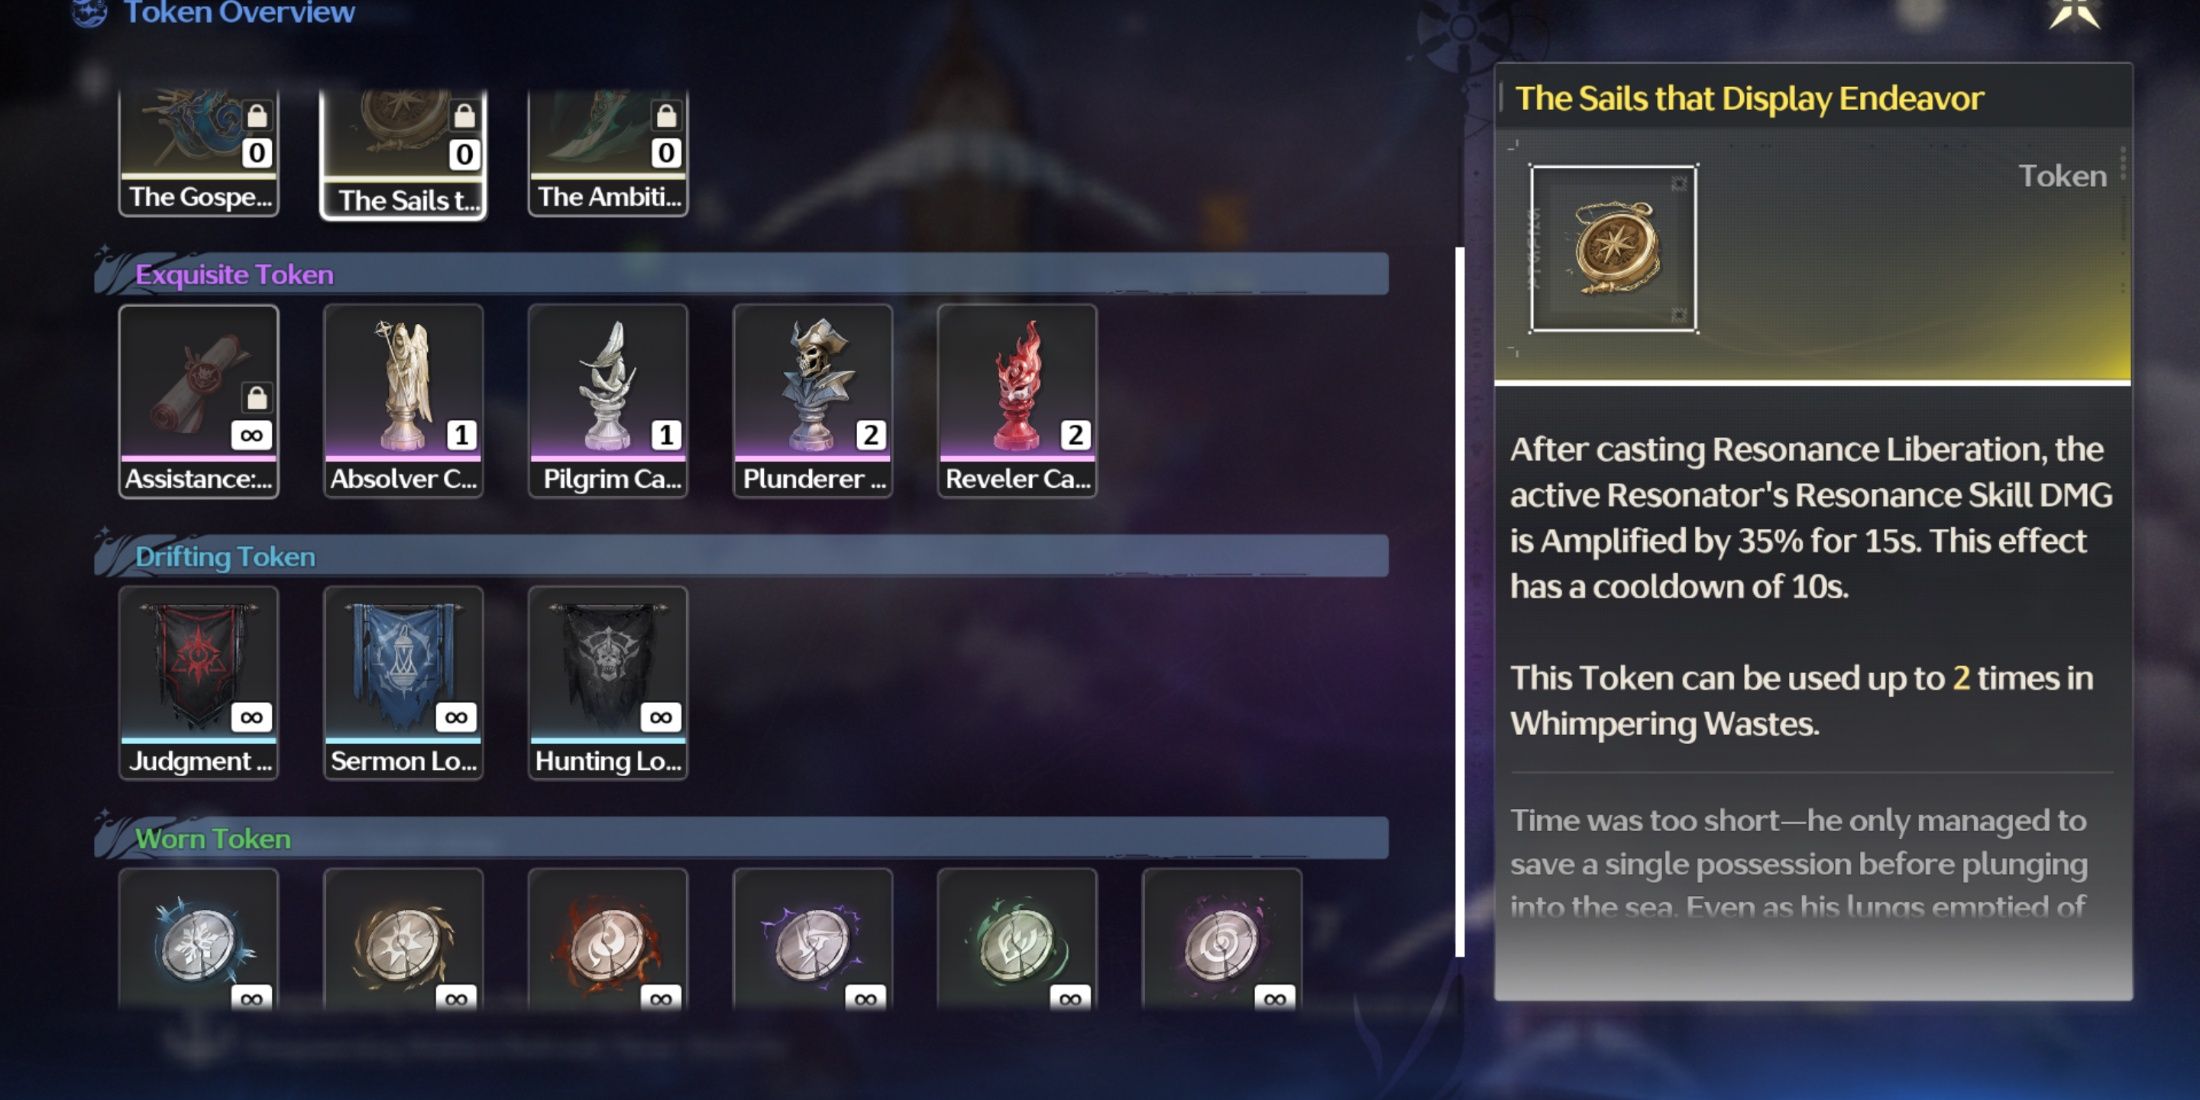
Tokens provide powerful effects that can alter the outcome of each stage. Certain tokens can be used an infinite number of times, while some others are limited in the number of times they can be brought to a stage. Listed below are all the Tokens you can obtain in Whimpering Wastes:
|
Tokens |
Effect and number of uses |
How to Unlock |
|---|---|---|
|
Glacio Eroded Coin |
Increases Glacio DMG by 20% (Unlimited) |
Unlocked by default |
|
Spectro Eroded Coin |
Increases Spectro DMG by 20% (Unlimited) |
Unlocked by default |
|
Fusion Eroded Coin |
Increases Fusion DMG by 20% (Unlimited) |
Clear Stage 1: Siren’s Boneyard |
|
Electro Eroded Coin |
Increases Electro DMG by 20% (Unlimited) |
Clear Stage 1: Siren’s Boneyard |
|
Aero Eroded Coin |
Increases Aero DMG by 20% (Unlimited) |
Clear Stage 2: Darkblight Ruins |
|
Havoc Eroded Coin |
Increases Havoc DMG by 20% (Unlimited) |
Clear Stage 2: Darkblight Ruins |
|
Judgment Lost Flag |
Crit DMG of all Resonators is increased by 40% for 15s after casting an Intro Skill (Unlimited) |
Clear Stage 3: Mistbound Lair |
|
Sermon Lost Flag |
Every time a Resonator deals Basic Attack DMG, their next Basic Attack DMG is amplified by 4% for 15s, stacking up to 5 times. (Unlimited) |
Clear Stage 3: Mistbound Lair |
|
Hunting Lost Flag |
Every time a Resonator deals damage, their Heavy Attack is amplified by 4% for 15s, stacking up to 5 times. (Unlimited) |
Clear Stage 3: Mistbound Lair |
|
Assistance: Rare Pact |
Summons an Echo to support you in combat. It does not take damage from Resonators. (Unlimited) |
Found in a Supply Chest located in Riccioli Islands |
|
Absolver Captain’s Seal |
After casting Resonance Liberation, increases Basic Attack Crit. DMG of all Resonators by 40% for 15s and Resonance Skill cooldown is reduced by 10s. (2 times) |
Clear Stage 4: Weeping Walkway |
|
Pilgrim Captain’s Seal |
Each time casting Resonance Skill reduces Resonance Liberation cooldown by 20% and recovers Resonance Energy by 20%. This effect has a cooldown of 3s. (2 times) |
Clear Stage 5: Starfall Expense |
|
Plunderer Captain’s Seal |
Recovers 3% of Resonator’s HP per second and deals 600% Electro DMG to nearby targets upon the sixth HP recovery. (2 times) |
Clear Stage 6: Burial Bay |
|
Reveler Captain’s Seal |
Amplifies all Attribute DMG by 25% (2 times) |
Clear Stage 7: Doomstrand |
|
The Gospel that Receives Harmonized Praise |
After casting Intro Skill, increases Crit. Rate of all Resonators by 40% and Crit. DMG by 80% for 15s. (2 times) |
Clear Stage 8: Whirlpool |
|
The Sails that Display Endeavor |
After casting Resonance Liberation, the active Resonator’s Resonance Skill DMG is amplified by 35% for 15s. This effect has a cooldown of 10s. (2 times) |
Clear Stage 8: Whirlpool |
|
The Ambition that Lies Hidden |
Increases Spectro DMG by 12.5% for each stack of Spectro Frazzle inflicted on targets, stacking up to 10 times. This effect lasts for 15s. (2 times) |
Clear Stage 8: Whirlpool |
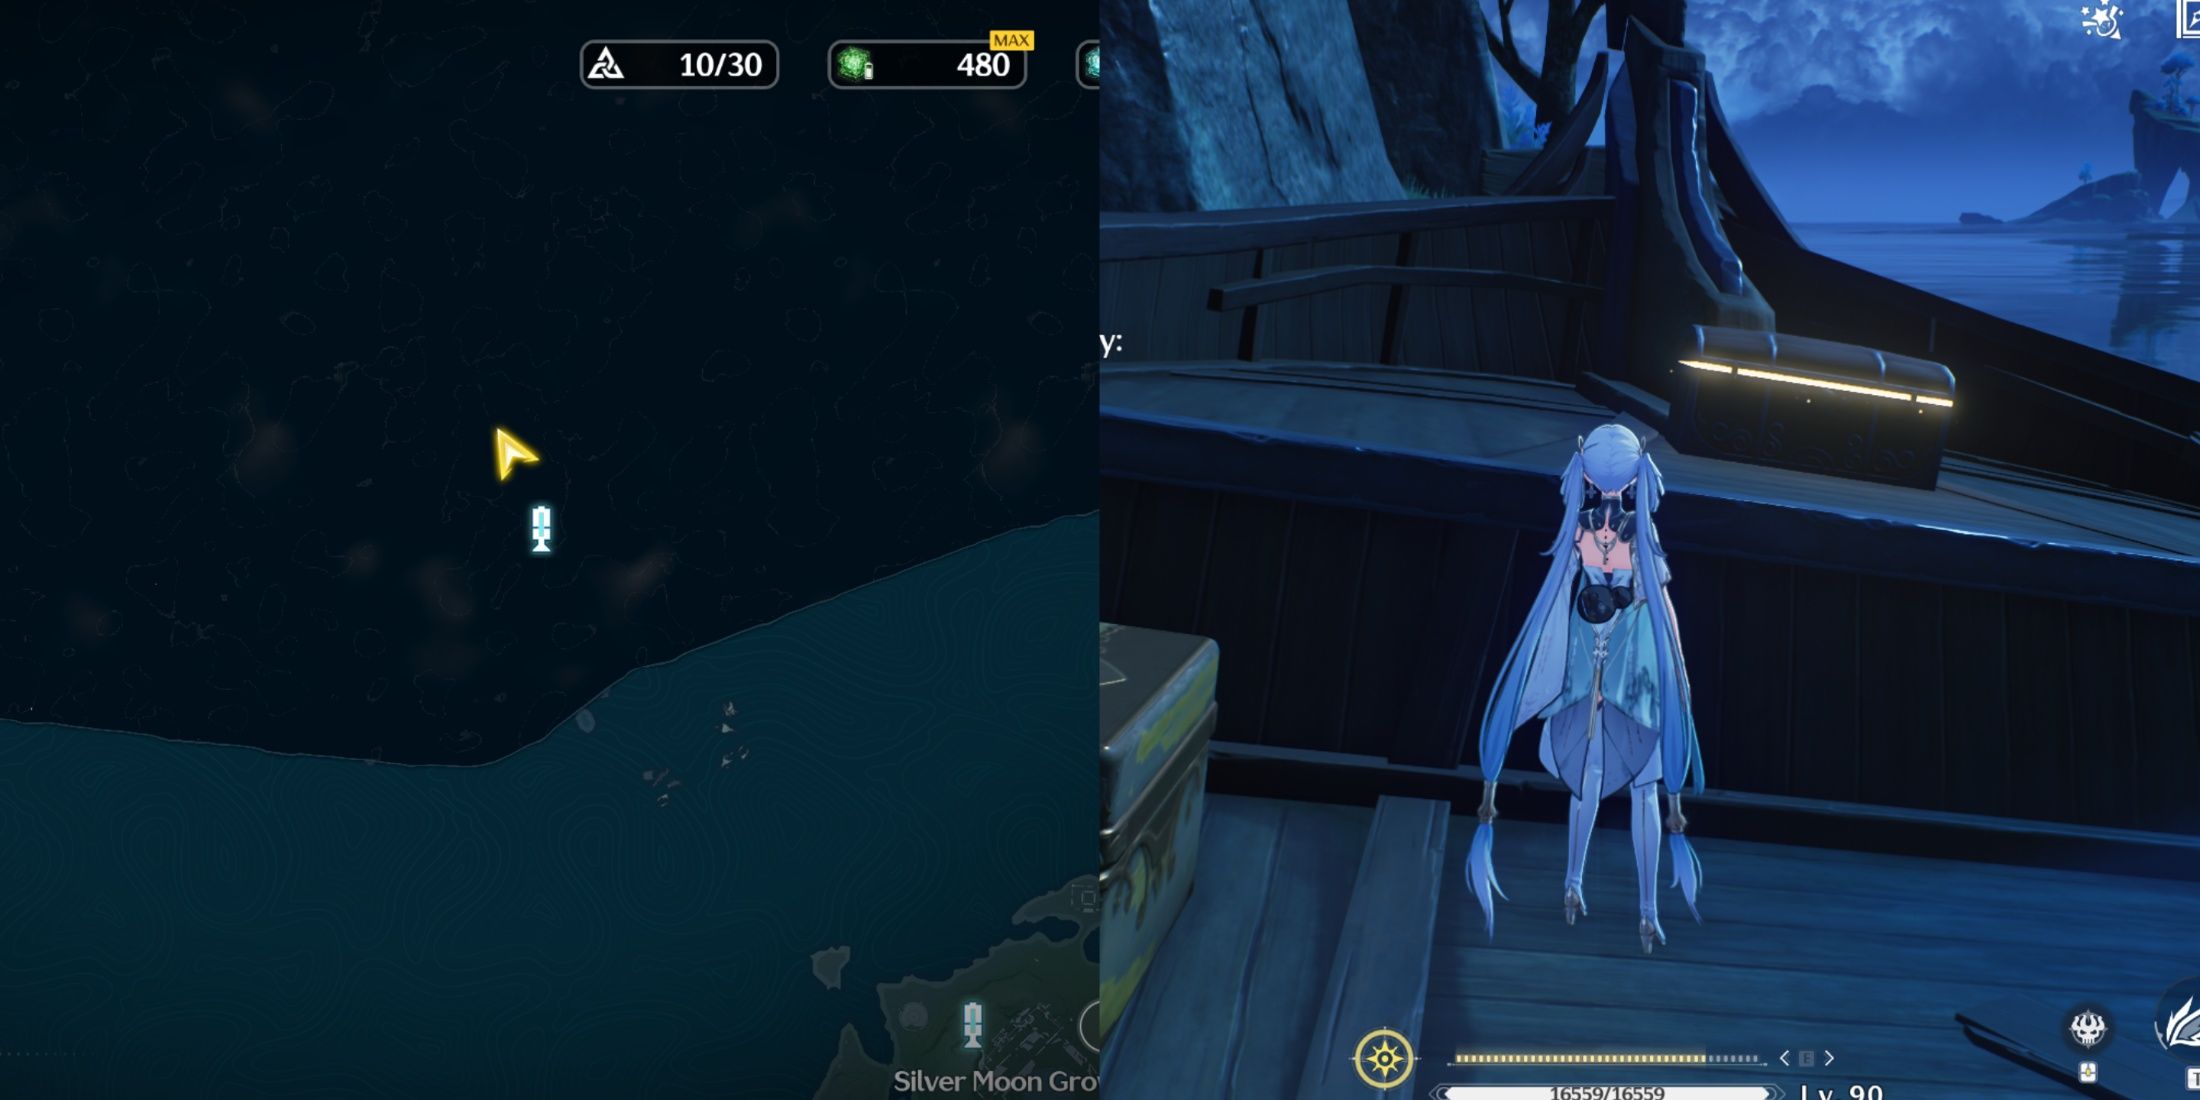
The Assistance: Rare Pact token can be unlocked by using the “Track” option after clicking on the token. This will lead you to a spot in Riccioli Islands, which can be accessed by simply flying over to the area. The tracked location will lead you to a Supply Chest that contains the token.
11:28

Related
Wuthering Waves: All Special Enemies Locations
Amongst the many enemies in Wuthering Waves, Rovers can test out their skills with the special enemies that range in difficulty.
Best Teams in Whimpering Wastes
There are plenty of team options that you can opt to use in Whimpering Wastes, depending on the enemy lineup in each stage. Here are the best teams, along with the best token, that can be used in most stages of Whimpering Wastes:
- Camellya/Sanhua/Verina (Sermon Lost Flag)
- Phoebe/Sanhua/Spectro Rover (Judgment Lost Flag/The Ambition that Lies Hidden)
- Carlotta/Zhezhi/Shorekeeper (Judgment Lost Flag)
- Jinhsi/Zhezhi/Verina (Judgment Lost Flag)
- Camellya/Roccia/Verina (Sermon Lost Flag)
- Jiyan/Mortefi/Verina (Hunting Lost Flag)
- Xiangli Yao/Yinlin/Shorekeeper (Judgment Lost Flag)








Leave a Reply