Mapping the Living Lands is a series of quests in Avowed, with Sanza the cartographer sending you to the far reaches of each land. After speaking with him in his Emporium in Dawnshore’s city of Paradis, you will get Mapping the Living Lands – Dawnshore.
Each time you go to a new region, a new quest will unlock automatically, with Emerald Star, Shatterscarp, and Galawain’s Tusks the suffix each time. The quuest marker will offer up a vague part of the map, but finding the exact location of each unlucky cartographer is tricky – that’s where this handy dandy guide comes in.
Where To Find The Cartographer For Mapping The Living Lands – Dawnshore
In Dawnshore, you’re directed to Usher’s Hand in the nothern reach of the Southern Embrace. The cartographer, who has had his skull crushed by a rock – he probably won’t recover – can be found near a campsite at about 2 o’clock if you think of the map guide as a clock. It’s on the very edge of the circle.
If you have the God’s Gate Beacon, it’s in a small cluster of what could once have been called a ruin about five steps to the left of the fast travel beacon.
Where To Find The Cartographer For Mapping The Living Lands – Emerald Stair
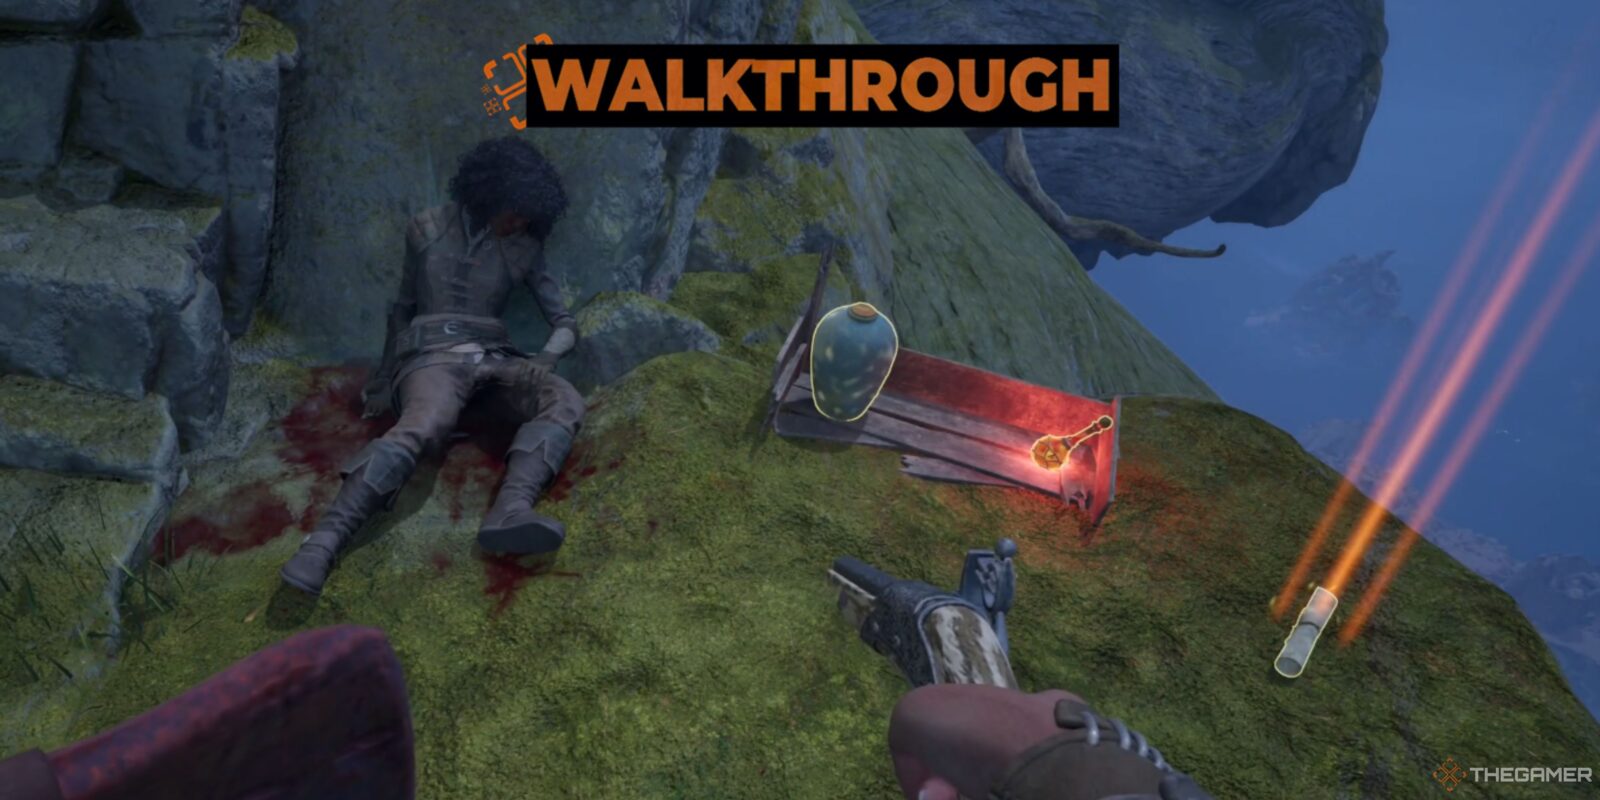
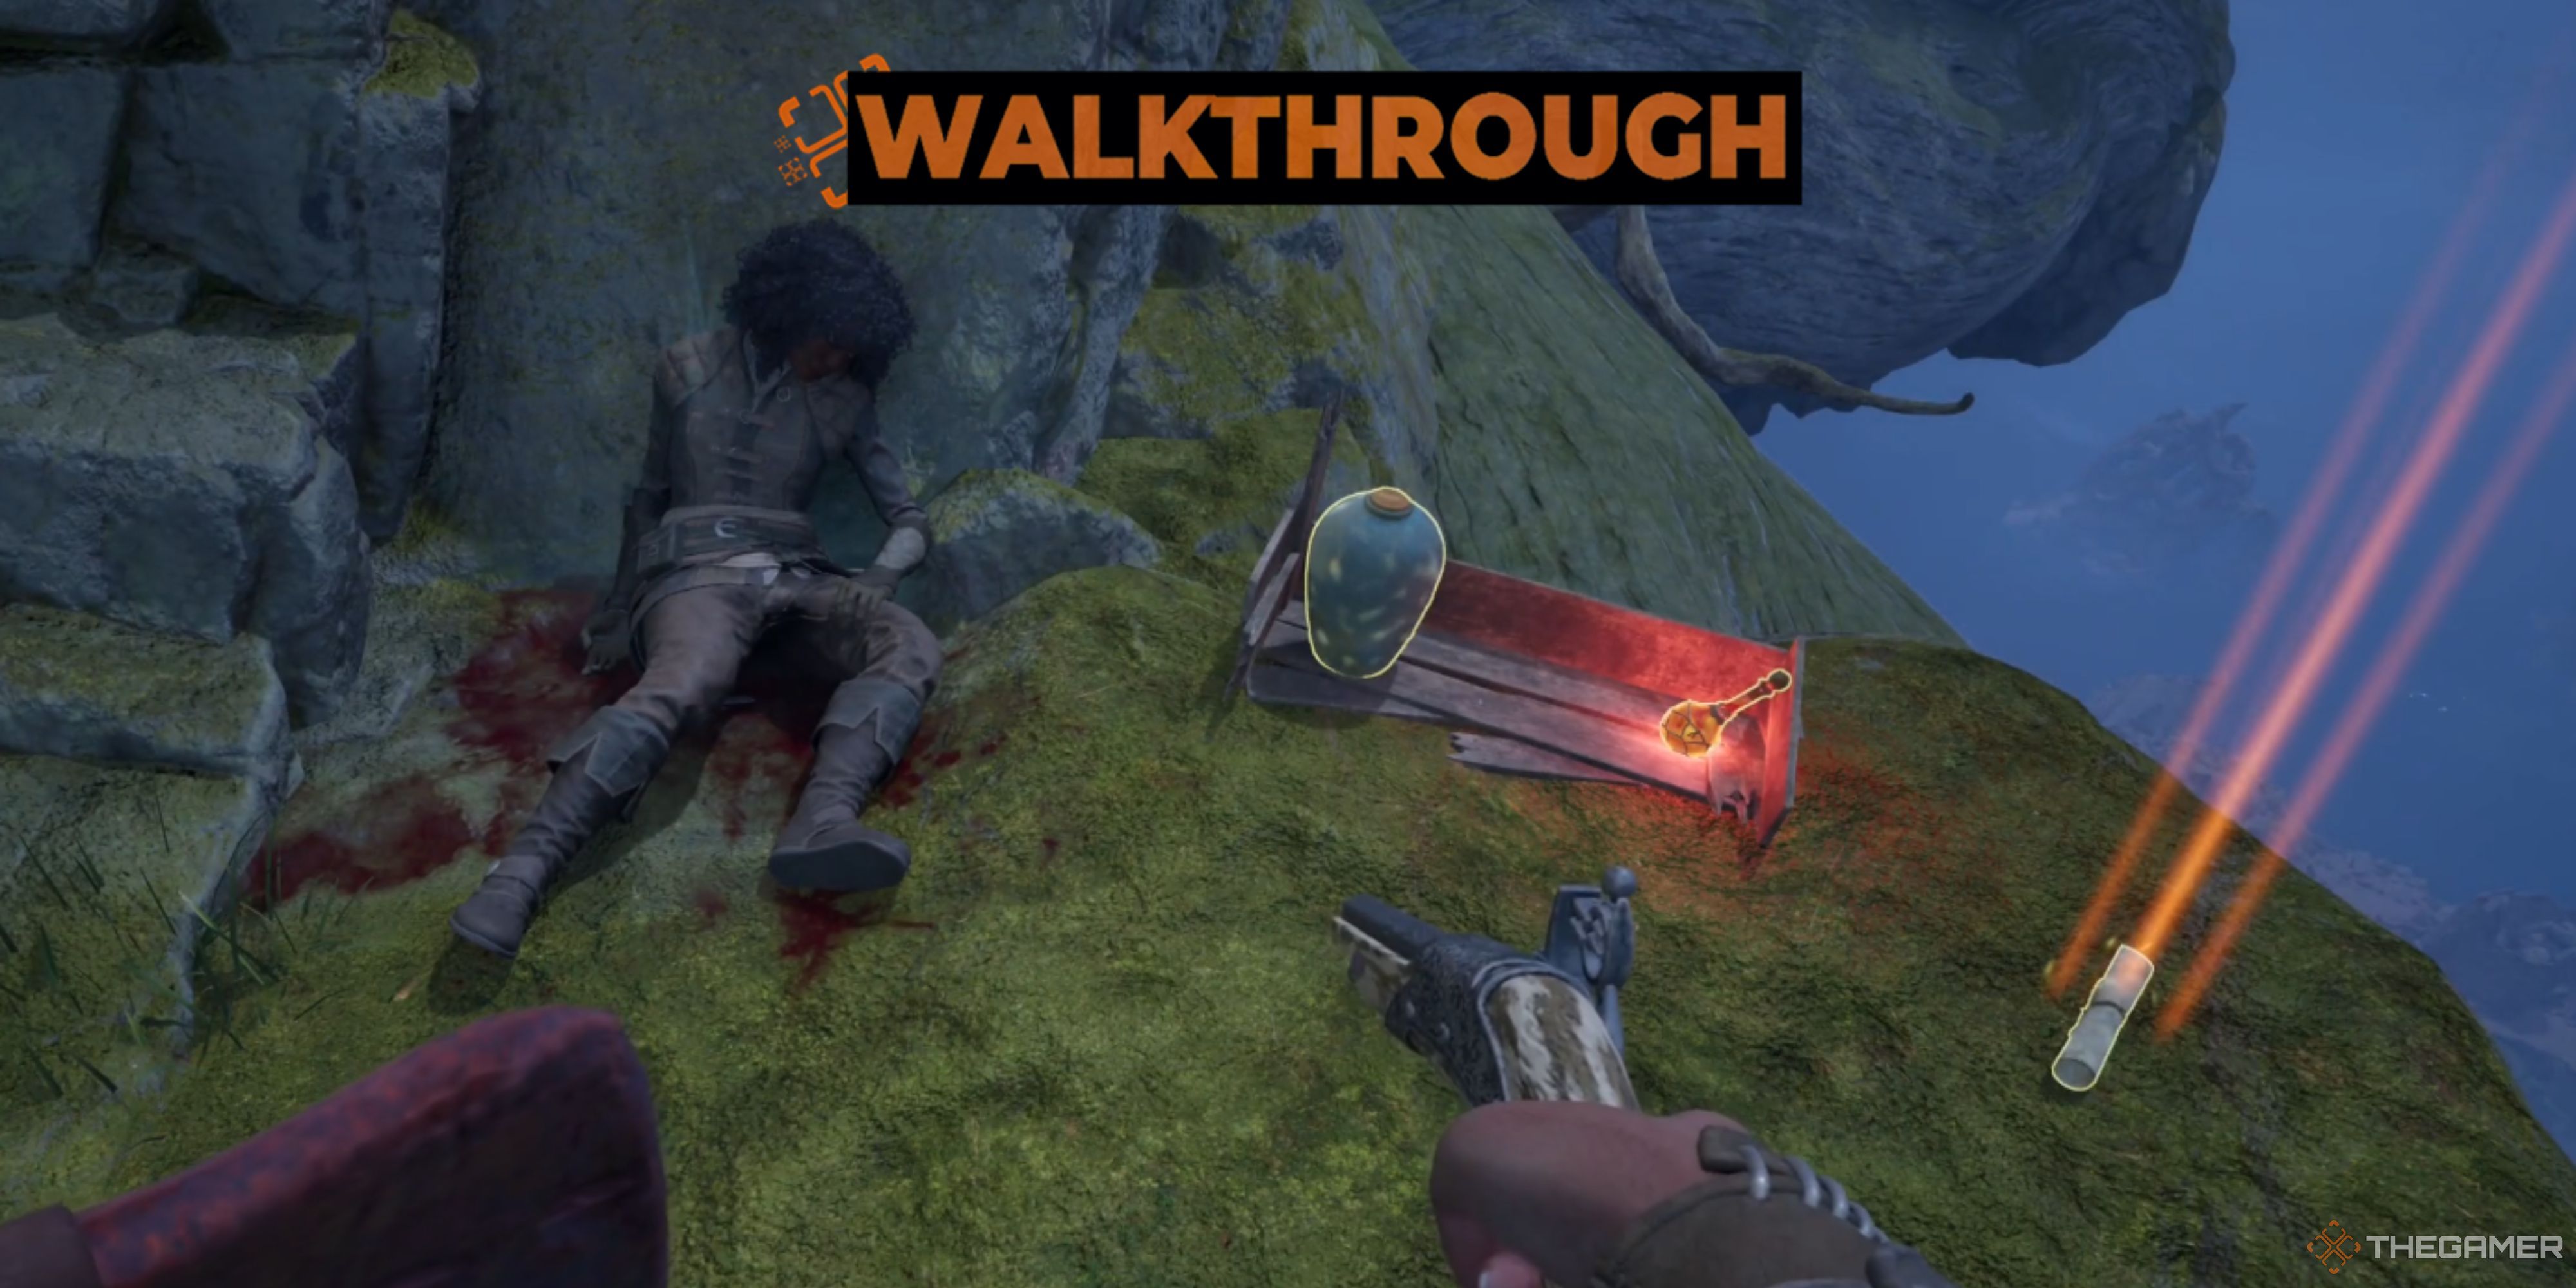
Head to the back of the Naku Tedek Grounds and jump off the wooden platform in the corner. From here, you can jump to a thick tree twisting around a cliff. Jump to it, make your way along, and at the end, drop down and turn around.
You’ll find the cartographer dead against the rock here, and her map lying on the edge of the cliff next to her. You can also drop around the front of the Naku Tedek Grounds from the nearby party camp, but it’s easier to miss her this way as it doesn’t look like the path continues after the graves.
Where To Find The Cartographer For Mapping The Living Lands – Shatterscarp
At the far south east of Shatterscarp, there is a rock column out in sea. Climb the rocky ledge near it, then jump out across the gap. Lying against the wall of the furthest, tallest rock is the cartographer and their camp. Next to them, you’ll find their map.
You can also check their nearby backpack for an Essence Potion, Spirit Residue and two Stelgaer Leather. What? It’s not like they’re going to be using it.
Where To Find The Cartographer For Mapping The Living Lands – Galawain’s Tusks
This last one is, in some ways, the trickiest one yet. However, in other ways, it’s also the easiest. That’s because rather than the huge basin the game directs you to, the cartographer is not at the location he is supposed to be. Instead, he has been arrested.
Head to South Warden Tower, north of the Writhing Ruins and west of The Sallow Steppe (as you can see in the pic above), and speak to the Warden there. It is relatively easy to convince the Warden to free the cartographer, but if you do end up in combat, the key can be found on the top floor. Once he is freed from jail one way or another, the quest will complete.
We completed this quest after Our Dreams Divide Us Still (and we saved the Keep), which may explain why the Wardens were less bothered about freeing him.
After each of these quests, you should head back to Sanza in the Northern Paradis Emporium in order to mark them as complete. Sanza will always be shocked to hear of each cartographer’s demise, although you’d think by the third time he’d just be used to it.