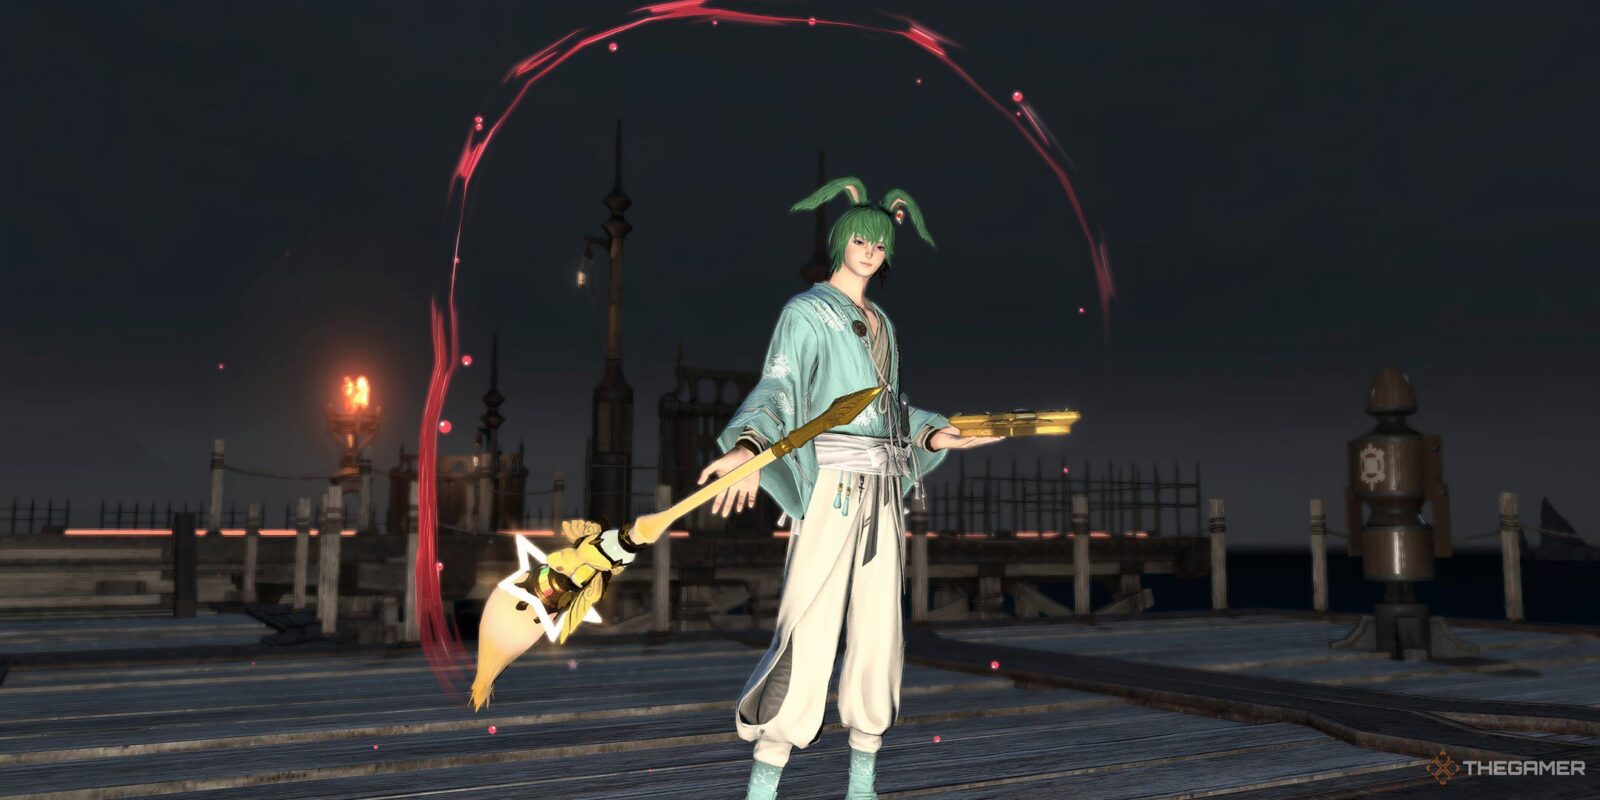
Introduced in Dawntrail, Pictomancer is known for being one of the best Jobs in Final Fantasy 14. With some great versatility, a lot of burst damage, and the ability to deal with downtime like no one else, it’s easy to see how its beautiful paintings managed to conquer everyone’s hearts in all game modes.

Related
Final Fantasy 14: Guide To Playing White Mage In PvP
If you think that your White Mage is only a healer, you should think again. Learn all about its damage-dealing skills for PVP in FF14.
This, of course, includes PvP battles, where the job is just as powerful as in regular Dungeons and Raids. With a playstyle very reminiscent of its PvE counterpart, the Pictomancer can easily paint its way to victory if you let the artist go unchecked for the day.
Overview

True to its caster nature, the Pictomancer is a Job that offers consistent damage, with some powerful nukes that can easily control the battlefield. Its kit is very straightforward but also versatile.
While it might not have the same direct damage as a Black Mage, it makes up for it with instant casts and lots of other utility Actions around the table. These can be used to put yourself in a better position to dish out your strongest spells.
Some of its skills can stun enemies, increase damage taken, and even shield/heal your whole team. Its superior mobility ensures that you can go anywhere at any time, making you extremely hard to deal with without crowd control abilities.
This is also a great Job for PvP newcomers. Most of Pictomancer’s skills are barely changed from its PvE counterpart, with only a few key differences and extra effects to consider.
Job Action Breakdown

The core of Pictomancer’s gameplay is painting your motifs and weaving them between your regular color spells. This will be your bread and butter during any PvP battle as you constantly adjust your position according to the battle.
Your goal is to take out the squishiest targets you can, while supporting your team with your occasional utility spells. You cannot control the order you get them, but you can save some of them for the right occasions if you know exactly what you’re getting next.
|
Action |
Cast Time |
Recast Time |
Attack Type |
Information |
|---|---|---|---|---|
|
Fire in Red |
Instant |
2.4s |
Spell |
Attack with a potency of 5,000 to a single target. Cannot be used while Subtractive Palette is active. |
|
Aero in Green |
Instant |
2.4s |
Spell |
Attack with a potency of 6,000 to a single target.
|
|
Water in Blue |
Instant |
2.4s |
Spell |
Attack with a potency of 7,000 to a single target.
|
|
Subtractive Palette |
Instant |
1s |
Ability |
Changes Fire in Red and its combo actions to Blizzard in Cyan and its combo actions, as well as changing Holy in White to Comet in Black. |
|
Blizzard in Cyan |
1.44s |
2.4s |
Spell |
Attack with a potency of 7,000 to a single target. Can only be used under Subtractive Palette. |
|
Stone in Yellow |
1.44s |
2.4s |
Spell |
Attack with a potency of 8,000 to a single target. Can only be used under Subtractive Palette.
|
|
Thunder in Magenta |
1.44s |
2.4s |
Spell |
Attack with a potency of 9,000 to a single target. Can only be used under Subtractive Palette.
|
|
Holy in White |
Instant |
16s |
Spell |
Attack with a potency of 8,000 to the target and all enemies nearby it. Two charges. Restores 12,000 of the caster’s HP.
|
|
Comet in Black |
Instant |
16s |
Spell |
Attack with a potency of 12,000 to the target and all enemies nearby it. Two charges.
|
|
Creature Motif |
2s |
3s |
Spell |
Paints a Motif, changing your Living Muse Action according to the painted Motif. Changes to a different Motif after you use your current Muse. Starts as Pom Motif. |
|
Pom Motif |
2s |
3s |
Spell |
Paints a Pom Motif. |
|
Wing Motif |
2s |
3s |
Spell |
Paints a Wing Motif |
|
Claw Motif |
2s |
3s |
Spell |
Paints a Claw Motif |
|
Maw Motif |
2s |
3s |
Spell |
Paints a Maw Motif. |
|
Living Muse |
Instant |
16s |
Ability |
Consumes your current sketch to use a Muse ability. Using a sketch allows you to paint a different sketch with Creature Motif. |
|
Pom Muse |
Instant |
16s |
Ability |
Attack with a potency of 8,000 to the target and all enemies nearby it. Also increases your damage dealt and healing potency by 20% Can only be used after painting a Pom Motif. |
|
Winged Muse |
Instant |
16s |
Ability |
Attack with a potency of 8,000 to the target and all enemies nearby it. Also reduces your spell cast and recast times by 25%, and increases your movement speed by 25%. Can only be used after painting a Wing Motif and after casting Pom Muse. |
|
Clawed Muse |
Instant |
16s |
Ability |
Attack with a potency of 8,000 to the target and all enemies nearby it. Also increases damage taken by the targets by 10% and reduces all healing efficiency on them by 20%. Can only be used after painting a Claw Motif and after casting Winged Muse. |
|
Fanged Muse |
Instant |
16s |
Ability |
Attack with a potency of 8,000 to the target and all enemies nearby it. Also applies a 4,000 potency Damage Over Time for 12 seconds. Can only be used after painting a Maw Motif and after casting Clawed Muse. |
|
Mog of the Ages |
Instant |
2.4s |
Ability |
Attack with a potency of 12,000 to all enemies in a straight line. Also silences enemies for 2 seconds. Can only be cast after using Pom Muse and Winged Muse. |
|
Retribution of the Madeen |
Instant |
2.4s |
Ability |
Attack with a potency of 12,000 to all enemies in a straight line. Also stuns enemies for 2 seconds. Can only be cast after using Mog of the Ages, Clawed Muse and Fanged Muse. |
|
Smudge |
Instant |
16s |
Ability |
Dashes 15 yalms forward. Also increases your movement speed by 25% for 4 seconds. Grants you Quick Sketch, allowing you to immediately draw a Motif without cast time (recast time is applied as normal). |
|
Tempera Coat |
Instant |
20s |
Ability |
Grants a shield of 12,000 potency to yourself, lasting for 10 seconds. Reduces cooldown by 5 seconds when the barrier is consumed. Allows you to cast Tempera Grassa. |
|
Tempera Grassa |
Instant |
2s |
Ability |
Removes Tempera Coat from yourself, and grants a shield of 6,000 potency to yourself and all allies nearby, lasting for 10 seconds. Reduces cooldown by 5 seconds when the barrier is consumed. |
|
Star Prism |
Instant |
2.4s |
Spell |
Attack with a potency of 16,000 to the target and all enemies nearby it. Also restores HP of yourself and all nearby allies by 16,000, while increasing their damage dealt by 10% for 15s. Can only be cast after using Advent of Chocobastion. |
If you played enough Pictomancer in PvE, you’ll quickly realize how similarly most of the skills work. Fire in Red triggers your regular combo but changes to Blizzard in Cyan once you activate Subtractive Pallete. Holy in White also changes to Comet in Black. Deactivating it returns the skills to normal and won’t break your combos.
Your “Fire in Red” combo is weaker but easier to cast, while the Blizzard in Cyan combo is stronger with much longer cast times. The main difference is that the Fire in Red combo is instant, while Blizzard in Cyan has a regular 1.44 cast time.
Holy in White is weaker than Comet in Black, but also offers some healing. Despite that, the extra power offered by the black paint spell is often the better choice, especially as it always deals full damage to all targets. Holy in White is only better when you need to survive and are trying to run from the battle.
You should have Subtractive Palette active 90 percent of the time. Casts are quick enough for you to feel its downsides rarely. Disable it whenever you have to run, and kite your enemies with Holy in White and the Fire in Red combo until you regroup with your team.
Painting Motifs is crucial, but thanks to Quick Sketch from Smudge (your dash), you can instantly paint them while repositioning. This should be your main method of painting, as it saves you from being vulnerable.
Motifs are powerful, and unlock two of your best spells after you use them. Use Mog of the Ages to silence enemies and finish them before they can heal, or Retribution of the Madeen to achieve a similar result. All Motifs (and their resulting spells) are also AoEs, so they’re perfect for grouped enemies.
You can use a quick Muse > Smudge > Paint Motif > Muse combo to quickly burst a target and get a Mog of The Ages/Retribution of the Madeen ready. This also helps keep the cooldown running on your Muse charges.
Tempera Coat (your shield) also works very similarly to its PvE counterpart, so use it as needed. The party shield is weaker than the individual version, so choose carefully which one you want to use.
Limit Break Breakdown

While many Limit Breaks define how a job works in PvP, that’s not always the case. Pictomancer’s a good example of that, but its Limit Break shouldn’t be overlooked by any means.
Advent of the Chocobation gives even more utility to an already powerful kit by giving you more damage options, some extra crowd control, and access to your most powerful Spell. All at a low cooldown of 105 seconds.
|
Action |
Recast Time |
Description |
|---|---|---|
|
Advent of Chocobastion |
105 seconds |
Summons a fat Chocobo that knocks enemies back, then forms a Chocobo area around yourself. Standing in this area increases HP recovered by healing skills by 25%, while also reducing your damage taken by 25%. Also grants you Starstruck, letting you cast Star Prism. |
Pictomancer’s already a huge threat, and its Limit Break makes it even stronger. This ability makes you a bit more tankier for a while, so it’s perfect for contesting an objective or forcing enemies away from a 1v1, as you’ll have a clear advantage. Combine it with your consistent shields and you’ll be practically unkillable.
Star Prism is locked behind your LB, and it’s your most powerful ability. Use it as soon as you can to make use of that sweet 15% damage boost. This is an AoE spell as well, making your already scary area damage even scarier. Combine it with two Comets in Black back-to-back for even funnier results. Mog or Madeen also works.
Common Actions Breakdown

|
Action |
Cast Time |
Recast Time |
Information |
|---|---|---|---|
|
Sprint |
Instant |
1.50s |
Increases your Movement Speed by 50%. Ends after using any other Action. |
|
Guard |
Instant |
30s |
Protects yourself with a barrier that reduces 90% of the damage taken for 5 seconds. Also makes you immune to crowd control effects (Silence, Stun, Snare, etc). You cannot use any other Action while in the barrier. |
|
Purify |
Instant |
24s |
Instantly removes the effects of Stun, Heavy, Bind, Silence, Deep Freeze, and Miracle of Nature. Also gives you Resilience, which makes you ignore those same effects for the next 3 seconds. Can be used under the effect of the mentioned effects. |
|
Recuperate |
Instant |
1s |
Immediately heals you for 15,000 HP. Costs 2500 MP. |
|
Standard-Issue Elixir |
4.5s |
5s |
Restores your HP and MP to maximum. Taking damage while casting it cancels the ability. |
The same abilities every other Job has in PvP. Using them alongside your regular skills (especially Recuperate) is essential for victory. You won’t have healers to take care of you in every match, so you alone are responsible for your health.
General Strategy

Combos for Pictomancer are very straightforward, so as long as you keep your cooldowns running, you’re probably doing a good job. This means not sitting on your Muse/Comet in Black charges. You can always save one for a surprise burst on a target, but never hold two charges for too long.
This also works for Recuperate. It only costs MP, which you recover throughout the battle anyway. If you’re low on MP, consider Smudging away and using your Elixir instead.
The Blizzard in Cyan combo is easy to pull off, and you can use your other skills without breaking it. Weave your Muses between your combo and use your Mog/Madeen for finishing off targets or hitting multiple enemies.
A general step-by-step for a match would be:
- Paint a Motif and activate Subtractive Palette outside battle.
- Activate Tempera Coat/Tempera Grassa when engaging enemies.
- Open with Comet in Black > Pom Muse > Blizzard in Cyan > Stone in Yellow > Thunder in Magenta.
The combo above ensures you spend your charges early while dealing decent damage to a target. You should also do the other steps whenever you respawn or disengage.
If enemies are grouped, you can follow with:
- Comet in Black > Smudge > Winged Motif > Winged Muse > Mog of the Ages > Blizzard/Stone/Thunder combo.
While each Muse has a special effect, you usually only want that extra damage immediately, as well as preparing Mog/Madeen. Focus on whoever was hit by the Muse, as its effects are always either a debuff to the target or a huge buff for yourself.
Outside of that, you should focus on squishier targets (usually Healers, Casters, or Physical Rangeds), but pay attention to whoever your team is focusing. Sometimes it’s better to bring down a low-health Tank first, especially if they also have no MP left.

When using Smudge to sketch a quick Motif, slide to the sides and never towards your opponent. Only slide forward if you’re really confident you’ll be safe. Staying alive is always more important than getting a kill.
Tempera Coat/Tempera Grassa should always be on cooldown. Use Tempera Grassa when you’re staying behind your team, as you’ll help your Melees/Tanks much more. But if you notice the enemy focusing on you or are conquering an objective, use Tempera Coat exclusively until you’re safe.
Use your Limit Break for bigger fights. Standing inside the Bastion makes you much more powerful, so try to cast your spells from it. Enemies will usually try to bait you away from it, but unless you need to chase them, don’t bite that. Star Prism should be used next to your allies so they also get the damage buff.
Crystalline Conflict Strategy

5v5 is where Pictomancer really shines. Its powerful combos can pressure the enemy team like no other, and your Limit Break is huge for conquering objectives, especially when paired with other “zone” Actions, like Sage’s Limit Break.
Let the Melee and Tanks take the frontline while you weave your spells from afar. Use walls and other cover you can find to avoid line of sight, as long as you can still attack them yourself. The Palaistra is one of the best maps for that, as there are plenty of covers to take.
You should always focus enemies standing on the objective, while still prioritizing the more fragile ones. Comet in Black + any Muse is great for pushing people away, especially if they’re grouped.
Standing on the objective is a must (especially when reaching checkpoints), but be careful when you do it. Being alone on an objective is a no-go, unless you’re sure no one’s coming for you.

Keep dashing away with Smudge whenever someone focuses on you. If they’re a caster, there’s a good chance they’ll stop as soon as you find cover. Take this chance to paint a Motif and return to battle with full strength. Never waste a Quick Sketch charge.
If your team is being pushed back, immediately deactivate Subtractive Palette and run. But don’t stop attacking for a second, and keep your Fire in Red combos going, with the occasional Holy in White for some healing.
Your Limit Break is best used when conquering checkpoints. Use it to push enemies back before they can try to recover it, then stand on it to get the buffs.
This also unlocks your strongest spell, and the Star Prism > Muse > Mog/Madeen combo can devastate unprepared targets.
There will be times when you won’t be able to stand in your Bastion area. This is unfortunate, but acceptable. As long as Star Prism went out, your LB was worth it.
Frontline Strategy

Frontline is a vastly different game mode with 72 players, but your core gameplay won’t change much. Your basic plan remains the same, and you’ll still be painting Motifs and casting nonstop colored spells.
However, there are many more objectives to capture in all Frontline modes. You cannot do it alone, so stay grouped up for as long as possible. Avoid being alone at all times, as this usually means certain death.
For Shatter Frontlines (The Fields of Glory), breaking the crystal is important, but fending off enemies is a higher priority. Thinning their ranks takes their points away and ensures they won’t get points from their objectives.
During the big fights, your goal remains the same: disrupting the enemy team with your powerful AoEs and crowd control skills. However, they get even more valuable as enemies are often stacked.
Don’t hold out on your Limit Break for long in here, as using it early can be the decisive factor for getting more kills. It’ll be back in less than two minutes, anyway.
Subtractive Palette spells are still a priority. However, as you’ll be running a lot more, you might find yourself turning it off much more than in 5v5s. Don’t forget to apply it again when you have the chance.
Snowballing is much more dangerous on Frontlines. Maintaining your Battle High vastly increases damage and healing done, so staying alive is much more important here.
The higher your Battle High, the harder you’ll be to kill, but you know your limits. You’re still a fragile caster, so being stunned at the wrong time still means death for you.
If you ever see someone isolated, target them immediately. Your team will likely follow, especially if you manage to Stun/Silence them. Those easy kills are an easy way to build more Battle High.
As long as you keep following your team, you shouldn’t have much trouble. Follow callouts (if you have someone giving those) and be careful with ambushes. Frontline is all about fighting in groups, and the Pictomancer happens to be great in those fights.

Next
Final Fantasy 14: Guide To Playing Sage In PvP
Despite being a healer, Sage can be a pretty destructive force in FFXIV’s competitive modes.