There are a lot of different things that Sniper Elite: Resistance is going to throw at you throughout all of its different missions. Particularly when you’re on your first time through each mission, you aren’t going to know what to expect, or have much of a plan of attack for anything past the here and now.

Related
Sniper Elite: Resistance – All Kill Challenges, Ranked
Here are the best kill challenges in Sniper Elite: Resistance!
Luckily, Sniper Elite: Resistance is built around playing missions more than once, and has a lot of different weaponry and items that you can bring along with you on a mission. If you’d like a loadout that’s going to be able to take any situation the game can throw at you, look no further.
Best Campaign Loadout

The point of this loadout is to have the tools available to handle any scenario that the campaign can throw at you. That can be a tall order, as there are a lot situations, some of which can come at you quickly, and unexpectedly.
Loadout Overview
Here’s a quick look at the full loadout, before we get into the details of everything included.
|
Slot |
Item |
|---|---|
|
Primary Weapon |
Lee NO.4 |
|
Secondary Weapon |
SIG MKMS |
|
Pistol |
Welrod |
|
Item 1 |
Med Kit |
|
Item 2 |
Bandage |
|
Item 3 |
Grenade |
|
Item 4 |
Decoy |
|
Item 5 (Gained with skills points) |
Teller Mine |
|
Item 6 (Gained with skills points) |
TNT |
Best Primary Weapon

For the Primary Weapon, you should use the Lee NO.4 is in competition for the best weapon in the game. It has the best effective range at base level compared to every other weapon, and it has good enough damage and a solid fire rate, to boot.
Because of the fire rate, this is a weapon that can conceivably be used in the more medium-range engagements; it’s not only restricted to long-range. Missing a shot isn’t too big of an issue, because the follow-up will be around one second after.
Best Attachments For The Lee NO.4
As with every weapon, the Lee NO.4 can be improved with the right attachments. For our purposes in this loadout, it needs to be able to compete at long and mid-range; we’ll get into why we need it for mid-range in a second.
|
Slot |
Attachment |
|---|---|
|
Barrel |
Lightened And Blued |
|
Muzzle |
MK II Suppressor |
|
Magazine |
20RD Magazine |
|
Stock |
Bullet Loops |
These attachments are going to make the Lee NO. 4 quieter, but just as importantly increase the firing rate considerably. Fights between 30-600 meters are going to be comfortable with this weapon, meaning you won’t need to swap for many situations.
When you need to be even quieter, but aren’t confident in hitting a target with a pistol, equip Subsonic rounds on the Lee NO.4, reducing the audible range even further below 57 meters.
Best Secondary Weapon

For the Secondary Weapon, use the SIG MKMS SMG is, ideally, not going to be used very often in this loadout. That’s not to say that it isn’t good, because it is, and it holds its own in situations where it’s needed. But, it can be a difficult weapon to keep on an enemy, and many fights can be handled by either the Lee NO.4 or the Welrod.
Instead, the MKMS is here for those situations where your cover is blown, and you have multiple enemies in close-medium range that are gunning for you. The MKMS can dispatch those enemies fairly quickly with its absurd fire rate and great damage-per-second. But, it has trouble in the longer-medium ranges, because of the stability.
Best Attachments For The SIG MKMS
Here are the MKMS attachments you’ll want to consider for this loadout.
|
Slot |
Attachment |
|---|---|
|
Barrel |
Precision Rifling |
|
Muzzle |
Mcleed Control Brake |
|
Magazine |
Extended Magazine |
|
Receiver |
Lightened Bolt |
These attachments are going to make the MKMS a bit easier to control, which is the most important thing for the role that it has in this loadout. This weapon is not going to be quiet, and it’s not going to have many use cases; but when it comes out, you need to be able to hit your shots with it.
The Lightened Bolt is also going to increase the rate of fire on the MKMS, effectively increasing its damage-per-second.

Related
Sniper Elite: Resistance – Difficulty Modes, Explained
Adjust your gameplay to the perfect experience with this guide.
Best Pistol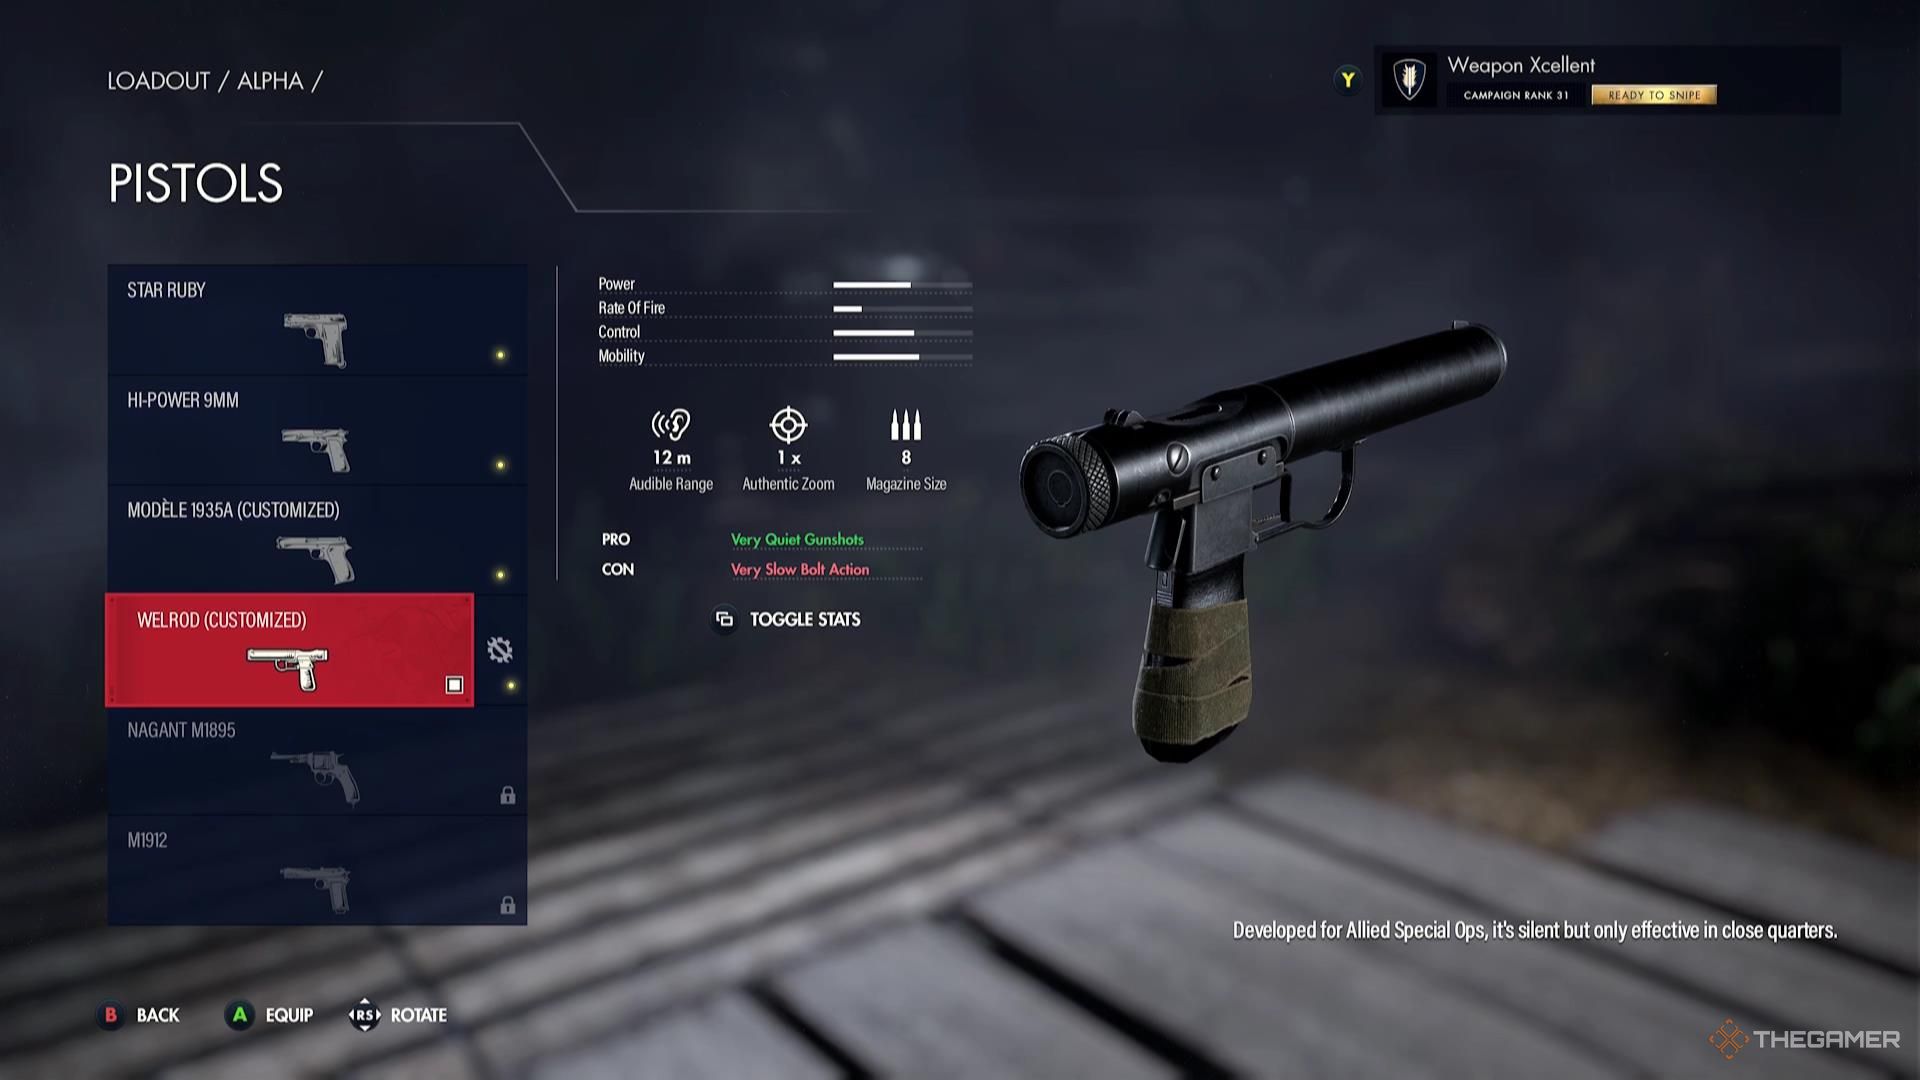
The Welrod is undoubtedly the most difficult pistol to use in the game, but it’s also the best, in a lot of situations.
The Welrod has the second-most damage of any pistol in the game, behind only the Nagant M1895. More importantly for our purpose here, it’s the quietest pistol in the game, with a default audible range of only 12 meters.
For our purposes in this loadout, you’re going to be using the Welrod quite a lot, especially if you don’t have many suppressing options unlocked yet for your Lee NO.4. There are a lot of situations in this game where you’ll be sneaking around enemies in close-range; if you can keep them from knowing you’re there, the fight is going to go a lot smoother.
Best Attachments For The Welrod
|
Slot |
Attachment |
|---|---|
|
Muzzle |
Solid Stealth Baffles |
|
Rear Grip |
Khaki Grip Tape |
|
Receiver |
Reinforced Overpressure |
With these attachments, the Welrod is going to be even quieter, with an audible range of only seven meters. That is, effectively, a silent weapon, because in almost any situation, the person you’ll be firing the gun at will be the person inside seven meters.
The Khaki Grip Tape is going to help the weapon stay a little bit steadier when aiming; missing with this weapon is extremely punishing, with about two-seconds in between shots. But, when used patiently, and when hitting Nazis just below their helmet or at the base of their spine, it’s going to put them down in one shot, without anyone being the wiser.
Best Items

With this loadout intended for use in every scenario, this loadout brings a lot of different utility along with it.
Med Kit

The Med Kit is the best healing item in the game. It might take a bit to use, but it can bring you from almost dead to fully alive. With the ‘Back In The Fight‘ skill from the Combat skill tree, you can also use a Med Kit to revive yourself.
Bandage

The Bandage is the smaller healing item, restoring one health chunk and stopping any bleeding. Much of the time, you’re only going to be down one or two health chunks, and bandages are going to be the better option. They’re also scattered around the map, and can be found when looting enemies.
When possible, always use Bandages instead of a Med Kit; the Med Kit can bring you back from the brink of death, and Bandages can’t, unless you have the ‘Combat Medic’ skill in the Combat skill tree.
Grenade

Grenades are multipurpose, and any grenade in your inventory gives you the option of using one of three grenades:
- Grenade – A typical grenade, which explodes at the end of the fuse.
- Sticky Grenade – A typical grenade, but one that sticks to the surface that it lands on. This is particularly great for smaller vehicles, or if you need a grenade not to bounce off of a wall.
- Impact Grenade – A very quiet grenade that explodes on impact, knocking out enemies nearby. This is perfect for a couple of enemies standing near each other, as it will put them both down without making much noise.
An Impact Grenade will still blow up an explosive nearby, which will then create a loud explosion. And, incidentally, be lethal.
Decoy

Decoys can be used to draw enemy fire away from you, either as a distraction, or as a way to gain intel. Enemies that shoot the Decoy will be tagged for you, making it a great way to tell where enemies are.
Decoys come in the default or Fused variety. Fused Decoys will pop up and make a sound at the end of their fuse, drawing enemy attention to them.
Teller Mine (Optional)

The last two item slots in this loadout require the ‘Extra Item Slot‘ skills in the Equipment skill tree, and so the least important items have been selected for them. That being said, these items are far from useless.
The Teller Mine has two variations, and like other items, having one Teller Mine affords you access to either of them:
- Teller Mine – This will explode when a single enemy steps on it.
- Pressure Mine – This creates a bigger explosion, but requires more weight to detonate. Usually, this is going to be used on vehicles, either destroying them or at least disabling the vehicle’s movement outright.
Vehicles aren’t going to present a problem in every mission, but they will be in certain ones, and the ability to keep the vehicle in one location can do a lot to help you maneuver the map.
For the default Teller Mine, these are great for setting up around your location while you’re sniping. If enemies do happen to figure out your location, some of them are liable to rush you. If you’ve set up Teller Mines in the right locations, they’ll walk right into them.
TNT (Optional)

TNT is a high explosive that is generally going to be used for more heavy-duty things, like vehicles. The default TNT requires damage to detonate, but there are fused variants, too. This is less easy to get onto a vehicle in motion than a Sticky Grenade, but is great for vehicles that have stopped moving.

Next
Sniper Elite: Resistance – Axis Invasion, Explained
It’s kill or be killed in Sniper Elite: Resistance’s Axis Invasion mode.