
Playing Final Fantasy 7: Rebirth on Hard Mode is, understandably, no easy feat. With various modifiers to make the game more challenging and restrictions on item use and MP restoration, getting through this challenge can be particularly brutal.
This Final Fantasy 7: Rebirth guide will discuss the restrictions imposed by hard mode, along with the benefits offered in exchange, and suggest strategies and useful items to make your hard mode experience easier. Playing hard mode gets a lot easier with proper preparation, so it’s worth making sure you have at least some of the items suggested further in before you go in.
Related
Final Fantasy 7 Rebirth: 10 Best Broadsword Skills Cloud Can Equip, Ranked
Cloud has a lot of powerful Broadsword skills to choose from in Final Fantasy 7 Rebirth; here are the best ones you should use.
Hard Mode Restrictions and Benefits

The first and most simple change in Hard Mode is that enemies will have more health and deal more damage. This applies to every enemy in the game, including bosses, making their most dangerous attacks even less forgiving than they were on other difficulty settings.
In Hard Mode, players are unable to use items during combat. This means no Phoenix Downs, no Potions, and no Ethers. It also means no easy access to Status Effect removal. A good way to make Hard Mode a bit easier is to outfit a character with the psychic’s charm so they can’t be silenced, and then give them healing and status removal spells via materia. Ideally, you’ll use someone like Aerith, who has plenty of MP by default and can use her Soul Drain skill to regain MP from enemies as needed. Items can still be used when not in combat, so it’s still worth carrying plenty of HP and MP restorative items, so you can keep your team at full strength during long dungeons.
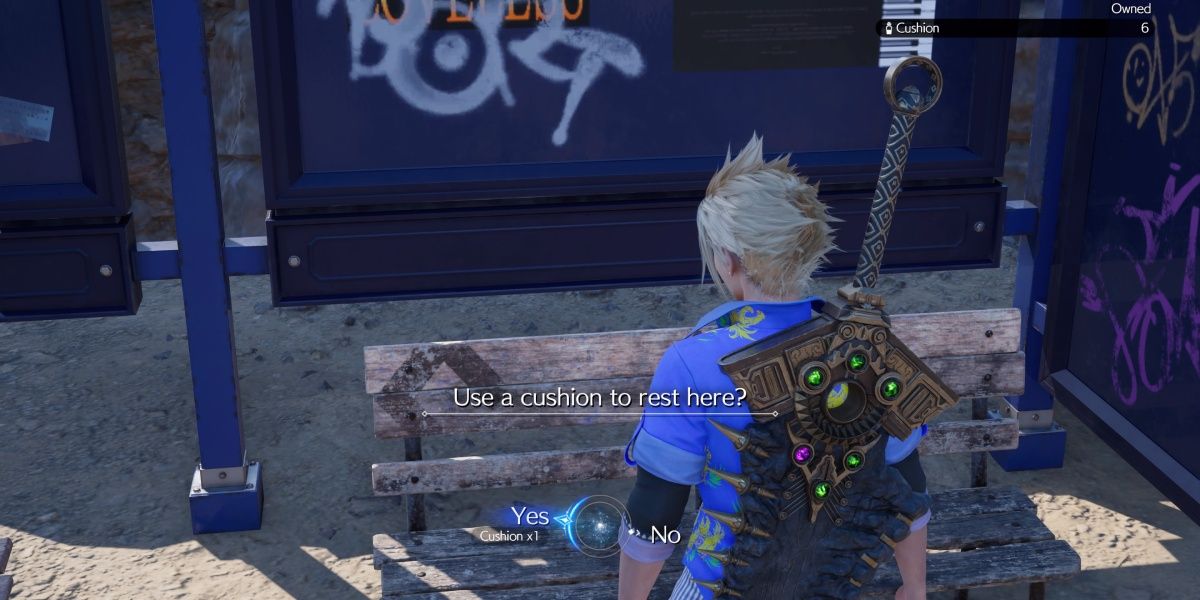
Another way Hard Mode makes things trickier is by removing MP restoration from the Benches found in dungeons. This means you’ll need to carry extra MP restoring items (ethers and the like) to top off your spellcasters. It’s important to note that broken benches at Chocobo Stops can still restore your MP, though they cost a cushion to use, so you can use them for a full restore when exploring the open world. Finally, once you start a Chapter in Hard Mode you’re locked into it until you finish it or exit to the chapter select. There’s no way to change the difficulty midway through without losing your progress through that chapter.
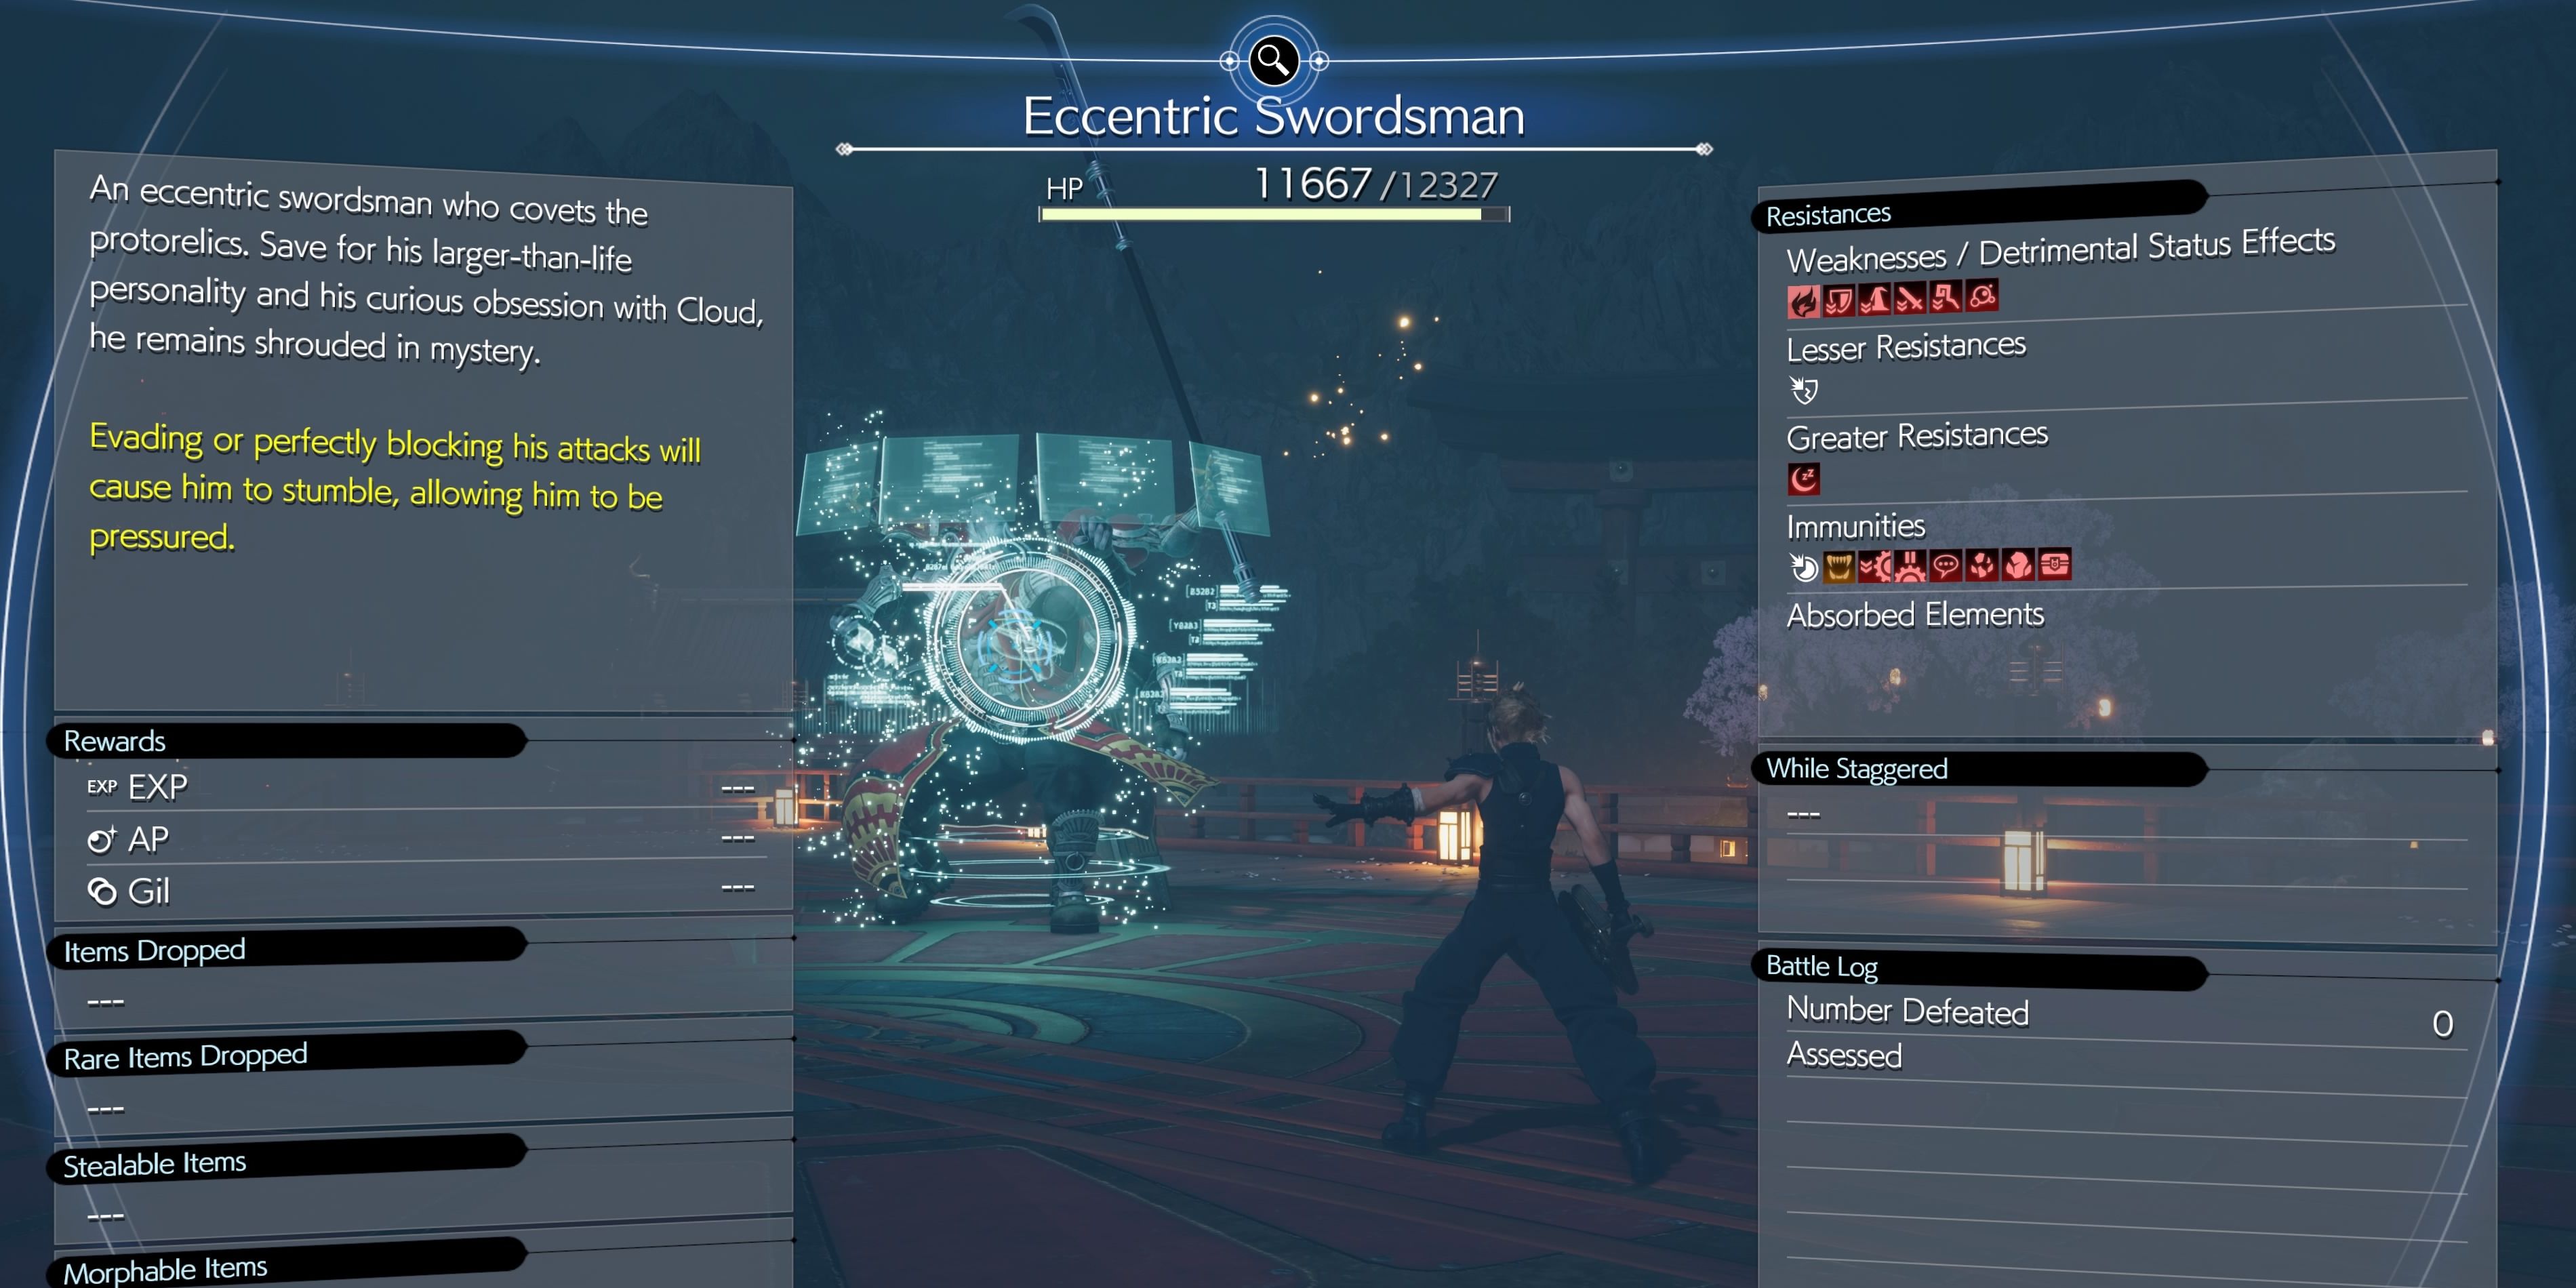
In terms of perks, Hard Mode offers increased Experience and AP gain, making it easier to reach higher levels and improve your Materia. It also offers you access to several new combat simulator challenges via Chadley. To access the new Combat Simulator Challenges you’ll need to run through chapter 17 on Hard Mode until you can reach Chadley, though fortunately, you don’t need to play through every chapter up to that point on Hard Mode to gain access.
General Hard Mode Tips and Tricks
You should do a few things to make your experience with Hard Mode a little easier. First, it’s important to adjust your equipment, especially your materia, according to the enemies you’re facing. Hard Mode doesn’t pull its punches and enemies have more health, so exploiting weaknesses becomes all the more essential to dealing damage. For similar reasons, it’s important to use your MP more conservatively, rather than firing all your most powerful spells at any and every opportunity. Since MP can’t be restored at normal benches, you’ll need to carry plenty of MP-restoring items and take advantage of Chocobo Stops to keep your MP topped up after fights.
Learning how to time perfect blocks and take advantage of the Precision Defense and Steadfast Block materia is another great way to keep your party alive and build up ATB when facing these more dangerous foes. With good timing, many attacks can be nullified entirely.
Equipment Tips and Tricks to Make Hard Mode Easier
Materia

The first and most important thing you should do when preparing for hard mode is acquire and max out a few Materia. To help you deal with the reduced opportunities to heal and restore MP, you should max out some HP Up and MP Up Materia to give yourself a boost. From there, having the Elemental Materia maxed out and using it to absorb whatever elemental damage a boss uses most is a great way to give yourself extra healing and deal with dangerous foes. Paired with a Provoke Materia on Cloud or Red XIII, this can keep the boss from targeting your squishier allies while keeping your tank of choice nice and healthy.
Precision Defense and Steadfast Block are similarly helpful, especially when on Red or Cloud like the aforementioned combo. Being able to nullify damage with good timing and build up ATB quickly just by blocking will be vital against tough opponents. Enemy Skill is a great choice too, providing a ton of stat bonuses just by equipping it and allowing you access to skills like Sonic Boom to quickly apply Bravery and Faith while dishing out a decent bit of damage. Skills like Mind Blast and Gorgon Shield can be helpful against enemies vulnerable to Paralysis and Petrification, while Plasma Discharge provides extra bursts of damage as you engage in melee.

Having a maxed-out Magnify Materia for your spellcaster of choice will hugely help you with handling groups of enemies, letting you hit their weaknesses and wipe them all out at once in many situations. Alternatively, you can use it with a Cure Materia to give your healer a way to top up the entire party at once. Prayer is another great way to do this and has the added benefit of freeing up your Magnify Materia to use elsewhere.
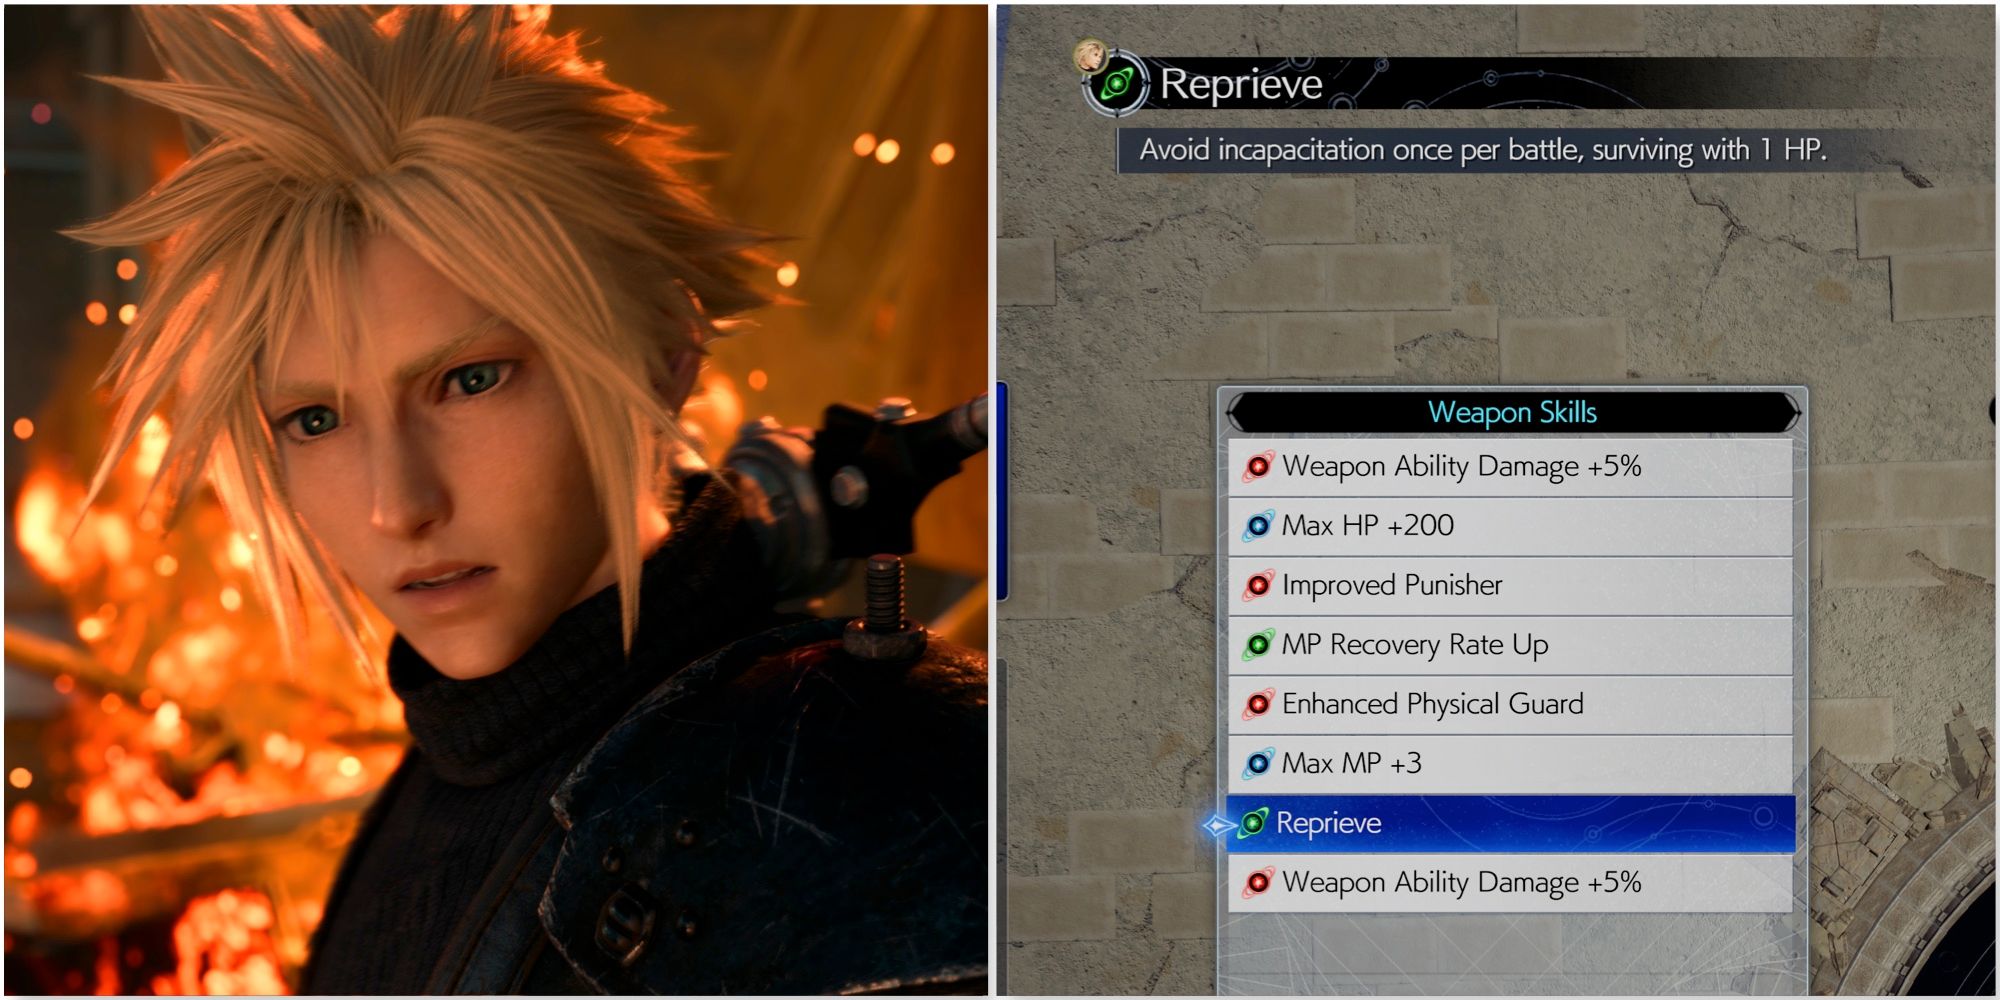
If possible, you want every member of the party to have HP and MP Up Materia, along with Healing and Revival Materia. This will help a ton with keeping your team alive and giving Precision Defense and Steadfast Block to as many people as possible will let you stretch that extra HP even further, so it’s worth considering that too. Using HP Absorb and MP Absorb Materia is another great way to keep people in the fight, though you can’t get more than two of each, so you’ll have to choose who gets them carefully. Giving extra Prayer Materia to any Party Member with the room for it is a good way to have group healing on demand for emergencies.
Armor
In terms of equipment, it’s important to grab the strongest available armor in the game: Cetran Armlet, Cetran Bracer, and the Hades Armlet. The former two offer eight Materia Slots while the latter has seven, giving you plenty of room to equip anything you might need. Since only one copy of each is available in the game, players looking to outfit the rest of their team should also pick up the Garm Bangle and Varvados Bracelet for the former’s excellent defense and the latter’s excellent magic defense.
When deciding who gets those three incredibly powerful armor pieces, you should consider that the Cetran Bracer has 42 defense and magic defense, making it the most powerful of the three. As such, it’s best equipped to whichever character you control the most in battle. Good choices would be Cloud and Aerith, since the former is an excellent all-rounder, while the latter can make great use of the four material links on the Bracer. Whichever of the two doesn’t get the Bracer should be given the Armlet, since it’s the second strongest with 33 defense and magic defense. With only one less point in both defenses, the Hades Armlet should go to a character who needs solid defenses and can make good use of its seven materia slots.
Accessories
You should make sure your healer is wearing the Psychic’s Charm so they can’t be silenced, ensuring they can always throw out healing and status-removing spells as needed during a fight. Aerith is a good candidate, but her excellent magic attacks make her a good candidate for the Genji Gloves instead. These gloves allow the wearer to break the damage cap of 9,999. By exploiting elemental weaknesses with damaging spells you can easily break the limit with Aerith or Cloud, making them the best candidates for this item.
For a tanky character like Red XIII, you should equip the Genji Ring for a 15% reduction in damage taken. Since this comes at the price of damage dealt, it’s not suitable for your main damage dealers. The Genji Earrings, on the other hand, increase damage dealt and taken by 15%, making them well-suited to quick characters with high damage outputs (Tifa or Yuffie would be a good choice here.) In the same vein as the Genji Ring, the Enhanced Karmic Cowl is a fantastic defensive choice that grants 50 defense and magic defense. As a bonus, it provides immunity to slow and instant death effects to help you handle certain frustrating enemies (tonberries come to mind.)
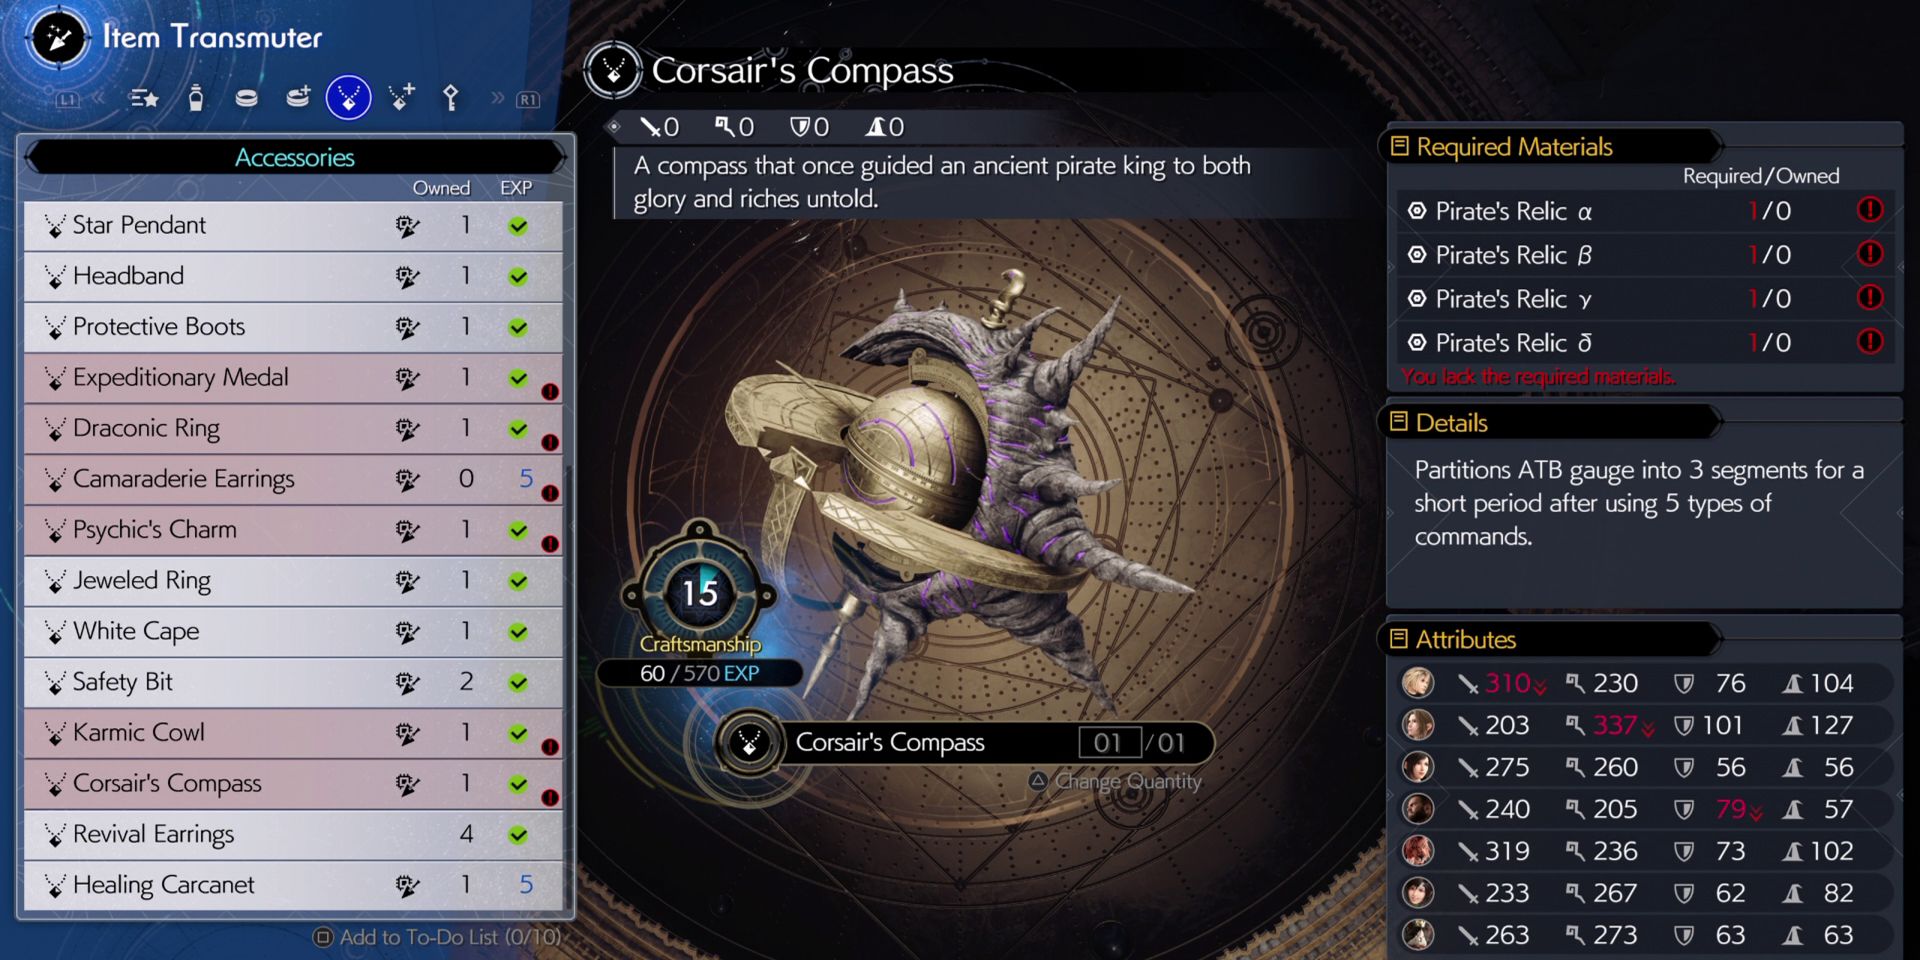
The Corsair’s Compass is a fantastic choice for any character, allowing them to split their ATB Gauge into three segments after using five differently named commands. Since this is otherwise only possible through the United Refocus Limit Break and allows you to use your commands more frequently, it’s a top-tier addition to any loadout. For similar reasons, the Chocoking’s Cape is a fantastic choice for characters that you want to act at the start of battle, providing two filled ATB segments at the start of every fight. Another good option for hitting the ground running would be the Hermes Boots, which provide Haste at the start of the fight to help you build ATB even faster.

- Released
-
February 29, 2024
- ESRB
-
T For Teen Due To Blood, Language, Mild Suggestive Themes, Use of Alcohol and Tobacco, Violence
Source link