What are the Black Myth Wukong bosses? Not to be outdone by the 81 trials in Journey to the West, Game Science’s inaugural action RPG includes a gauntlet of over 100 bosses to beat on your quest to resurrect the long-lost Sun Wukong. We’ve combed through each area on this arduous journey to uncover every Black Myth Wukong boss per chapter so you can clear every challenge and reap the rarest boss rewards.
Bosses form the basis of progression in Black Myth Wukong, and learning how to beat them is the only way to complete your first playthrough ahead of Black Myth Wukong new game plus. Some bosses have multiple phases to catch you off-guard, while others can be weakened with secret items found in the action-adventure game’s hidden areas. Our full list of every Black Myth Wukong boss includes all main bosses and optional bosses and your reward for beating them.
All Black Myth Wukong bosses, locations, and rewards
Here are all the bosses in Black Myth Wukong in order:
Chapter One – Black Wind Mountain
| Boss | Type | Location | Reward |
| Erlang, the Sacred Divinity | Main | Prologue / Tutorial | None |
| Bullguard | Main | Forest of Wolves, Front Hills | x2 Yarn, Immobilize (spell) |
| Guangzhi | Main | Forest of Wolves, Outside the Forest | Stone Spirit, Wolf Guai: Red Tides (transformation) |
| Wandering Wight | Optional | Forest of Wolves, Outside the Forest | x3 Yarn, Blood of the Iron Bull, Cat’s Eye Beads (curio), Wandering Wight (spirit) |
| Lingxuzi | Main | Forest of Wolves, Guanyin Temple | x3 Yarn, Grey Wolf Mask (headgear), Mind Core |
| Baw-Li-Guhh-Lang | Optional | Bamboo Grove, Snake Trail | x1 Stone Spirit, Baw-Li-Guhh-Lang (spirit), Tadpole |
| Guangmou | Main | Bamboo Grove, Snake Trail | Guangmou (spirit), Stone Spirit, Blood of the Iron Bull |
| Whiteclad Noble | Main | Bamboo Grove, Marsh of White Mist | x3 Yarn, Jade Fang, Yarn |
| Elder Jinchi | Optional | Secret: Ancient Guanyin Temple, Grand Chamber | Fireproof Mantle (vessel) |
| Red Loong | Optional | Forest of Wolves, Loong Claw Grove | x2 Yaoguai Core, Boshan Censer (curio), Thunder Tail, Loong Pearl, Mind Core, Silk |
| Black Wind King | Main | Black Wind Cave, Cave Interior | x1 Stone Spirit, Cloud Step (spell) |
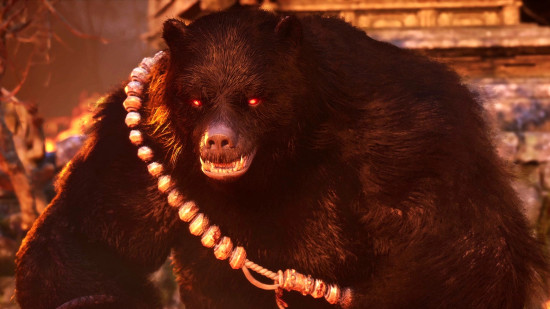
| Black Bear Guai | Main | Black Wind Cave, Bodhi Peak | Craving Eyes (relic), Flame Ebongold, x5 Yarn, x2 Silk Yaoguai Core, Stone Spirit, Mind Core |
Chapter Two – Yellow Wind Ridge
| Boss | Type | Location | Reward |
| Lang-Li-Guhh-Baw | Optional | Sandgate Village, Village Entrance | x2 Silk, x2 Yarn, Tadpole, Evil Repelling Medicament (formula), Stone Spirit, Yaoguai Core |
| Earth Wolf | Optional | Sandgate Village, Village Entrance | Yarn, Tiny Piece of Gold, Blood of the Iron Bull, Earth Wolf (spirit) |
| King of Flowing Sands & Second Rat Prince | Main | Sandgate Village, Village Entrance | Pungent Flesh Chunk (key item), Second Rat Prince (spirit), Blood of the Iron Bull, Stone Spirit, x2 Silk, x2 Yaoguai Core |
| First Prince of Flowing Sands | Optional | Sandgate Village, Valley of Despair | Arhat Gold Piece (key item), Stone Spirit, Yarn, Silk |
| Man-in-Stone | Optional | Fright Cliff, Squall Hideout | Azure Dust (spell), Man-in-Stone merchant unlock |
| Mother of Stones | Optional | Fright Cliff, Squall Hideout | Stone Essence (key item), Stone Spirit, Yaoguai Core |
| Stone Vanguard | Main | Fright Cliff, Rockrest Flat | Sternness of Stone (key item), x3 Silk, Mind Core |
| Tiger Vanguard | Main | Crouching Tiger Temple, Temple Entrance | Rock Solid (spell), Keenness of Tiger (key item), Mind Core, x2 Yaoguai Core |
| Tiger’s Acolyte | Optional | Yellow Wind Formation, Windrest Hamlet | Tiger’s Acolyte (spirit), Old Rattle-Drum (key item), Blood of the Iron Bull, x2 Yarn, x2 Silk |
| Shigandang | Optional | Fright Cliff, Rockrest Flat | Skandha of Feeling (key item), Mind Core, x2 Yaoguai Core, Heart of Stone, x3 Silk |
| Mad Tiger | Optional | Sandgate Village, Village Entrance | Mad Tiger (spirit), Blood of the Iron Bull, Yaoguai Core, Stone Spirit |
| Gore-Eye Daoist | Optional | Yellow Wind Formaation, Windseal Gate | Gore-Eye Daoist (spirit), Blood of the Iron Bull, x2 Yarn, x2 Silk |
| Yellow-Robed Squire | Optional | Fright Cliff, Rockrest Flat | Snout Mask (headgear), Kingdom of Sahali secret location unlock |
| “Tiger Vanguard” | Optional | Secret: Kingdom of Sahali, Sandgate Pass | Tiger Tally (curio), Stone Spirit, Yaoguai Core |
| Fuban | Optional | Secret: Kingdom of Sahali, Sandgate Bound | Wind Tamer (vessel), Sky-Piercing Horn |
| Black Loong | Optional | Fright Cliff, Hidden Loong Cavern | Tridacna Pendant (curio), Thunderbone, Loong Pearl, Mind Core, x2 Refined Iron Sand |
| Yellow Wind Sage | Main | Crouching Tiger Temple, Cellar | Samadhi Wind Agate, x2 Cold Iron Leaves, x5 Silk, x2 Yaoguai Core, Refined Iron Sand, Mind Core, Fuming Ears (relic) |
Chapter Three – The New West
| Boss | Type | Location | Reward |
| Macaque Chief | Main | Snowhill Path, Frost-Clad Path | None |
| Kang-Jin Loong | Main | Snowhill Path, Mirrormere | Starlit Cloud-Bidden Antler, x3 Cold Iron Leaves, Refined Iron Sand |
| Captain Lotus-Vision | Optional | Pagoda Realm, Upper Pagoda | The Spirit of Captain Lotus-Vision (key item), Cold Iron Leaves, Frostsprout Twig, Mind Core |
| Captain Wise-Voice | Main | Pagoda Realm, Mani Wheel | The Spirit of Captain Wise-Voice (key item), Mind Core, x2 Refined Iron Sand |
| Macaque Chief | Optional | Pagoda Realm, Warding Temple | None |
| Third Rat Prince | Optional | Pagoda Realm, Lower Pagoda | Ashen Slumber (spell) |
| Kang-Jin Star | Main | Turtle Island, Bitter Lake | Loong Pearl, x3 Cold Iron Leaves |
| Cyan Loong | Optional | Turtle Island, Bitter Lake | Breath of Fire (soak), Loong Pearl, x2 Fine Gold Thread, Mind Core, Mountain-Shaking Claw, |
| Chen Loong | Optional | North Shore, Bitter Lake | x2 Cold Iron Leaves |
| Yin Tiger | Optional | Zodiac Village, Village Entrance | Ebon Flow (spell), Iron Horned Helm (headgear), Iron-Tough Armor (body), Iron-Tough Gauntlets (arms), Iron-Tough Greaves (legs) |
| Apramana Bat | Optional | North Shore, Bitter Lake | x2 Cold Iron Leaves, Turtle Tear (soak) |
| Non-White | Optional | Valley of Ecstasy, Mindfulness Cliff | Non-White (spirit), Blood of the Iron Bull, Cold Iron Leaves |
| Non-Able | Optional | Valley of Ecstasy, Forest of Felicity | Maitreya’s Orb (curio) Non-Able (spirit), Blood of the Iron Bull, x2 Cold Iron Leaves |
| Lang-Li-Guhh-Lang | Optional | Valley of Ecstasy, Forest of Felicity | Tadpole, Yaoguai Core, x2 Silk, x1 Cold Iron Leaves |
| Old Ginseng Guai | Optional | Valley of Ecstasy, Forest of Felicity | Old Ginseng Guai (spirit), Ginseng Cape (chest), Blood of the Iron Bull, Millennium Ginseng Seed, Refined Iron Sand |
| Green-Capped Martialist | Optional | Valley of Ecstasy, Melon Field at the culmination of the Treasure Hunter questline | Spell Binder (spell), x2 Yaoguai Core, Refined Iron Sand |
| Captain Void-Illusion | Main | Valley of Ecstasy, Longevity Road | Spirit of Captain Void-Illusion |
| Captain Kalpa-Wave | Main | Valley of Ecstasy, Longevity Road | The Spirit of Captain Kalpa-Wave (key item), x2 Yaoguai Core, Refined Iron Sand, Mind Core |
| Non-Pure | Optional | New Thunderclap Temple, Temple Entrance | Non-Pure (spirit), Blood of the Iron Bull, Yaoguai Core, Refined Iron Sand |
| Non-Void | Optional | New Thunderclap Temple, Temple Entrance at the culmination of the Snow Fox questline | Non-Void (spirit), Blood of the Iron Bull, Tonifying Decoction, x2 Cold Iron Leaves |
| Monk from the Sea | Optional | New Thunderclap Temple, Mahavira Hall | Hoarfrost (spell) |
| Macaque Chief | Main | New Thunderclap Temple, Mahavira Hall | Yaoguai Core, Refined Iron Sand |
| Yellowbrow | Main | New Thunderclap Temple, Mahavira Hall | Hubris Nose (relic), Cosmo Radiance, x2 Fine Gold Thread, x3 Cold Iron Leaves, x2 Refined Iron Sand, Gold Tree Core, Mind Core |
Chapter Four – The Webbed Hollow
| Boss | Type | Location | Reward |
| The Second Sister | Main | Village of Lanxi, Estate of the Zhu | Gold Tree Core, Venomous Hair |
| Elder Amourworm | Optional | Webbed Hollow, The Verdure, Bridge | Proto-Amourworm (key item), Refined Iron Sand |
| Venom Daoist | Optional | Webbed Hollow, Pool of Shattered Jade | Venomous Armguard (arms) |
| Centipede Guai | Optional | Webbed Hollow, Middle Hollow | Centipede Guai (spirit), Knot of Voidness, Gold Tree Core |
| Buddha’s Right Hand | Main | Webbed Hollow, Cliff of Oblivion | Past-Echo (key item), Fine Gold Thread, x2 Cold Iron Leaves, Buddha’s Right Hand |
| Yellow Loong | Optional | Webbed Hollow, Relief of the Fallen Loong | Golden Lining (spell), Golden Carp (curio), Sea-Supporting Tendon, Kun Steel, Mind Core, Loong Pearl |
| Baw-Li-Guhh-Baw | Optional | Webbed Hollow, Middle Hollow | Buddha’s Left Hand (key item), Refined Iron Sand, Tadpole |
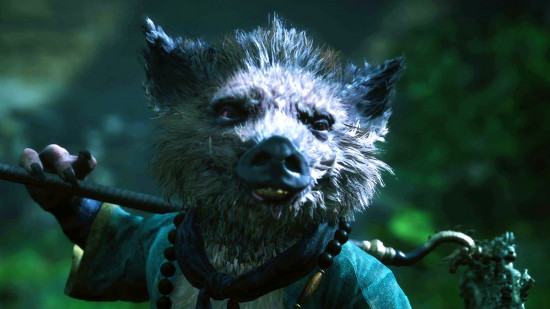
| Zhu Bajie | Main | Webbed Hollow, Hut of Immortality | Jade Moon Rabbit (curio), Bloody Stained Needle (key item), Fine Gold Thread |
| Violet Spider | Main | Webbed Hollow, The Gathering Cave | Spider Leg, Gold Tree Core, x2 Fine Gold Thread, Refined Iron Sand |
| Commander Beetle | Optional | Temple of the Yellow Flower, Forest of Ferocity | Commander Beetle (spirit), Knot of Voidness, Refined Iron Sand |
| Fungiwoman | Optional | Temple of the Yellow Flower, Court Of Illumination | Fungiwoman (spirit), Monkey-Head Fungus Seed, Silk, Knot of Voidness, Refined Iron Sand |
| Venom Daoist | Optional | Temple of the Yellow Flower, Court of Illumination | Gold Tree Core |
| The Scorpionlord | Optional | Secret: Purple Cloud Mountain, Bounds of Deity’s Abode | Stained Jade Gourd, Sky-Piercing Horn, Mind Core, Gold Tree Core, Refined Iron Sand |
| Daoist Mi | Optional | Secret: Purple Cloud Mountain, Bounds Of Deity’s Abode | Violet Hail (transformation), x2 Silk, Cold Iron Leaves |
| Duskveil | Optional | Secret: Purple Cloud Mountain, Cloudnest Peak | Weaver’s Needle (vessel), Double-Combed Rooster Blood (soak), Mind Core, Duskveil’s Horn, x2 Gold Tree Core, Kun Steel |
| Hundred-Eyed Daoist Master | Main | Temple of the Yellow Flower, Court Of Illumination | Envious Tongue (relic), Golden Glowing Eye, Kun Steel, Sky-Piercing Horn, x2 Fine Gold Thread, Mind Core, Gold Tree Core, Celestial Ribbon |
Chapter Five – Flaming Mountains
| Boss | Type | Location | Reward |
| Pale-Axe Stalwart | Main | Woods of Ember, Ashen Pass I | x3 Tiny Piece of Gold |
| Brown-Iron Cart | Optional | Woods of Ember, Ashen Pass I | x2 Silk, Cold Iron Leaves |
| Gray-Bronze Cart | Optional | Woods of Ember, Height of Ember | Refined Iron Sand |
| Father of Stones | Optional | Woods of Ember, Height of Ember | Father of Stones (spirit), Knot of Voidness, Refined Iron Sand |
| Quick as Fire, Fast as Wind | Main | Woods of Ember, Height of Ember | Refined Iron Sand, Gold Tree Core |
| Flint Chief | Optional | Furnace Valley, Valley Entrance | Flint Chief (spirit), Samadhi Fire Crystal, Knot of Voidness, x2 Silk, Cold Iron Leaves |
| Misty Cloud, Cloudy Mist | Main | Furnace Valley, Valley Entrance | Misty Cloud, Cloudy Mist (spirit), Knot of Voidness, Fine Gold Thread, x2 Cold Iron Leaves |
| Keeper Of Flaming Mountains & Yin-Yang Fish | Main | Furnace Valley, The Emerald Hall | Yin-Yang Daoist Robe (body), Celestial Ribbon, x2 Fine Gold Thread |
| Crimson-Silver Cart | Optional | Furnace Valley, The Emerald Hall | x2 Silk, Cold Iron Leaves |
| Rusty-Gold Cart | Optional | Cooling Slope | Flame Orb (curio) |
| Nine-Capped Lingzhi Guai | Optional | Field of Fire, Ashen Pass III | Earth Spirit Cap (headgear), Nine-Capped Lingzhi Guai (spirit), Knot of Voidness, Nine-Capped Lingzhi Seed, x2 Silk, Cold Iron Leaves |
| Flint Vanguard | Optional | Field of Fire, Fallen Furnace Crator | Samadhi Fire Crystal, Flint Vanguard (spirit), Knot of Voidness, Tiny Piece of Gold, Refined Iron Sand |
| Mother of Flamlings | Optional (requires x4 Flame Ore to summon) |
Field of Fire, Fallen Furnace Crater | Samadhi Fire Crystal, Knot of Voidness, Refined Iron Sand |
| Baw-Lang-Lang | Optional | Cooling Slope | Refined Iron Sand, Tadpole |
| Top Takes Bottom, Bottom Takes Top | Optional | Secret: Bishui Cave, Cooling Slope | Refined Iron Sand, Gold Tree Core |
| Bishui Golden-Eyed Beast | Optional | Secret: Bishui Cave, Cooling Slope | Bishui Beast Staff, Bull King’s armor set, Daoist’s Basket of Fire and Water (curio), Bishui Beast Bit, x3 The Bull King’s Iron Horn, Celestial Ribbon, Fine Gold Thread, Mind Core |
| Red Boy & Yaksha King | Main | Field of Fire, Fallen Furnace Crater | Mind Core, Fine Gold Thread, Celestial Ribbon, x2 Gold Tree Core, Kun Steel, Yaksha armor set, Grieved Body (relic) |
Chapter Six – Mount Huaguo
| Boss | Type | Location | Reward |
| Supreme Inspector | Main | Foothills, Verdant Path | Somersault Cloud (spell), Mind Core, Celestial Ribbon, Ascension Powder (formula), x2 Fine Gold Thread, x2 Gold Tree Core |
| Poison Chief (x2) | Optional | Foothills, Verdant Path | Mind Core, Fine Gold Thread, Cold Iron Leaves |
| Water-Wood Beast | Optional | Foothills, Verdant Path | Mind Core, x2 Refined Iron Sand |
| Son of Stones | Optional | Foothills, Verdant Path | Cold Iron Leaves |
| Lang-Baw-Baw | Optional | Foothills, Verdant Path | Celestial Birthstone Fragment (curio), Fine Gold Thread, Tadpole, x2 Cold Iron Leaves |
| Jiao-Loong of Waves | Optional | Foothills, Verdant Path | Waterward Orb (curio), Cold Iron Leaves, Fine Gold Thread, Mind Core |
| Giant Shigandang | Optional | Foothills, Verdant Path | Five Skandhas Pill (celestial medicines) |
| Gold Armored Rhino | Main | Foothills, Rhino Watch Slope | Gold Suozi Armor (body), Mind Core, x2 Cold Iron Leaves |
| Cloudtreading Deer | Main | Foothills, Deer Sight Forest | Lotus Silk Cloudtreaders (legs), Mind Core, Fine Gold Thread, x2 Cold Iron Leaves |
| Feng-Tail General | Main | Foothills, Mantis-Catching Swamp | Golden Feng-Tail Crown (headgear) |
| Emerald-Armed Mantis | Main | Foothills, Mantis-Catching Swamp | Dian-Cui Loong-Soaring Bracers (arms), Mind Core, Gold Tree Core, Refined Iron Sand |
| Erlang, The Sacred Divinity | Optional | Secret: Mount Mei, Mei-Jian Peak | None |
| The Four Heavenly Kings | Optional | Secret: Mount Mei, Mei-Jian Peak | None |
| Erlang Shen | Optional | Secret: Mount Mei, Mei-Jian Peak | Tri-Point Double-Edge Spear (weapon), Azure Dome (transformation), Kun Steel, x2 Celestial Ribbon |
| Stone Monkey & The Great Sage’s Broken Shell | Main | Birthstone, Heart Of Birthstone | NG+ unlock, Mount Mei secret location unlock, blacksmith upgrade unlock |
How to beat Black Myth Wukong bosses
Tracking down every boss in Black Myth Wukong is one thing, but defeating them is another. We’ve included a selection of strategies to beat the most difficult Black Myth Wukong bosses you’re likely to encounter. Each entry includes a general overview of each boss and their moveset, along with the best Black Myth Wukong spells and skills to help you beat them all.
Guangzhi
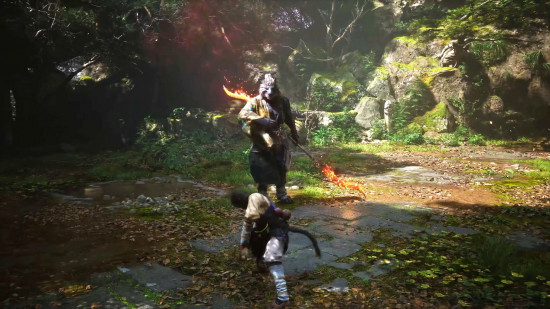
Guangzhi might be an instructor in the principles of Buddhism, but don’t expect him to go easy on you. This wolf-headed monk wields a fiery, double-headed glaive in a collection of graceful yet deadly moves that demand careful dodging to avoid. He twirls it around himself to create a circle of fire you can easily get caught up in if you’re not fast on your feet. Guangzhi is susceptible to charged heavy attacks, so use Immobilize to freeze him in place and expend your focus point.
You might be tempted to keep your distance, but don’t stray too far. Guangzhi can close the gap with a swift forward charge from the ground or air. He can also throw his glaive in a straight line directly ahead; it follows the same path to return to its master’s hand, so stay clear to avoid a backstab. Finally, watch out for the succession of downward strikes when he cartwheels toward you. This attack is easy to interrupt, but it requires careful timing to avoid taking damage in the process.
Lingxuzi
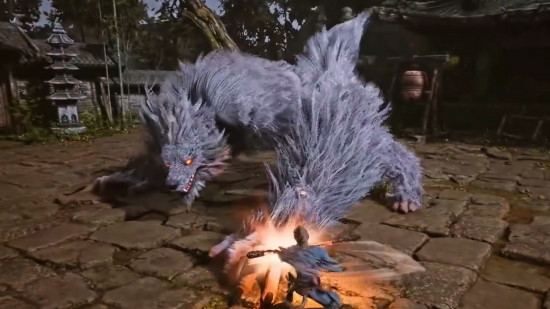
Lingxuzi is a hyper-aggressive boss that opts to use its teeth and claws in battle, with a moveset complete with forward lunges and diagonal sweeps. It also loves to close gaps by leaping into the air; anticipate the short pause before it pounces to avoid being baited into an early dodge. These frenzied attacks can be relentless and you may find the camera is your worst enemy in this fight. However, Lingxuzi is highly susceptible to fire, so don’t hesitate to use the Instructor Daolang transformation to set its pelt alight. He’s also easily staggered by charged heavy attacks, particularly if you land one on his head. Once it loses a quarter of its health, Lingxuzi leaps onto the surrounding buildings to reposition for an overhead pounce, so keep a keen eye and light foot to slay this beast.
Elder Jinchi
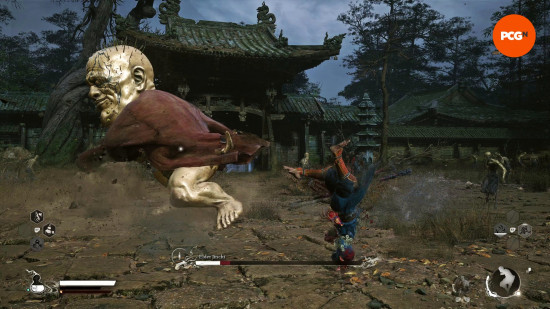
Elder Jinchi is the main secret boss in Black Wind Mountain and a major antagonist in Journey to the West, so defeating him is no easy feat. He’s an imposing figure in his own right, delivering a sequence of swipes, stomps, and leap attacks. He can also unleash a quick burst of energy with his raised palm, so try to avoid standing directly in front of him when his right hand glows golden.
Occasionally, Elder Jinchi slams his fist into the ground to create an AoE that expands in three concentric circles, so keep your distance and use this time to heal and swig a medicine or two. He can also call upon the non-hostile monks to run to your location and explode, so disengage from Elder Jinchi and focus on sprinting out of their reach. At half health, Elder Jinchi levitates into the air and can absorb nearby monks to restore his health. Take them out before they can come close, and cast Red Tides to offset any successful healing once he becomes vulnerable again.
Black Bear Guai
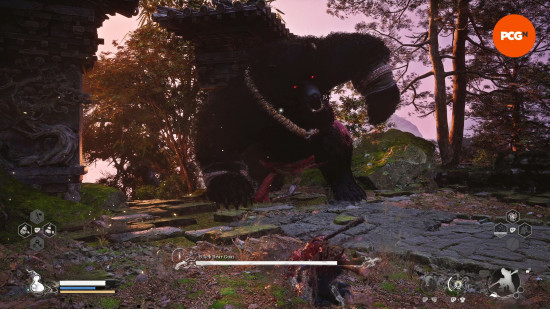
Black Bear Guai is the final Black Myth Wukong boss in chapter one, and you’re liable to use all the spells, abilities, and transformations you’ve collected thus far to beat him. His colossal size makes him difficult to dodge, and his second phase turns the battlefield into a raging inferno that inflicts burn damage over time if you stand in the wrong place. However, we’ve got plenty of tips to counter this blazing bear, so check out our dedicated strategy guide for the Black Myth Wukong Black Bear Guai boss fight to dampen his fiery spirit and collect your first relic.
King of Flowing Sands and Second Rat Prince
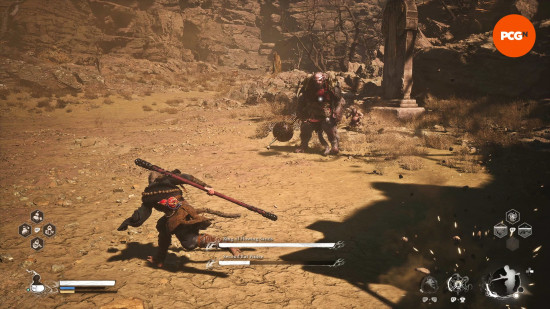
This royal father-son duo might not be at the same difficulty as soulslike kings Ornstein and Smough, but they’re still a formidable pair. The Second Rat Prince serves as the main offensive line, wielding a heavy club that he can spin and slam into the ground. He can also swing it to send a line of energy in your direction, so we recommend dodging sideways as often as possible. While the King of Flowing Sands lets his son do all the heavy lifting, he spends most of his time at the top of the nearby pillar, throwing rocks and insults. Put yourself between the two
The King of Flowing Sands and Second Rat Prince have separate health bars, so it’s up to you to decide which one to prioritize first. You can reach the King of Flowing Sands while he’s on the pillar using the Pillar Stance, but your best bet is to use Immobilize when he’s on the ground to target him without leaving yourself wide open to attack from the Prince. However, killing the King first causes the son to enter a berzerk mode for the rest of the fight. The Prince hits harder, faster, and unleashes more projectiles than in his first phase. Instead, we recommend targeting the Second Rat Prince, leaving the King of Flowing Sands entirely at your mercy.
Tiger Vanguard
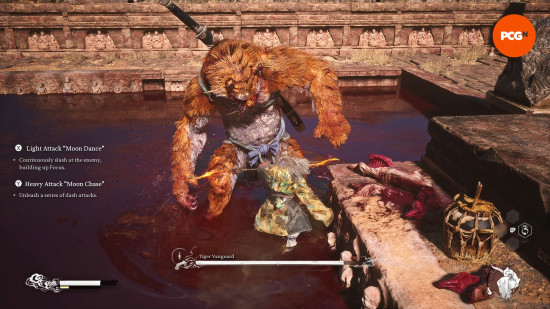
Tiger Vanguard is as close to a skill check as Black Myth Wukong bosses get. He’s more relentless than any boss who’s come before it – and with the limited spells and skill points you’ve managed to accrue at this point in your journey, you can’t afford to put a foot wrong. Our dedicated strategy guide to the Black Myth Wukong Tiger Vanguard boss fight is essential reading if you want to avoid being cut down by its claws and katana. Ultimately, Tiger Vanguard is an exercise in managing greed, so stay on the defensive and take the opportunities as they come.
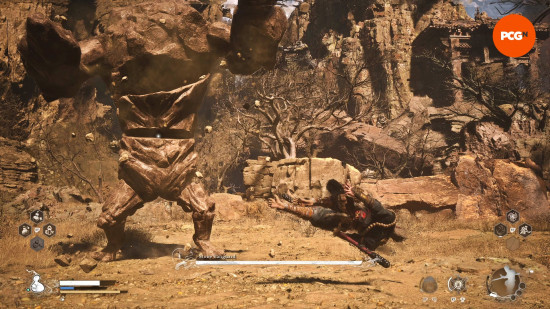
Stone Vanguard
Stone Vanguard is a hulking golem that’s quite a bit slower than the bosses that come before it, making it easier to dodge than most – in fact, it’s so slow you might be prone to dodging too early. Be careful of its sweep when attacking from behind, since he can easily clip you. Instead, your best bet is to remain at a distance and bait it into a leap, since staying close leaves you vulnerable to its close-range AoE. Staying at long range is more likely to trigger a sequence of pincer slams while moving toward your position that culminates in an overhead slam. However, this is easily avoidable, and we recommend exploiting Stone Vanguard’s slow tempo to utilize the Azure Dust transformation and punish accordingly.
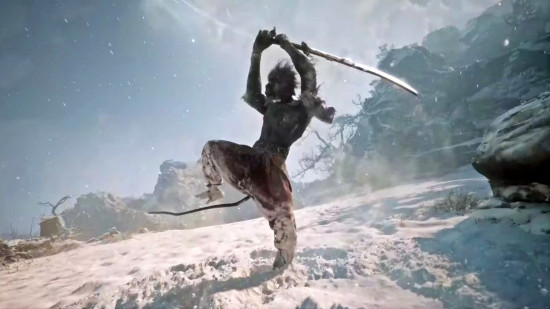
Macaque Chief
Macaque Chief is a recurring boss throughout chapter two, and each confrontation becomes progressively more difficult. The Macaque Chief is a monkey with a powerful weapon and an iron will (just like you!) so you already know you’re in for a challenge. It favors its one-handed saber in battle, though it will occasionally wield it with its feet to leave its hands free for a sequence of furious swipes. While the basic sword slashes are easily avoided, it has two major attacks: a forward slash that triggers a vertical projectile and an overhead leap that culminates in a whirlwind AoE.
The snow region is Macaque Chief’s natural habitat, so it should come as little surprise that fire abilities are your best bet here. Thankfully, Macaque Chief has limited protection and is prone to getting staggered, so the first few encounters shouldn’t be too difficult. It’s far tougher during your showdown with Yellowbrow, with more aggressive attacks – however, Zhu Bajie comes to your aid, so let him draw aggro whenever you need to disengage from Macaque Chief to heal.
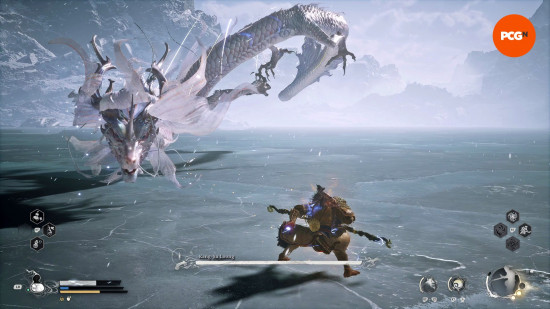
Kang-Jin Loong
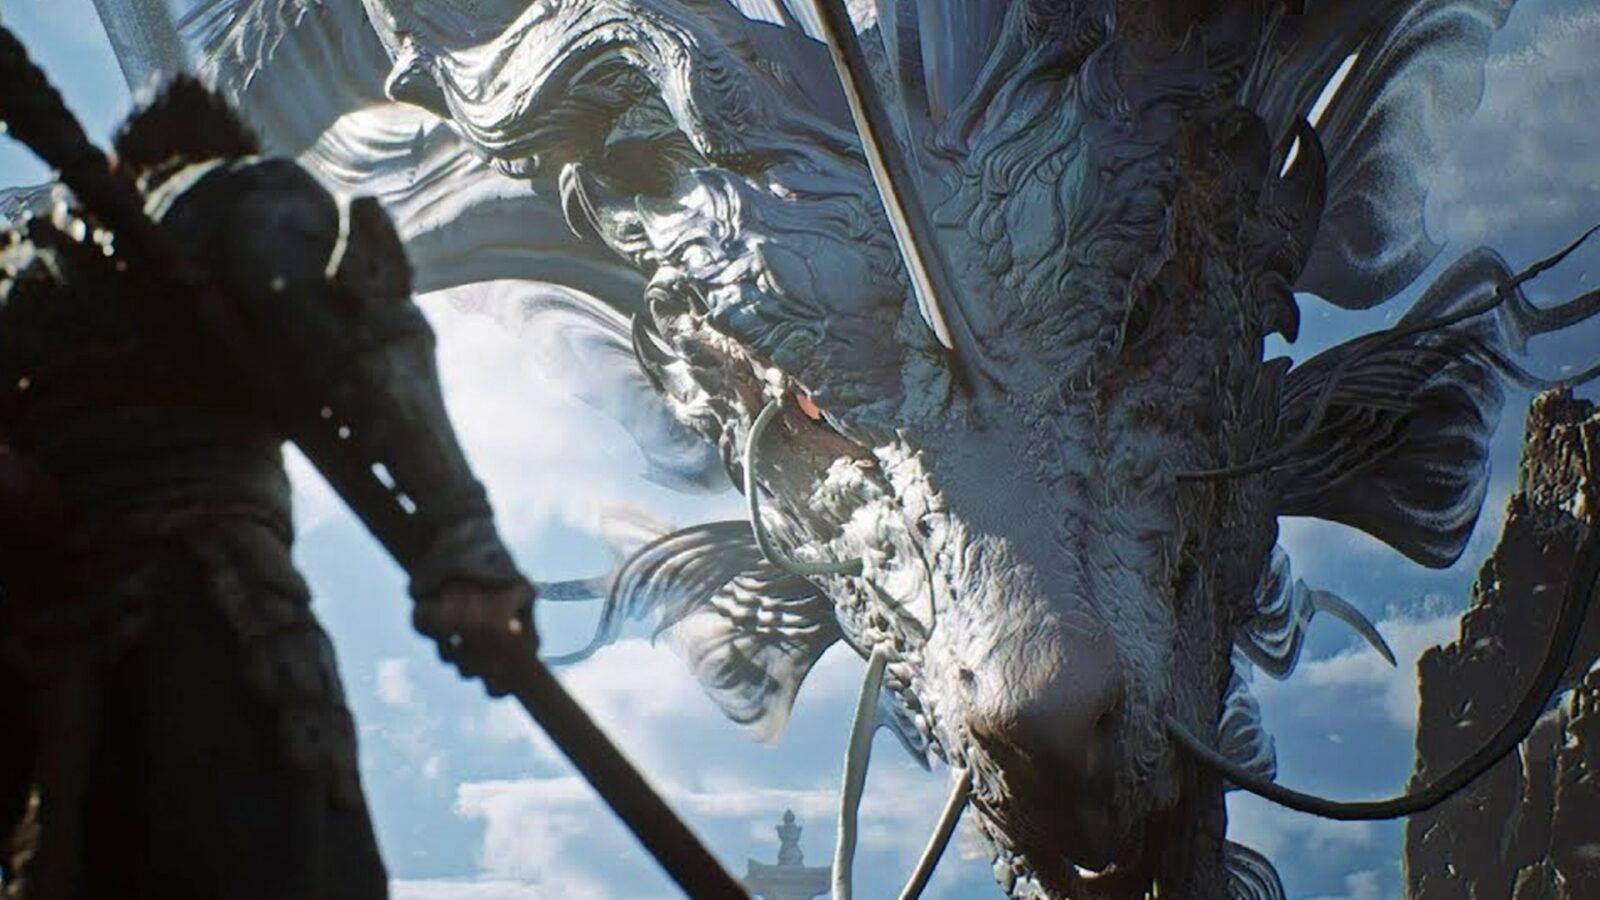
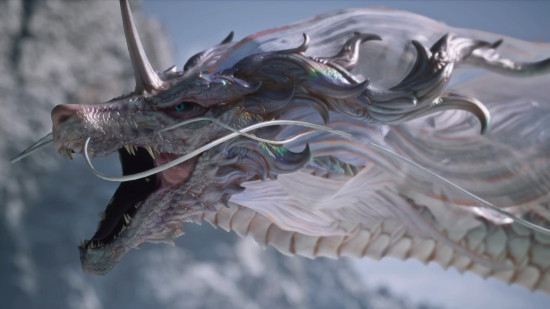
Kang-Jin Loong is a colossal white dragon that patrols the skies above a desolate ice lake, which serves as the treacherous arena for your battle. Your overhead strikes and pole vault can give you the height required to reach it in the air, and landing an attack on its snout can cause it to stagger. Kang-Jin Loong can be knocked to the ground if you deal enough damage – there are no obvious weak points to target, so just take the opportunity to get as many hits as possible before it retakes flight.
Like all Black Myth Wukong dragon bosses, Kang-Jin Loong has a suite of electric attacks at its disposal, including a devastating electric beam that emerges from its mouth. Watch out for the line of electricity it sends toward you when it touches the ground and the electric explosion during its tail slam attack. Its deadliest move is a charge attack that triggers a near-fatal animation if it collides, so dodge early to avoid it. Finally, watch out for the cascade of lightning strikes that engulf the arena towards the end of the battle, which demands you to focus on sprinting and dodging to stay alive.
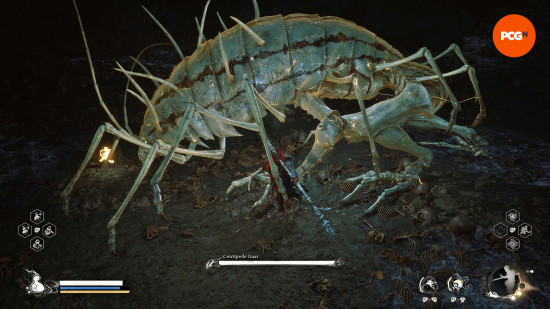
Centipede Guai
Despite its name, Centipede Guai resembles a colossal woodlouse, with a thick carapace that soaks up damage. In classic Dark Souls fashion, the best way to avoid harm during its leap attack is to dodge forwards. This maneuver will put you behind it, giving you a few precious moments to inflict damage; just be sure to avoid its backward body slam after it recovers. Thankfully, this position is when Centipede Guai is at its most vulnerable, and a plunging strike to its exposed stomach can take off a chunk of its health in one blow.
At half health, Centipede Guai summons an army of smaller centipedes that explode on impact, inflicting poison damage. There’s no foolproof way to destroy them, so sprint out of their path until they despawn. Finally, Centipede Guai periodically spews poison from its mouth, which you can anticipate when it pauses to shake its head from side to side. These poison pools remain for a short period, so take care not to step in them before they disappear – especially when Centipede Guai is rolling around the battlefield.
Black Loong
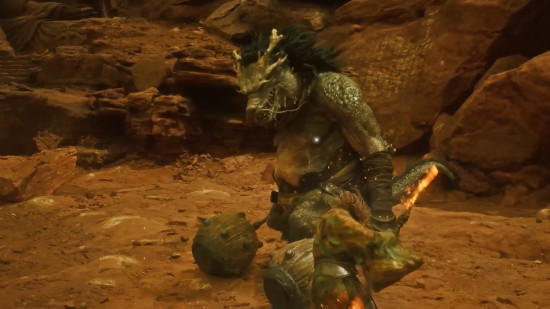
Black Loong is a stout desert dragon that dual-wields maces imbued with electricity. Many of Black Loong’s swings include a nasty pause that can bait unwitting players into an early dodge, but you can also exploit this to get a free hit in before a successful evasion. However, Black Loong’s AoE attacks can still catch you off guard. It slams its maces into the ground repeatedly, so get ready to dodge or leap over the electric AoE attacks that spread outwards in a circular radius at each point of impact. Watch out for the lighting spark at the culmination of this attack, and dash in to inflict damage while it recovers. It can also twirl its maces together to summon an electrical storm in the immediate vicinity, so back off and keep your distance until it stops. Black Loong is nowhere near as fast as Tiger Vanguard or Wolf Demon, but casting Immobilize can disrupt its AoE attack patterns and save you from an early demise.
The Scorpionlord
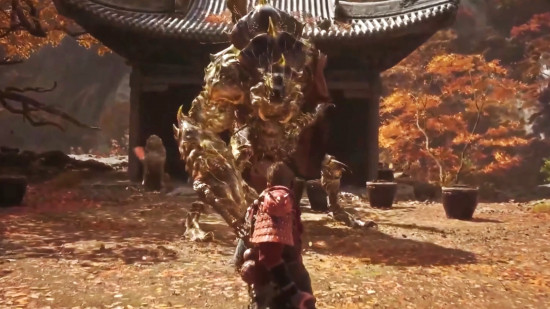
The Scorpionlord uses his stinger just as much as his claws, so parrying is your best bet. His moveset is replete with extended attack strings that can cause you to become overwhelmed, so we recommend Immobilize for an easy disengage. His scorpion tail has surprising reach when he uses it for a forward strike; don’t assume that putting distance between you and The Scorpionlord will be enough to keep you from harm. Instead, summon clones to divide his attention if you need a clear moment to heal. True to his name, The Scorpionlord’s stinger drips deadly poison, and he can even slam it into the ground to spawn poison pools in your vicinity. Be sure to dash out of their perimeter before they explode, and take advantage of The Scorpionlord’s immobility during this attack to punish accordingly.
Daoist Mi
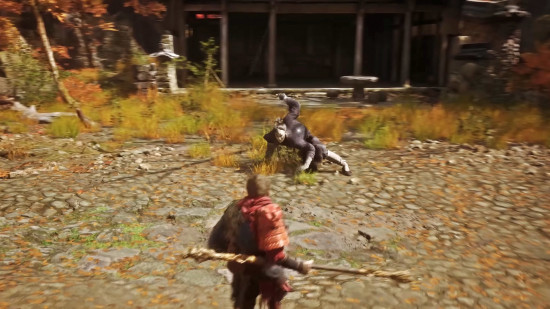
Daoist Mi might be smaller than some other Black Myth Wukong bosses you’ve faced thus far but don’t underestimate him. This masked monk is incredibly swift, alternating Shaolin kicks and katana slashes that make him tough to overpower at close range. You can safely dodge out of his reach until his second phase, where he undergoes a horrific transformation and inflicts close-range AoE poison attacks during combat. Daoist Mi’s movements are clumsier in this form, but his attacks boast far greater reach; he can quickly close a gap with a forward charge that culminates in an AoE burst of poison. Stay on the defensive, refrain from lengthy attack combos, and you should be able to defeat Daoist Mi before you succumb to his poison.
Duskveil
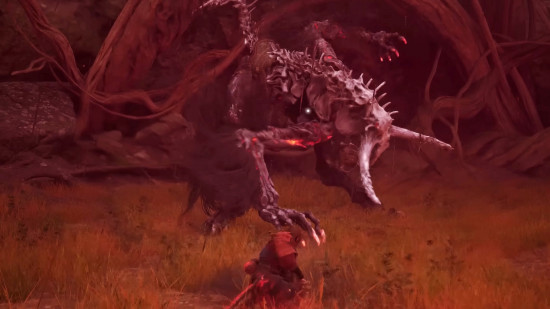
Duskveil puts you at a natural disadvantage in an arena with no verticality. This newly birthed beast is also pretty massive, and it has a habit of launching itself into the air for a plunging attack. It shoots spines from its wings in a horizontal formation, so make sure you dodge toward them instead of trying to sidestep out of their path. Towards the end of its first phase, Duskveil roars and flaps its wings before initiating a lengthy charge attack that can deliver some serious damage if you get caught in it. After three charges across the length of the arena, Duskveil collapses, giving you a huge window of opportunity to dish out some damage of your own.
Duskveil’s second phase is a very different beast insofar as its moveset. Whenever it brandishes its weapon, be prepared to dodge its projectiles; these horizontal and diagonal red slashes travel at some speed, and we recommend sidestepping then dodging forwards once Duskveil leaps into the air to bring its sword down. This leaves you in close enough range to squeeze in a hit or two before it recovers. Occasionally, it plunges its weapon into the ground, giving you only moments to dodge the colossal AoE that triggers when it slams its foot into the hilt.
There’s no question this second phase is a tough fight; you’ve also got to account for the red haze that descends on the arena during this phase, making it more difficult to see at a distance. However, many of Duskveil’s moves are just advanced versions of its first phase, so try not to be too intimidated. Rely on Immobilize when in dire straits, and watch out for when it pauses its assault to vomit, which serves as your cue to position yourself behind it for some free hits.
Red Loong
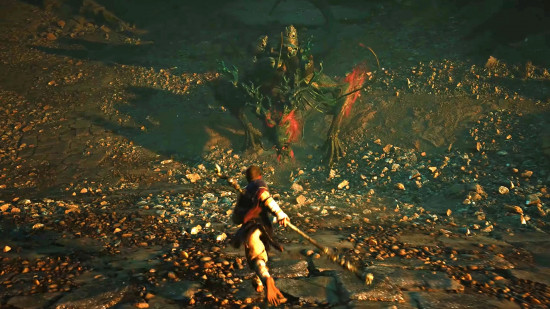
Like Black Loong, Red Loong’s moveset is chock-full of electric attacks that pack a punch. You might be tempted to remain at a distance, but the reduced visibility in Red Loong’s domain means you won’t be able to anticipate its attacks. It’s also prone to performing an electrified tail whip at mid-range, which you can easily predict and dodge through whenever Red Loong turns its back. Instead, we recommend a close-range frontal assault – just avoid its teeth and claws.
Whenever it collapses on its side, target the nodes on its back before it recovers to take a chunk out of its health in one burst. Red Loong’s electric AoE attacks are the most lethal in its arsenal, so remember to retreat when the nodes on its back begin to crackle. A haze of golden dust appears moments before the AoE triggers, so be sure to get out of its perimeter and target Red Loong where possible.
Now that you’re prepared to locate and beat all Black Myth Wukong bosses, brush up on all the best Black Myth Wukong weapons and armor to craft and upgrade along the way. Alternatively, check out our Black Myth Wukong review to get our definitive thoughts on Game Science’s reimagining of Journey to the West.







Leave a Reply