After all the exploring and dangerous puzzles you’ve completed in Luma Island, there are only a few more temples to face and one last key to find in the Jungle. This region is beautiful and dangerous, with plenty of evidence of other people visiting it considering all the old shipwrecks around.
Related
Luma Island: All Frozen Tablet Locations
You’ll have to come face to face with natural obstacles and even more deadly traps if you want the Frozen Tablets from Luma Island.
Like the other regions, there are three tablets for you to find, and you’ll need to scour the Jungle to find where the three temples they’re found in are. There are going to be more enemies, hazards, traps, and difficult terrain to navigate on your journey, but you’ve come this far already.
How To Get Magma Tablet A
The first Magma Tablet is located in the final region in the game, the Jungle, and you’ll find it in the first temple you generally come across, the Damned Jungle Temple.
This temple is found in the southwestern corner of the region, and to reach it, you’ll want to follow the path going northwest from the island’s dock.
Continue northwest at the first fork in the road, then take the path toward the water at the second fork with the Skeleton Slime, and follow it through a stone arch until you reach a broken bridge.
Each Temple has a cave near them which connects them to the central cave system full of shortcuts that’s located northwest of the dock.
Use five Jungle Wood, five Jungle Stone, three Reeds, and two Jungle Resin to repair the bridge, then cross to the other side and keep following the path.
You’ll begin seeing Empty Offering Braziers as the path curves around, which goes past the first shortcut cave and leads to the entrance to the Damned Jungle Temple.
There are four Empty Offering Braziers in total scattered around the immediate area, and each one needs three Jungle Stone and one Jungle Resin to light.
- One is in the patch of trees and grass by the bridge.
- One is by some rocks and a single palm tree by the shore.
- One is at the end of the shore against a cliff and below the temple.
- One is on the back side of the hill just above the temple.
All Damned Jungle Temple Puzzle Solutions
|
Room |
Solution |
|---|---|
|
Room 1 |
Break the web and exit the room. Has an Archaeology Room that contains the Broken Zapolca Bracelet and the Broken Zapolca Necklace. |
|
Room 2 |
Kill the Bat on the platform while avoiding the Falling Rock Trap Tiles, then cross the invisible bridge directly across from the exit door. Has an Ancient Seafarer’s Door which wants three Bladefin and 200 Water Spirits. Contains a Purple Chest, barrels and vases, and a Jungle Berry plant. Has an Ancient Scale Door across an invisible bridge that wants one Sunset Fire Opal and 200 Rock Spirits. Contains a Purple Chest, some barrels and vases, and four nodes of Volcanic Ore. |
|
Room 3 |
Introduces a new trap: the faster Wall Fireball. First, go around the stairs to the left, break the barrels, and use the hiding spot along the left wall to avoid the Wall Fireballs. Wait until the Auto-rotating Statue’s flame faces right before going into the bottom tile below it. Wait until the flame is facing left to go around to the top tile, then run to the next hiding spot with another statue, repeating the process of moving when it’s right, and then left. At the last spot, you’ll need to go around the corner to a hiding spot in the upper wall, and now you’ll be dodging Wall Fireballs going right, but the same pattern applies. At the end, go around the corner and rotate the Fire-breathing Statue to face the pillar. On the way back, go across the two-tile bridge to the platform with the tree, and follow it to a Fire-breathing Statue, then rotate it once. Go back to the entrance and go around the stairs to the right, following the spikes as they go, break the Jungle Boulders on the other side, and rotate the Fire-breathing Statue to the pillar. Break the Jungle Boulders in the way, then wait for the Auto-rotating Statues to face each other, then run along the side to the exit door. |
|
Room 4 |
Approach the edge while the Auto-rotating Statue’s flame is away from you and lure the three Bats over so you can kill them. Wait for the statue’s flame to face away from you, then run to the exit door. |
|
Room 5 |
Open the chest and then exit through the door. Has an Ancient Farmer’s Door that needs three Almonds, three Eggplants, and 200 Earth Spirits. Contains a Purple Chest, some barrels and vases, and three Jungle Berries. Has an Ancient Druidic Door that needs three Jungle Wood, three Jungle Resin, three Jungle Flowers, and 200 Nature Spirits. Contains a Purple Chest, some barrels and Vases, and three Jungle Berries. |
|
Room 6 |
Go around the right side, wait by the first set of Wall Fireballs, and run past after they shoot. Continue around the corner, going around the Falling Rock Trap Tiles, and past another set of Wall Fireballs. Continue down to the small Spider Web, break it, past the set of three Wall Fireballs, and around the corner to the Fire-breathing Statue, and rotate it. Turn around and go past the set of three Wall Fireballs, down the stairs, and to the safe zone past six Wall Fireballs that intersect. Carefully go up the other set of stairs to the left, down to the other Fire-breathing Statue, and rotate it away from the doorway. Go back to the bottom grassy floor zone, wait for the six Wall Fireballs to go past, then run across. Wait for the next set of six to shoot, then run to the exit door. |
|
Room 7 |
Lure the Bat over and kill it, then cross the spike pit while hugging the left side when the slow Rolling Saw is moving to the right and the Saw Plant has just shot diagonally. Quickly run around the corner, hugging the bottom wall as the next Rolling Saw is moving, and the spike pit has gone down, and up the stairs to the exit door. Has an Ancient Excavator’s Door that wants five Spider Silk, five Slimey Gunk, and 200 Lost Spirits. Contains a Purple Chest and some barrels and vases. |
|
Room 8 |
Carefully approach the first Saw Plant and kill it, ignoring the Bat if it comes over until at least one plant is dead. Kill the Bat quickly, then approach the second Saw Plant, and kill it as well. Go up onto the stairs, wait for the Auto-rotating Statue to face up, and for both sets of three Wall Fireballs to shoot, then run along the edge closest to the stairs to the safe zone to the right or left of the Wall Fireball trio. Run down the stairs when it’s safe and kill the Saw Plant, then approach the next one and kill it, avoiding the Falling Rock Trap Tiles. Break the Spider Web in front of the door, and exit. |
|
Room 9 |
|
|
Room 10 |
Introduces a new trap: the Moving Cube. Wait for the first Moving Cube to go up towards the other side of the room, then run behind it and pause in the row of tiles between the two cubes. Let the second cube go down, then run ahead of it and to the right to reach the exit door. |
|
Room 2 (Part 2) |
Wait for the upper row of Rolling Saws to go down, then follow behind them until they begin to turn, then run to either side to avoid the bottom row. Run to one of the statues at the end, then grab the Ancient Book, and exit. |
|
Room 11 |
Go to the right side of the room first, wait for the Wall Fireballs to shoot, then run down and into the safe zone along the wall. Let them shoot again, then go down and rotate the Fire-breathing Statue, and return to the entrance. Repeat the process on the left side, and go down to the end of the hallway to the next part of the section. Wait for both Wall Fireballs sets to shoot and the Auto-rotating Statue to face up before running past it and around the corner. Go onto the right side of the first Fire-breathing Statue and rotate it so it faces up, then go onto the left side of the other Fire-breathing Statue and rotate it so it faces up as well. Continue past the stairs and down the edge to the Fire-breathing Statue by the exit door, and rotate it so it faces the wall. Head back to the stairs, go around and grab the chest, break the Spider Web, and go to the Fire-breathing Statue at the end. Rotate it so it faces the wall, then go back up the stairs, and take the one-tile wide staircase down to the next Fire-breathing Statue and rotate it once. Return to the entrance and go down the center path, avoid the Falling Rock Trap Tiles on the edges, and exit the room. |
|
Room 12 |
Carefully lure at least three Bats to the entrance and kill them, then kill the first Saw Plant on the right. Kill the second Saw Plant next, and the fourth Bat, if it’s still alive, then exit the room. |
|
Room 13 |
|
|
Room 14 |
Lure the Bat to the entrance and kill it, then go up the left set of stairs. Follow either of the Rolling Saws as they go back up, dodging both sets of Wall Fireballs, and over to the other side. Flip the switch, then break the nearby Jungle Boulders, and go down the path, avoiding the Wall Fireballs again. Rotate the inactive statue, and go to the entrance. Go to the right set of stairs, and repeat the process of following a Rolling Saw, dodging the Wall Fireballs, and flipping the switch at the other end. Head down the hall, dodge the Wall Fireballs, and rotate the other inactive statue so you can go back to the beginning. Go down the stairs to the Spike Panel, and follow the spikes as they pass, making sure you time it so you’re going through as the Wall Fireballs hit. Avoid the Falling Rock Trap Tile at the end, and exit the room. |
|
Room 15 |
|
|
Room 16 |
Grab Magma Tablet A off the ground, then open the Orange Chest for a Luma Egg and regular loot. |
How To Get Magma Tablet B
Magma Tablet B is usually going to be the second one you find, and it’s found at the end of the Haunted Jungle Temple. This temple can be found in the northeastern corner of the map, and the quickest route to it is by heading northeast from the island’s pier.
Go through the path with two bushes by the entrance and follow it through the shallow water towards the northeast until you pass by a large waterfall and can go onto dry land again.
There’s going to be a short section with four Saw Plants you can either run around or kill. On the other side of them, head across the beach and around the corner through a stone arch.
Follow the path until you see a waterfall with a circular pond and two paths around it. Go to the right around it and repair the broken bridge you find with five Jungle Wood Planks, five Jungle Stone Blocks, and ten Silk Ropes before crossing.
The path going to the left of the waterfall leads to one of the many ladder-based shortcuts around the Jungle.
Head up the hill, and you’ll see the Haunted Jungle Temple in the distance, and for this one, you’ll have four switches in the surrounding area that you need to hit within the time limit to open it up.
- One is by the shortcut cave on the beach.
- One is on the hill across from the temple.
- One is on a small island in the shallow water to the right of the temple.
- One is on the left side of the temple.
There are multiple routes you can take for them, but the easiest one is to start at the cave by the beach, head around to the switch on the hill, then go through the small path through the rocks to the switch near the beach, then finally the switch on the left side of the temple.
All Haunted Jungle Temple Puzzle Solutions
|
Room |
Solution |
|---|---|
|
Room 1 |
Break the Spider Web and exit through the door. Has an Archaeology Room that contains the Broken Zapolca Ring and the Broken Zapolca Chalice. Has an Ancient Farmer’s Door which wants three Pumpkins, three Kiwifruit, three Cocoa Beans, and 300 Earth Spirits. Contains a Purple Chest, and some barrels and vases. |
|
Room 2 |
Wait for the bottom Rolling Saw to head to the left side of the room, then run to the right and around the corner to the safe zone in the right corner of the room. Let the double Rolling Saw going up-and-down head to the other end, then run behind it to the next safe zone leading towards the center of the room. Go to the other side of the room, but this time wait until the double Rolling Saw is going down before running ahead of it and into the safe zone in the upper corner of the room. Wait for the saw in the row you’re standing in to go away, then run behind it to the safe zone by the doorway, break the Spider Web, and exit. |
|
Room 3 |
Introduces a new trap type: the Wall Spike Panel. Break the Jungle Boulders in the center of the room, and wait at the bottom of the stairs until the trio of Wall Fireballs shoot, then run to the other side. Break the Spider Web, then pause and wait for the next trio of Wall Fireballs to shoot before running to the safe tile right before either Wall Spike Panel. Wait for the Wall Spikes to go down, then run through to the exit door. Has an Ancient Seafarer’s Door by the exit door that wants three Raging Marlins and 300 Water Spirits. Contains a Purple Chest and some barrels and vases. |
|
Room 4 |
First, go forward and break the Spider Web, kill the Bat along the outside of the room, and break all the Jungle Boulders to clear out space. Go to the other side of the room, break the Spider Web, and kill the Leech Plant hiding behind the Pillar, then go back to the middle of the room and start carefully clearing out the Saw Plants. Break any nearby Jungle Shrubs and Plants, then the large Spider Web, and go to the next room to kill the next two Saw Plants, and the Leech Plant hiding. Once everything’s dead, hit the switch at the end of the room with the lights, then the one at the bottom of the stairs below the exit door, and the one on the ledge last within a certain amount of time. |
|
Room 5 |
Try to lure as many Bats to the entrance as possible and kill them first, then head to the left. Go past the Rolling Saws, avoiding the Falling Rock Trap Tile, then wait for the next Rolling Saw to be at the end near you. Run ahead of it to the safe row of tiles next to the switch, and flip it with your Whip, then return to the entrance. Repeat the process on the right side of the room, then go back to the entrance and go to the exit door. |
|
Room 6 |
Head forward, grab the Gray Chest, break the large Spider Webs, and avoid the Falling Rock Trap Tiles, then exit. Has an Ancient Excavator’s Door which wants five Slimey Gunk, five Jungle Ectoplasm, and 300 Lost Spirits. Contains a Purple Chest and some barrels and vases. Has an Ancient Druidic Door which wants four Jungle Wood, four Jungle Resin, four Jungle Mushrooms, and 300 Nature Spirits. Contains a Purple Chest and some barrels and vases. |
|
Room 7 |
Begin crossing the invisible bridge, starting from the one darker gray brick tile on the edge of the rug. Head up across the bridge, then let the right Auto-rotating Statue face down before following it as it rotates until you can go past it and around to the exit door. |
|
Room 8 |
Kill all eight Bats flying around the room, then exit through the door. |
|
Room 9 |
|
|
Room 10 |
Wait for the Rolling Saws closest to the right wall to start going upwards, then follow it towards the other end of the path, crossing diagonally, then back and forth by the saws in the middle until you can run to the safe zone. Hit the switch with your Whip, return to the entrance, go through the now open doorway, and around the corner to the next Rolling Saw section. Let either Rolling Saw on the left side of the gap go up, then follow behind it and cross to the other row before it turns and wait in the safe zone by the vase. Go around the corner when the Rolling Saw closest to the gap goes down, then wait for the Rolling Saw on the right closest to you to go away so you can run up, break the Spider Web, and then hit the switch. Go back to the branching path, and through the next open doorway. Wait for either Rolling Saw closest to the walls to start going up and follow behind it, crossing diagonally and weaving between the saws until you get to the safe zone. Flip the last switch, then exit through the door. |
|
Room 11 |
Go forward and kill the Bat, grab the Ancient Book, then break the Spider Web and exit through the door. Has an Ancient Scale Door that wants one Ruby and 300 Rock Spirits. Contains a Purple Chest and some barrels and vases. |
|
Room 12 |
Take the one-tile-wide hallway heading right, avoiding the Falling Rock Trap Tile in front of it, and run through it once the Wall Spike Panel retracts. Kill the Bat, then run along the solid gray brick tiles closest to the wall when the trio of Rolling Saws are moving away, and break the Spider Web. Carefully lure and kill the two Bats in the next room while avoiding the three Falling Rock Trap Tiles in the room. Run along the left or right wall as the two outer Rolling Saws move to the opposite side, wait in the third row, then move to the middle as the middle Rolling Saw goes away, then over to the other side as the two Rolling Saws come back. Watch for two Falling Rock Trap Tiles before the next section. Hug the tile closest to the gap and not below the suit of armor ahead. Wait for the first set of Rolling Saws to move to the opposite side, then run to the middle row of safe tiles. Wait for the last row of Rolling Saws to go to the opposite side, then run straight across to the other side, past the Falling Rock Trap Tile, and exit the room. |
|
Room 13 |
Head up the stairs on the left, and up and around to the Fire-breathing Statue at the end of the path, and rotate it once. Return to the entrance, then take the one-tile-wide path below the left staircase, and run past each Wall Spike Panel as it retracts until you reach the other end of the room. Flip the switch to turn them off, then rotate the Fire-breathing Statue once, and return to the entrance. Go down the path on the right side of the room now, and run behind the Wall Spike Panel as it pops up until you reach the safe zone. Wait for the next Wall Spike Panel to retract, then run through to the other side. Flip the switch to turn them off again, then rotate the Fire-breathing Statue once, and go up the stairs behind you and break the Jungle Boulders. Rotate the last Fire-breathing Statue and grab the Gray Chest, then return to the entrance and head to the exit. |
|
Room 14 |
Follow the Moving Cube as it heads to the other end of the room, and quickly swap to the right side once you’re near the safe zone and the Wall Fireballs have just shot. Wait for the Moving Cube to head to the other end and the Wall Fireballs to just shoot, then run up and break the barrels to open up a safe zone. Wait in that new safe zone against the wall for the Moving Cube to be at the southern end of the room and the Wall Fireballs to have just shot before running diagonally to the next safe zone on the right side of the room. Hug the wall near the vases, avoiding stepping into the Wall Fireball’s path, then run across after they shoot, and the other Moving Cube is away, and up to the safe zone with the exit door. |
|
Room 15 |
Break the small Spider Web closest to all the traps and go into the small room. Wait for the Wall Spike Panels to retract and run through to the Fire-breathing Statues, avoiding the one facing towards you. Rotate the two Fire-breathing Statues facing down, so their flames face the wall, then return to the small room with the Wall Fireball traps. Wait for the first set of two Wall Fireballs to shoot, then run past them to the safe zone. Run past the single Wall Fireball and the Falling Rock Tile Trap to the next safe zone, and break the small Spider Web ahead. Head to the Fire-breathing Statue down the path, and rotate it. Return to the entrance, break the small Spider Web blocking the right path, and go through to the other room that was previously blocked by fire. Rotate the first Fire-breathing Statue twice, so its flame faces the wall, then run to the middle row of tiles where the Gray Chest is. Grab it, then run ahead and around the corner. Don’t rotate the statue at all, and just wait for the Wall Spike Panels to retract before running past them, avoiding the two Falling Rock Trap Tiles. Go to the right side of the Fire-breathing Statue near the Spider Web, and rotate it once. Break the Spider Web, then go back to the room with the two Fire-breathing Statues, stand at the bottom of the first Fire-breathing Statue, and rotate it, so its flame faces to the right. Go up to the second Fire-breathing Statue, stand at the bottom of it, and rotate, so its fire faces the wall. Go around them both and rotate the Fire-breathing Statue near the exit door once. Head back to where that big Spider Web was and go through to the center of the room. Don’t rotate any statues yet, and instead, wait for the Auto-Rotating Statue to face down and the set of Wall Fireballs to shoot before running around the left side to the tile just below the single Wall Fireball. Let it shoot, then run around to the exit door before the Auto-Rotating Statue turns and exit. |
|
Room 16 |
Grab Magma Tablet B off the ground, open the Orange Chest for a Luma Egg and regular loot, then leave the temple. |
How To Get Magma Tablet C
The final Magma Tablet is in the Cursed Jungle Temple, the last major temple and the most difficult of them all. It’s located in the southeastern corner of the Jungle, and the path to it is similar to reaching the Haunted Jungle Temple.
Use the same path through the shallow waters as before, but after you’ve passed the Saw Plant section, go to the broken bridge instead and repair it with five Jungle Wood, five Jungle Stone Blocks, and ten Silk Ropes.
Go across it and follow the path over a rock bridge, above the top of the temple, and down the slope to the beach next to it. For this last major temple, you’ll need to rotate Gem Pillars in the correct direction, and there are four in the nearby area.
- One is on top of a rock formation on a small island with an unfinished camp below it to the left of the temple.
- One on top of a rock formation south of the temple and across from the bridge leading to it.
- One is beneath the arched rock bridge to the right of the temple.
- One is at the edge of a rock formation directly in front of the temple.
All Cursed Jungle Temple Puzzle Solutions
|
Room |
Solution |
|---|---|
|
Room 1 |
Exit through the door. Has an Archaeologist’s Room that contains the Broken Zapocala Staff and Broken Zapocala Crown. |
|
Room 2 |
Stand near the corner and lure the Bat over to kill it, then run past the set of Wall Fireballs. Head to the doorway with only two Wall Spike Panels, and run through when they retract. Break the Jungle Bushes near to prevent any speed loss, then run down the row of tiles without any plants after the Wall Fireballs shoot, and flip the switch at the end. Return to the center hallway and then exit through the door. |
|
Room 3 |
Wait for the large Wall Spike Panel on either side to start popping up, then run behind them as they disappear until you reach the safe zone in the corners, avoiding the Falling Rock Trap Tiles. Follow them around the room until you reach the exit door. |
|
Room 4 |
Head forward and grab the chest, then break the large Jungle Boulder and small Spider Web blocking the way. Kill the three Bats, then exit the room. Has an Ancient Farmer’s Door that wants three Potatoes, three Coffee Beans, three Watermelons, three Mangoes, and 400 Earth Spirits. Contains a Purple Chest and some barrels and vases. |
|
Room 5 |
Avoid the Falling Rock Trap Tile next to the weapon rack, then go forward, stand at the bottom right Fire-breathing Statue, and rotate it, so its flame faces the pillar. Head diagonally across the floor and flip the switch across the gap, then return to the entrance and go through the hallway that’s now open. Go to the end and wait for the Wall Spike Panel to retract before running around the corner to the room with two Fire-breathing Statues. Stand on the right side of the Fire-breathing Statue closest to the switch and rotate it, so its flame faces down, then go to the back of the other, and rotate it, so its flame faces right. Go around them both, and flip the switch, then run through the Wall Spike Panel to the other side. In the next room, go to the top of the Fire-breathing Statue furthest from the switch and rotate it, so its flame faces right onto the trap tile. Go around and rotate the other statue once, then run around and flip the switch. Go back through the Wall Spike Panel section and the second open door so you can rotate the Fire-breathing Statue so it faces the wall. Return to the center room and rotate the bottom left Fire-breathing Statue so it faces right, and then the upper left statue so it’s facing down, then go to the left side of the bottom left statue and rotate it one more time, so its flame faces up, then run through to the exit door. |
|
Room 6 |
Kill the Bat, then run to the exit. Has an Ancient Scale Door that wants one Diamond and 400 Rock Spirits. Contains a Purple Chest, three Volcanic Ore nodes, and some barrels and vases. Has an Ancient Seafarer’s Door that wants three Tornadofish and 400 Water Spirits. Contains a Purple Chest and some barrels and vases. |
|
Room 7 |
Go down the stairs and hug the wall, then wait for the left Rolling Saw to start going up before following behind it. Swap to the open path when it starts to go back down and run to the safe zone. Break the vase to open up a safe tile, then wait for the left-to-right Rolling Saw to go away and the slower one to be near the top before running to the two safe tiles by the square wall in the middle. Let the Rolling Saw on the left to start going up, then run to the safe tile near it and wait for it to go back down and the upper left-to-right Rolling Saw to begin moving before running around the corner to the next safe zone near the Blue Chest. Wait for the two slower left-to-right Rolling Saws to go left before running diagonally and stopping in the one safe tile at the end of the wall with two pillars against it. Run to the next two safe tiles against the second four-tile wall piece when the three Rolling Saws go back, and then straight across to the left when you have a clear path. Wait for either Rolling Saw in the final section to go up, then run behind it, running to the open row when it turns until you reach the stairs, then exit. |
|
Room 8 |
Grab the Gray Chest then exit through the door. Has an Ancient Druidic Door which wants five Jungle Wood, five Jungle Resin, five Jungle Berries, and 400 Nature Spirits. Contains a Purple Chest and some barrels and vases. Has an Ancient Excavator Door which wants five Spider Webs, five Bat Hide, five Jungle Ectoplasm, and 400 Lost Spirits. Contains a Purple Chest and some barrels and vases. |
|
Room 9 |
Stand by the door and lure the Bat close before killing it to avoid the Wall Fireballs that intersect in the room and the Saw Plant’s blades. Hug the corner closest to the room with one Saw Plant and three Bats, and run through when there’s an opening, ignoring the Bats at first. Focus on dodging the Saw Plant and the Wall Fireballs that intersect, kill the Saw Plant, and then the Bats last. Stand next to the group of three pillars, then run to the next room after the Wall Fireballs shoot, and into one of the safe corners. Wait for it to shoot, then run to the final room, ignoring the Bat until you’re safe, then kill it and exit. |
|
Room 10 |
Cross over the massive Spike Panel by running diagonally to the single safe tiles dotted throughout, then exit through the door. |
|
Room 11 |
|
|
Room 12 |
Grab the Ancient Book off the ground, then you’ll need to go to the left and right. Wait for the Wall Spike Panels to start popping up, then follow them down and around each path until you reach the switches and flip them. Return to the entrance and then leave the room. |
|
Room 13 |
Hit the switch closest to the entrance, then go forward into the room with three Fire-breathing Statues blocking a Blue Chest. Run around them and hit the switch to progress. Go back to the entrance and run through the now open doorway to another room with three Fire-breathing Statues. Stand on the bottom side of the one facing up and rotate it, so its flame faces to the left. Go around the corner to the middle Fire-breathing Statue, stand on the left of it, and rotate it, so its flame faces up. Walk around the corner and rotate the last Fire-breathing statue so it faces the wall, then go back to the middle statue, stand on the right side of it, and rotate it, so its flame faces left. Go around and hit the switch. Head back to the middle hallway and through the third doorway to the final room. Go to the left side of the Fire-breathing statue facing right and rotate it once so it faces down, then go to the bottom side of the one facing up, and rotate it once. Walk around to the left side of that second statue, and rotate it twice so it’s also facing down. Go around to the third statue, but stop at the statue facing down, stand on its right side, and rotate it twice so it faces up. Head to the back of the third statue and rotate it once so its flame faces left, and then go around them all to the exit door. |
|
Room 14 |
Go around down the one-tile-wide hallway to the right, and wait at the edge of the room. Lure the Bat over and kill it, then run to the other side and down to the corner after the Wall Fireballs shoot. Break the barrels then wait for them to shoot again before running and hitting the switch. Return to the entrance and go up the other hallway to where the Rolling Saws are. Wait for one to begin going up, then follow behind it, swapping rows as needed until you reach the other side, ignoring the hall with the Wall Spike Panel for now. Head down the hall to the room with the Bat in it, and lure it over like before. Let both sets of Wall Fireballs shoot, then run across the ledge and to the corner of the room with the torch. Wait again, then hit the switch, then return to the area with the Rolling Saws. Wait for your chance to run to the two safe tiles before the Wall Spike Panel, then follow behind them as they pop up. Grab the Gray Chests at the end, then exit. |
|
Room 15 |
Let the Moving Cube go back down the hall, then run behind it after all four sets of Wall Fireballs have shot. Hug the Moving Cube first, then let it get ahead of you, then run to either the left or right and go around it between the next round of Wall Fireball shots. Wait for the sets to shoot before rounding the corners, staying in the middle three tiles of the bridges for safety until you reach the other side. Let the Moving Cube come to you, then follow behind it, waiting in its path a few steps behind where it turns so you can dodge both the Wall Fireballs and go around it to the exit door. |
|
Room 16 |
Grab Magma Tablet C off the ground, then open the Orange Chest for a Luma Egg and regular loot before leaving. |
How To Use The Magma Tablets
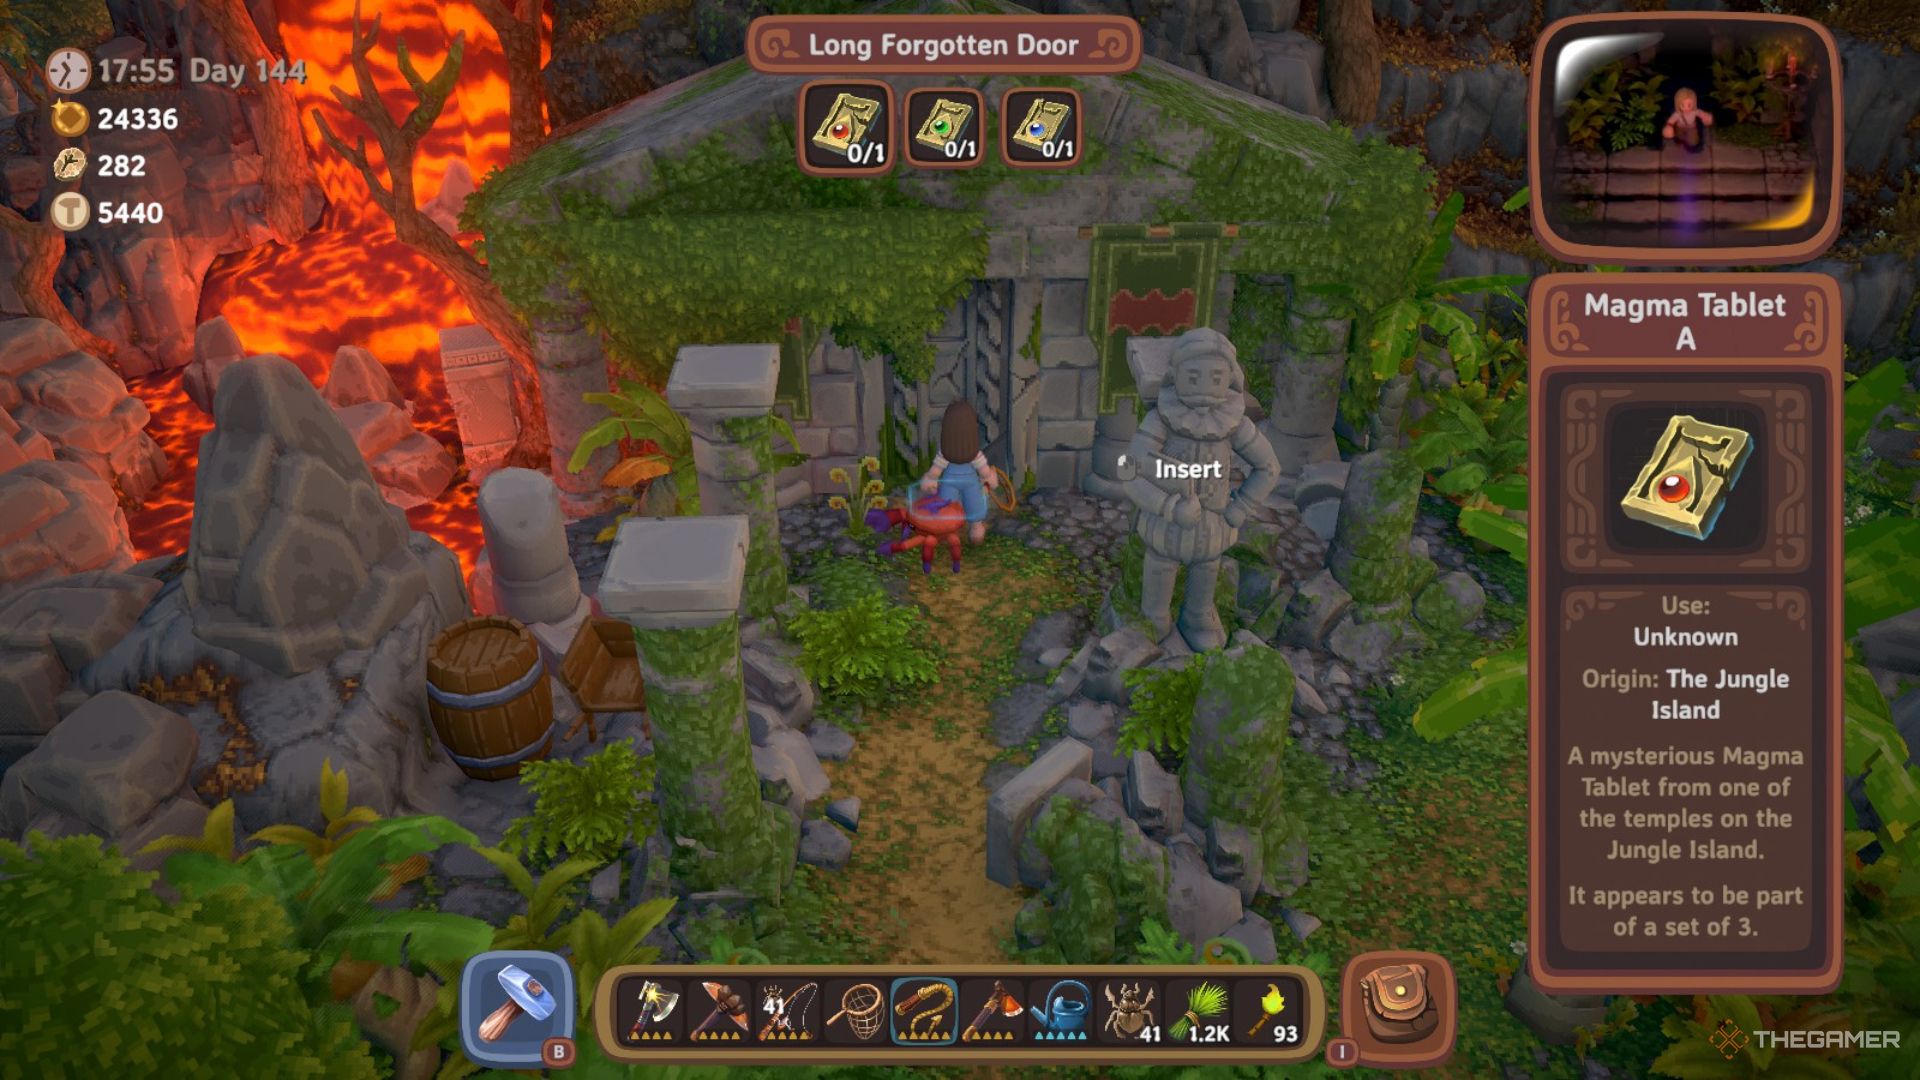
When you’ve got all three tablets, return to the Ancient Jungle Temple just northwest of the landing point, and use them to open the door. Head down to the very bottom of the room, and you’ll find the Ancient Ember Key on the ground alongside two Purple Chests.
Next
Luma Island: All Mountain Offering Crystal Locations
You’ll need to find another set of Offering Crystals if you want to claim the Mountain Shrine’s treasures.








Leave a Reply