Sword of Convallaria places significant emphasis on choices, with players’ decisions playing a critical role. Whether shaping the outcome of the story through narrative choices or determining a character’s playstyle by selecting their skills, each decision carries considerable weight.
The number of choices offered to the players further extends to talents. In Sword of Convallaria, talents are a system that players can utilize to further strengthen their team. However, the way talents work in Sword of Convallaria is a bit complex, so classifying them into best and worst is not possible.
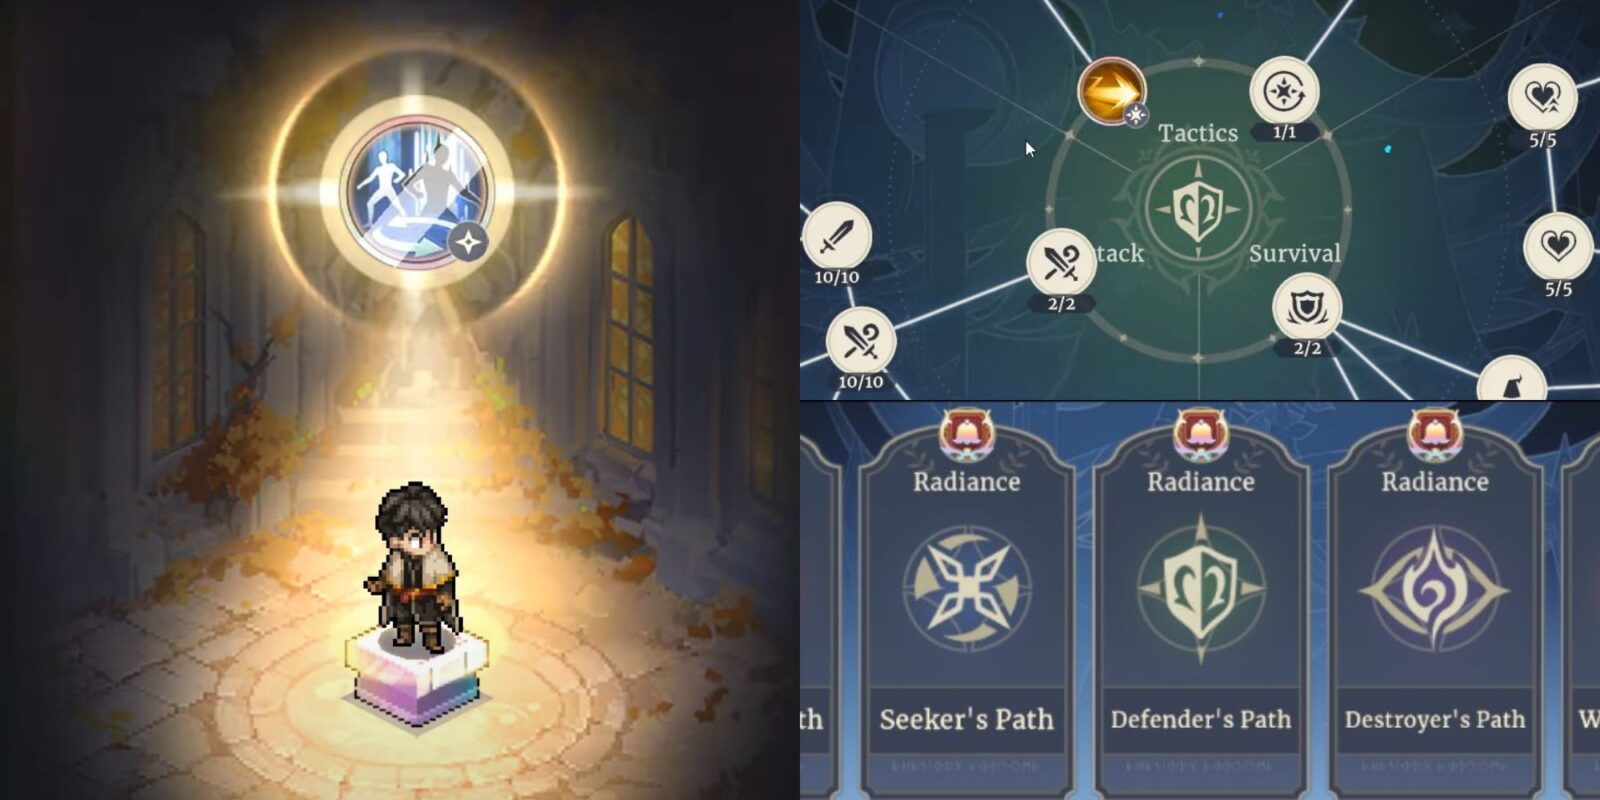
Talents are powerful skills that can unlock new potential for players, unlocking new battle possibilities. These talents are associated with a character’s element and are classified into five different paths. Each path consists of three options: Tactics, Attack, and Survival.
Related
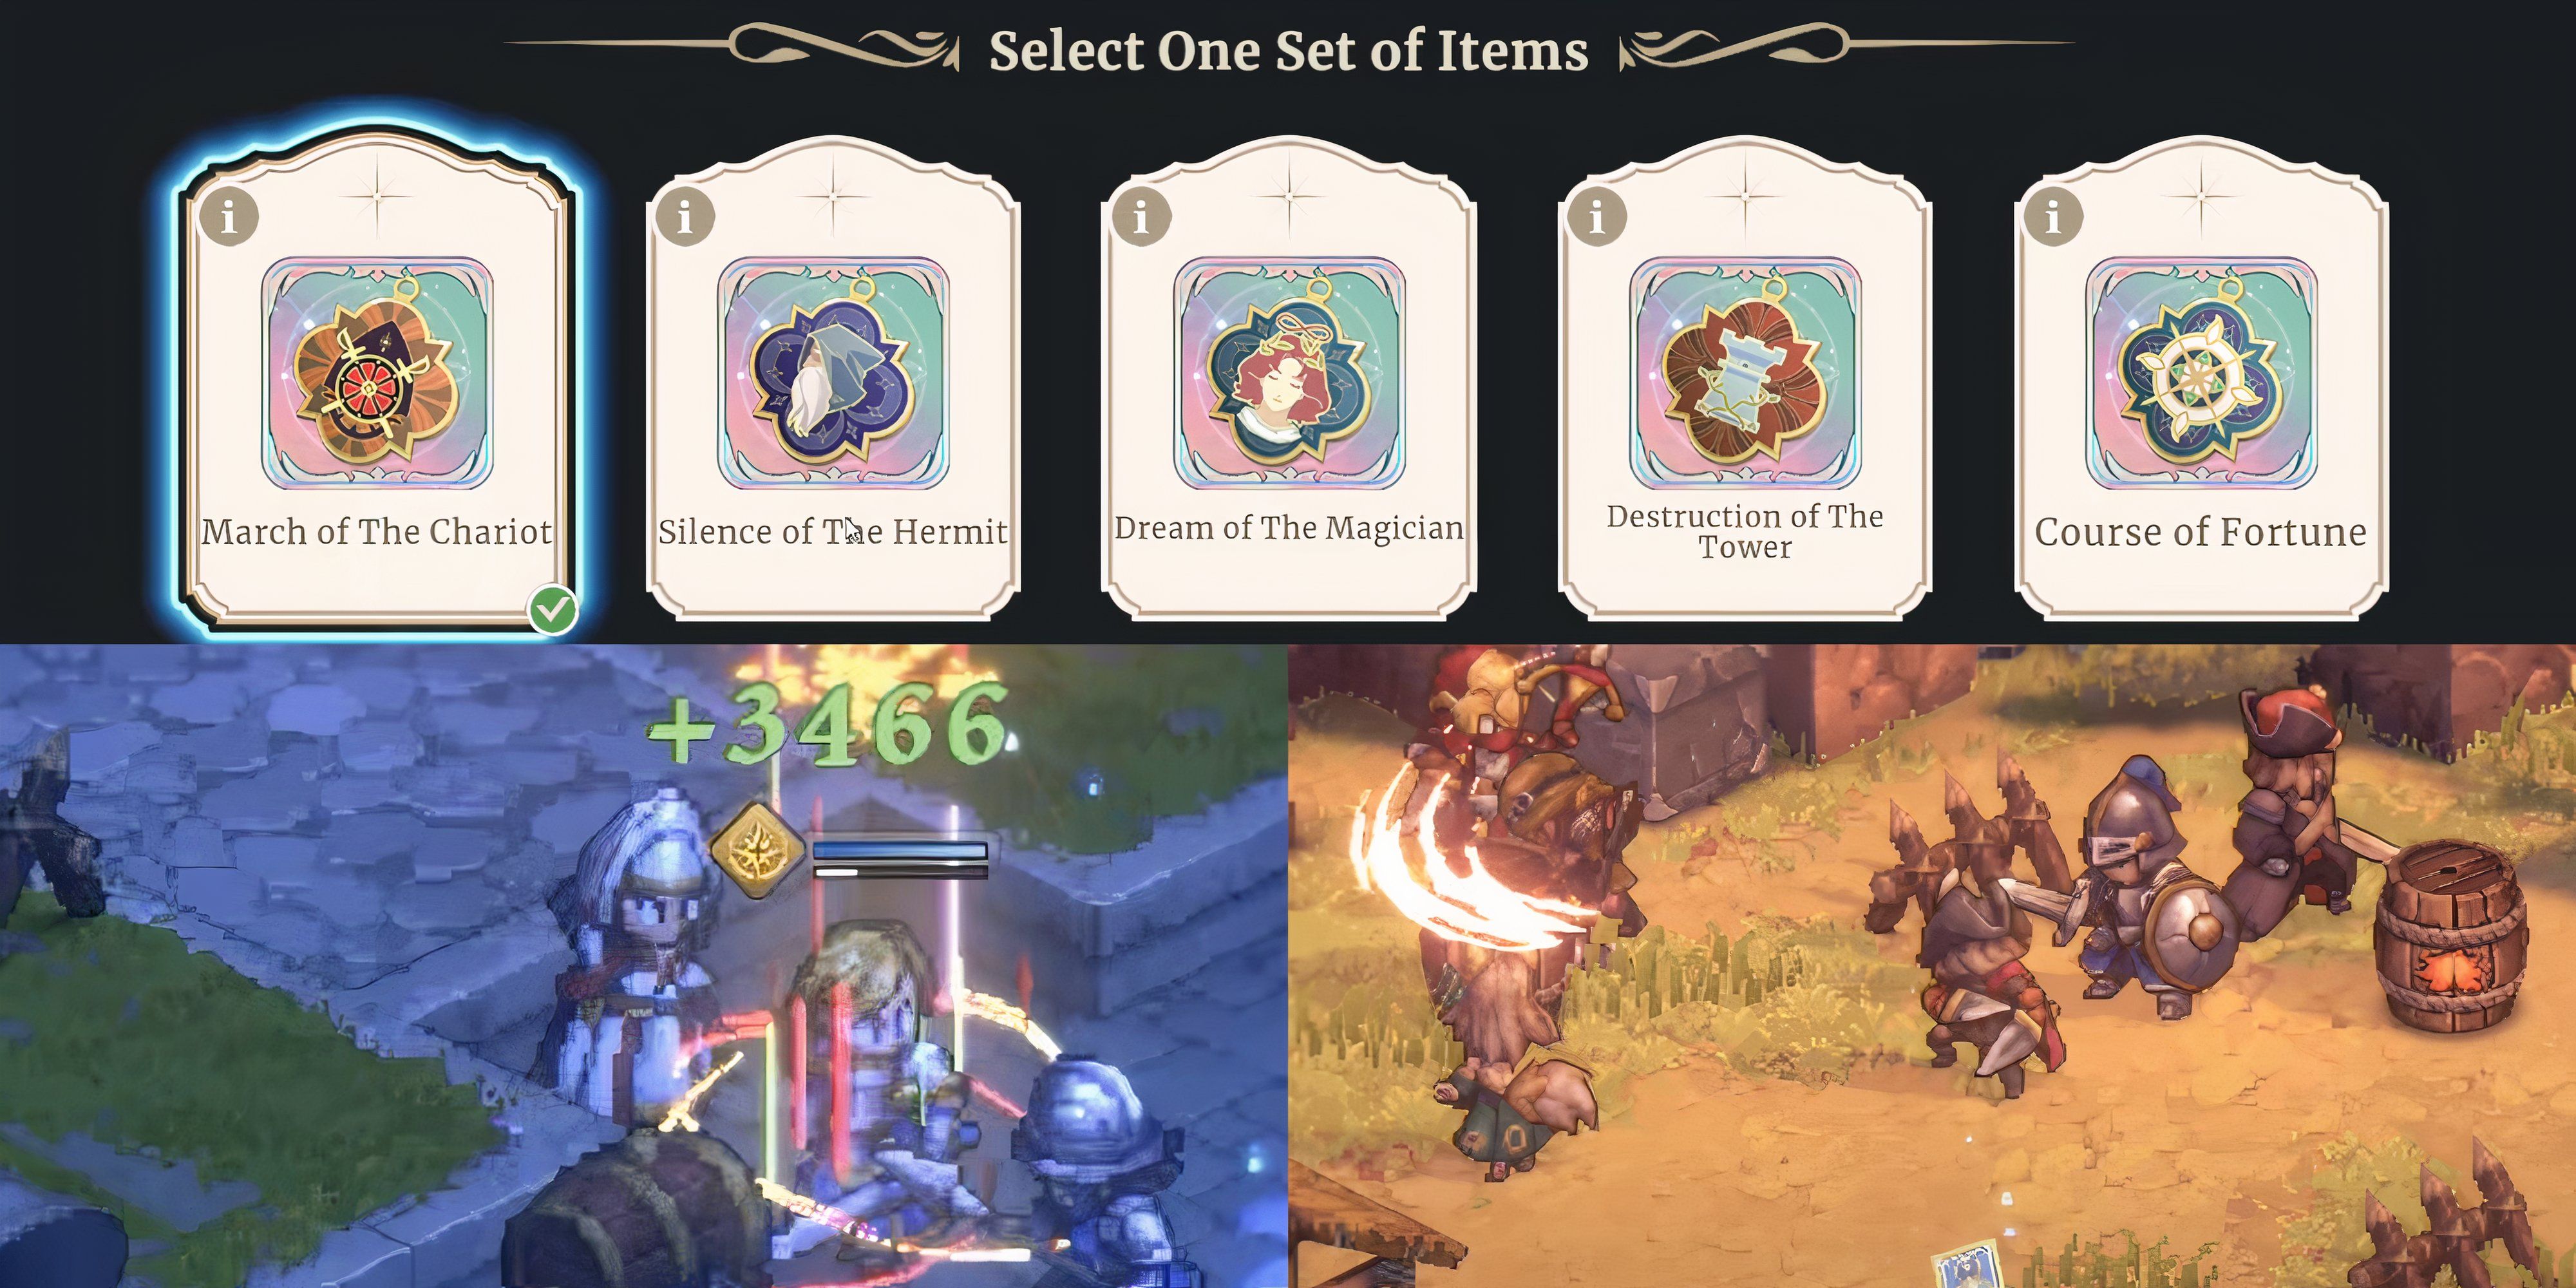
Sword of Convallaria: Best Tarot Whispers
Each Tarot in Sword of Convallaria comes with a unique passive that aids the player. Here are the best Tarot Whispers available in the game.
Tactics are powerful skills that players can utilize on the battlefield to gain an advantage over enemies. These skills are further classified into three types: Common, Intermediate, and Advanced, and players can only equip one skill from the classified types. Out of the three choices, choosing the right tactics for combat is most crucial for battles.
The other two categories, Attack and Survival, mainly consist of skills that contribute to the offense and defense stats of the characters.
With all the information about talents, it is important for players to plan their approach to leveling up, especially when figuring out the best tactics. This list aims to help players by listing the best tactics to equip and upgrade before heading into battle.
The best tactics or best way to upgrade talents in Sword of Convallaria solely depends on the player’s choices. It includes which class player utilizes the most in battle, the preferred strategies, etc. The list only helps with the best tactics to equip and the best way to upgrade the talent chart.
8
Ragnarok
Pierce Through The Enemy Waves
|
Path |
Destroyer’s Path |
|---|---|
|
Tactical Points |
450 TP |
|
Cool Down |
1 Turn |
|
Type |
Advanced |
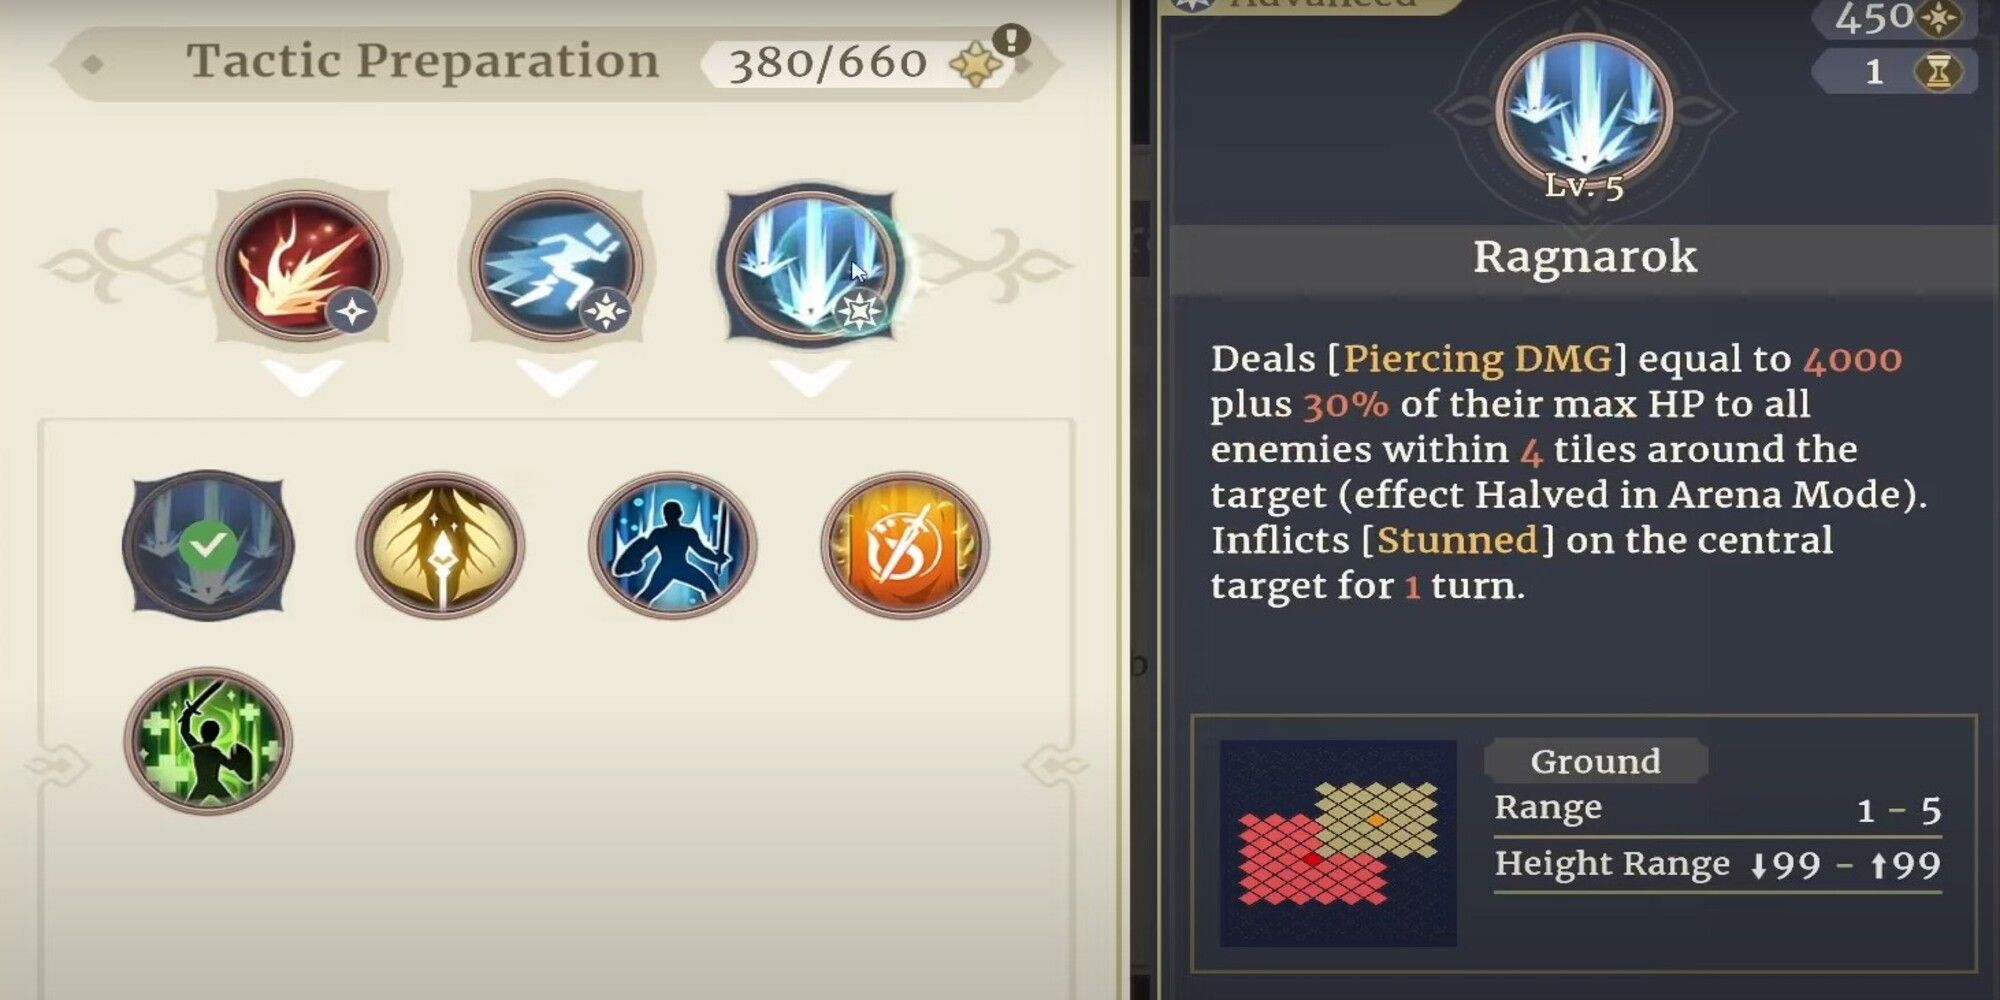
Ragnarok is an advanced tactic and easily one of the best tactics for players to use, especially in early-game. Ragnarok works by dealing with Piercing Damage equal to 4000 plus 30% of their max HP to all enemies within 4 tiles on max upgrade.
Piercing Damage is a special type of damage in Sword of Convallaria that directly ignores physical and magical defense, making this AoE tactic a boon for users to burn through mobs quickly in a large area. Additionally, it inflicts stun on the central target, which is a nice extra bonus. The downside of this tactic is that it comes with a high cost, so players can not use it much in combat despite having a low cooldown time.
7
War Horn
Even The Mightiest Kneel
|
Path |
Watcher’s Path |
|---|---|
|
Tactical Points |
275 TP |
|
Cool Down |
3 Turns |
|
Type |
Intermediate |
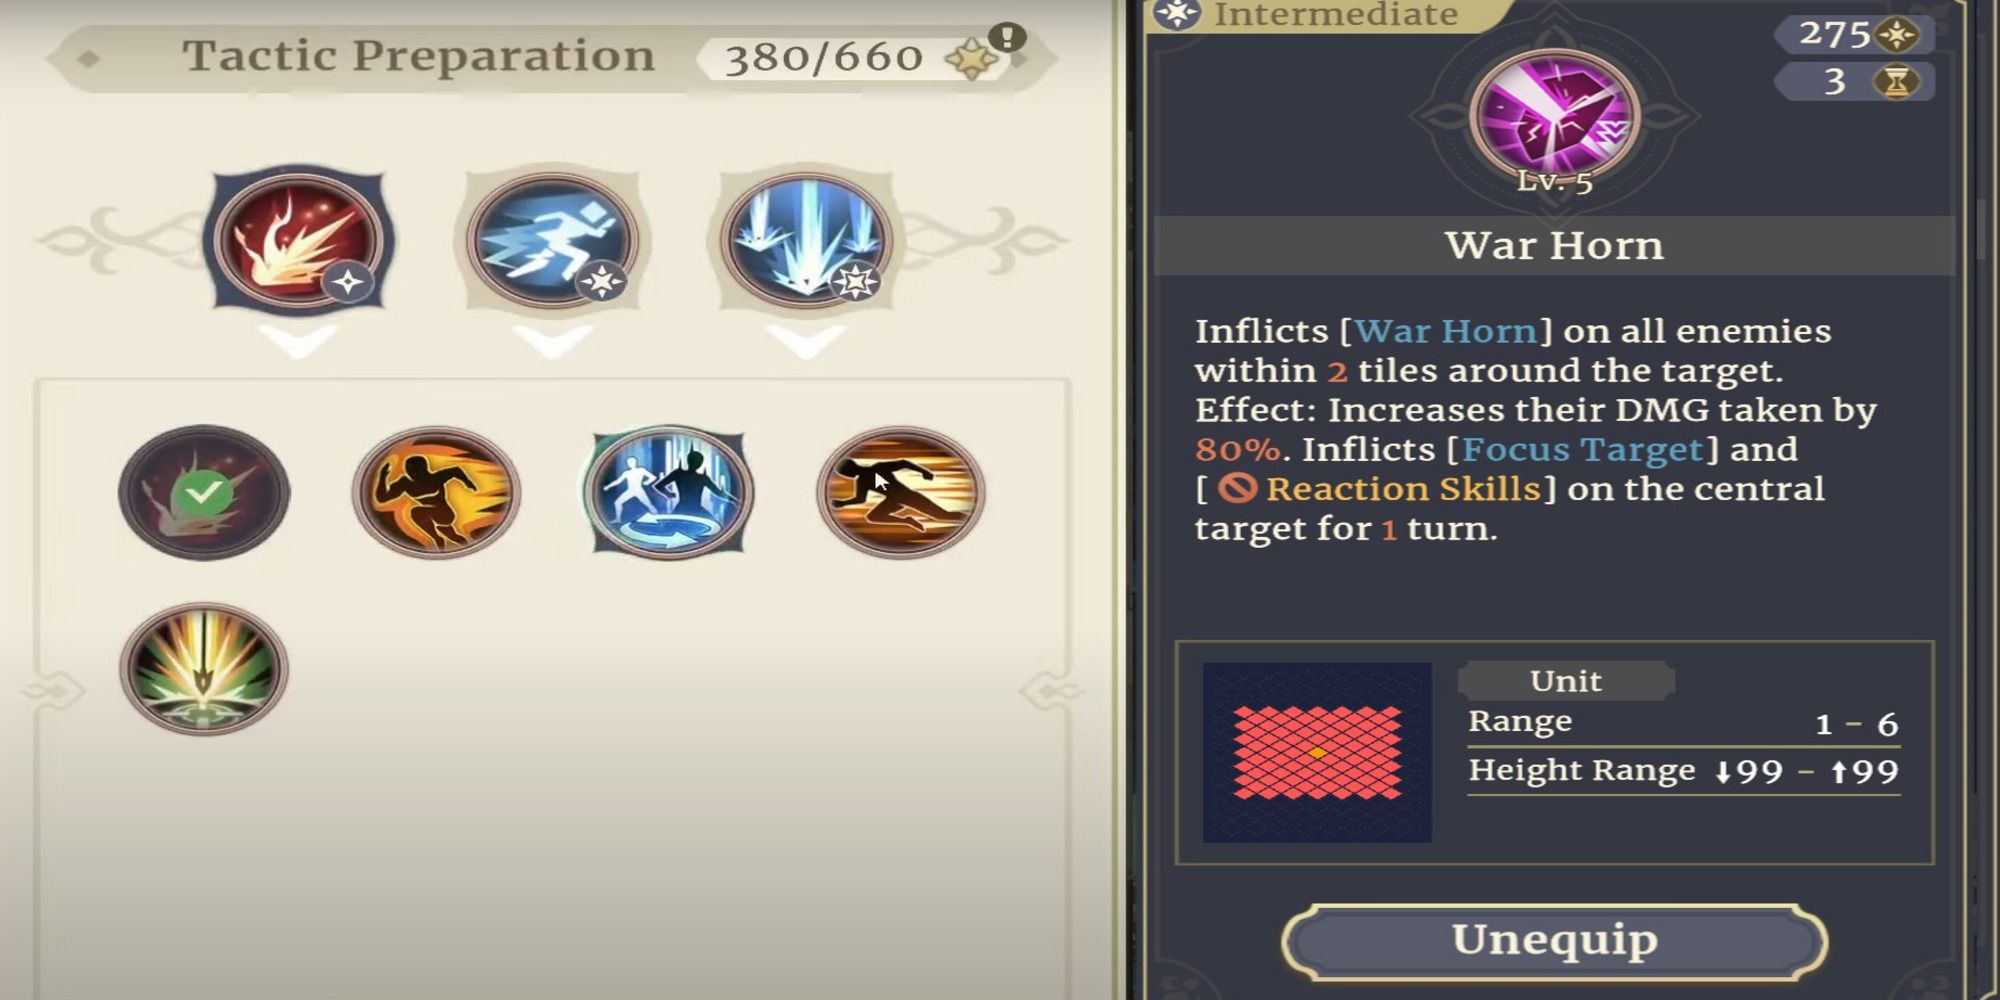
War Horn is an intermediate tactic that has the potential to deal lethal damage to enemies. When the tactic is activated by the character, it inflicts War Horn on all enemies within a 2-tile radius around the target. The War Horn effect increases the damage dealt by characters to the affected enemies by 80%.

Related
Genshin Impact: All Skill Terms Explained & Skill Level Up Priority Overview
Skills in Genshin Impact are an important factor when it comes to understanding your character and how they work.
The utility of the tactic does not stop here as it inflicts focus target and reaction skills debuff on the central target for 1 turn. Focus target reduces defense by 20%, making the target even more vulnerable to the player’s attacks. Reaction skills render all the reaction skills ineffective.
The combined effects of this tactic can strike down enemies quickly once players start attacking them. The low cost and moderate cooldown time of this tactic make it an ideal choice to use for an intermediate tactic, especially around the endgame.
6
Urgent Order
The Entire Map Is Personal Territory
|
Path |
Watcher’s Path |
|---|---|
|
Tactical Points |
80 TP |
|
Cool Down |
1 Turn |
|
Type |
Common |
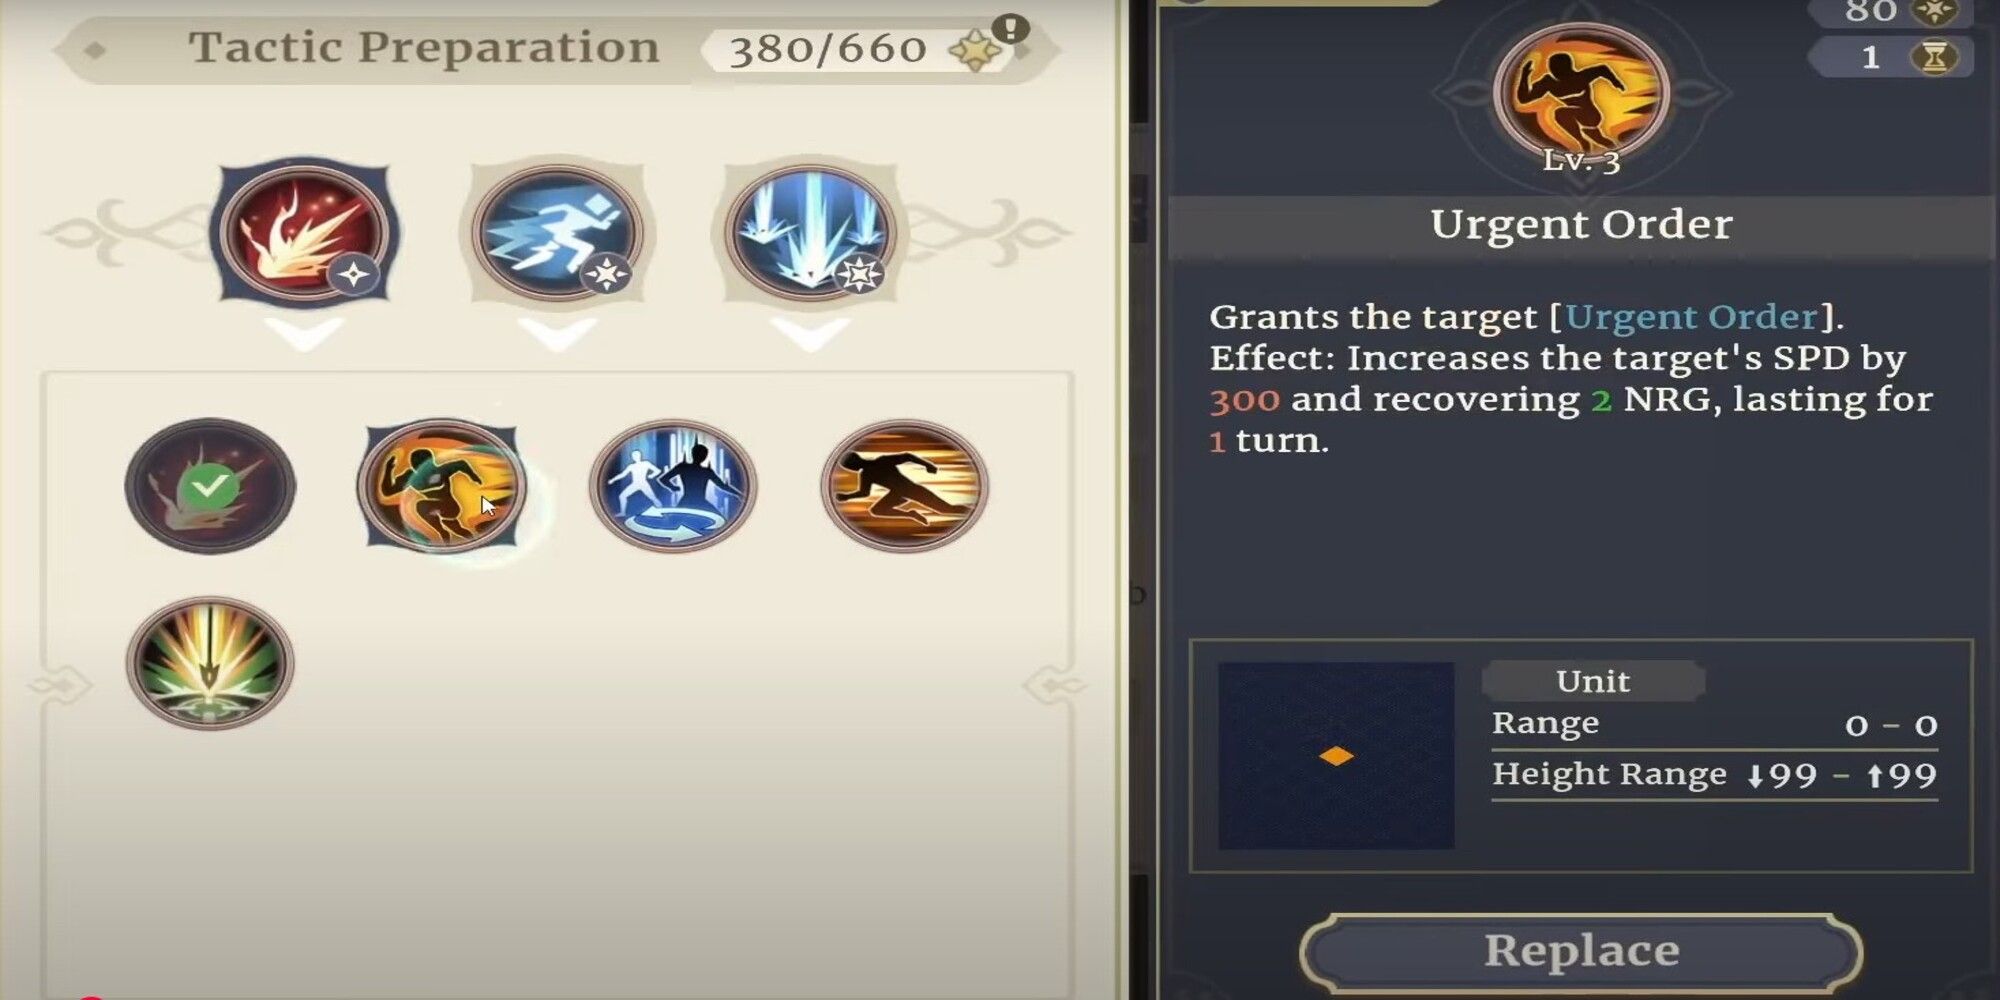
In turn-based strategy games, the movements of players are restricted, which makes planning the movement of the team across the board an essential part of the strategy. Urgent Order is a common tactic that overlooks this as it allows the character to move anywhere across the map as it increases the target’s speed by 300.
The resources required to level up talents gradually become expensive and if players don’t pay attention to upgrading the right talents, they might not be able to see the benefits of talents on the battlefield. Plan out the best way to level up talents according to the team’s needs.
The tactic also recovers 2 NRG, lasting for 1 turn. Urgent Order comes with a minimal TP cost, which makes it possible for the players to use this ability for every single turn. The additional NRG gained allows characters to use their skills freely without concern for the cost, making it one of the go-to tactics to equip before entering combat.
5
March Command
Boosts Team Movement
|
Path |
Seeker’s Path |
|---|---|
|
Tactical Points |
200 TP |
|
Cool Down |
4 Turns |
|
Type |
Intermediate |
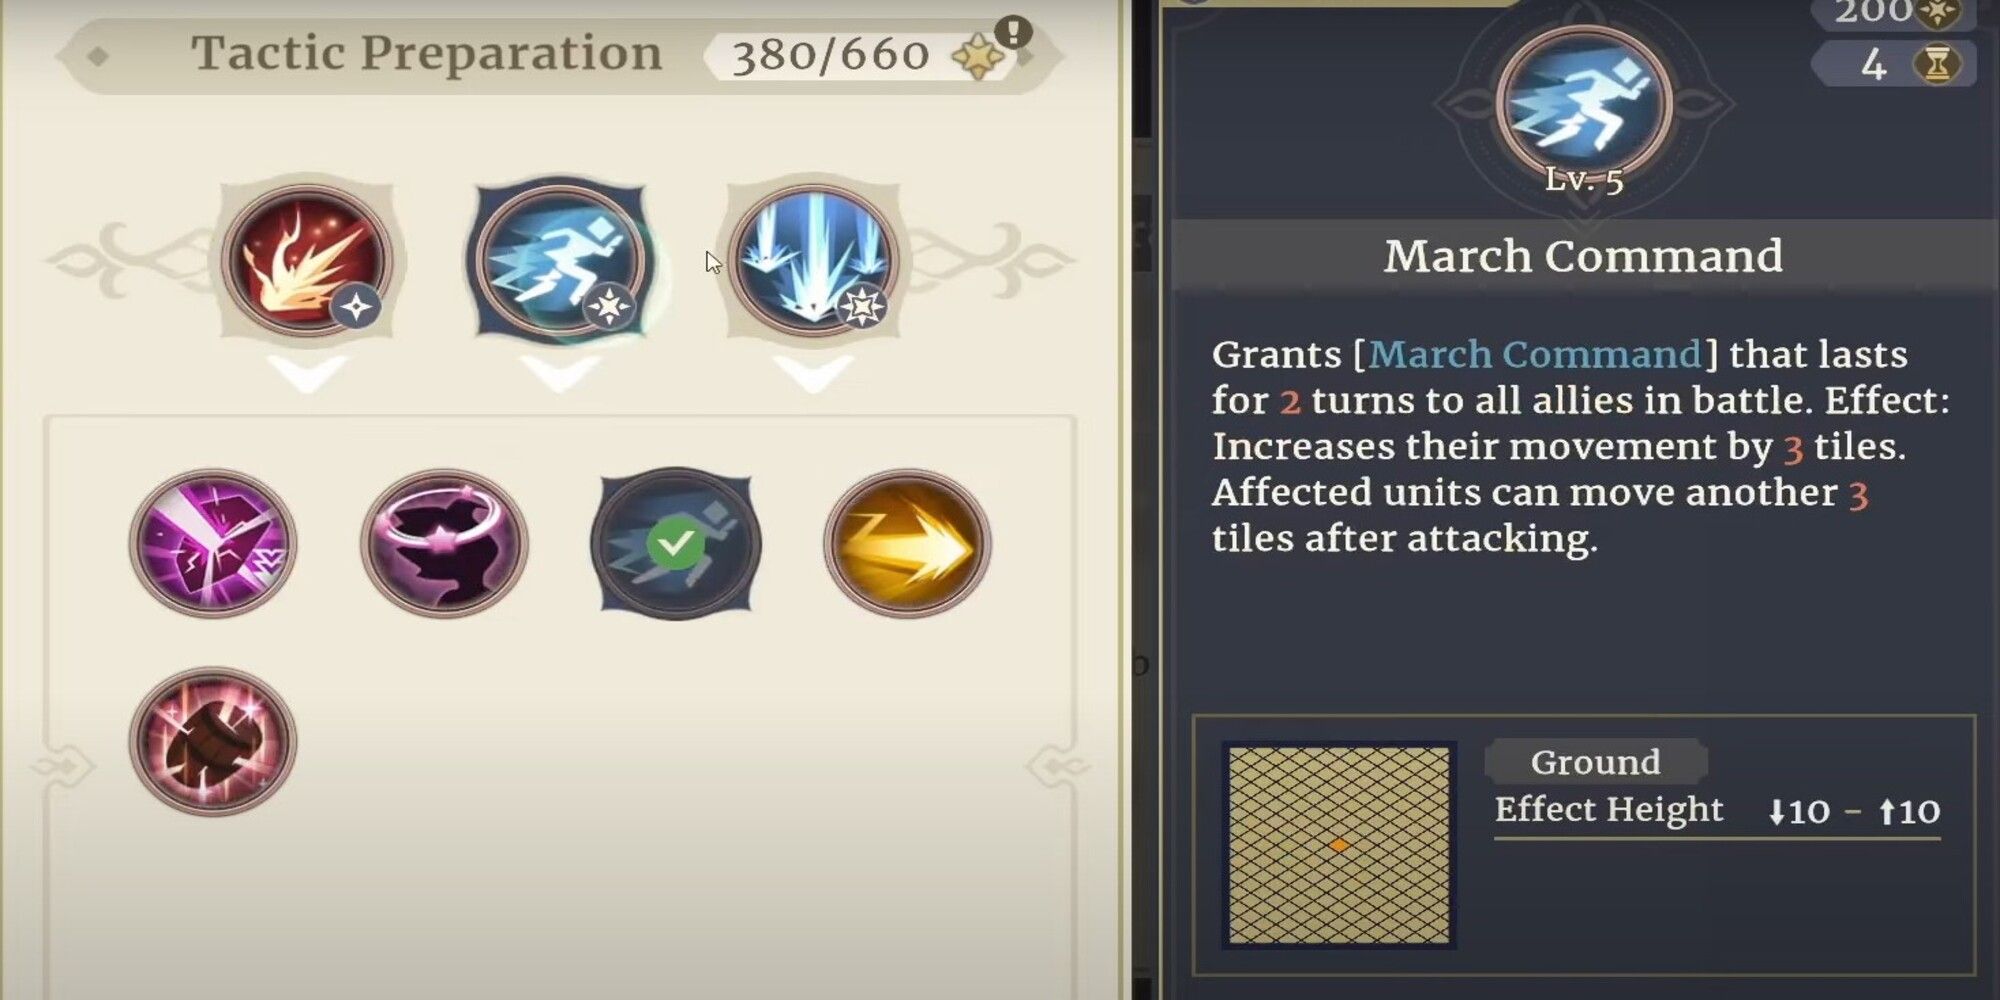
March Command might sound like an expensive version of Urgent Order, but this intermediate tactic well justifies its TP cost. The tactic grants March Command, which lasts for 2 turns, to all allies in battle. The effect of this tactic increases the party’s movement by 3 tiles and the affected units can further move 3 tiles after attacking.
The ability to move even after attacking is a cherry on top, and it allows the characters to attack the enemies and reposition themselves. The best way to make the most of this ability is by utilizing the ability at the start of the level to quickly eliminate enemies.
4
Summon Explosive Barrel
EXPLOSION!
|
Path |
Breaker’s Path |
|---|---|
|
Tactical Points |
175 TP |
|
Cool Down |
1 Turn |
|
Type |
Intermediate |
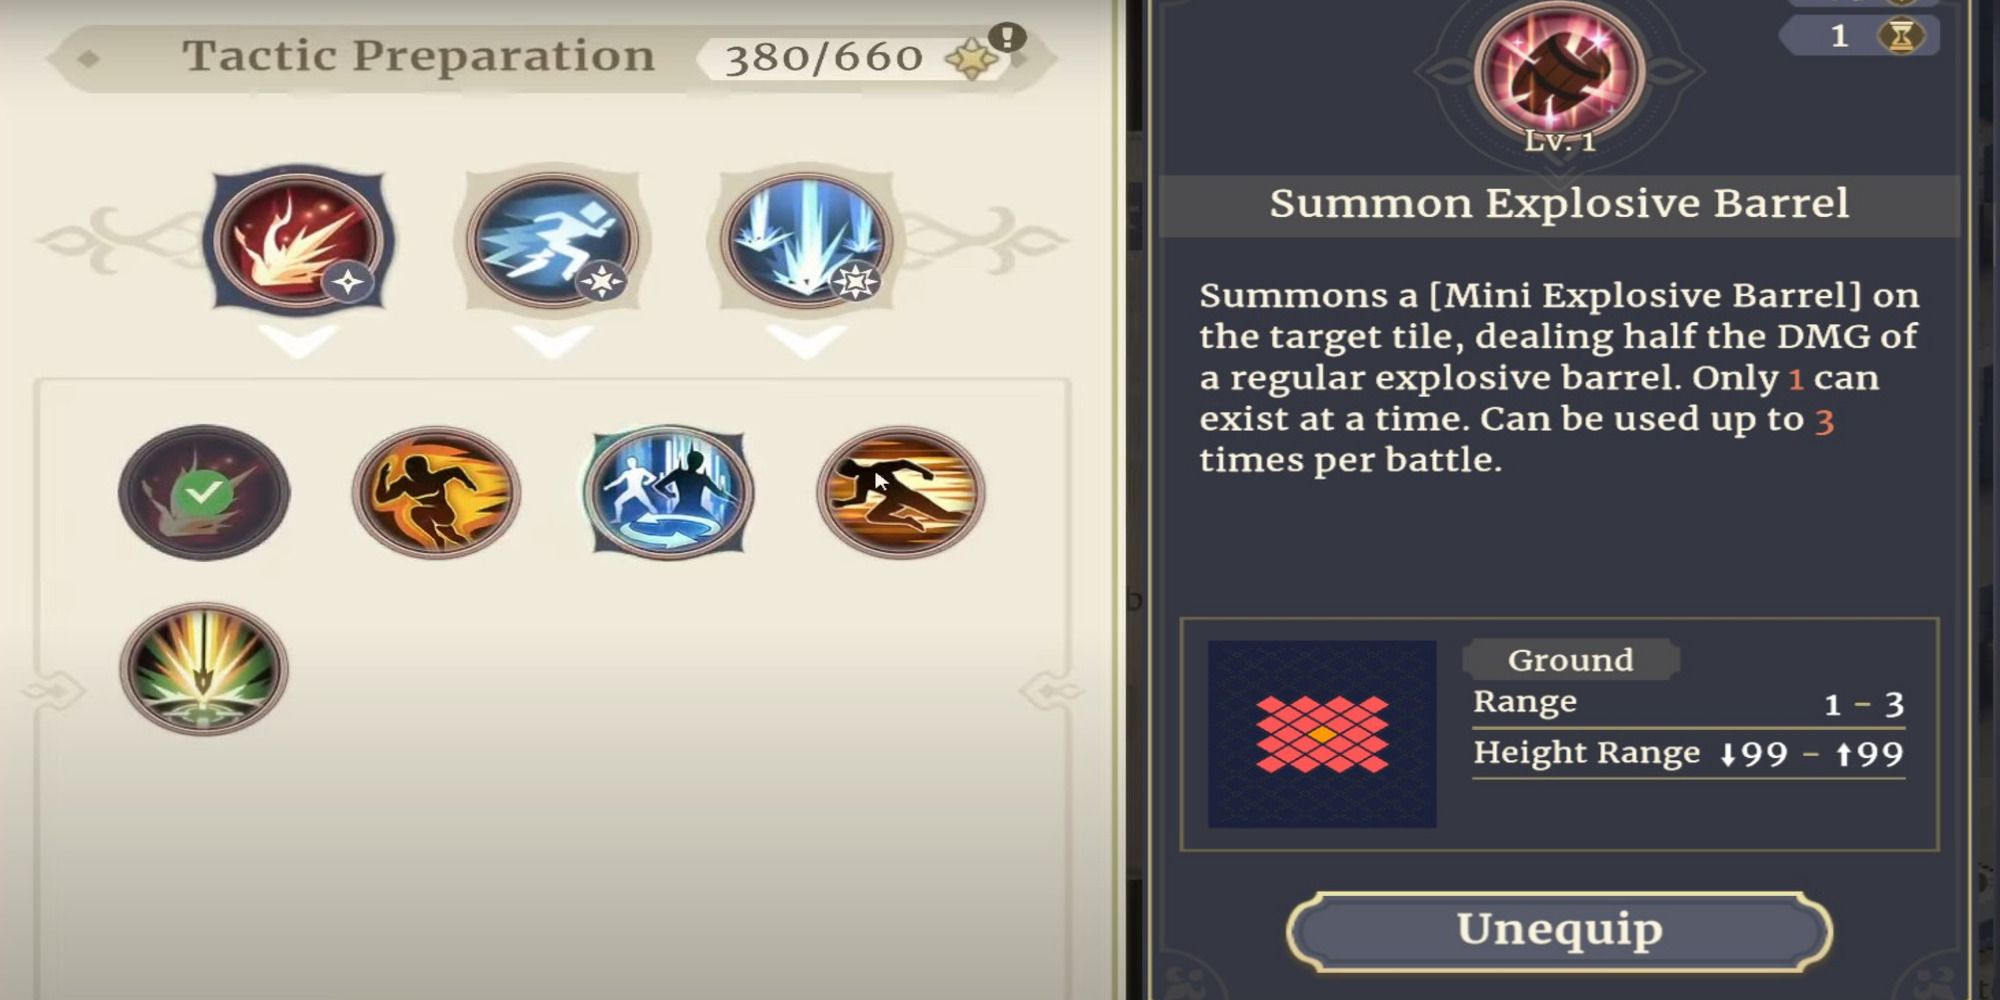
The Summon Explosive Barrel is quite an interesting tactic that can be utilized by the players in various ways. The tactic summons an explosive barrel on a target tile, dealing half the damage of a regular explosive barrel. Only 1 barrel can exist at a time, and it can be used up to 5 times in battle.
8:17

Related
The 20 Best Gacha Games For F2P Players
Players who can’t break the bank for gacha games should try the following F2P-friendly titles.
Moving to the ways this tactic can be used is the most intriguing part. Whether it is to trigger another explosive barrel, block an enemy’s line of sight, or simply just blow enemies up. The sheer versatility of this tactic is useful in different scenarios that would be appreciated by the players.
3
Pursuit Order
Attack And Attack Again
|
Path |
Defender’s Path |
|---|---|
|
Tactical Points |
200 TP |
|
Cool Down |
3 Turns |
|
Type |
Intermediate |
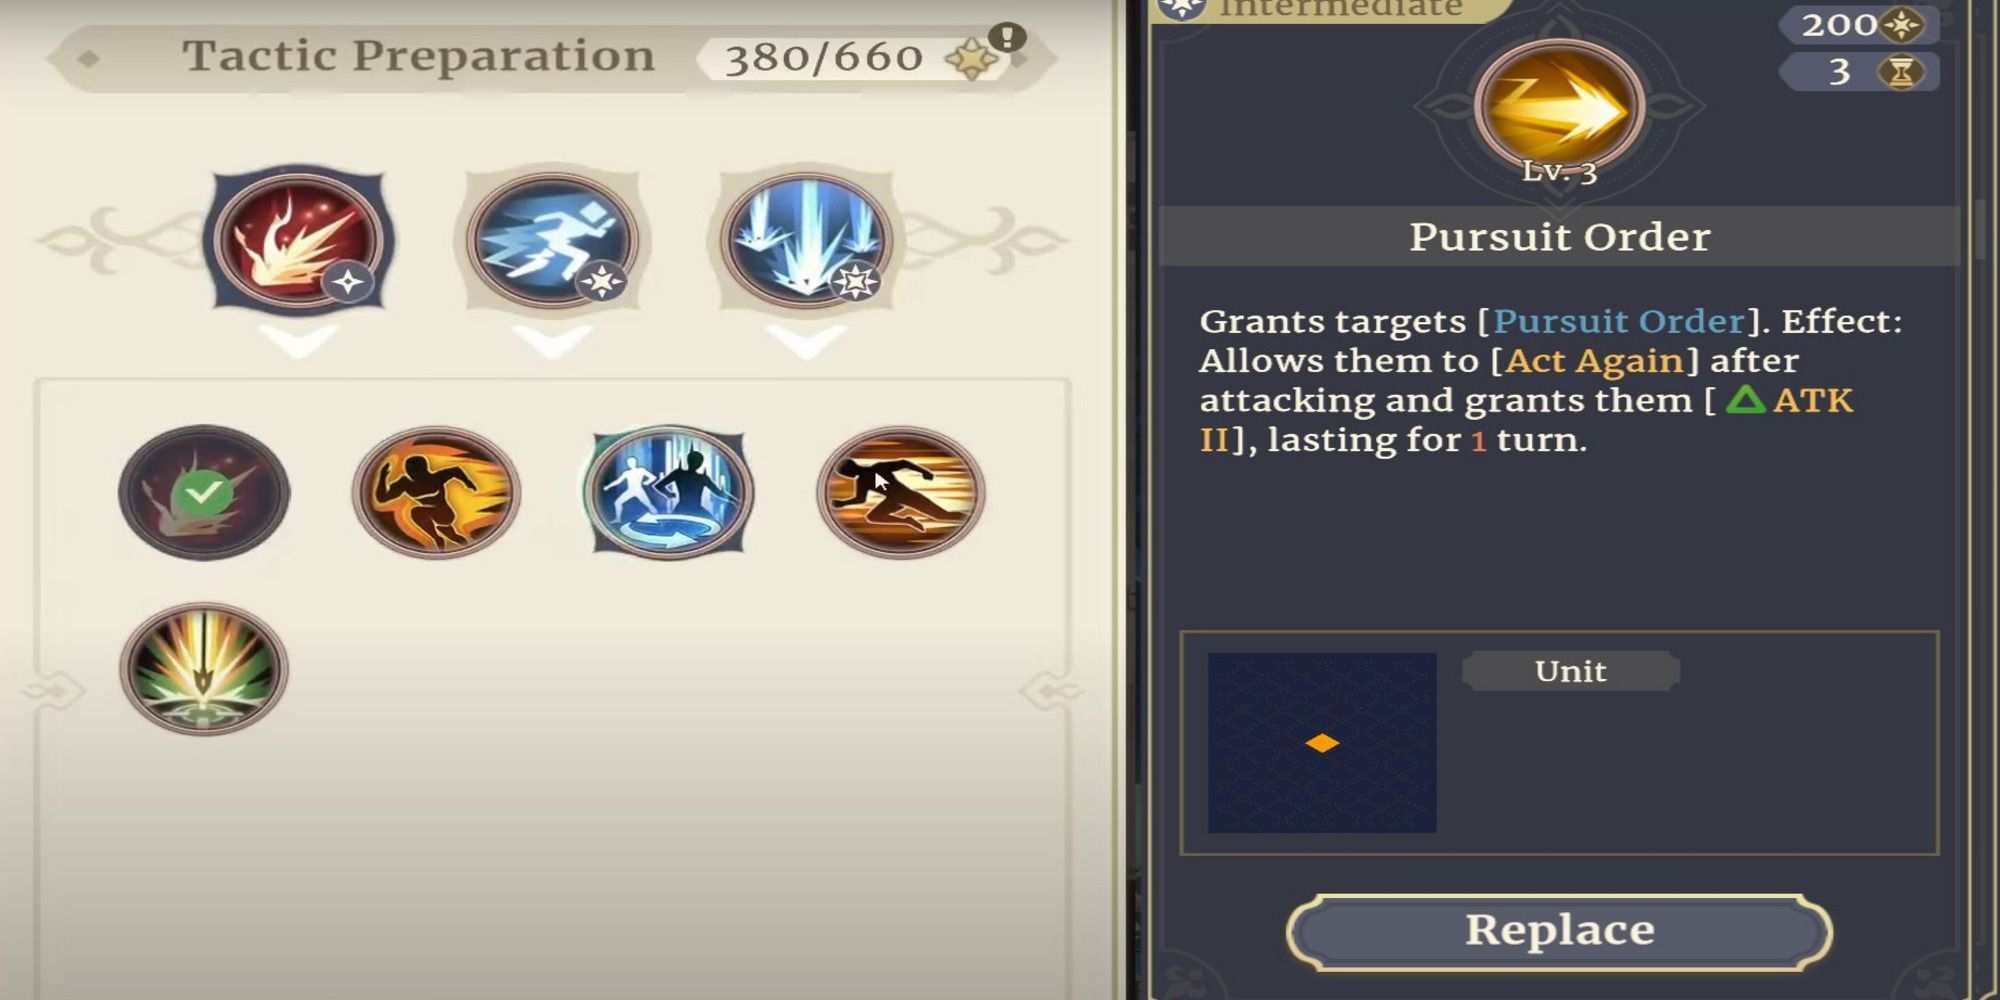
When dealing with stronger enemies, it is vital to clear them as soon as possible else they will pose a major threat to the party, and Pursuit Order, an intermediate tactic, does the exact work to deal with this issue.
When activated, this tactic allows players to take another action after attacking, providing an extra opportunity along with an attack boost that lasts for one turn. Although it comes with a moderate TP cost and a reasonable cooldown, it can do wonders, especially when using it with a strong DPS unit to wipe out powerful enemies who can pose problems as the battle drags out.
2
Flag of Convallaria
Defend The Flag, Retain The Buff
|
Path |
Watcher’s Path |
|---|---|
|
Tactical Points |
350 TP |
|
Cool Down |
3 Turns |
|
Type |
Advanced |
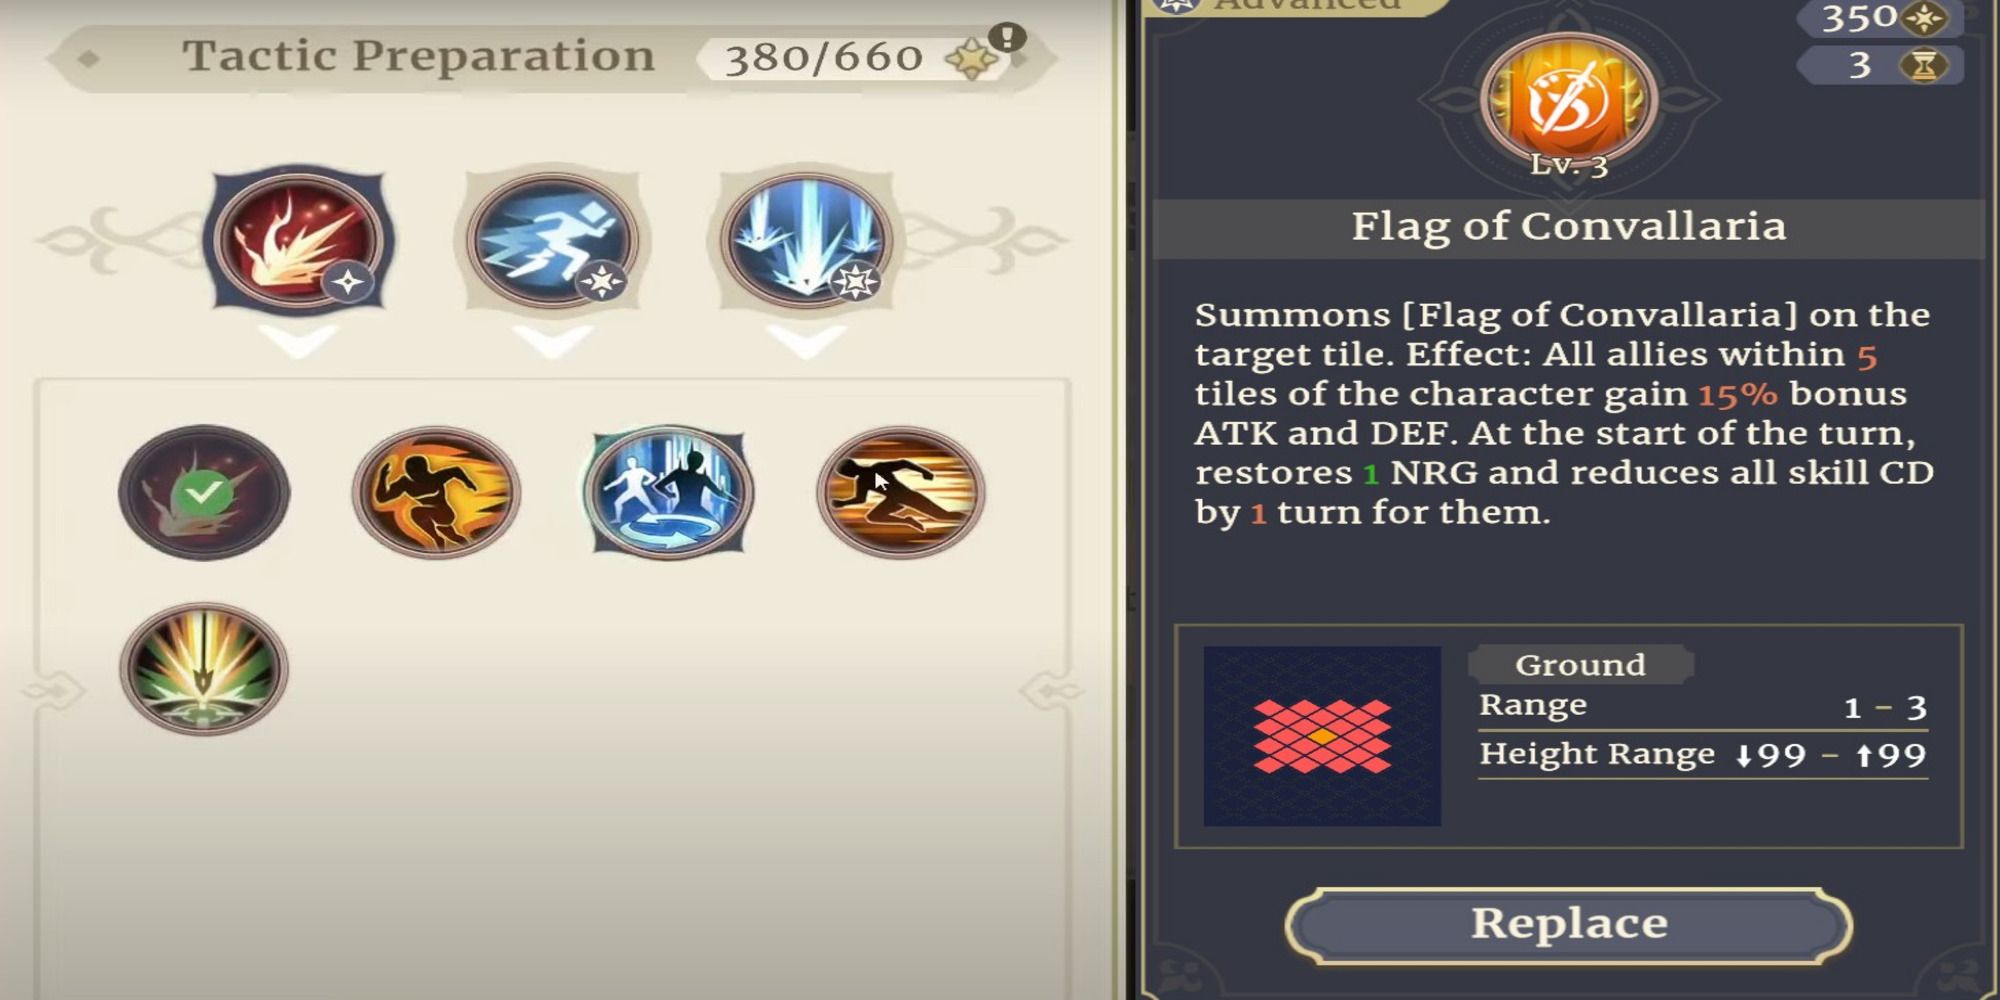
This tactic lies on the more expensive side of tactics as it utilizes a hefty sum of TP and comes with a longer cooldown. However, the extra expense is all worth it when compared with the buff this tactic grants to the entire team.
When summoning the Flag of Convallaria on a target tile, all allies within a 5-tile radius of the character gain 20% bonus ATK and DEF. Furthermore, the tactic restores 1 NRG and reduces all skills CD by one turn.
One thing to keep in mind is to defend the flag and avoid getting it destroyed prematurely, but if players can meet the basic requirements, this advanced tactic can bring out the best in the player’s team.
1
Maneuver Command
Teleport Instantly
|
Path |
Destroyer’s Path |
|---|---|
|
Tactical Points |
120 TP |
|
Cool Down |
3 Turns |
|
Type |
Common |
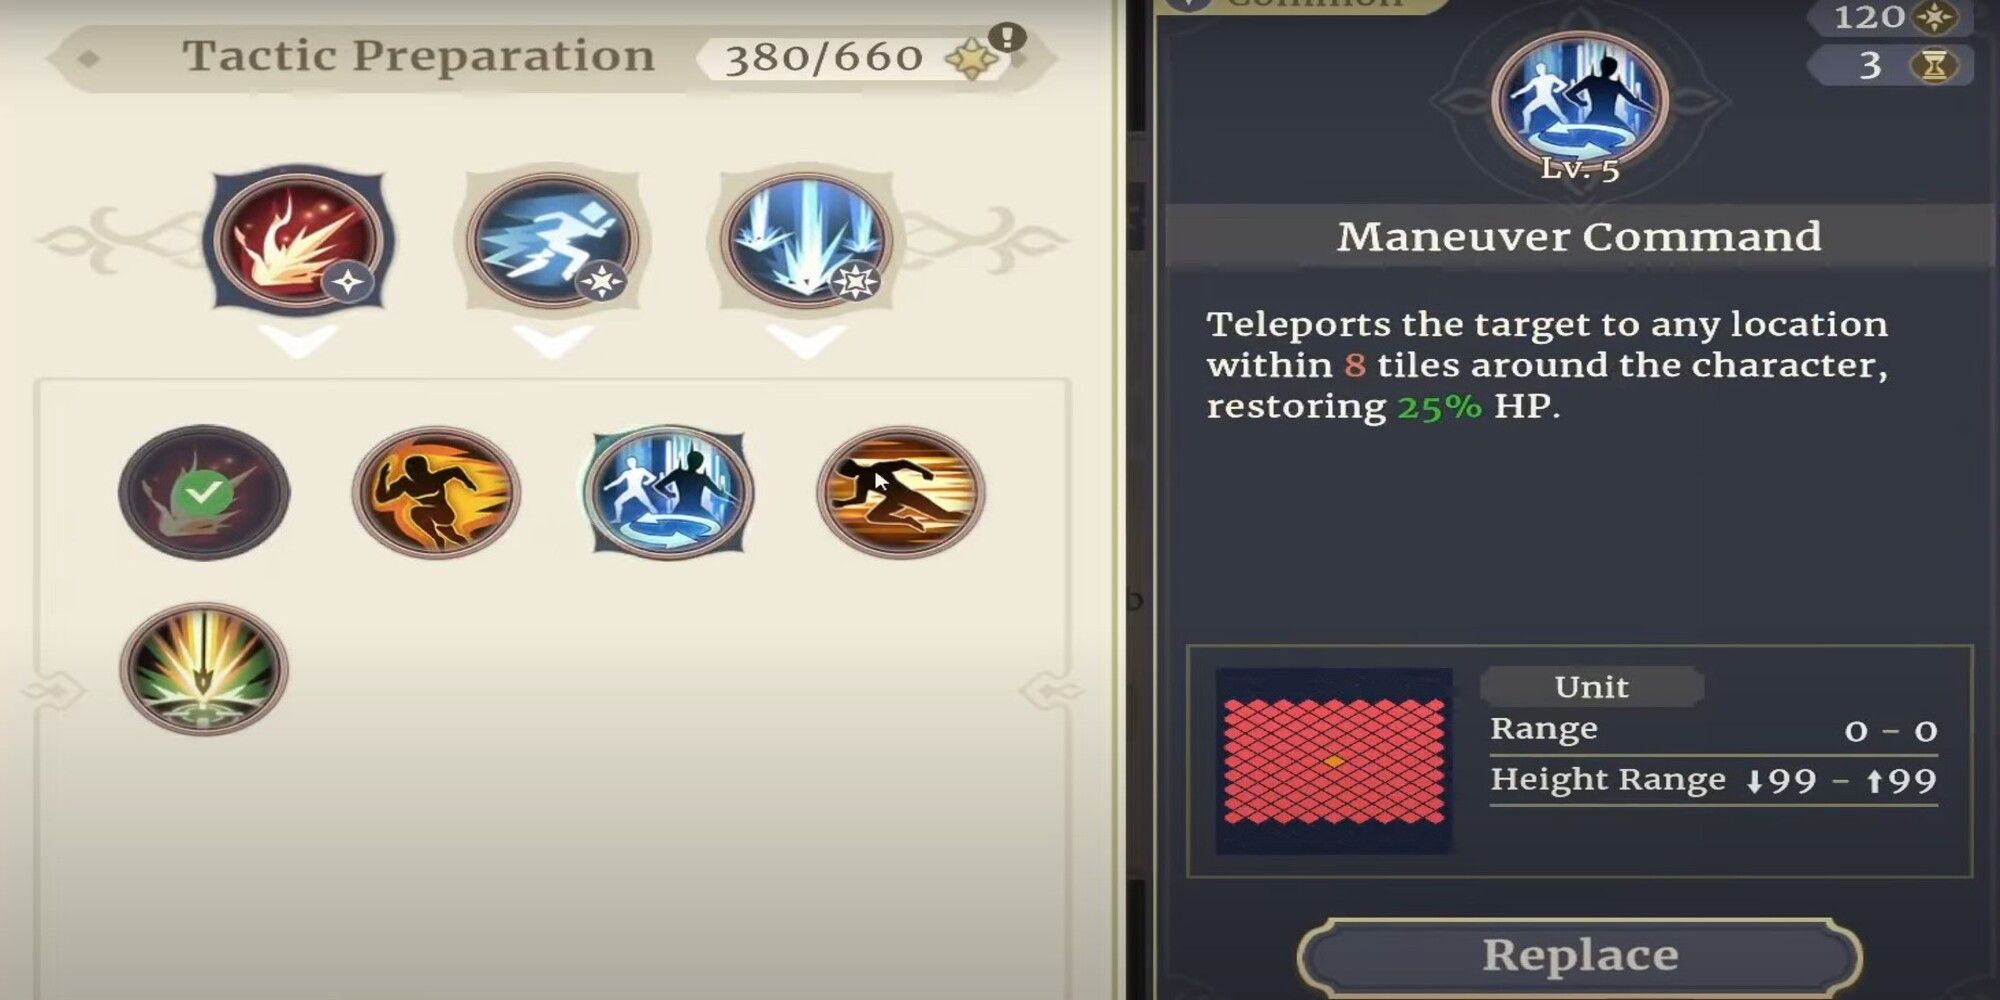
When moving around on the battlefield, players might find themselves in a pickle where the only way to get out of the situation is via teleporting out of the place. Maneuver Command is a common tactic that players can use to tackle the said situation as it teleports the target to any location within 8 tiles around the character, restoring 25% HP.
Another way to utilize this tactic is to advance early in the battle and catch the enemy off guard with a surprise attack. This ability proves invaluable in critical situations, and players who use it will not regret their choice when using tactics that matter the most.
Once players are done with figuring out the best tactics for their team, they can move on to the other parts of the talent chart in the following order – Tactical Points> Physical / Magical ATK> Team Buffs> Class Buffs.








Leave a Reply