After collecting five of the game’s colored orbs, Dragon Quest 3 Remake players will have to turn their gaze to Mt. Necrogond volcano, and make their way into the Maw of the Necrogond. This long series of encounters and dungeons will ultimately lead players to the Silver Orb, which will likely be the final orb players’ collect before unlocking Ramia the Everbird.
4:09
Related
Dragon Quest 3 Remake: Theddon Jail Cell Solution (Green Orb)
A guide to solving the mystery of Theddon’s jail cell in Dragon Quest 3 Remake.
The Maw of the Necrogond is the main dungeon DQIII Remake players will have to complete in order to collect the sixth and final orb. This massive complex is situated right in the middle of two smaller – yet equally important – encounters. The first is Mt. Necrogond volcano, which ultimately unlocks the path to the Maw of the Necrogond. The second is the Necrogond Shrine, where players will receive the Silver Orb. In this guide, we will walk you through each area, and explain how to get the Silver Orb in Dragon Quest 3 Remake,
Mt. Necrogond Volcano Walkthrough – Dragon Quest 3 Remake
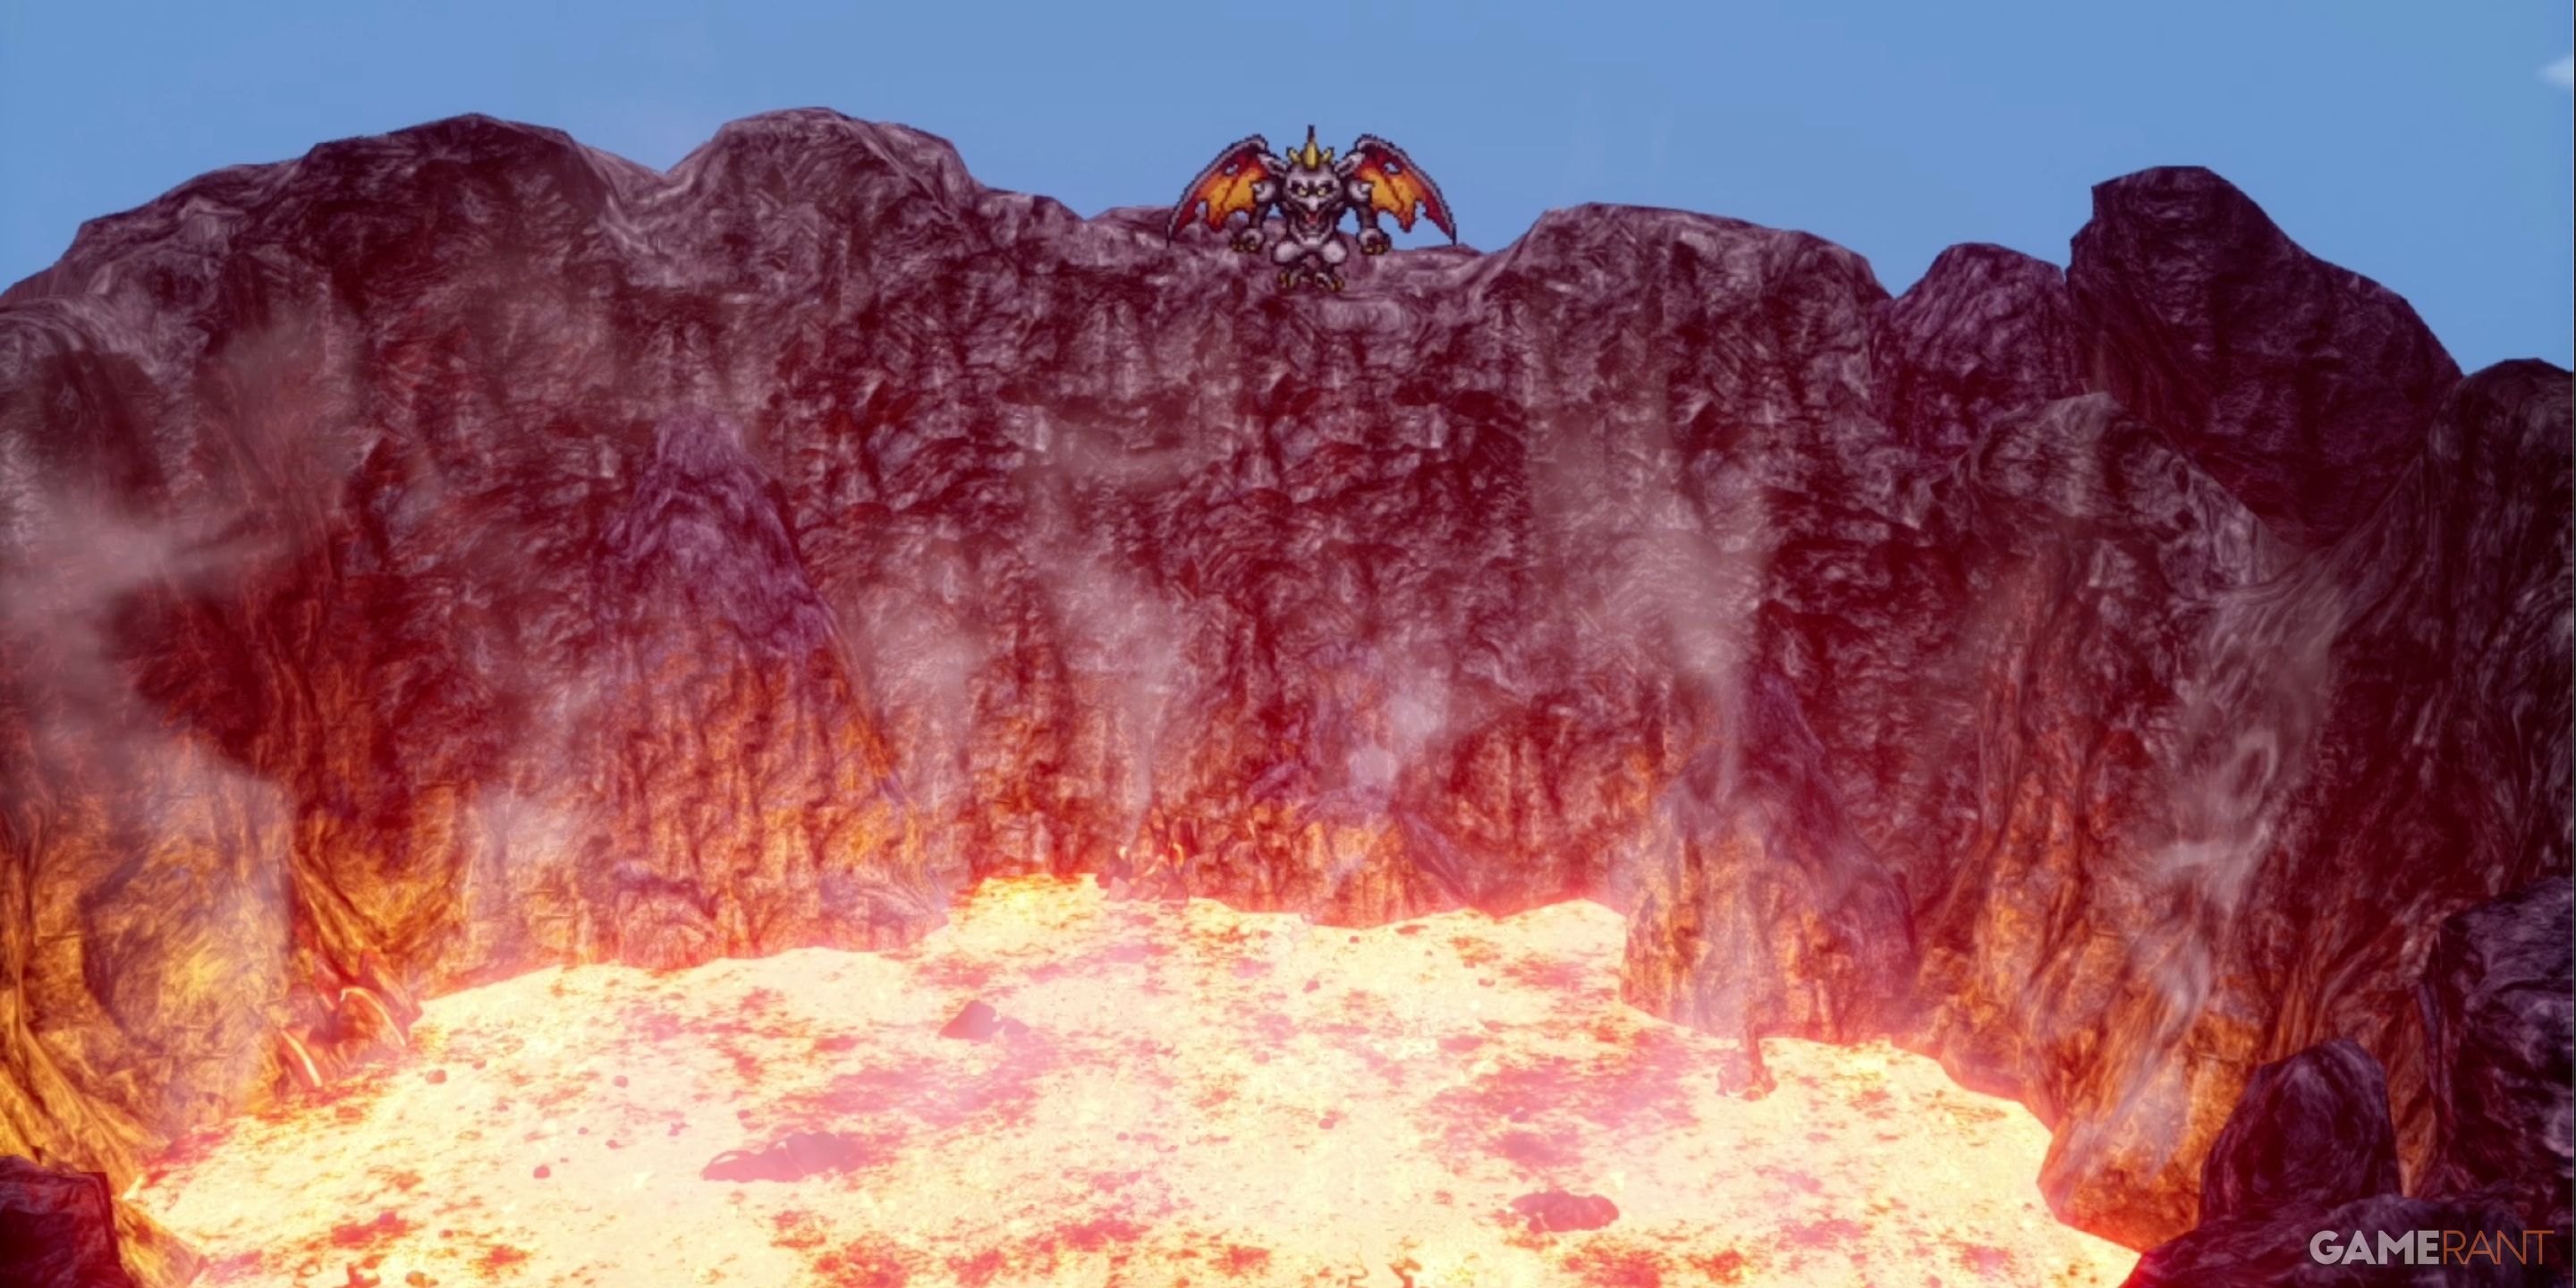
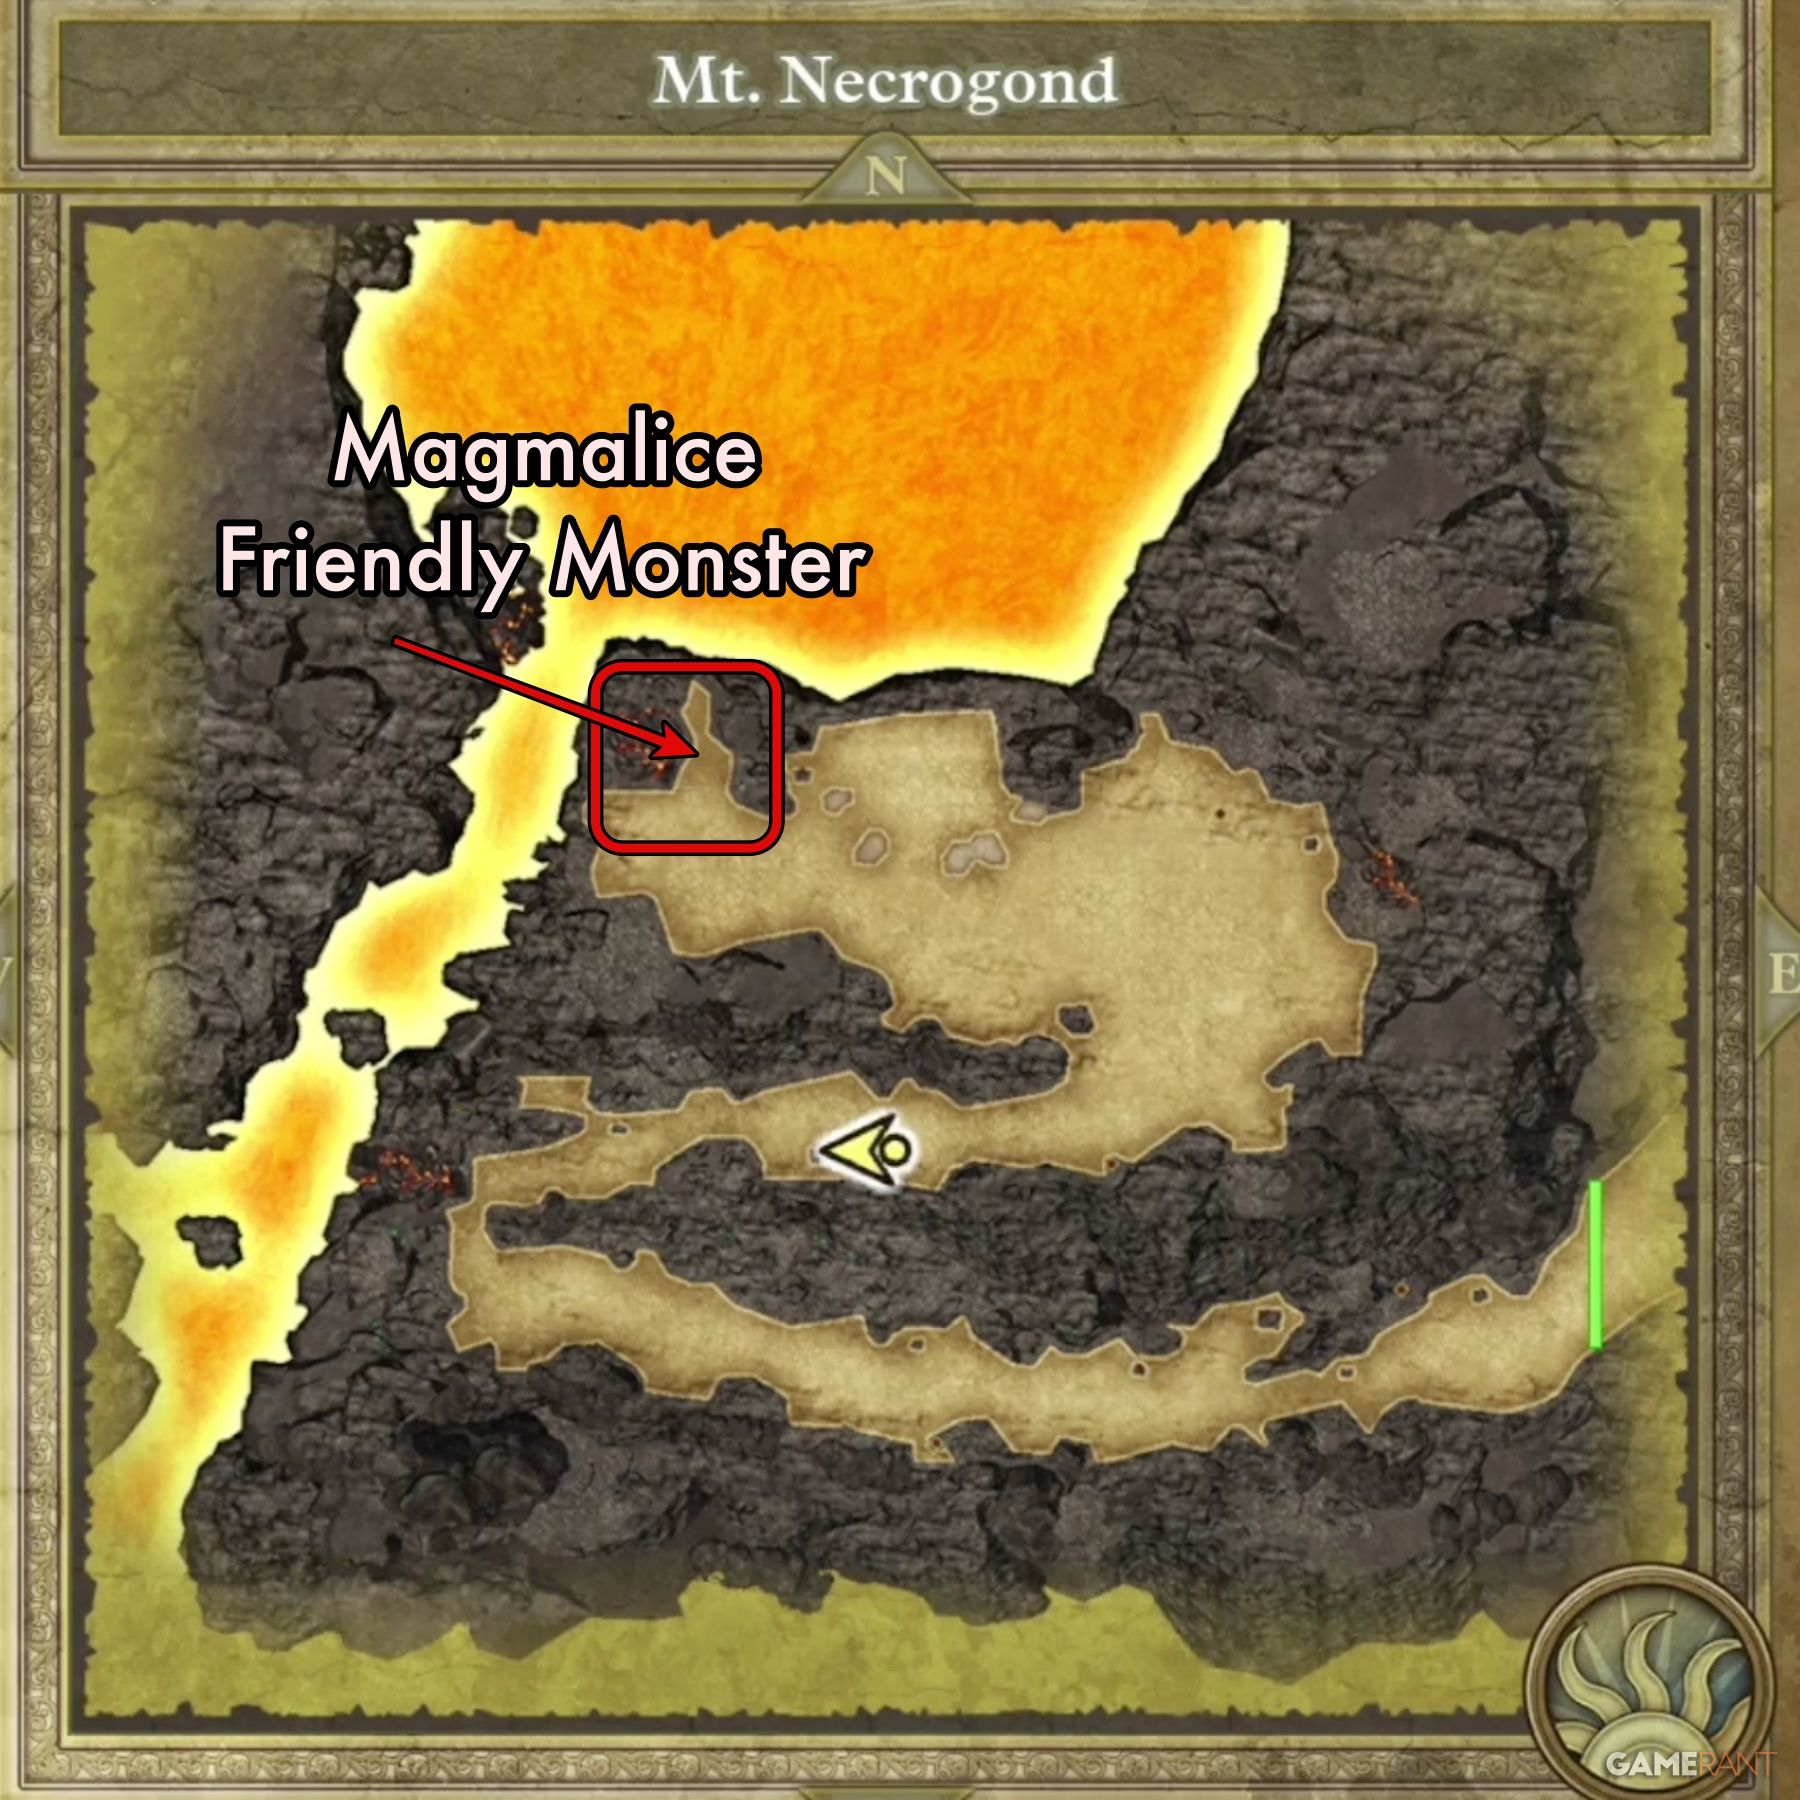
The first event you’ll need to complete in order to get the Silver Orb is the Volcano. Before entering this area, you will have to acquire the Mountaincleaver from the Shrine of Shackles. Once the sword is in your possession, it’ll be time to scale the mountain and face the Garboyle. After you gather the Mountaincleaver, the game should direct you to Mt. Necrogond volcano – AKA the fiery mountain – as your next task.
How to Reach Mt. Necrogond:
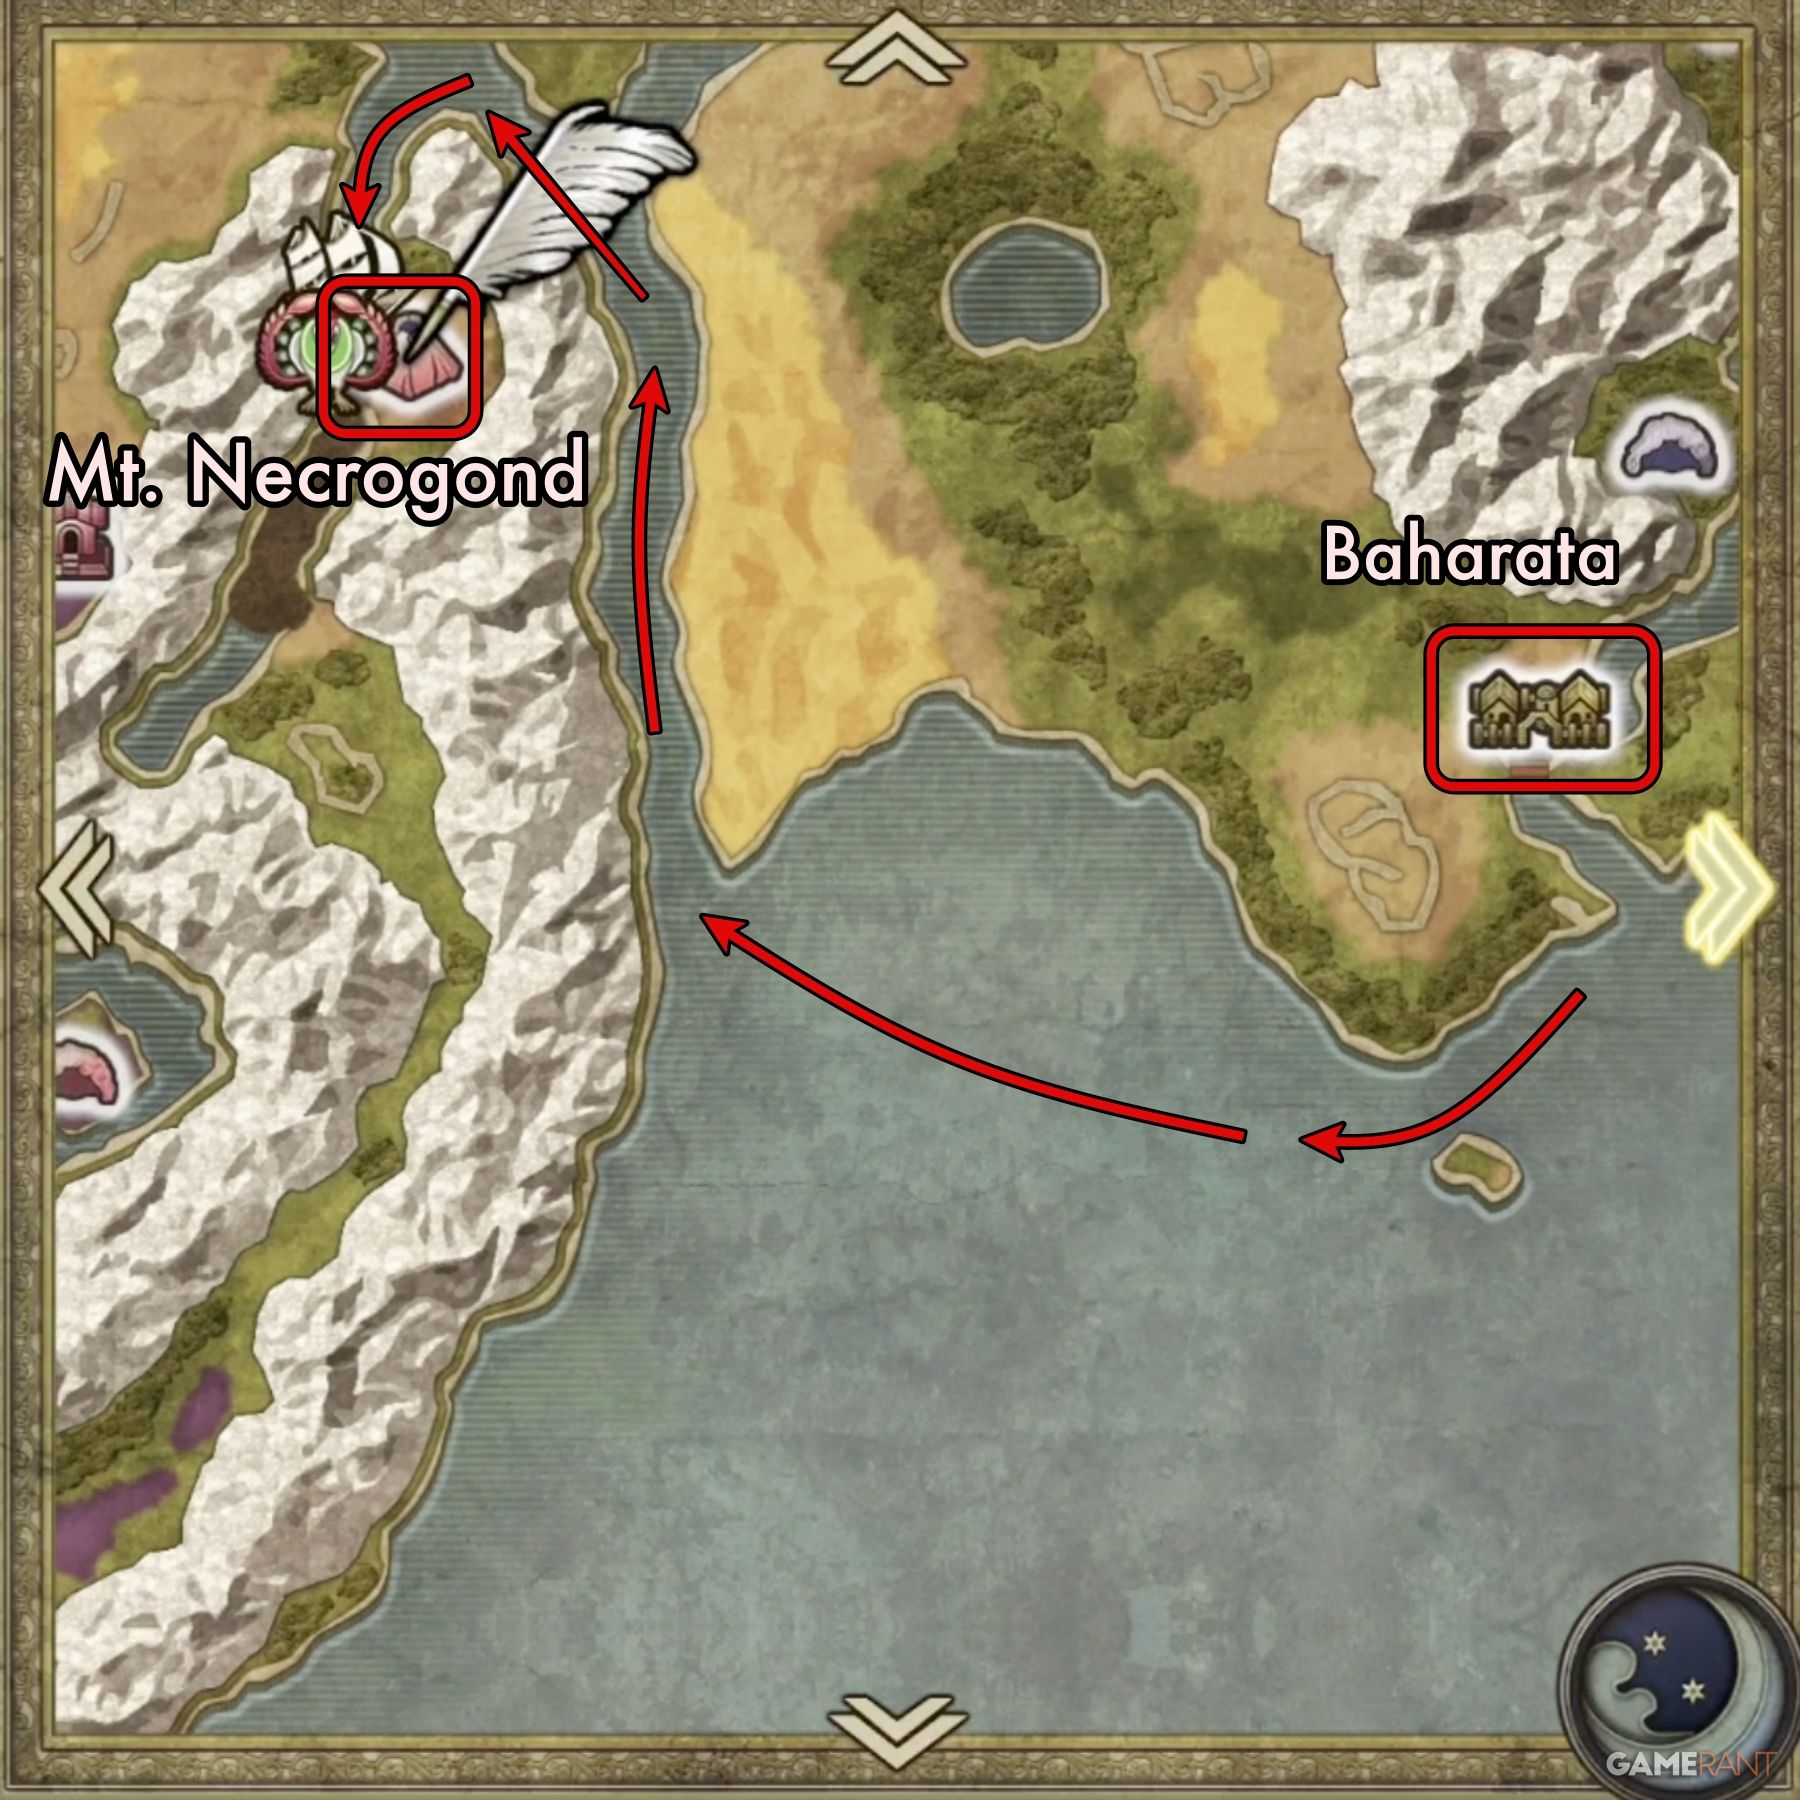
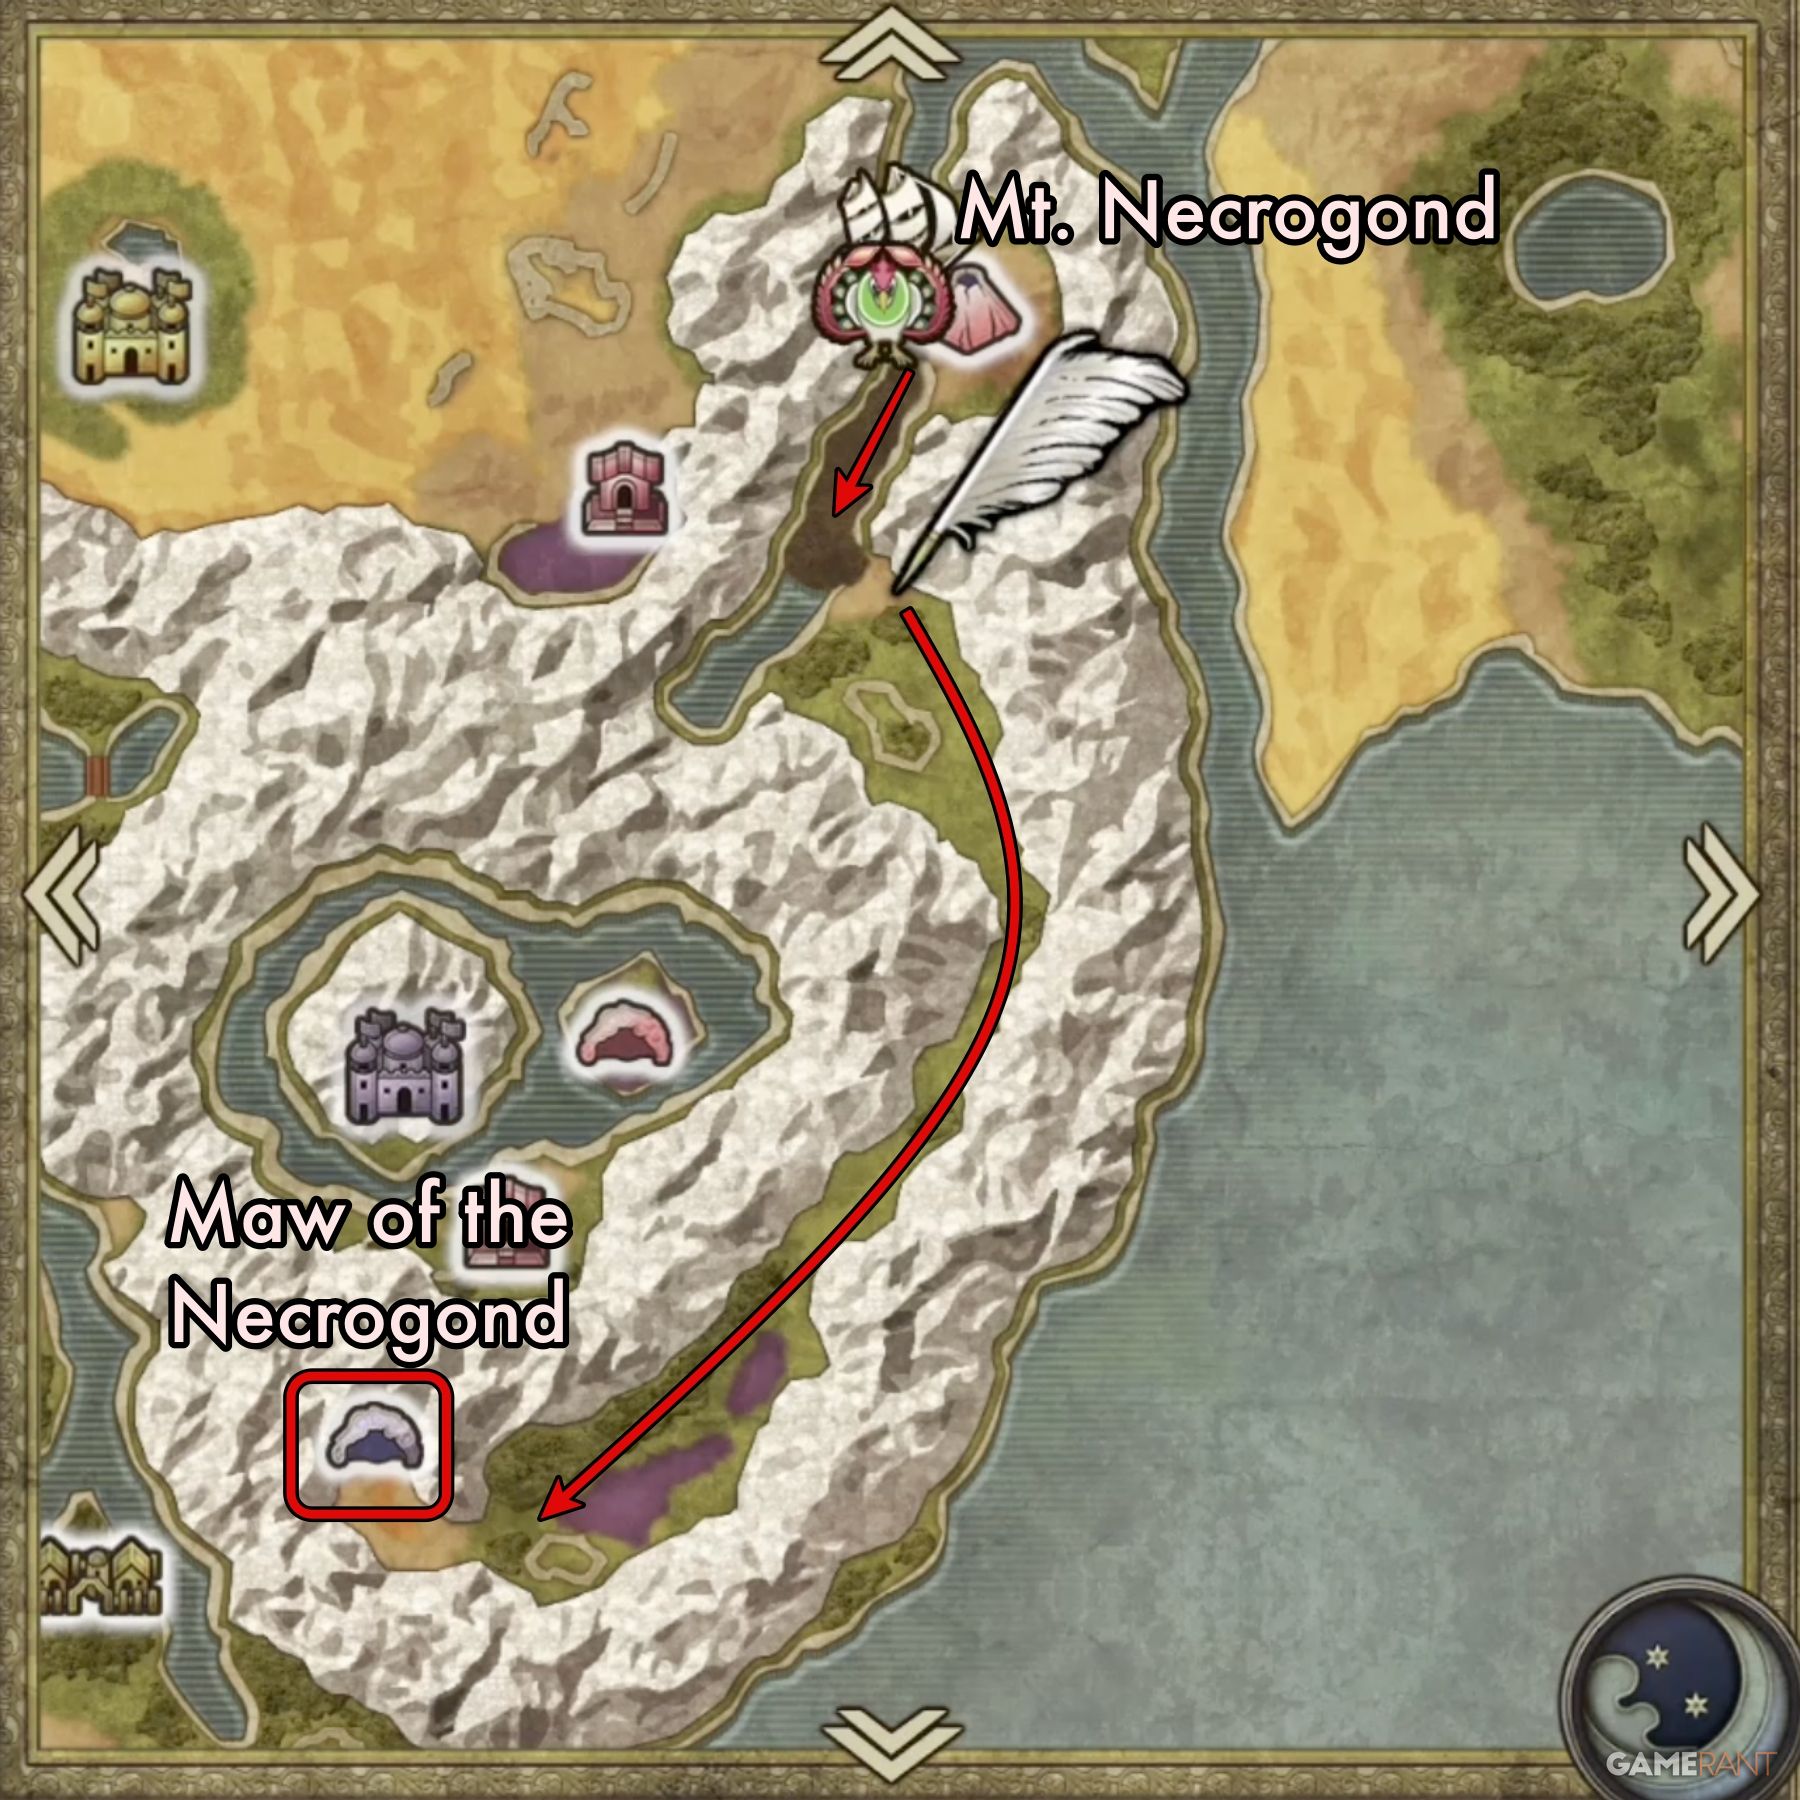
To reach Mt. Necrogond, you’ll want to sail west from Baharata. As you sail west, check the map for a small river inlet to the north. It will be just after a small desert area. Make your way up the river, then turn left when the river splits. At the end of this small river section, you’ll want to get off the ship and walk the short distance to Mt. Necrogond.
The volcano actually entails only one real encounter: the Garboyle main boss.
How to Defeat Garboyle in Dragon Quest 3 Remake:
Garboyle is a very powerful boss who uses a variety of attacks. It is capable of performing three attacks per turn, which can be devastating, even to appropriately leveled characters. In our fight, which was at the Dragon Quest difficulty level, Garboyle used four main attacks:
- Attack Attacker: This brutal attack not only does massive damage, but will lower the attack power of whomever it hits.
- Frizzle: A mid-level fire-based spell.
- Burning Breath: A dangerous cloud attack that is capable of inflicting paralysis on all party members.
- Dazzle: A spell that is capable of confusing the party, making you lose control of whomever is affected.
The most important pieces of Equipment for this fight are those that can help stop Paralysis and Confusion. The Banishing Bell is a good accessory for protecting against both at the same time. Check your Equipment bag for any gear that protects against these status effects.
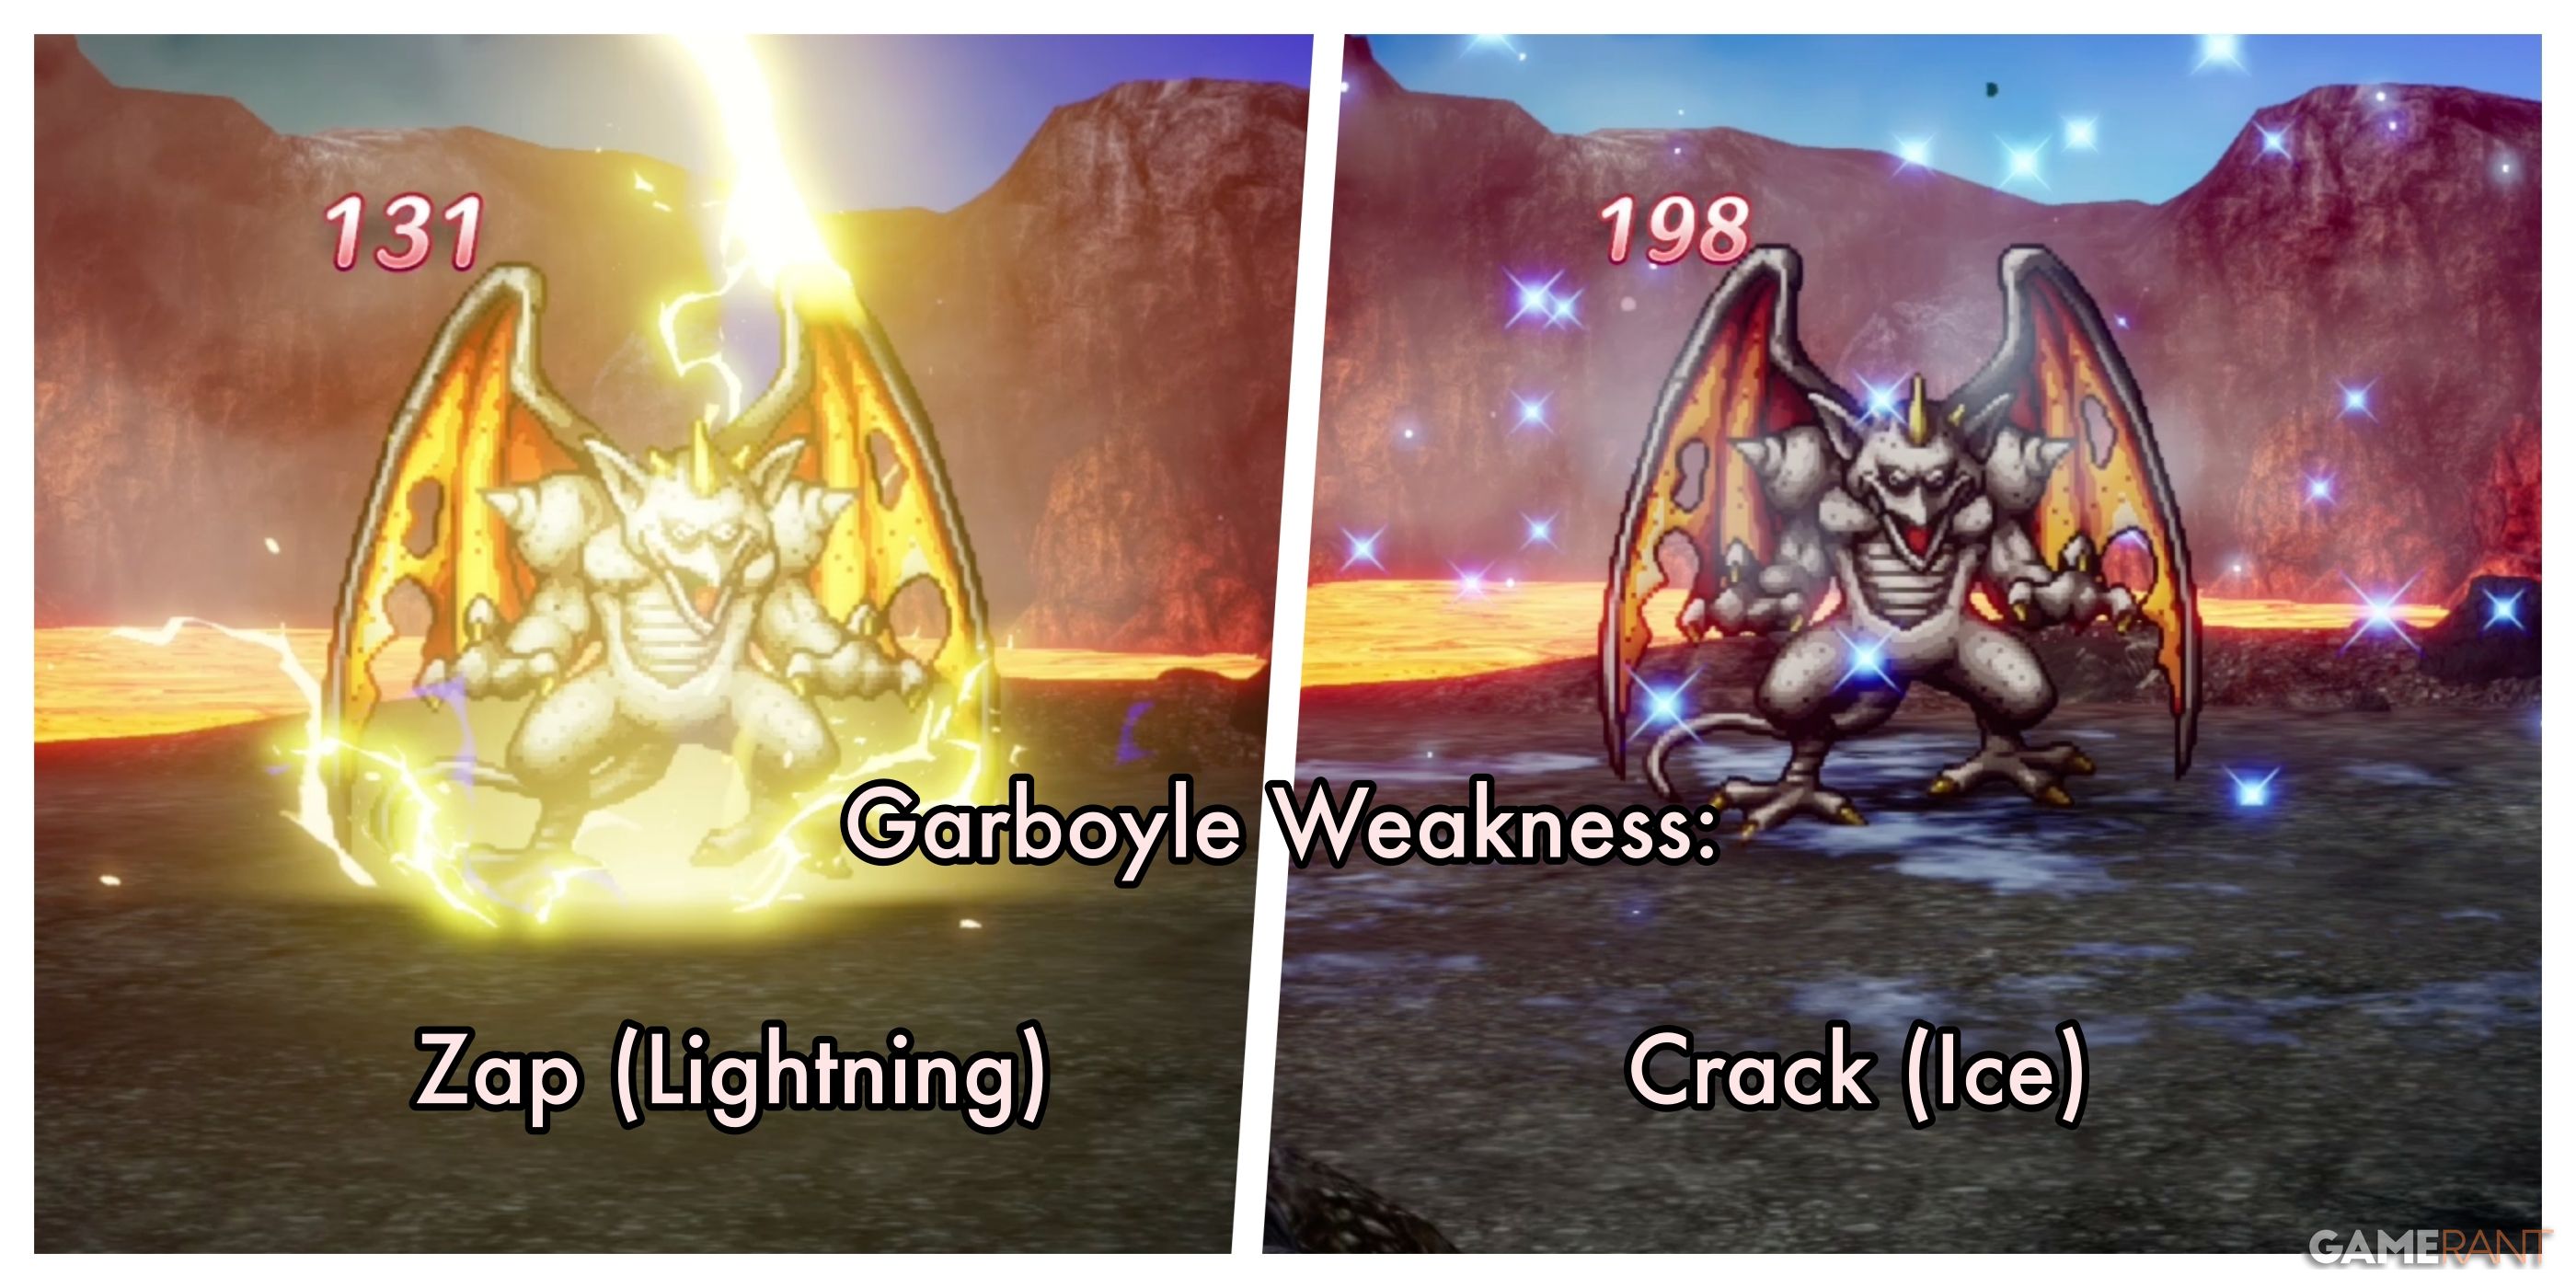
Garboyle has two major weaknesses: Crack-based spells (Ice) and Zap-based spells (Electricity).
The Hero will want to use Zapple or Lightning Slash. If you have at least one spell-caster, Kacrack should be available at this point. We had two spell-casters, but made the mistake of focusing too much on attacks. You definitely want at least one party-member to be dedicated to healing.
In many ways, Garboyle is one of the most significant skill checks in Dragon Quest 3 Remake. While we were able to defeat it on our first attempt, only our Hero survived the fight. In hindsight, the better strategy would have been to focus two party members on attacks, and keep two party members back in a supporting role. It would have taken longer to win, but the entire party would have had a better chance of surviving.
After you defeat Garboyle, a special cutscene will play that will give you more insight into Ortega’s character. Avoiding major spoilers, it is enough to say that the fight will result in a new path being formed that will allow you to proceed to the Maw of the Necrogond.
Maw of the Necrogond B1 Walkthrough – Dragon Quest 3 Remake
How to Reach the Maw of the Necrogond:
After defeating the Garboyle, Mt. Necrogond will erupt, creating a path of volcanic rock that allows you to reach the Maw of the Necrogond. If you check the map, you’ll see a long, skinny path that leads south between the snow-covered mountains. At the end of the path, you’ll find the dungeon’s entrance.
About two-thirds of the way down the path you’ll encounter poisonous purple areas that harm the party if they walk through them. Use the Safe Passage spell to safely enter and collect the sparkly loot cache.
Near the southern end of the path, before you turn west to enter the cave, you’ll notice there is a Secret Spot on a raised plateau. You can only reach this area once you’ve unlocked Ramia the Everbird. The Secret Spot contains a Stealth Suit and a Thief’s Turban.
Maw of the Necrogond B1 Main Path:
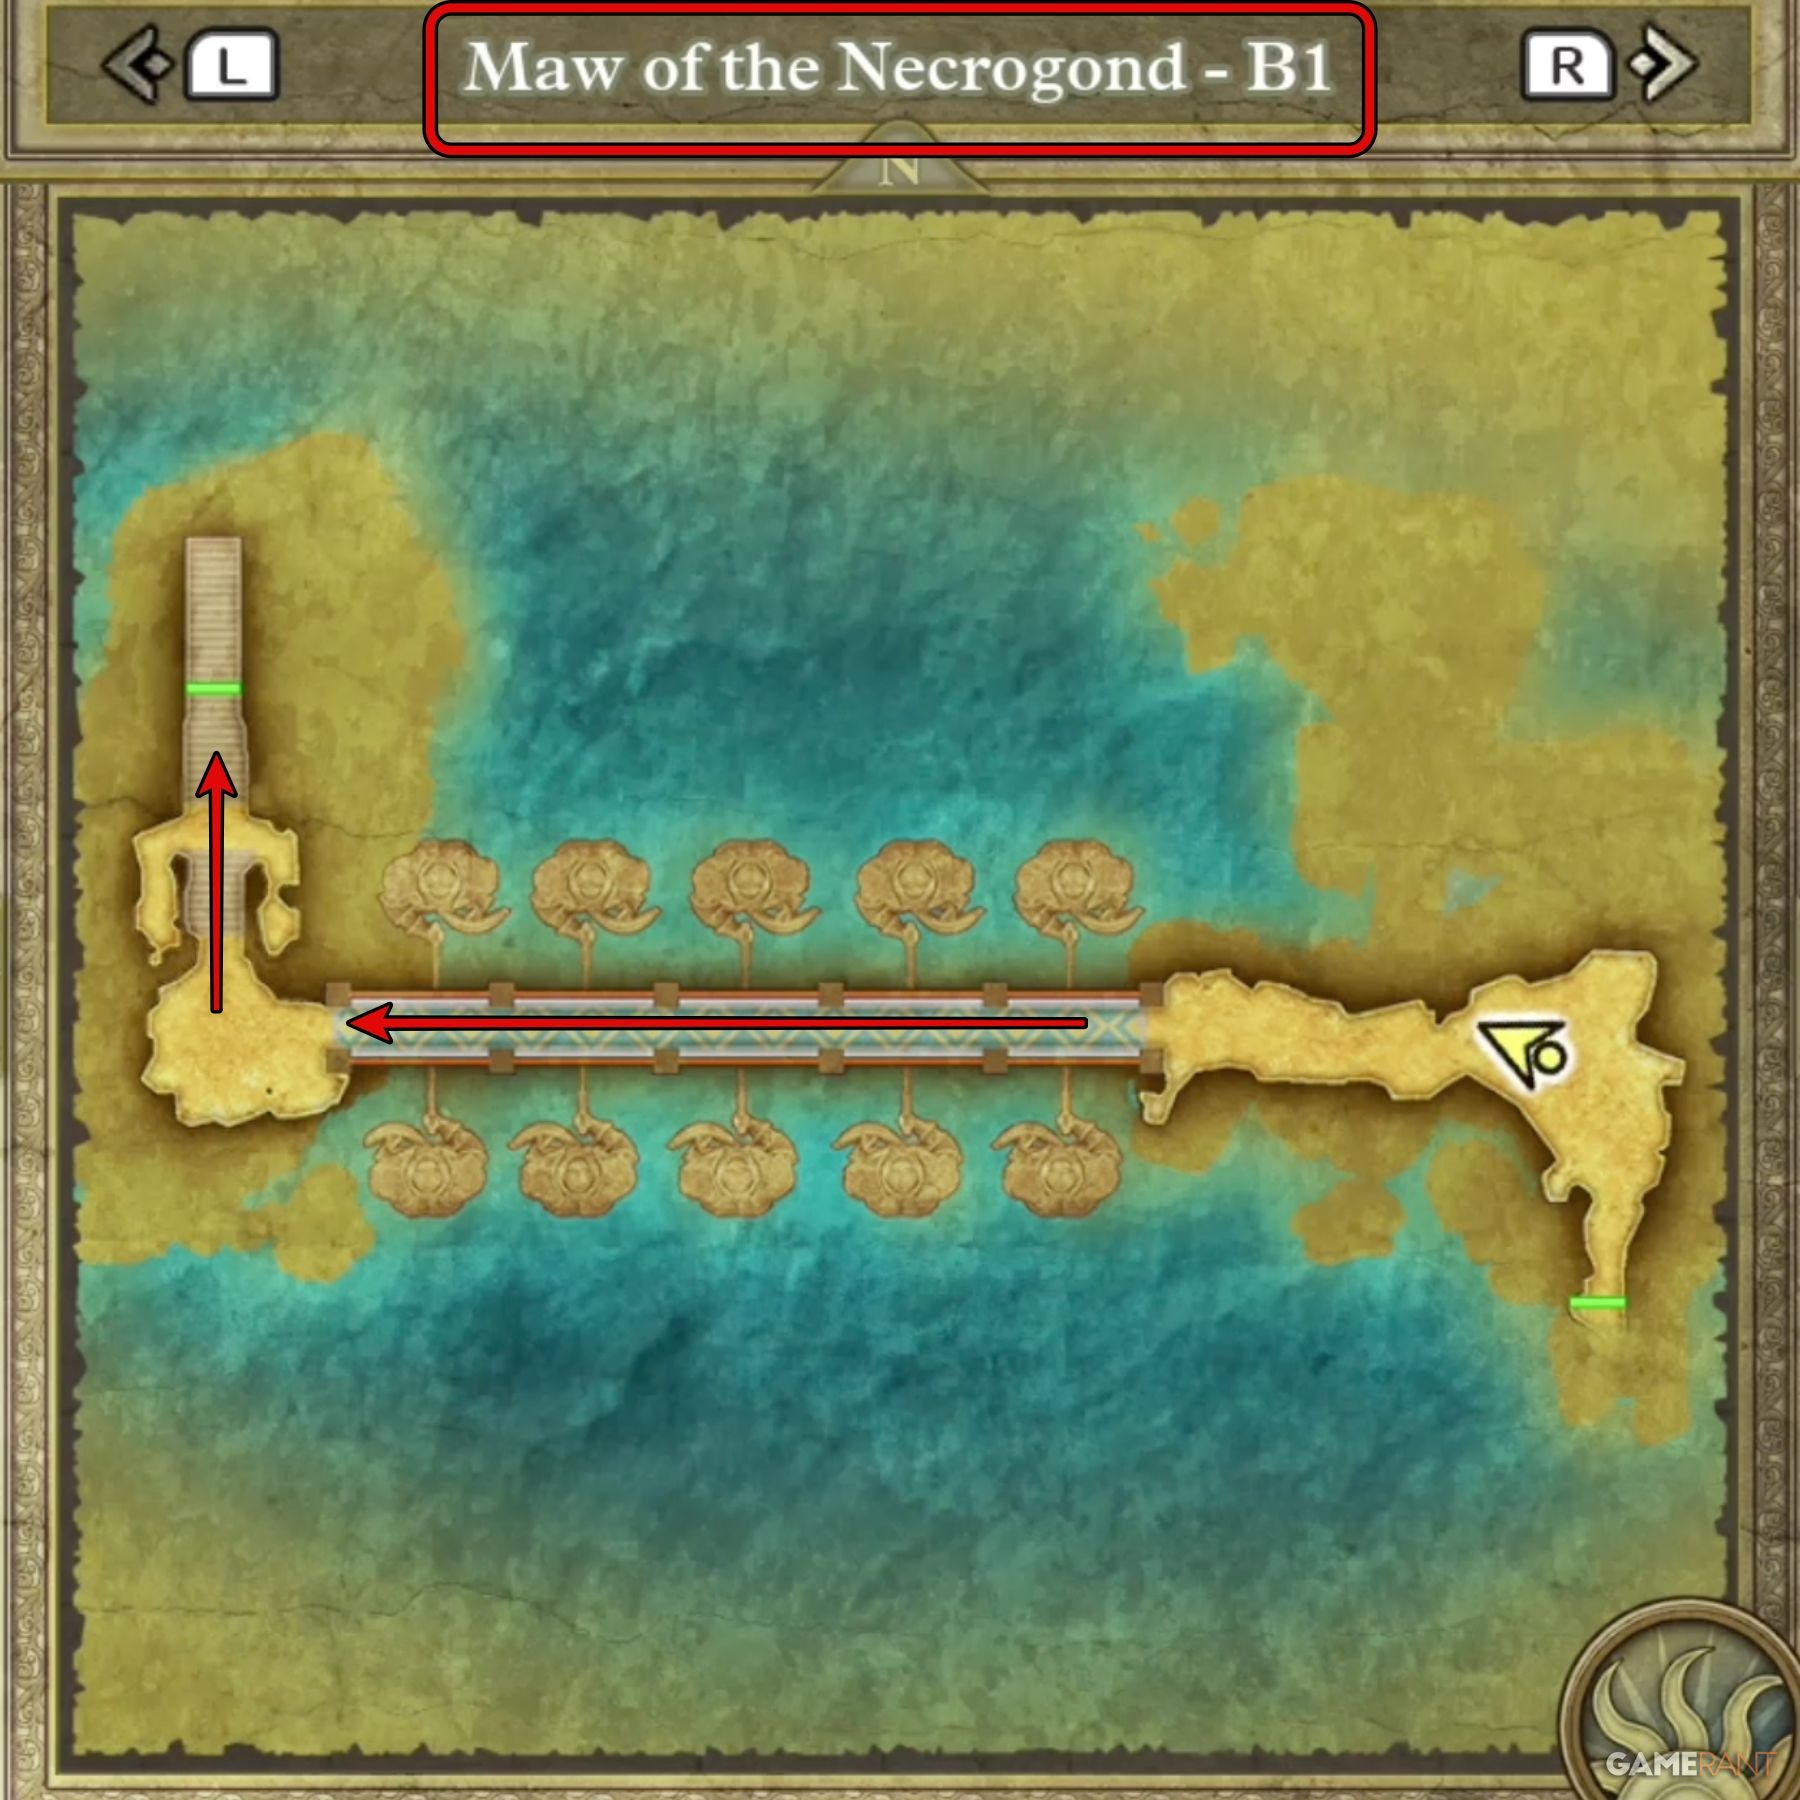
When you enter the Maw of the Necrogond, you’ll start on the first basement level, or B1. There aren’t any significant events that happen on the first level. You’ll simply cross the bridge and climb the stairs that leads to the first main level, or L1.
Maw of the Necrogond L1 Walkthrough – Dragon Quest 3 Remake
Maw of the Necrogond L1 Main Path:
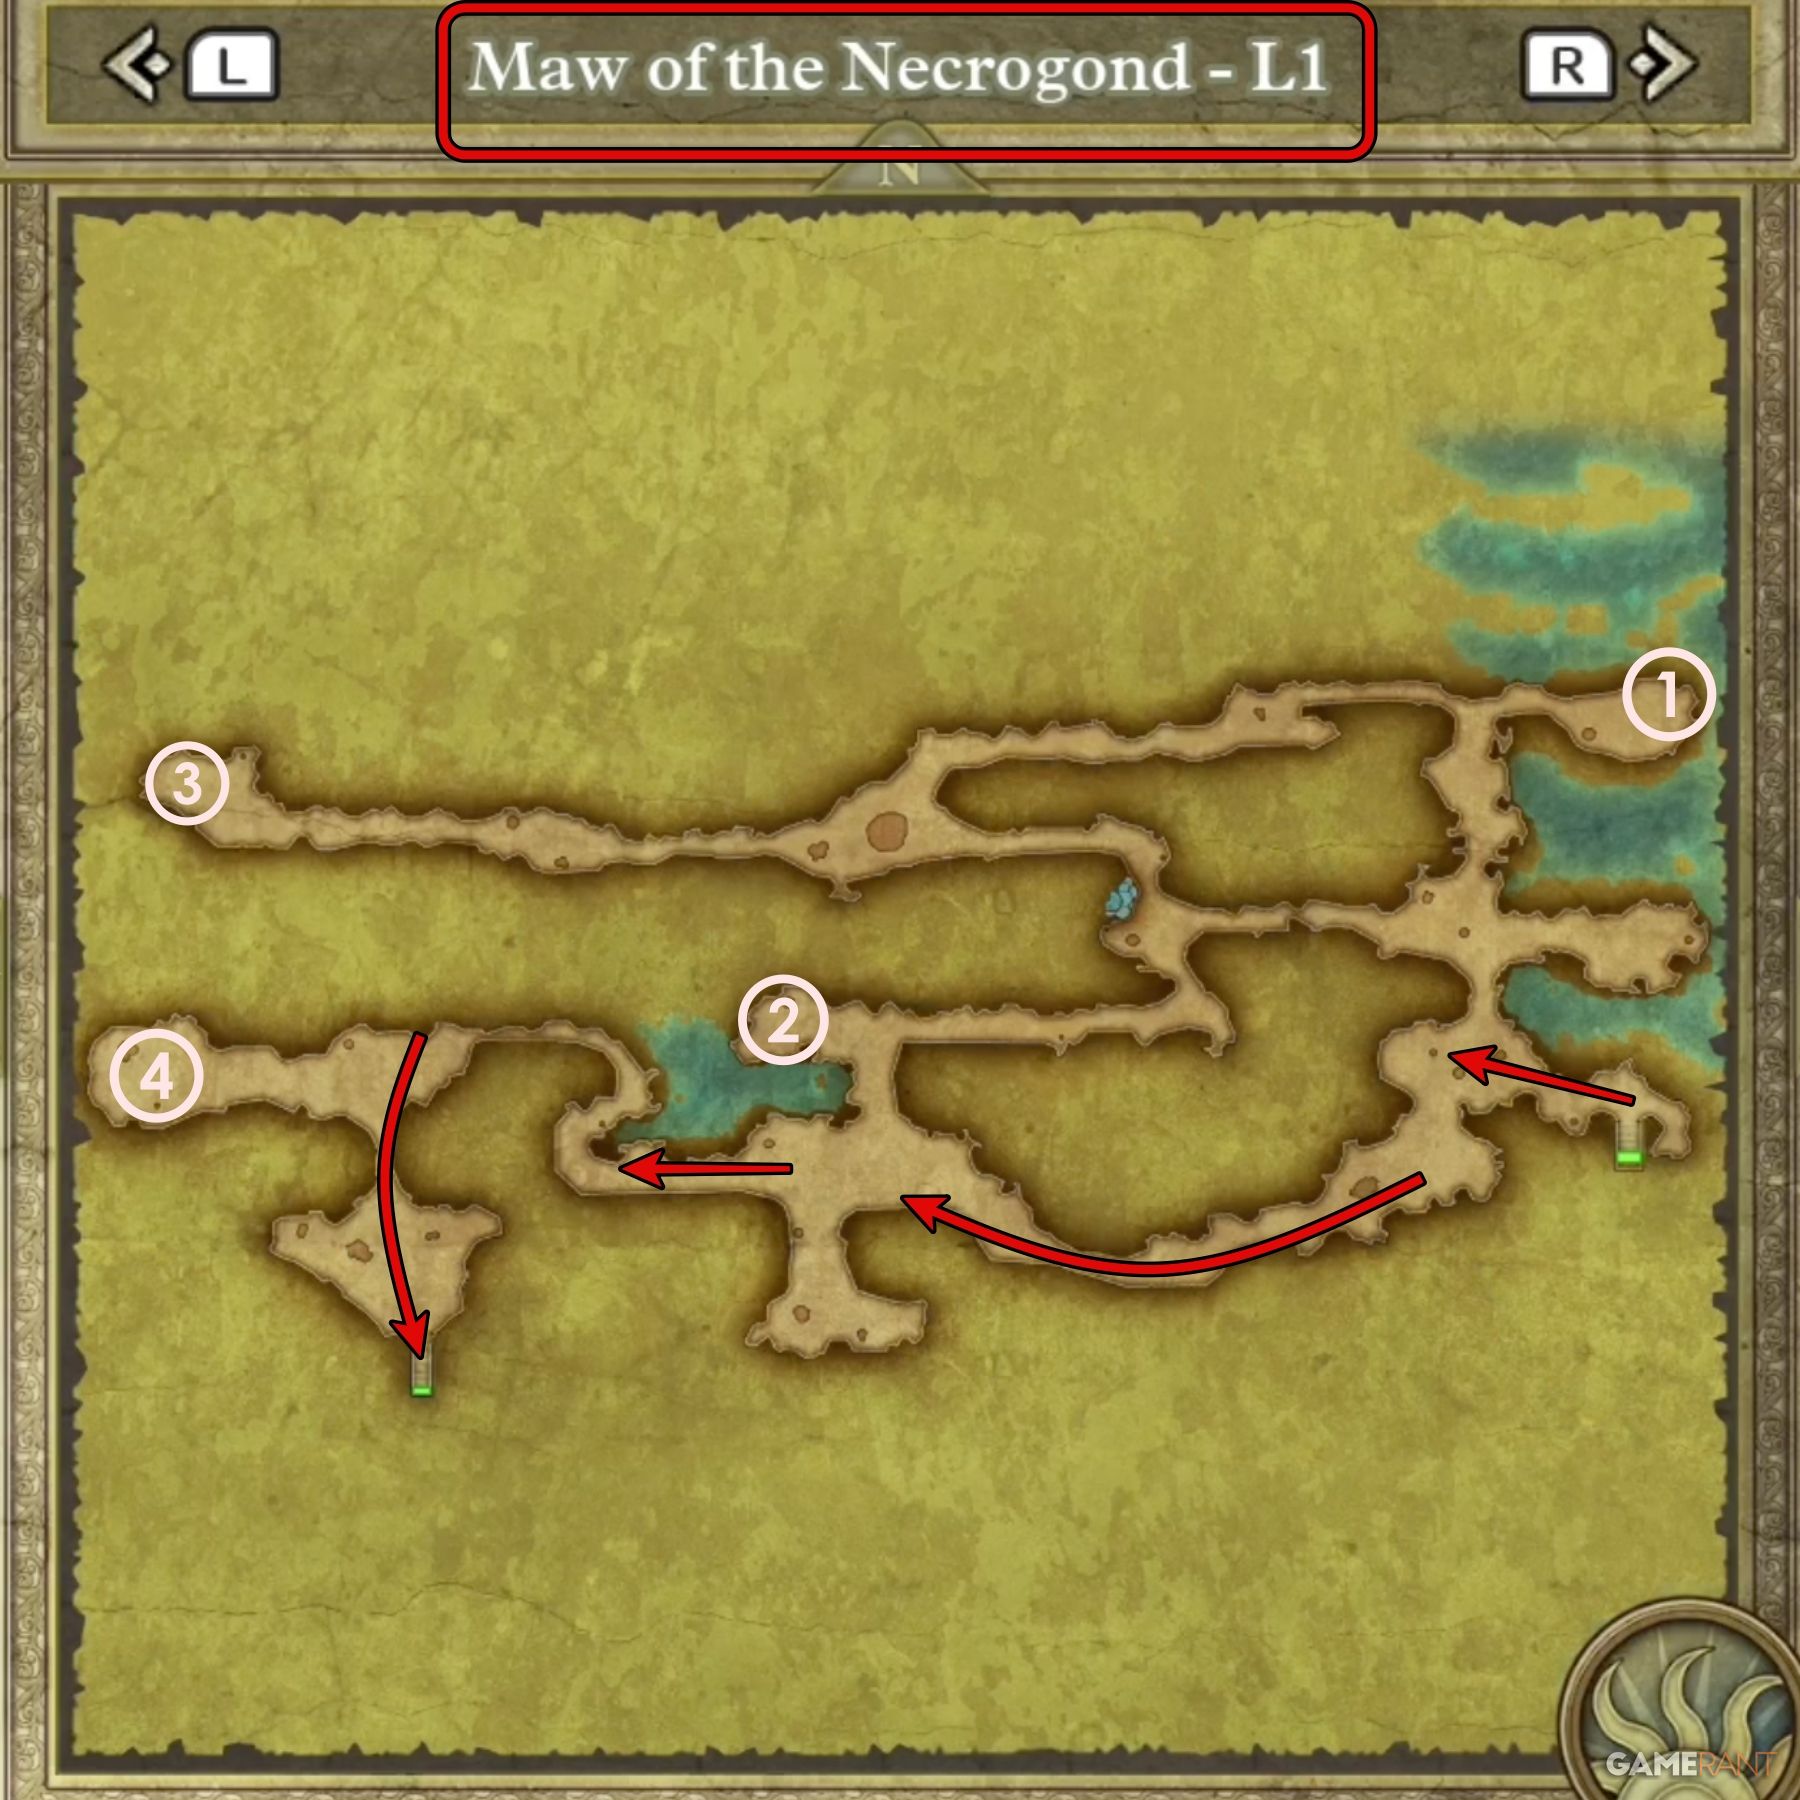
The first main level is where the dungeon begins in earnest. You’ll enter the floor in the southeast corner, and you’ll ultimately need to reach the southwest corner. Between these two points, you’ll face many difficult foes, many of which you will not have seen yet.
The main route along L1 stays on the lower section of the map. You can see above the easiest path through the area. However, if you want to collect all four pieces of treasure, you’ll have to explore.
All Treasure on Maw of the Necrogond L1:
- Treasure 1: Full Moon Ring
- Treasure 2: Thunderbolt Blade
- Treasure 3: Sage’s Elixir
- Treasure 4: Spiked Armor
Maw of the Necrogond L2 Walkthrough – Dragon Quest 3 Remake
Maw of the Necrogond L2 Main Path:
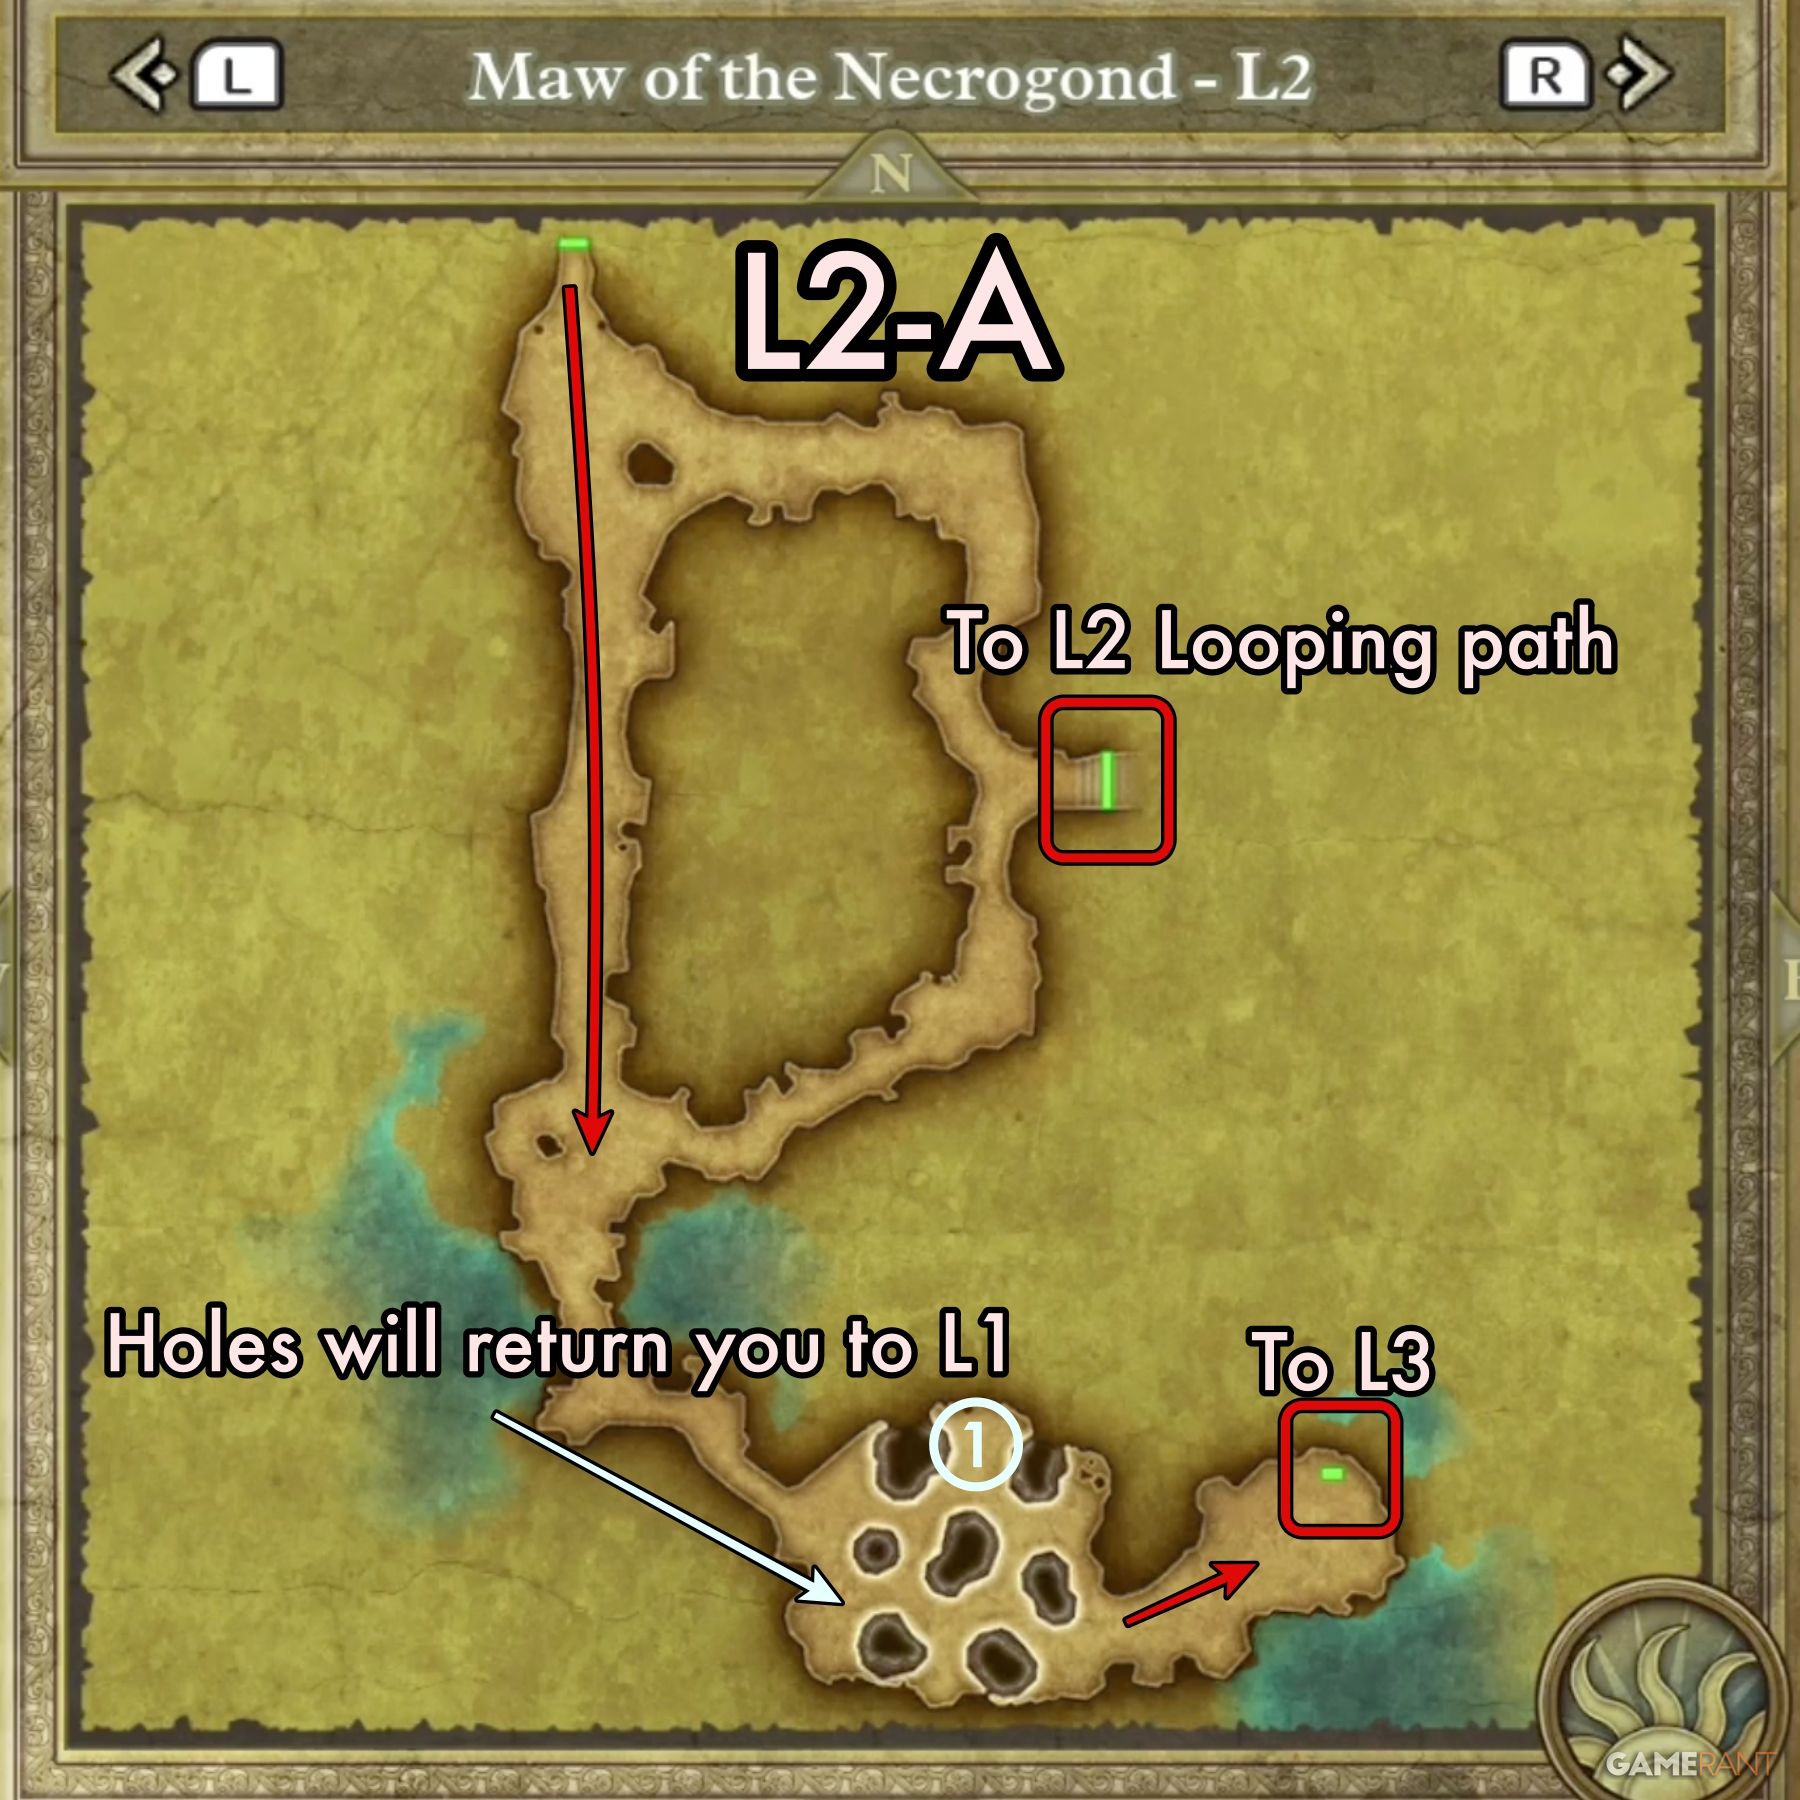
The second level of the maw has multiple regions, with multiple maps covering them. When you first reach L2 and look at the map, you’ll see two exits; the first exit is on the northeastern side, and the second is on the southeastern side, past the areas with large holes.
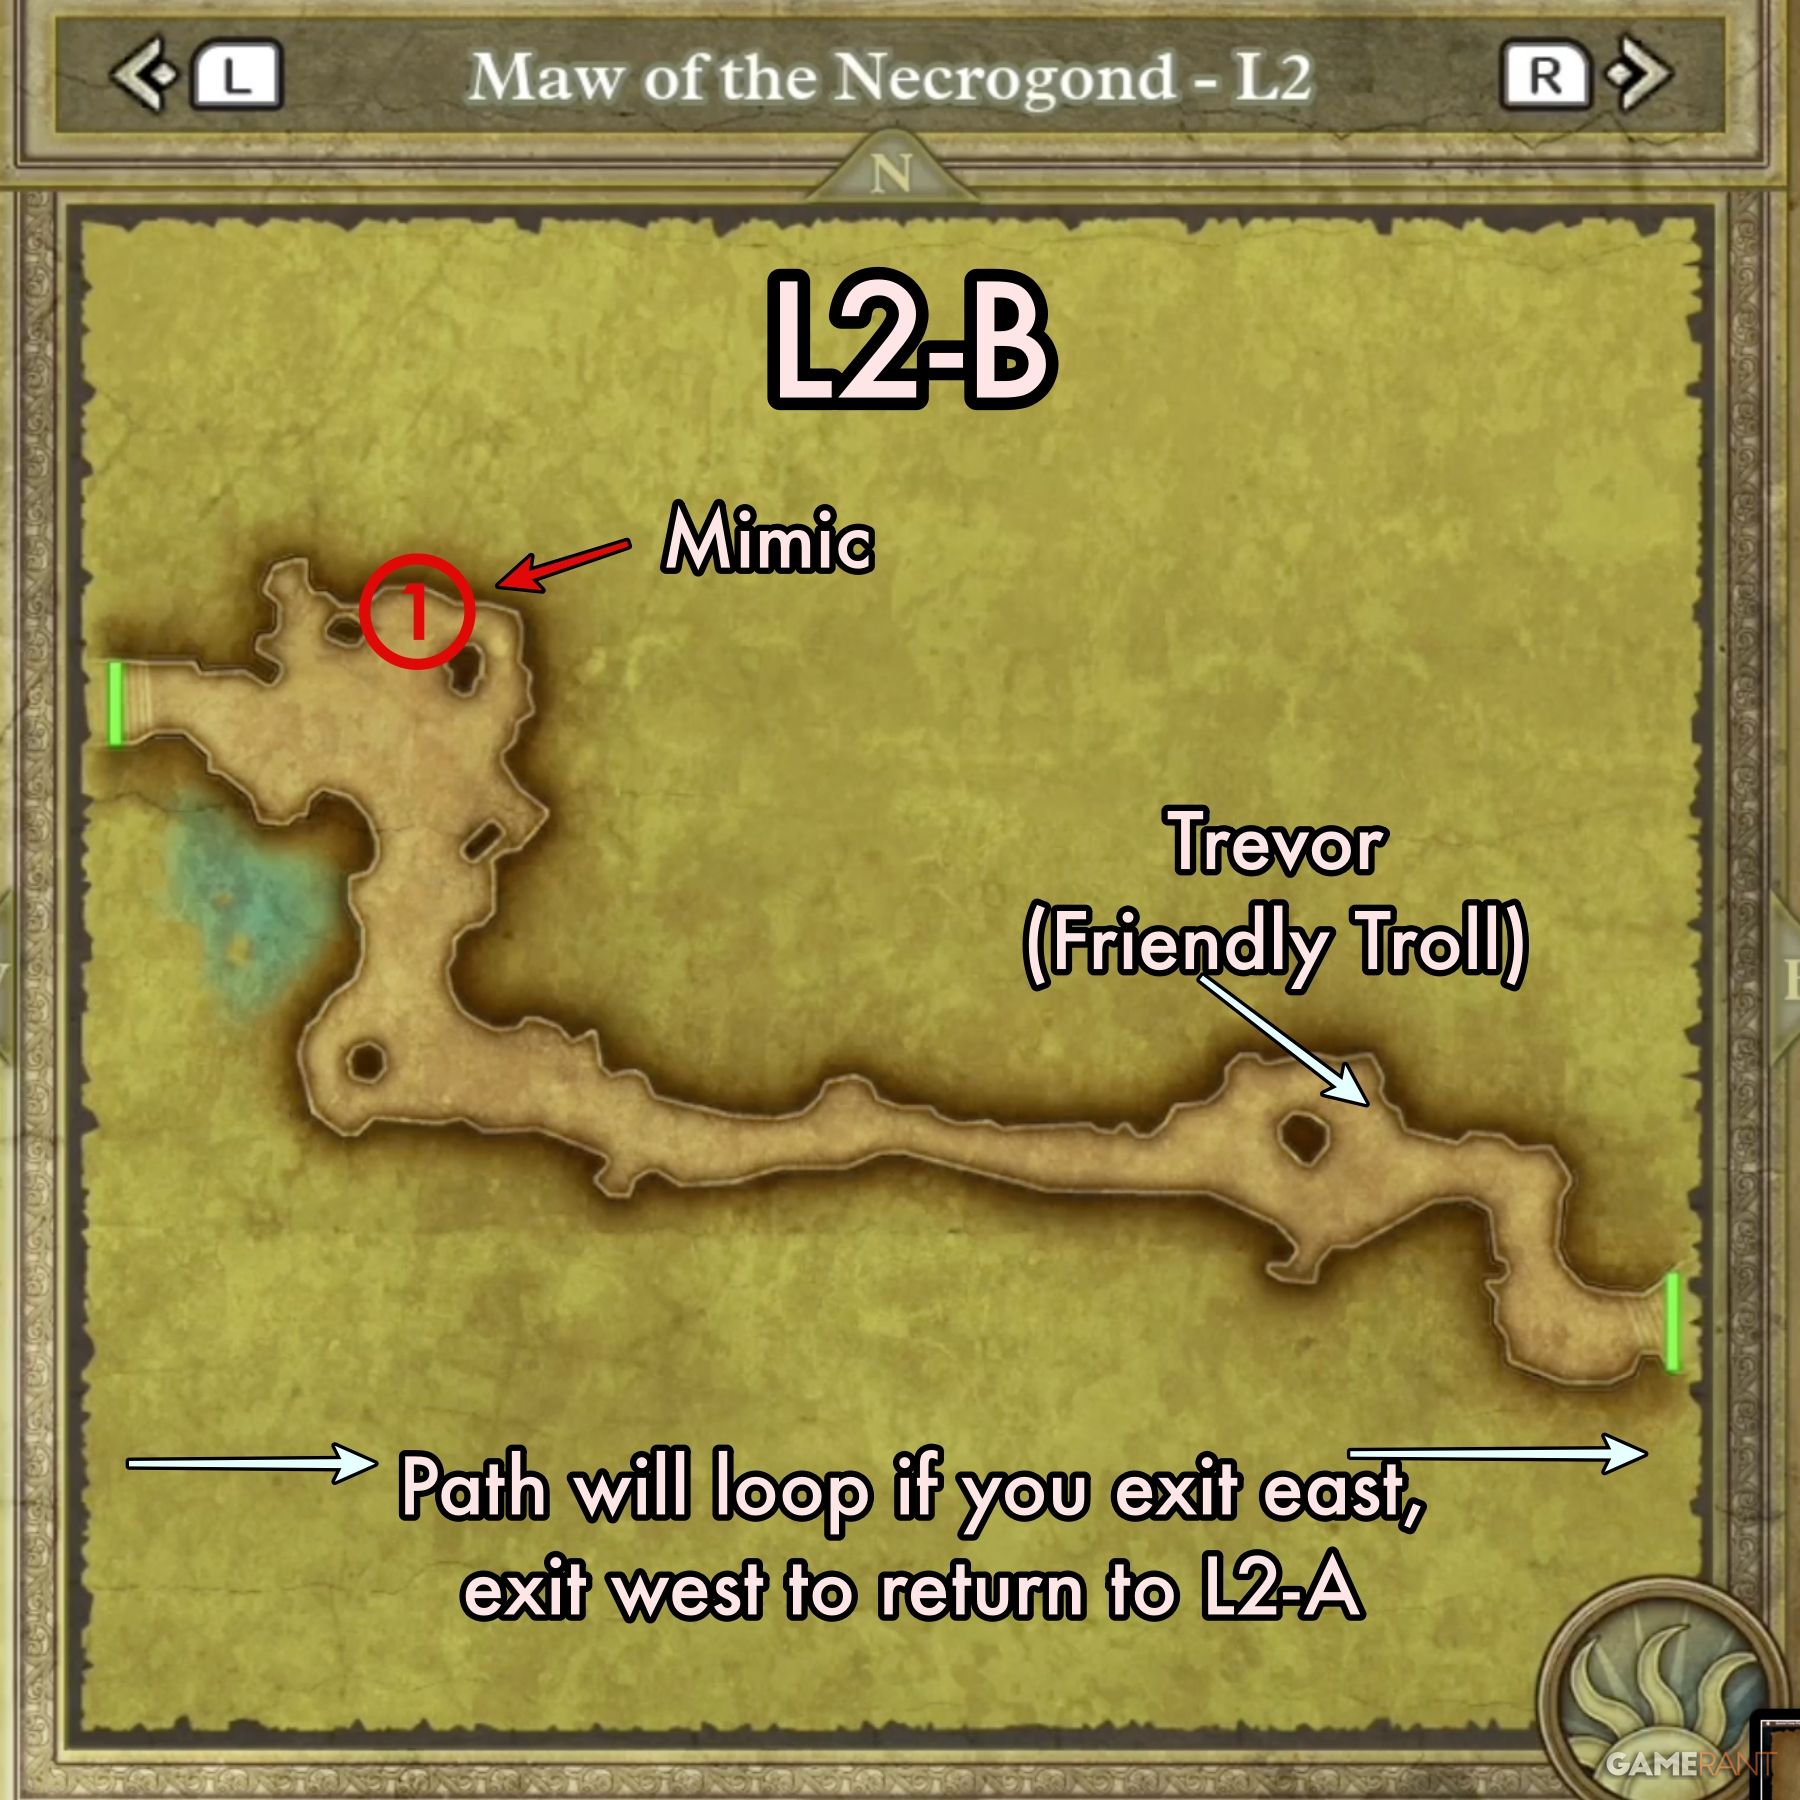
The main path leads to the southeastern exit, which takes you to L3. The first exit, on the right side of the loop, takes you to another section of L2 (we’ll call it L2-B). This extended area is actually a path that will simply loop if you continue to head east. There is a Friendly Monster in this section, so it is worth visiting.
When you return to L2-A, make your way down past the large holes in the ground. If you fall in one of the holes, you’ll end up back on L1. Make your way up the ladder in the southeast corner to reach L3.
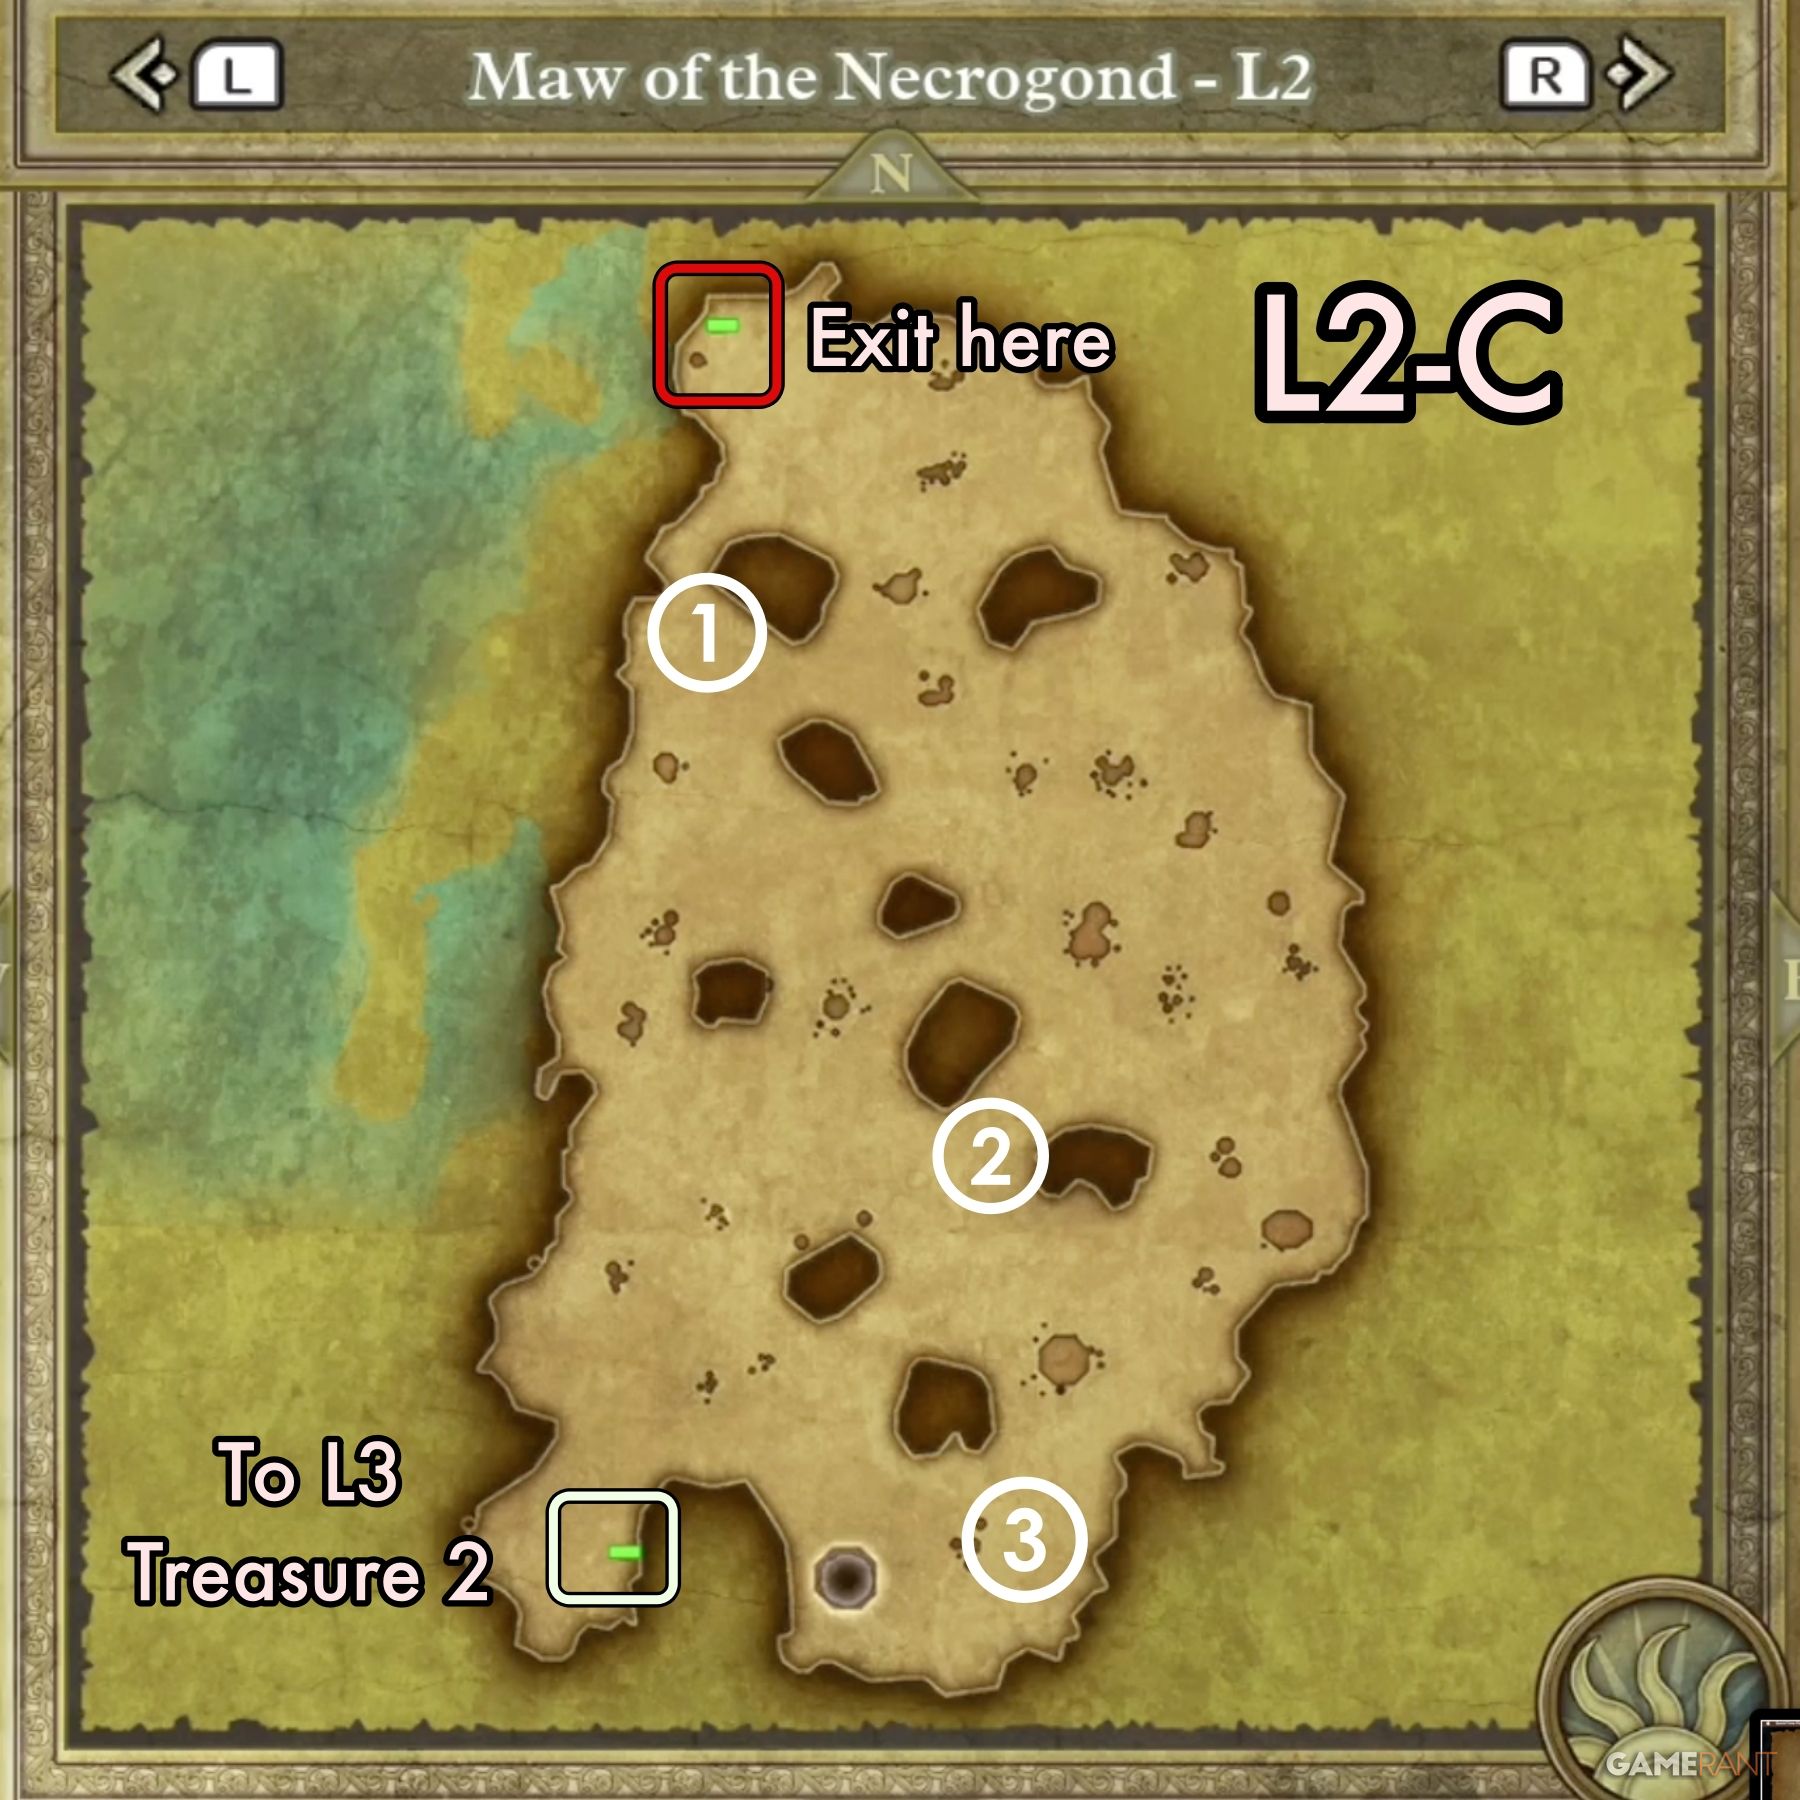
There is a third section, L2-C, that you can only reach from L3, so it will be included in that section.
All Treasure in Maw of Necrogond L2:
L2-A:
L2-B:
- Treasure 1: This chest is a Mimic
4:41
Related
Dragon Quest 3 Remake: How to Unlock the Temple of Trials
How to find Dragon Quest 3 Remake’s secret post-game dungeon, the Temple of Trials.
Maw of the Necrogond L3 Walkthrough – Dragon Quest 3 Remake
Maw of the Necrogond L3 Main Path:
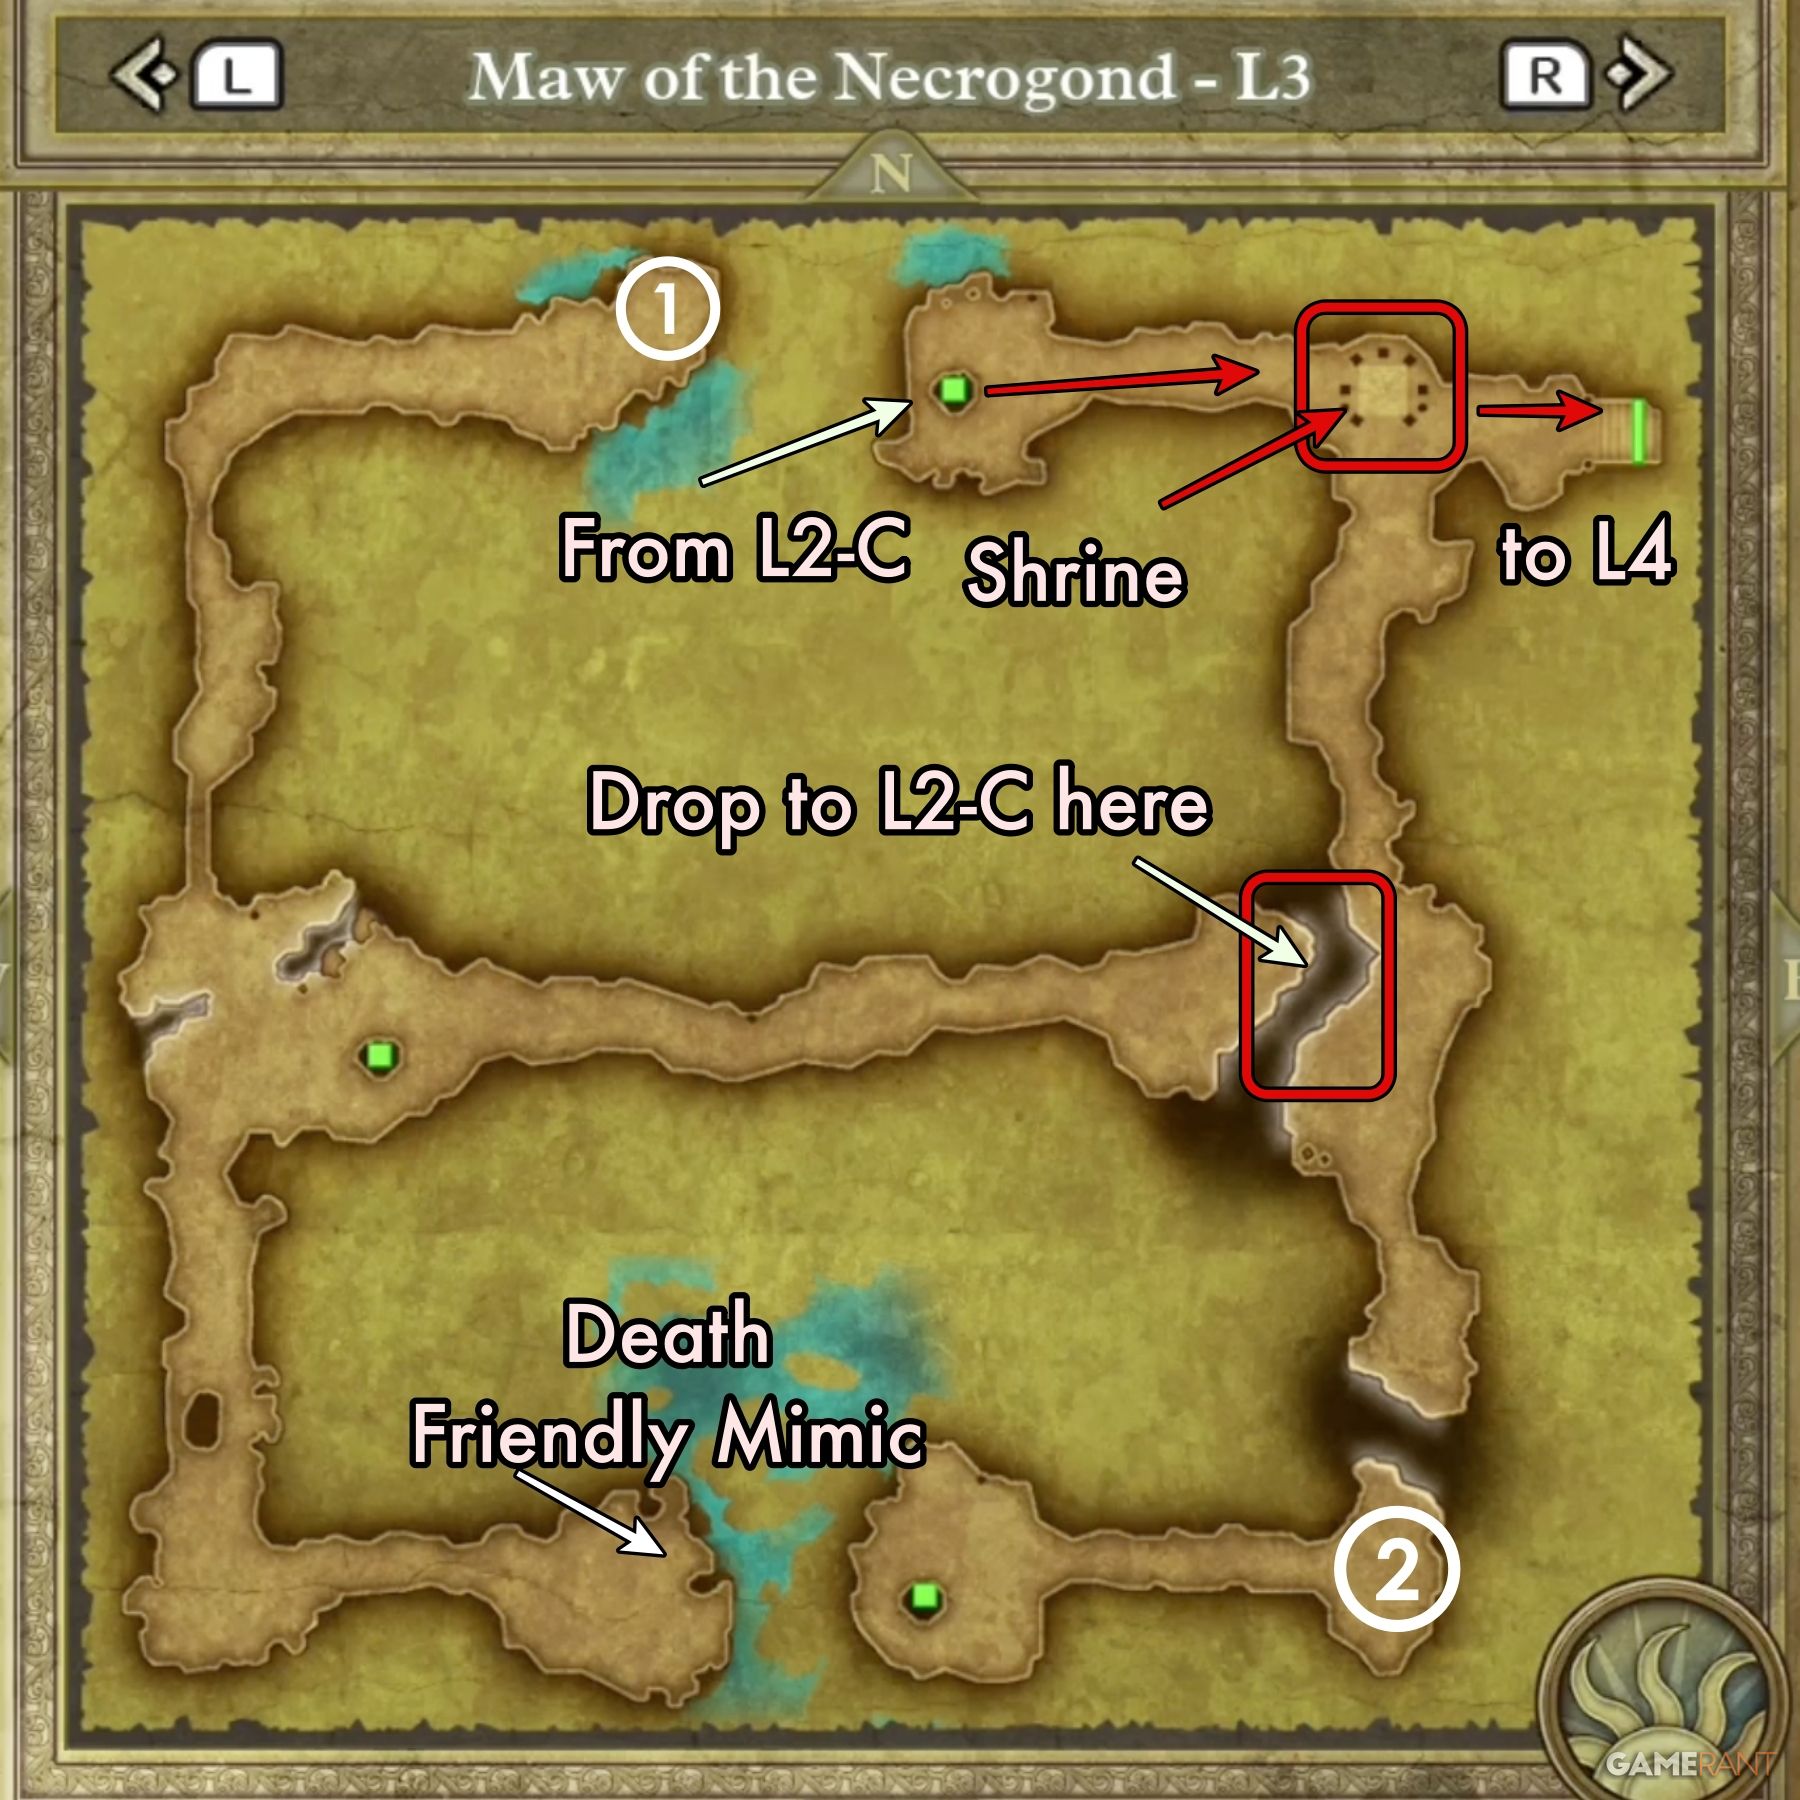
The third level of the Maw of the Necrogond is a bit tricky, as you must drop to a lower level in order to reach the exit to L4. If you check the map, you’ll see a path that leads across the center of the area. At the end of that path across the center, there is a drop. You want to fall into this drop to reach L2-C, which is the only way to reach the right part of L3.
On L2-C, you can see that there is a north exit and a south exit. The south exit will take you to the lower route on L3 that leads to Treasure 2. The northern exit will take you to the northeastern route on L3, which will lead to the exit to L4.
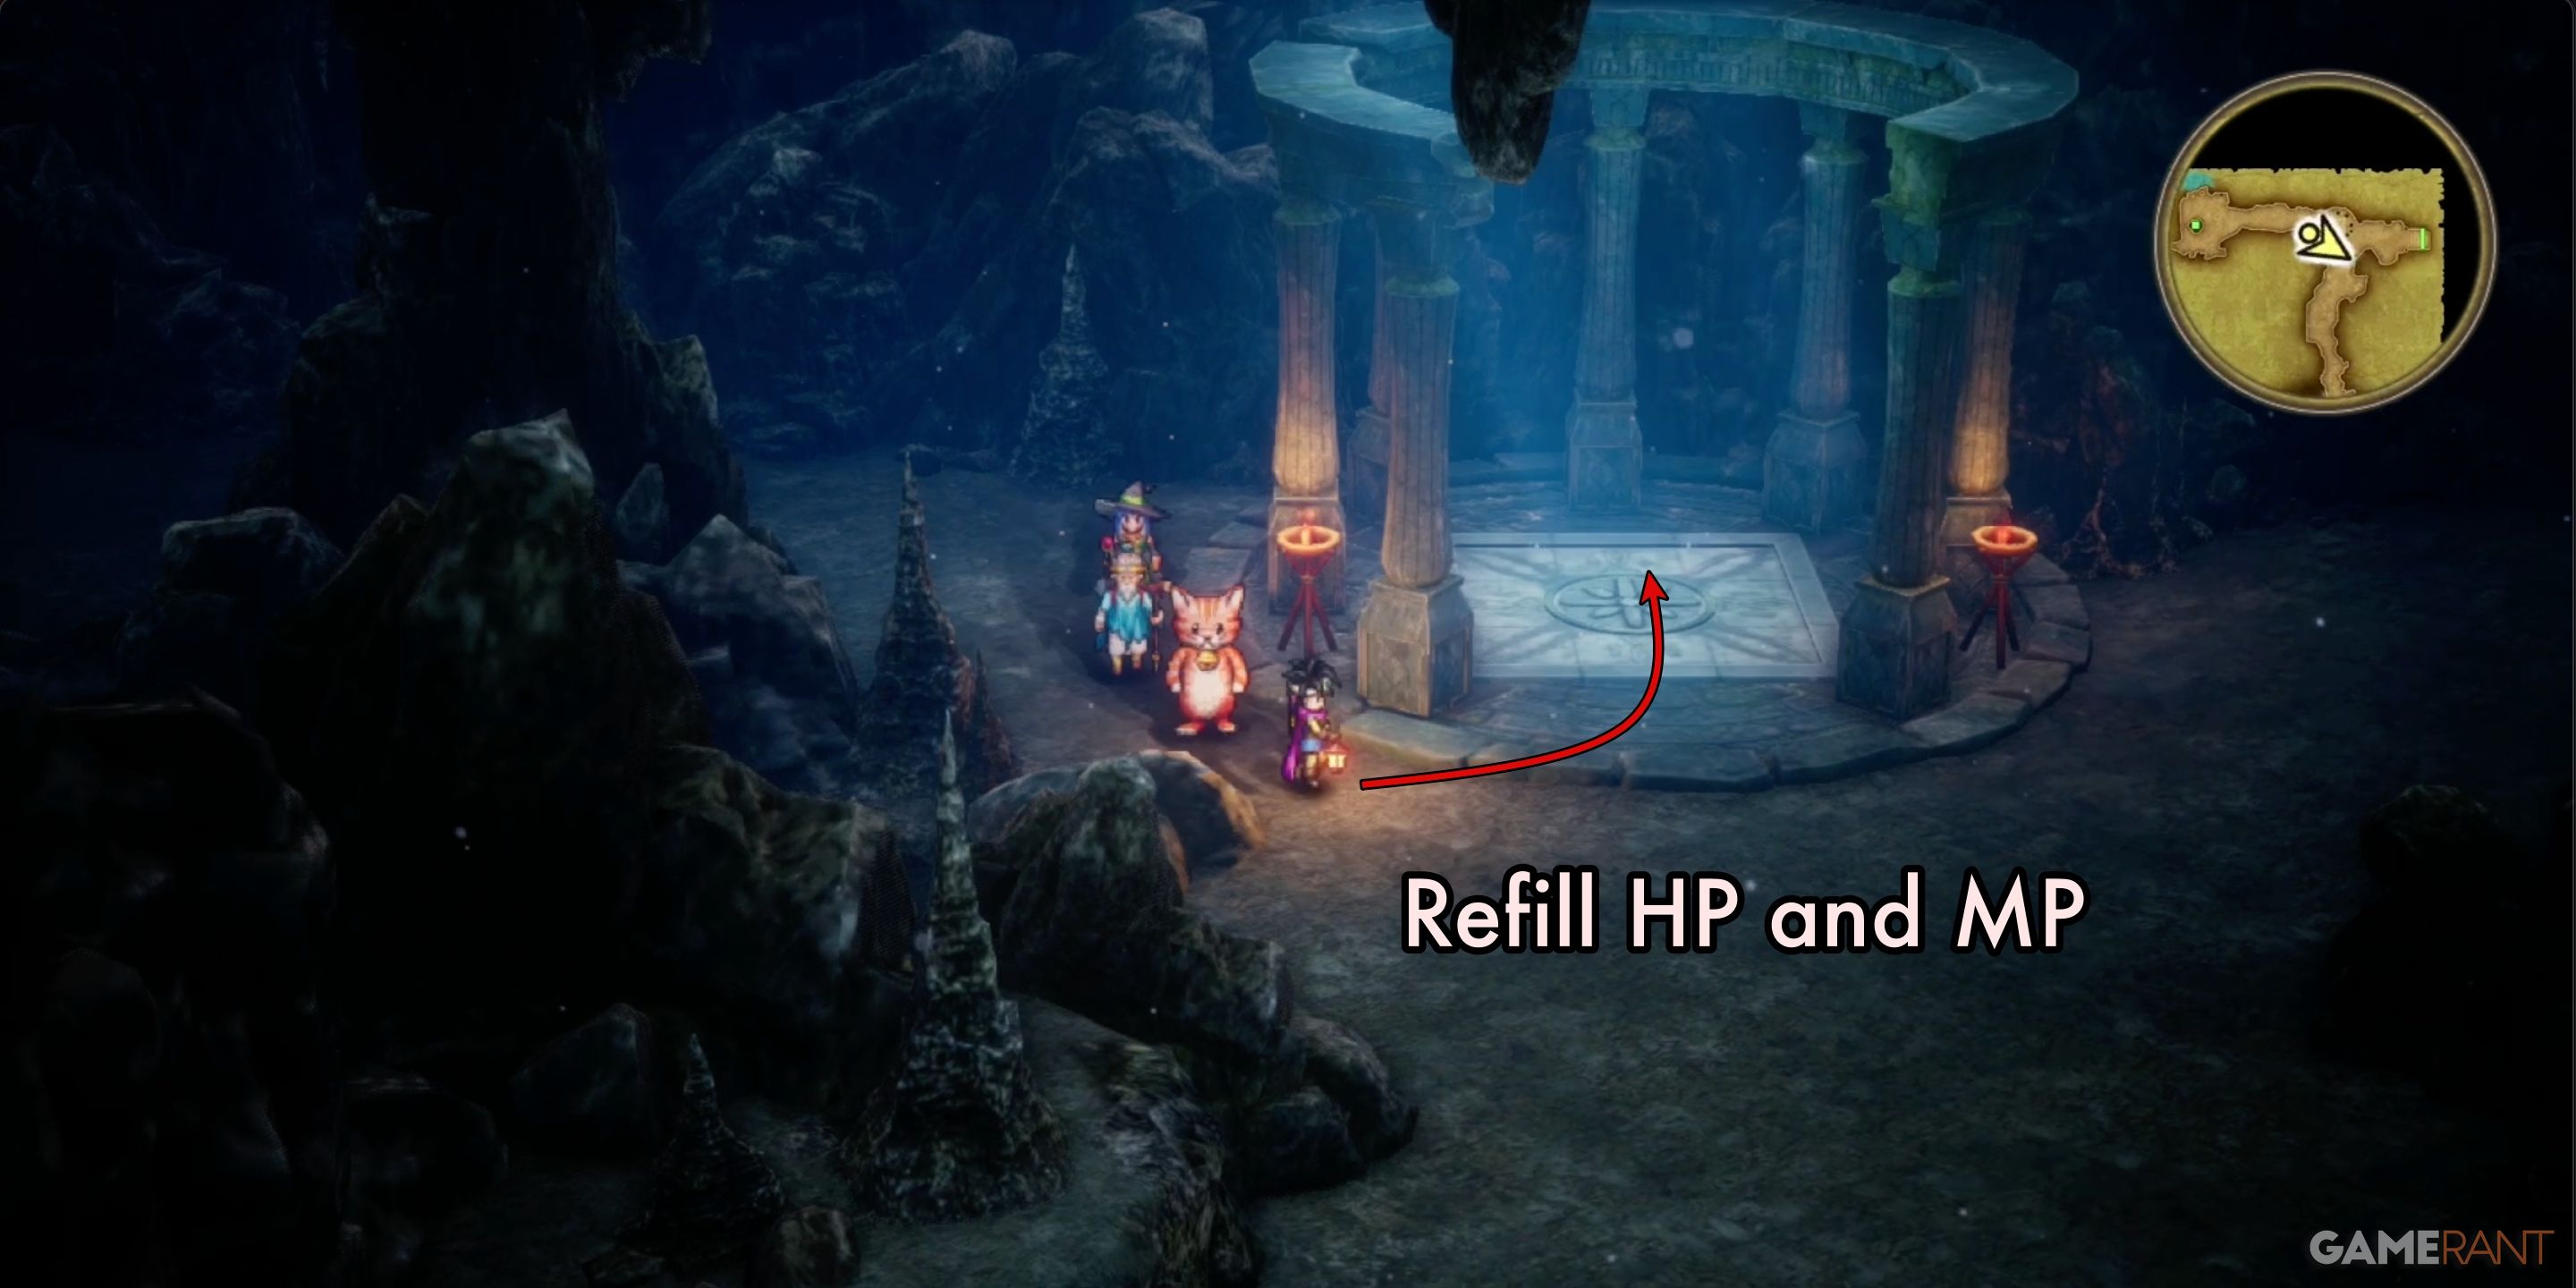
When you reach the NE route on L3, look for the shrine just before the exit. Step inside to refill your party’s HP and MP.
All Treasure on Maw of the Necrogond L3 and L2-C:
L2-C:
- Treasure 1: Assassin’s Dagger
- Treasure 2: Mini Medal
- Treasure 3: Black Bandanna
L3:
- Treasure 1: 3, 024 Gold Coins
- Treasure 2: Mythril Helm
Maw of the Necrogond L4 Walkthrough – Dragon Quest 3 Remake
Maw of the Necrogond L4 Main Path:
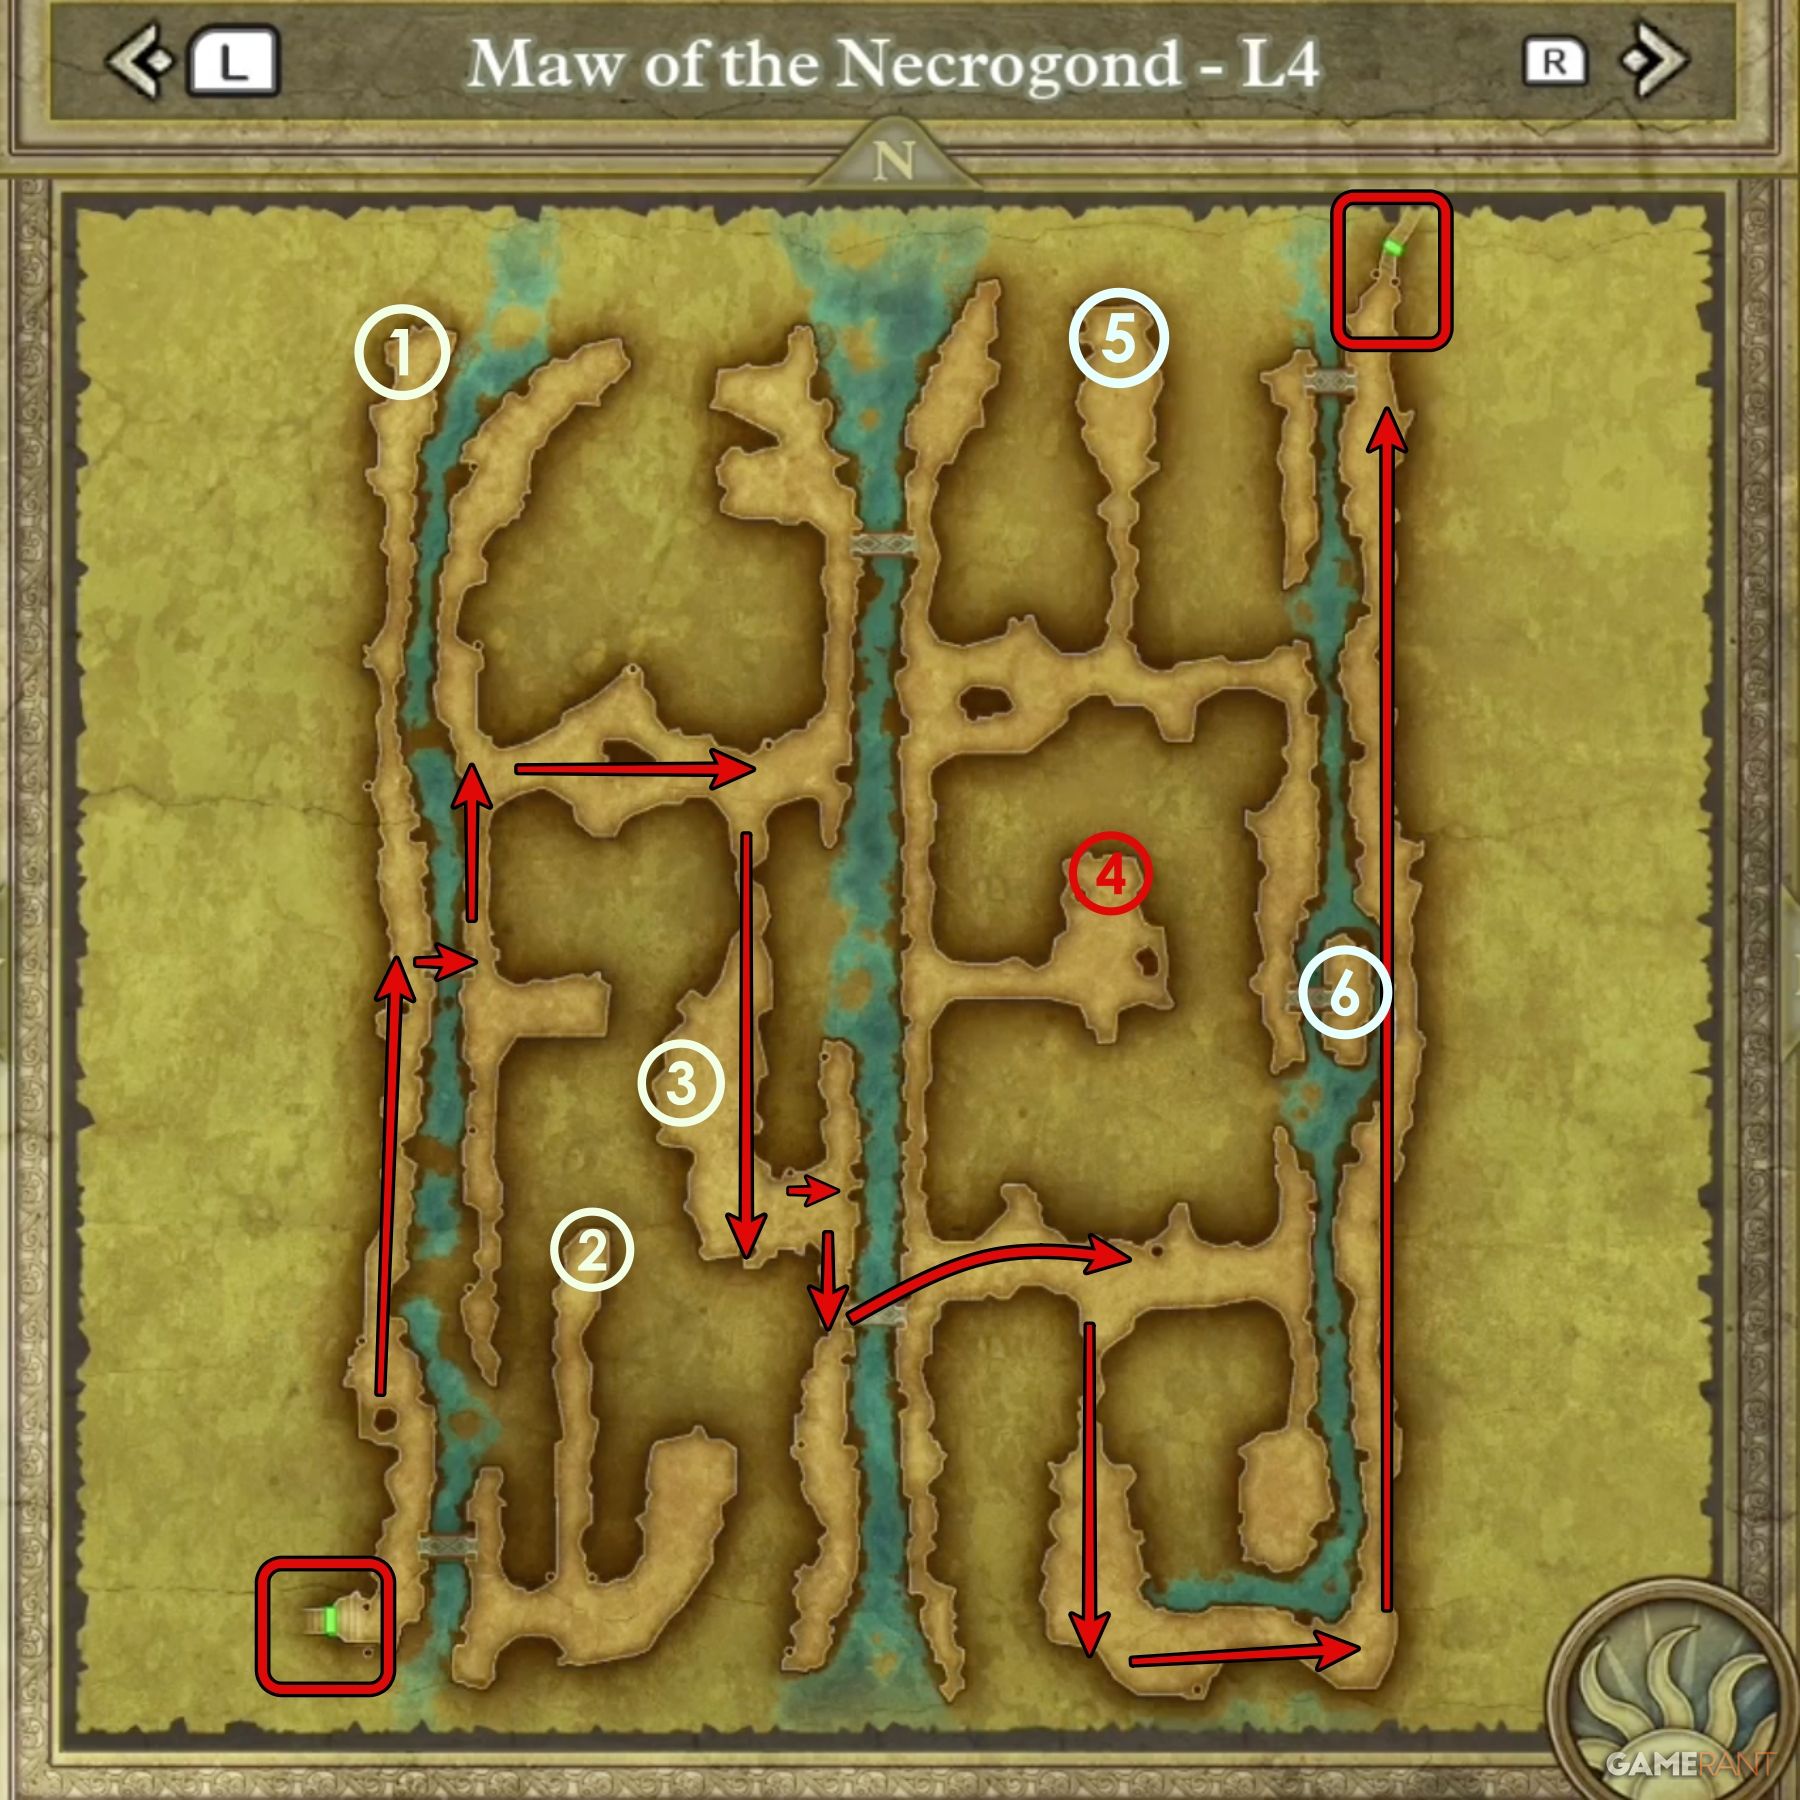
The fourth level of the Maw of the Necrogond is the last normal dungeon floor, and it is absolutely massive. Check our map for the actual main path through the level, as that is the best way to learn it.
Because the chamber is so big, you will have an unusually high number of encounters before reaching the exit. This is a good place to use either Holy Protection from the Hero, or Padfoot from a Thief. Using either or both spells will make it much easier to get through the chamber quickly.
All Treasure on Maw of the Necrogond L4:
- Treasure 1: Magic Shield
- Treasure 2: Magical Robes
- Treasure 3: Phial of Magic Water
- Treasure 4: This treasure is a Mimic
- Treasure 5: Yggdasil Leaf
- Treasure 6: Thinking Cap
Maw of the Necrogond L5 Walkthrough – Dragon Quest III Remake
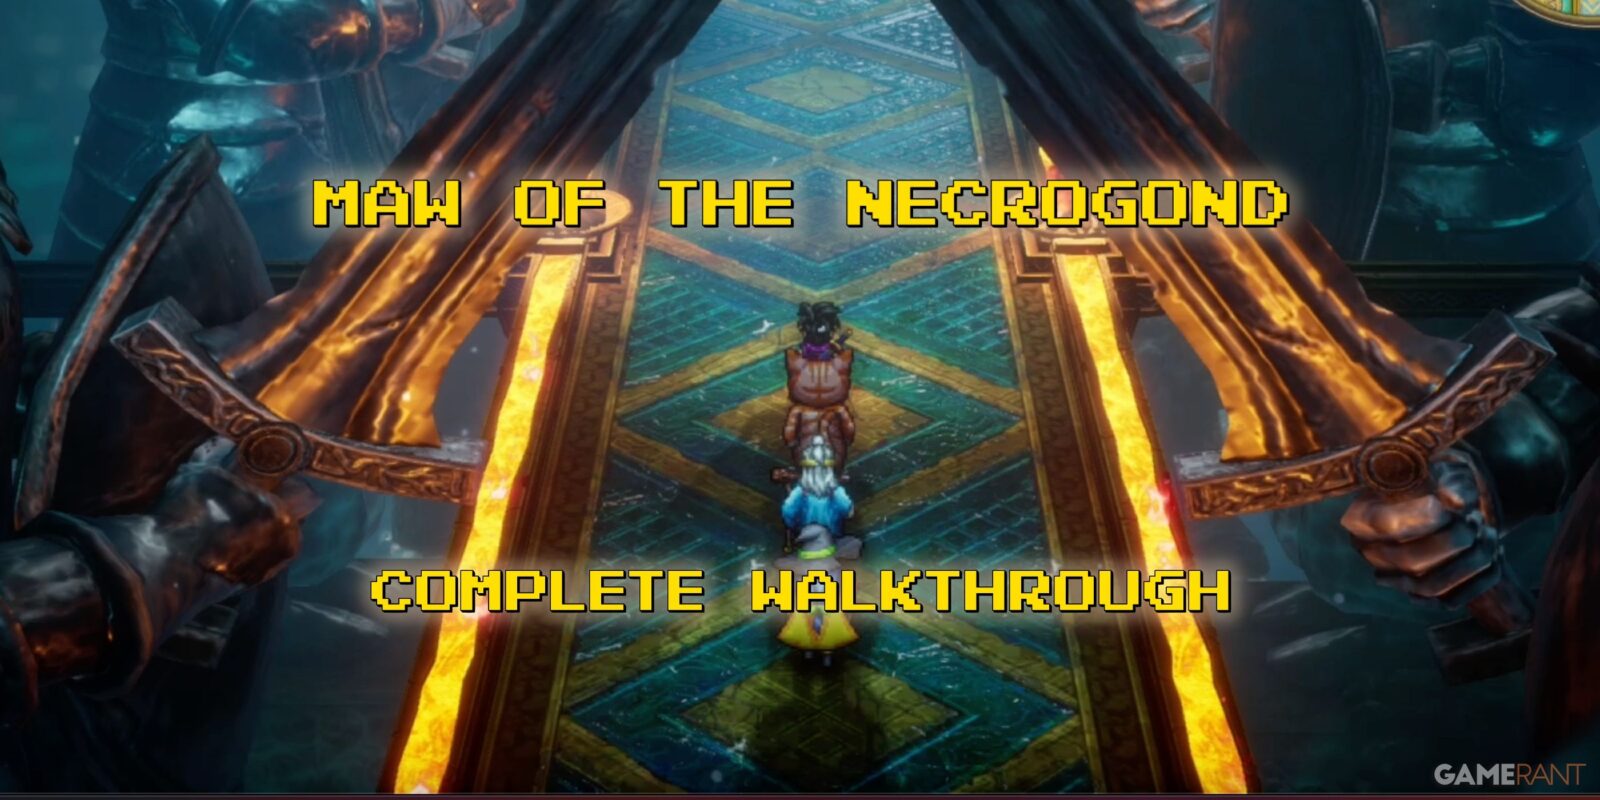
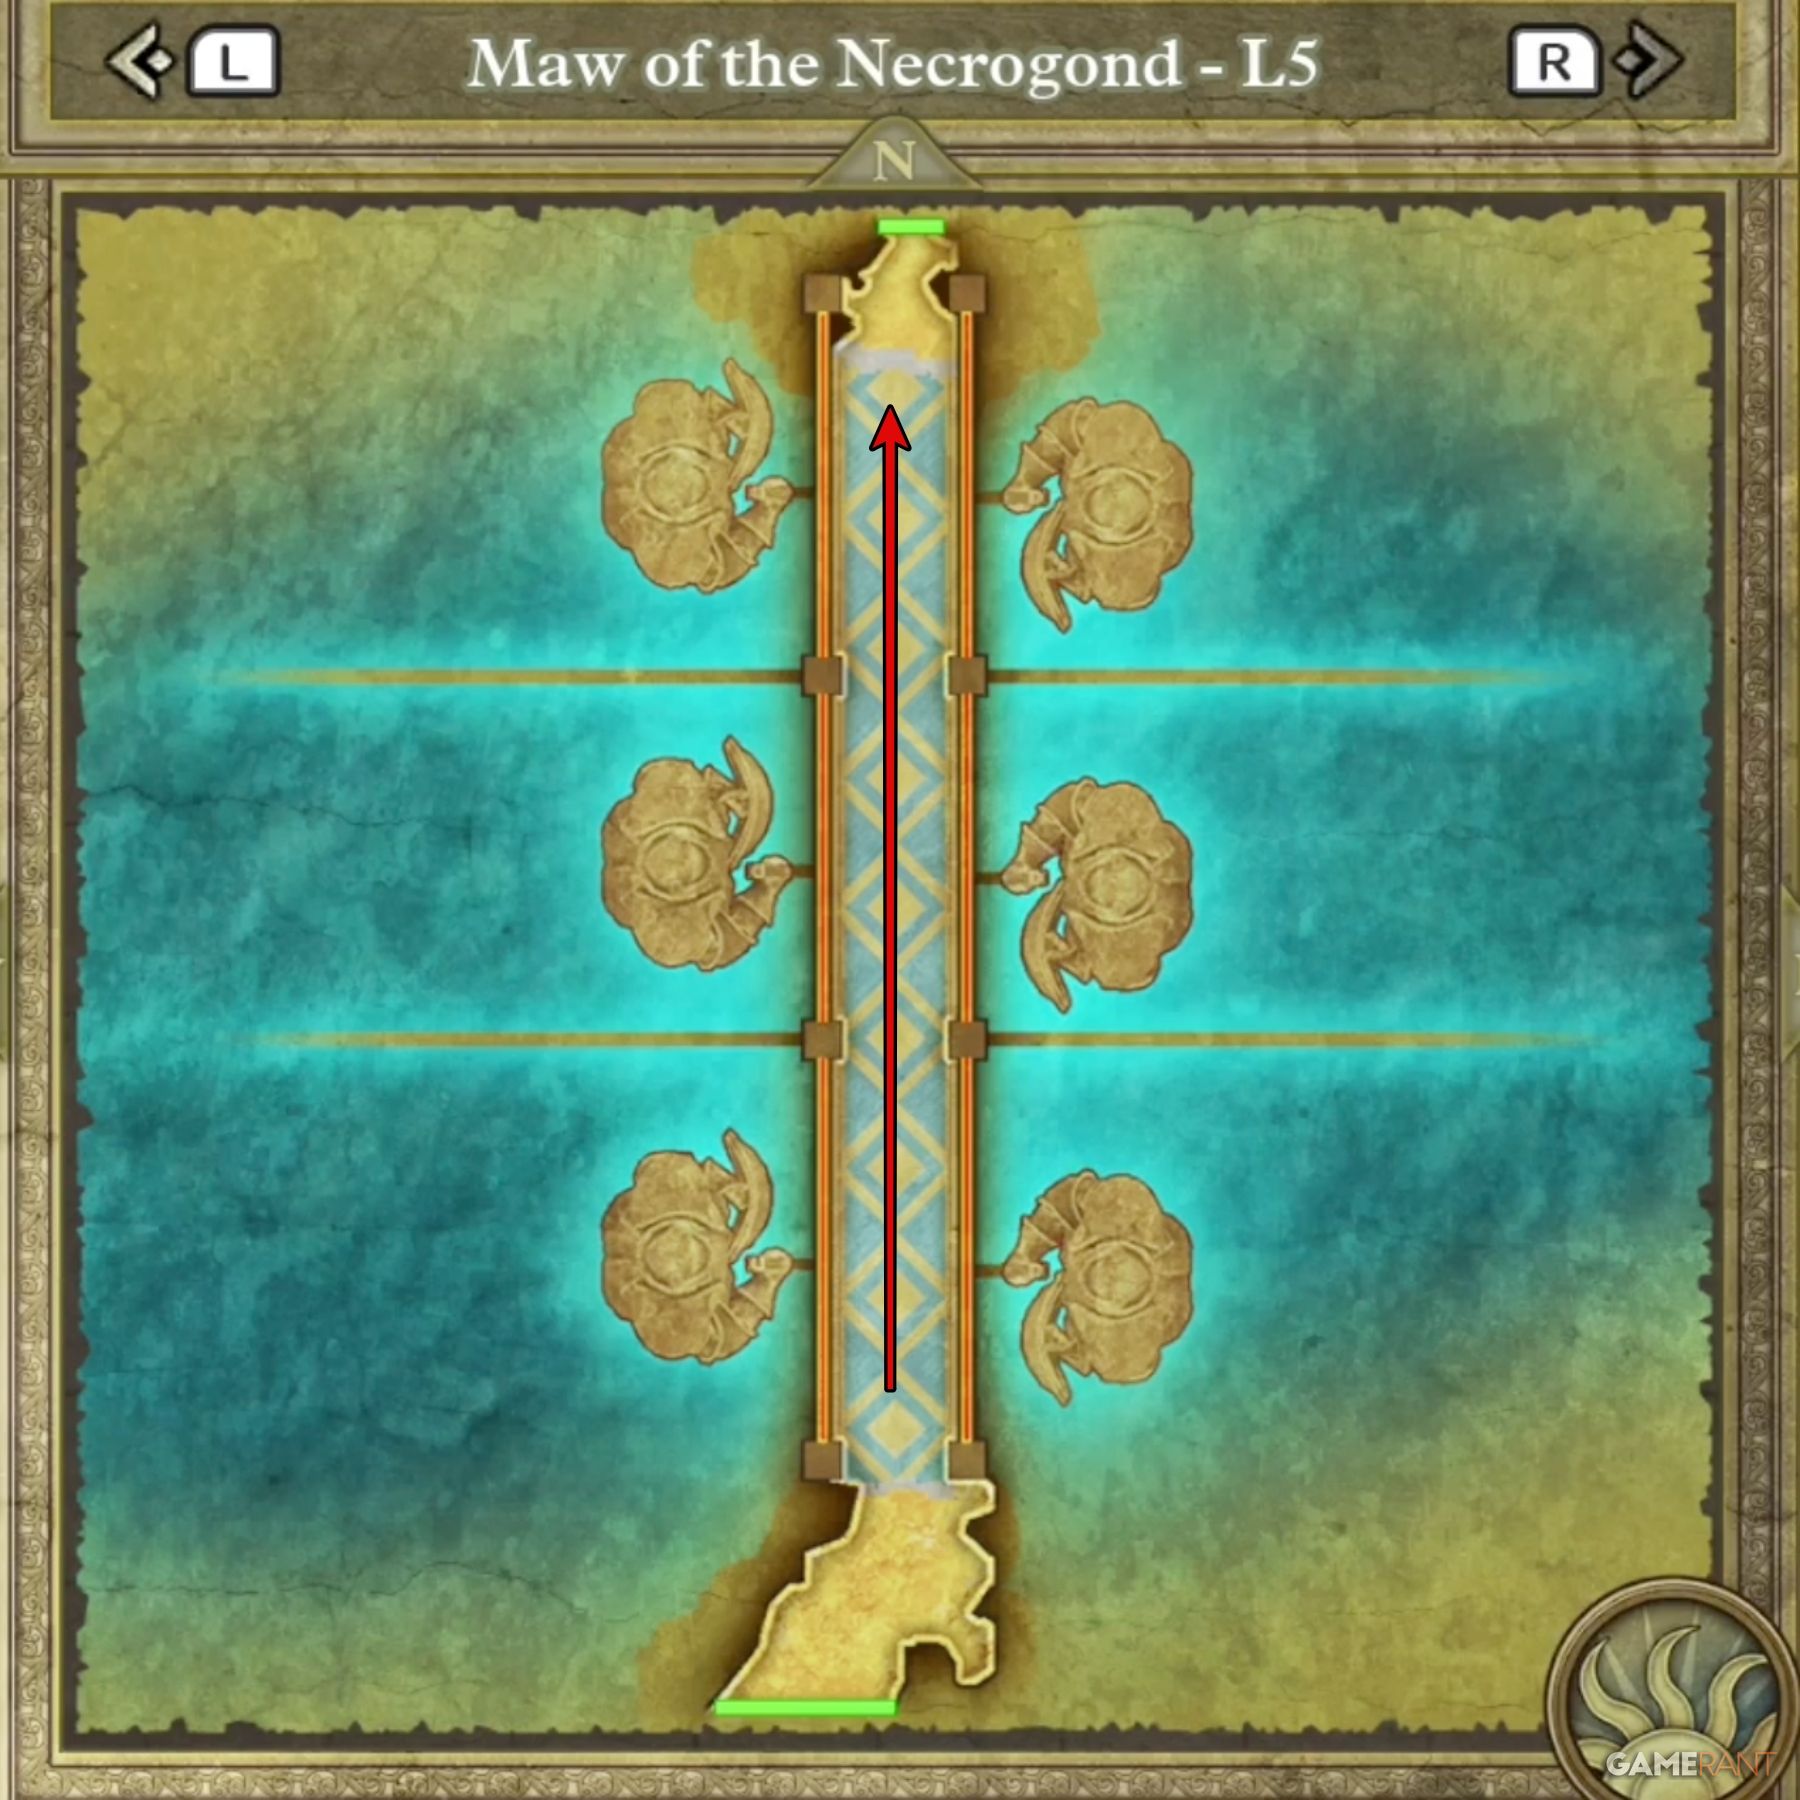
The final floor of the Maw of the Necrogond is simply a bridge that leads outside to the Necrogond Shrine.
Related
Dragon Quest 3 Remake: Edina Castle Rock Puzzle Solution
To get the Bottomless Pot in Dragon Quest 3 Remake, players must solve the
Edina Castle rock puzzle.
Necrogond Shrine Walkthrough – Dragon Quest 3 Remake
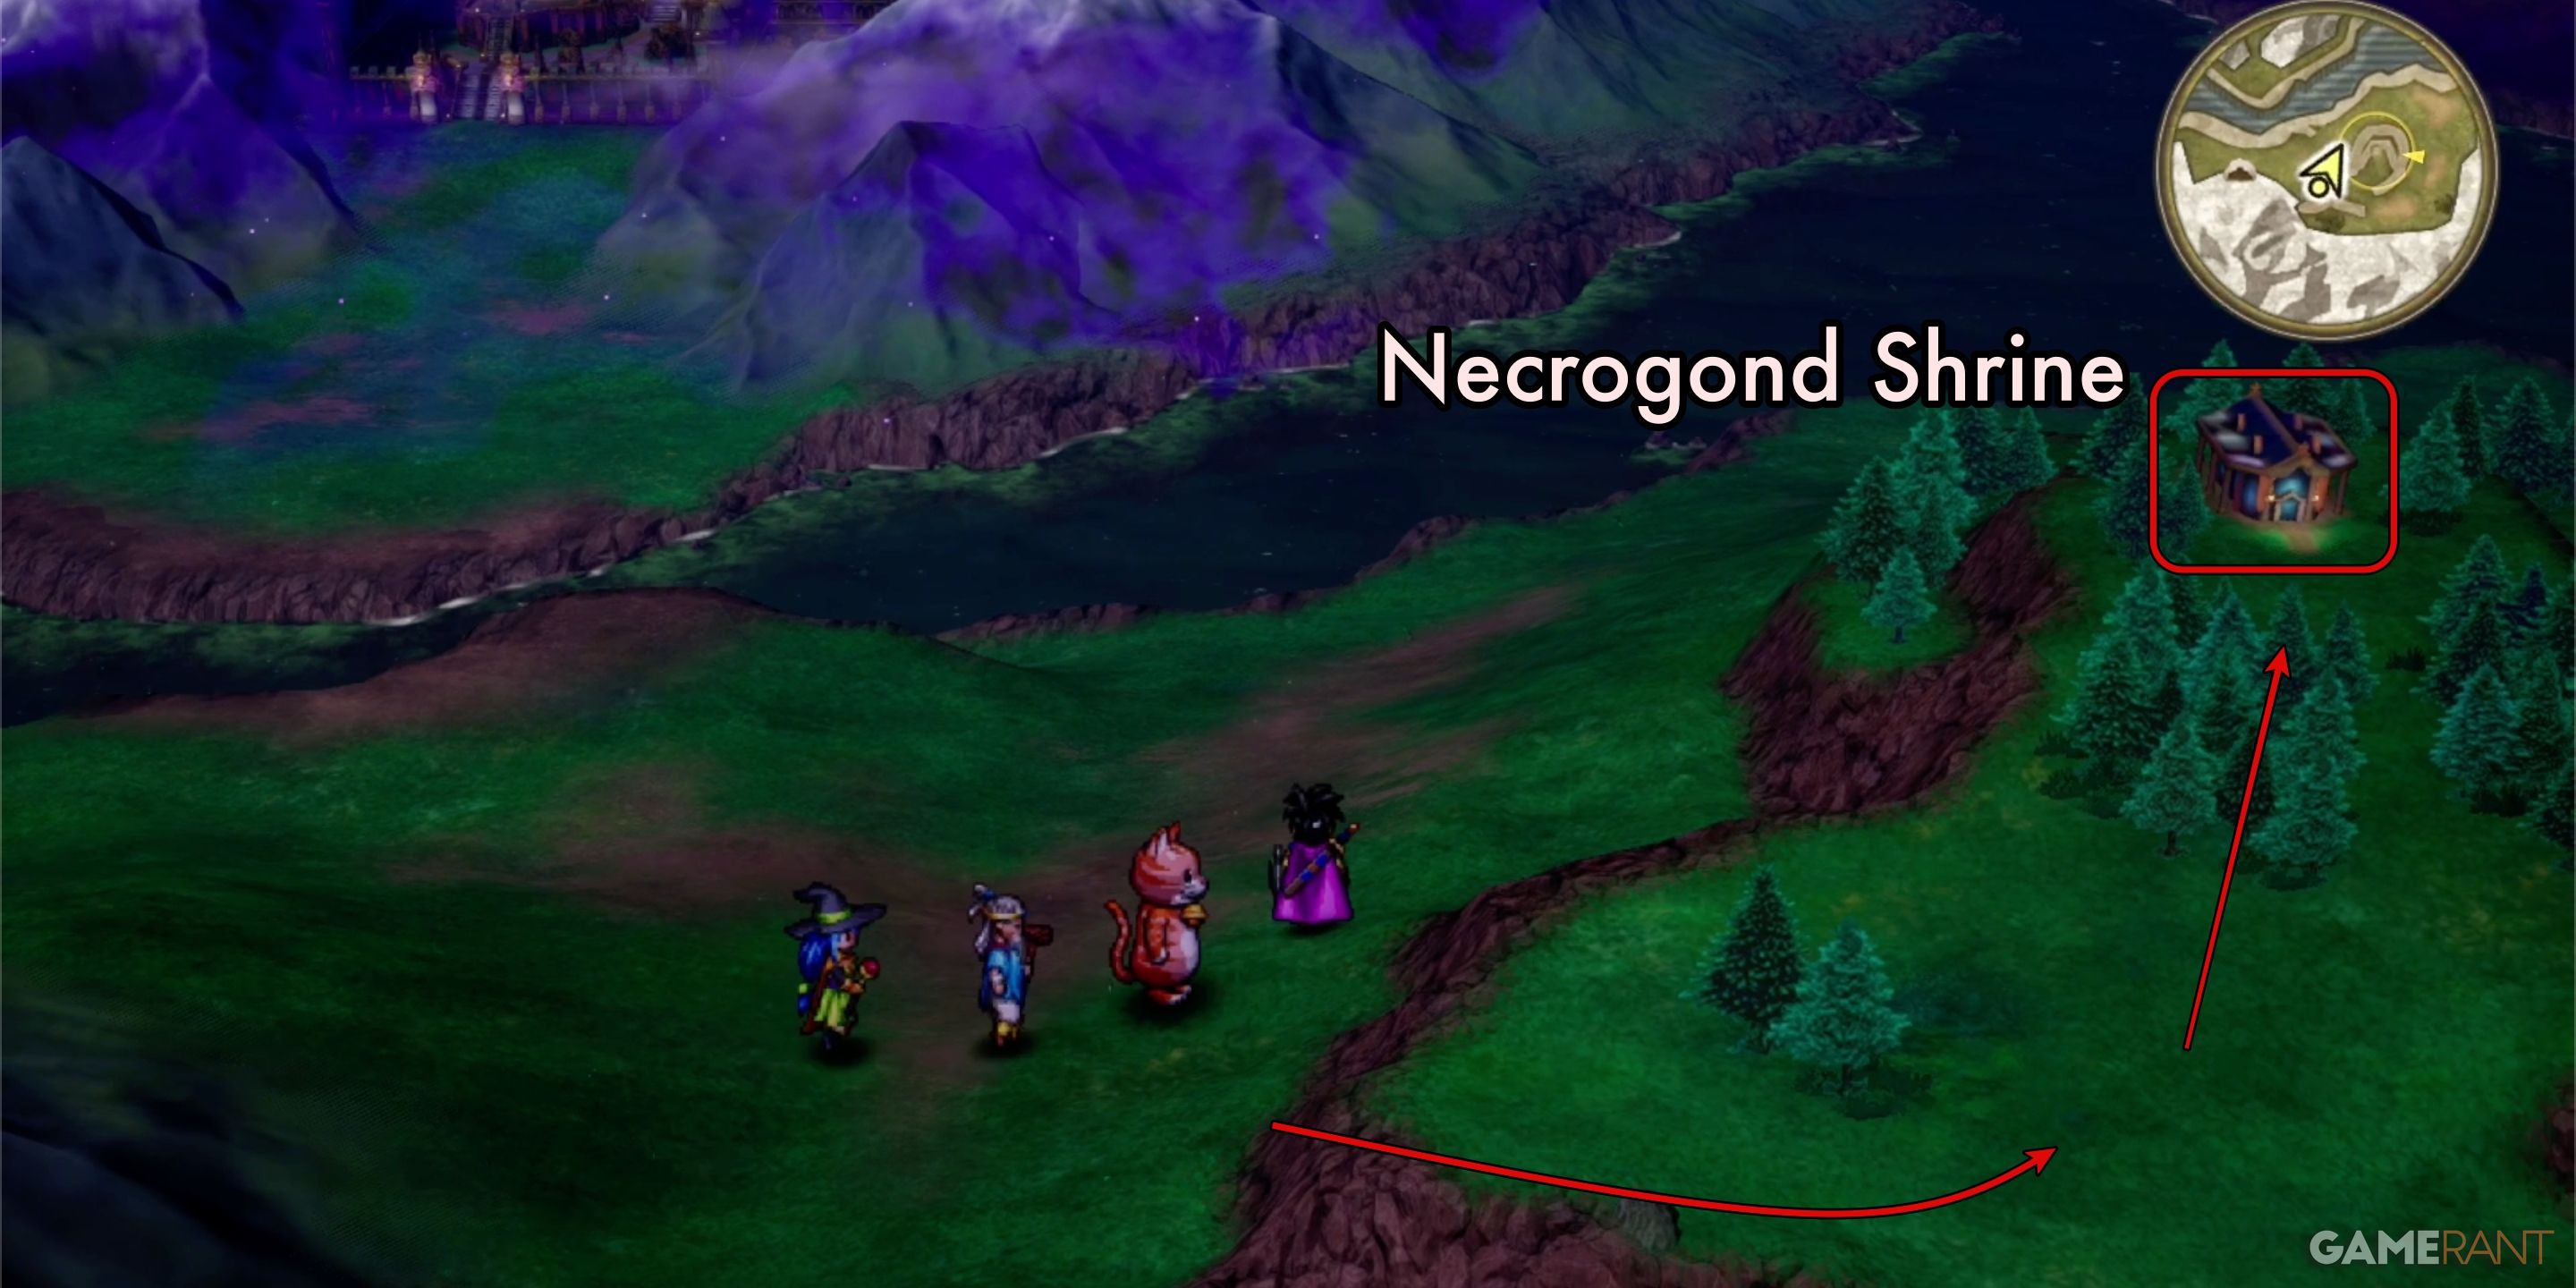
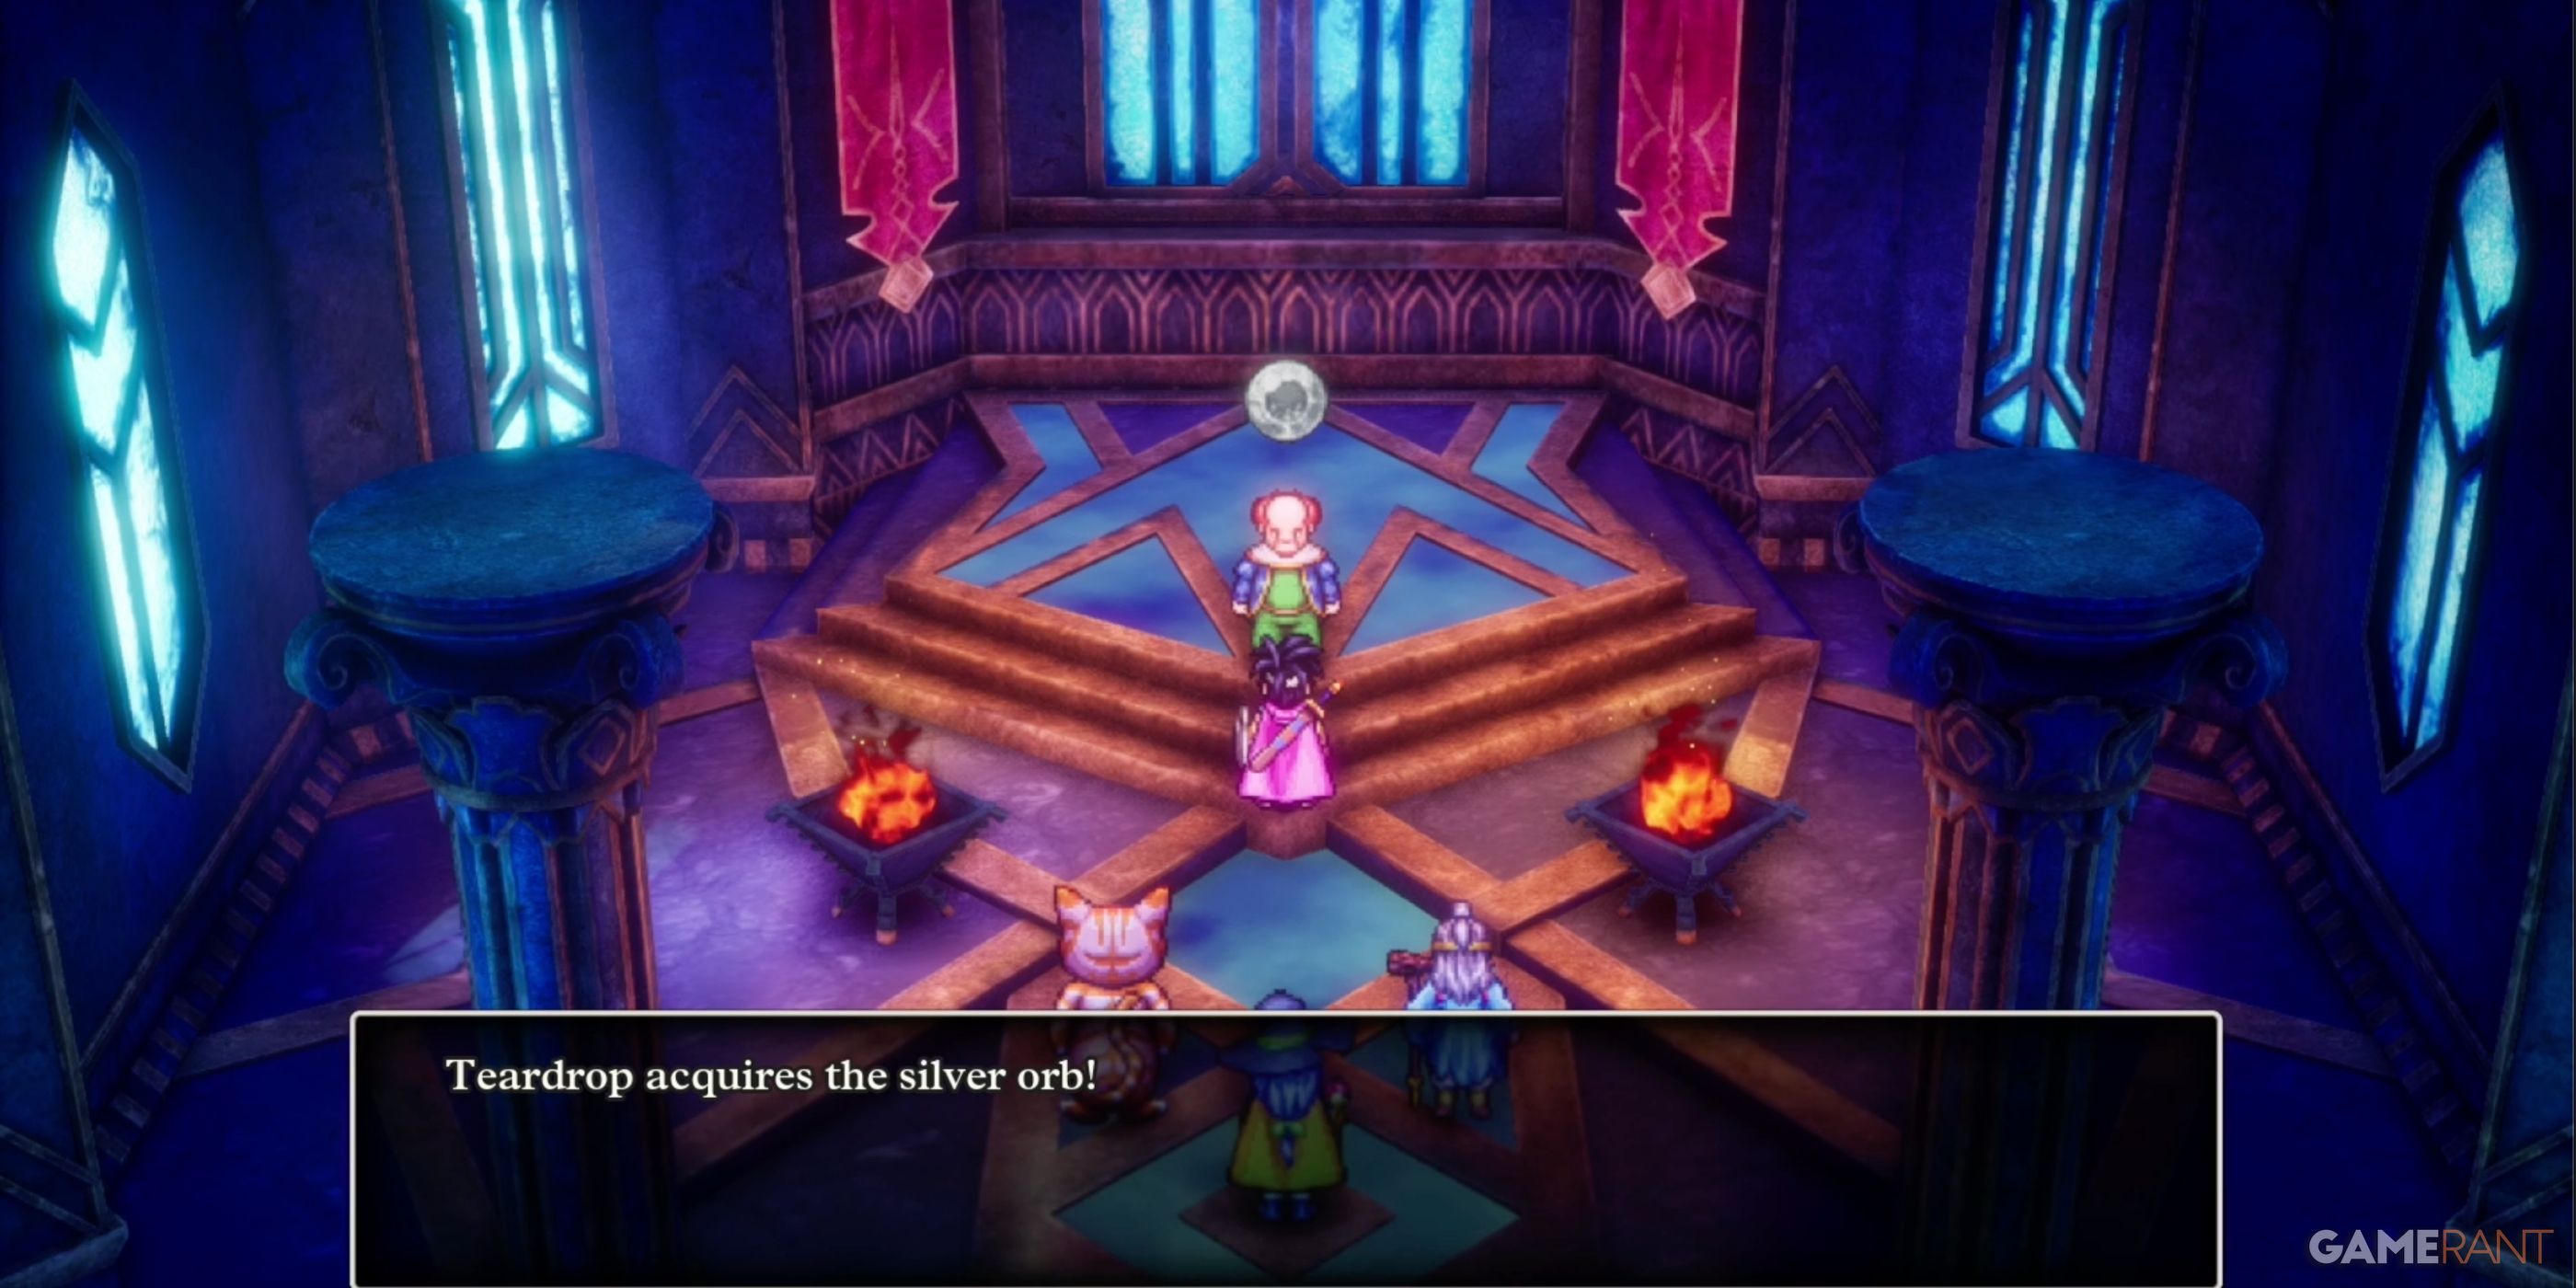
After you exit the Maw of the Necrogond, you’ll want to head east until you see a small church on top of a hill. This is the Necrogond Shrine. Head inside the shrine and speak to the NPC – they cannot be missed.
There are three treasures at the Necrogond Shrine:
- Outside the shrine, on the eastern side, you’ll find a barrel containing a Dragon Scale.
- Inside the shrine, check the area behind the NPC. You’ll find two buried treasures, the first being one of DQIII Remake‘s Mini Medals, the next being a Seed of Life.
Speaking to the NPC will automatically award you with the final orb, the Silver Orb.
Now that you have all six orbs, you will be able to head to Rimland, where the Shrine of the Everbird awaits. Unlocking the Everbird is the only way to reach the lair of the Archfiend Baramos.
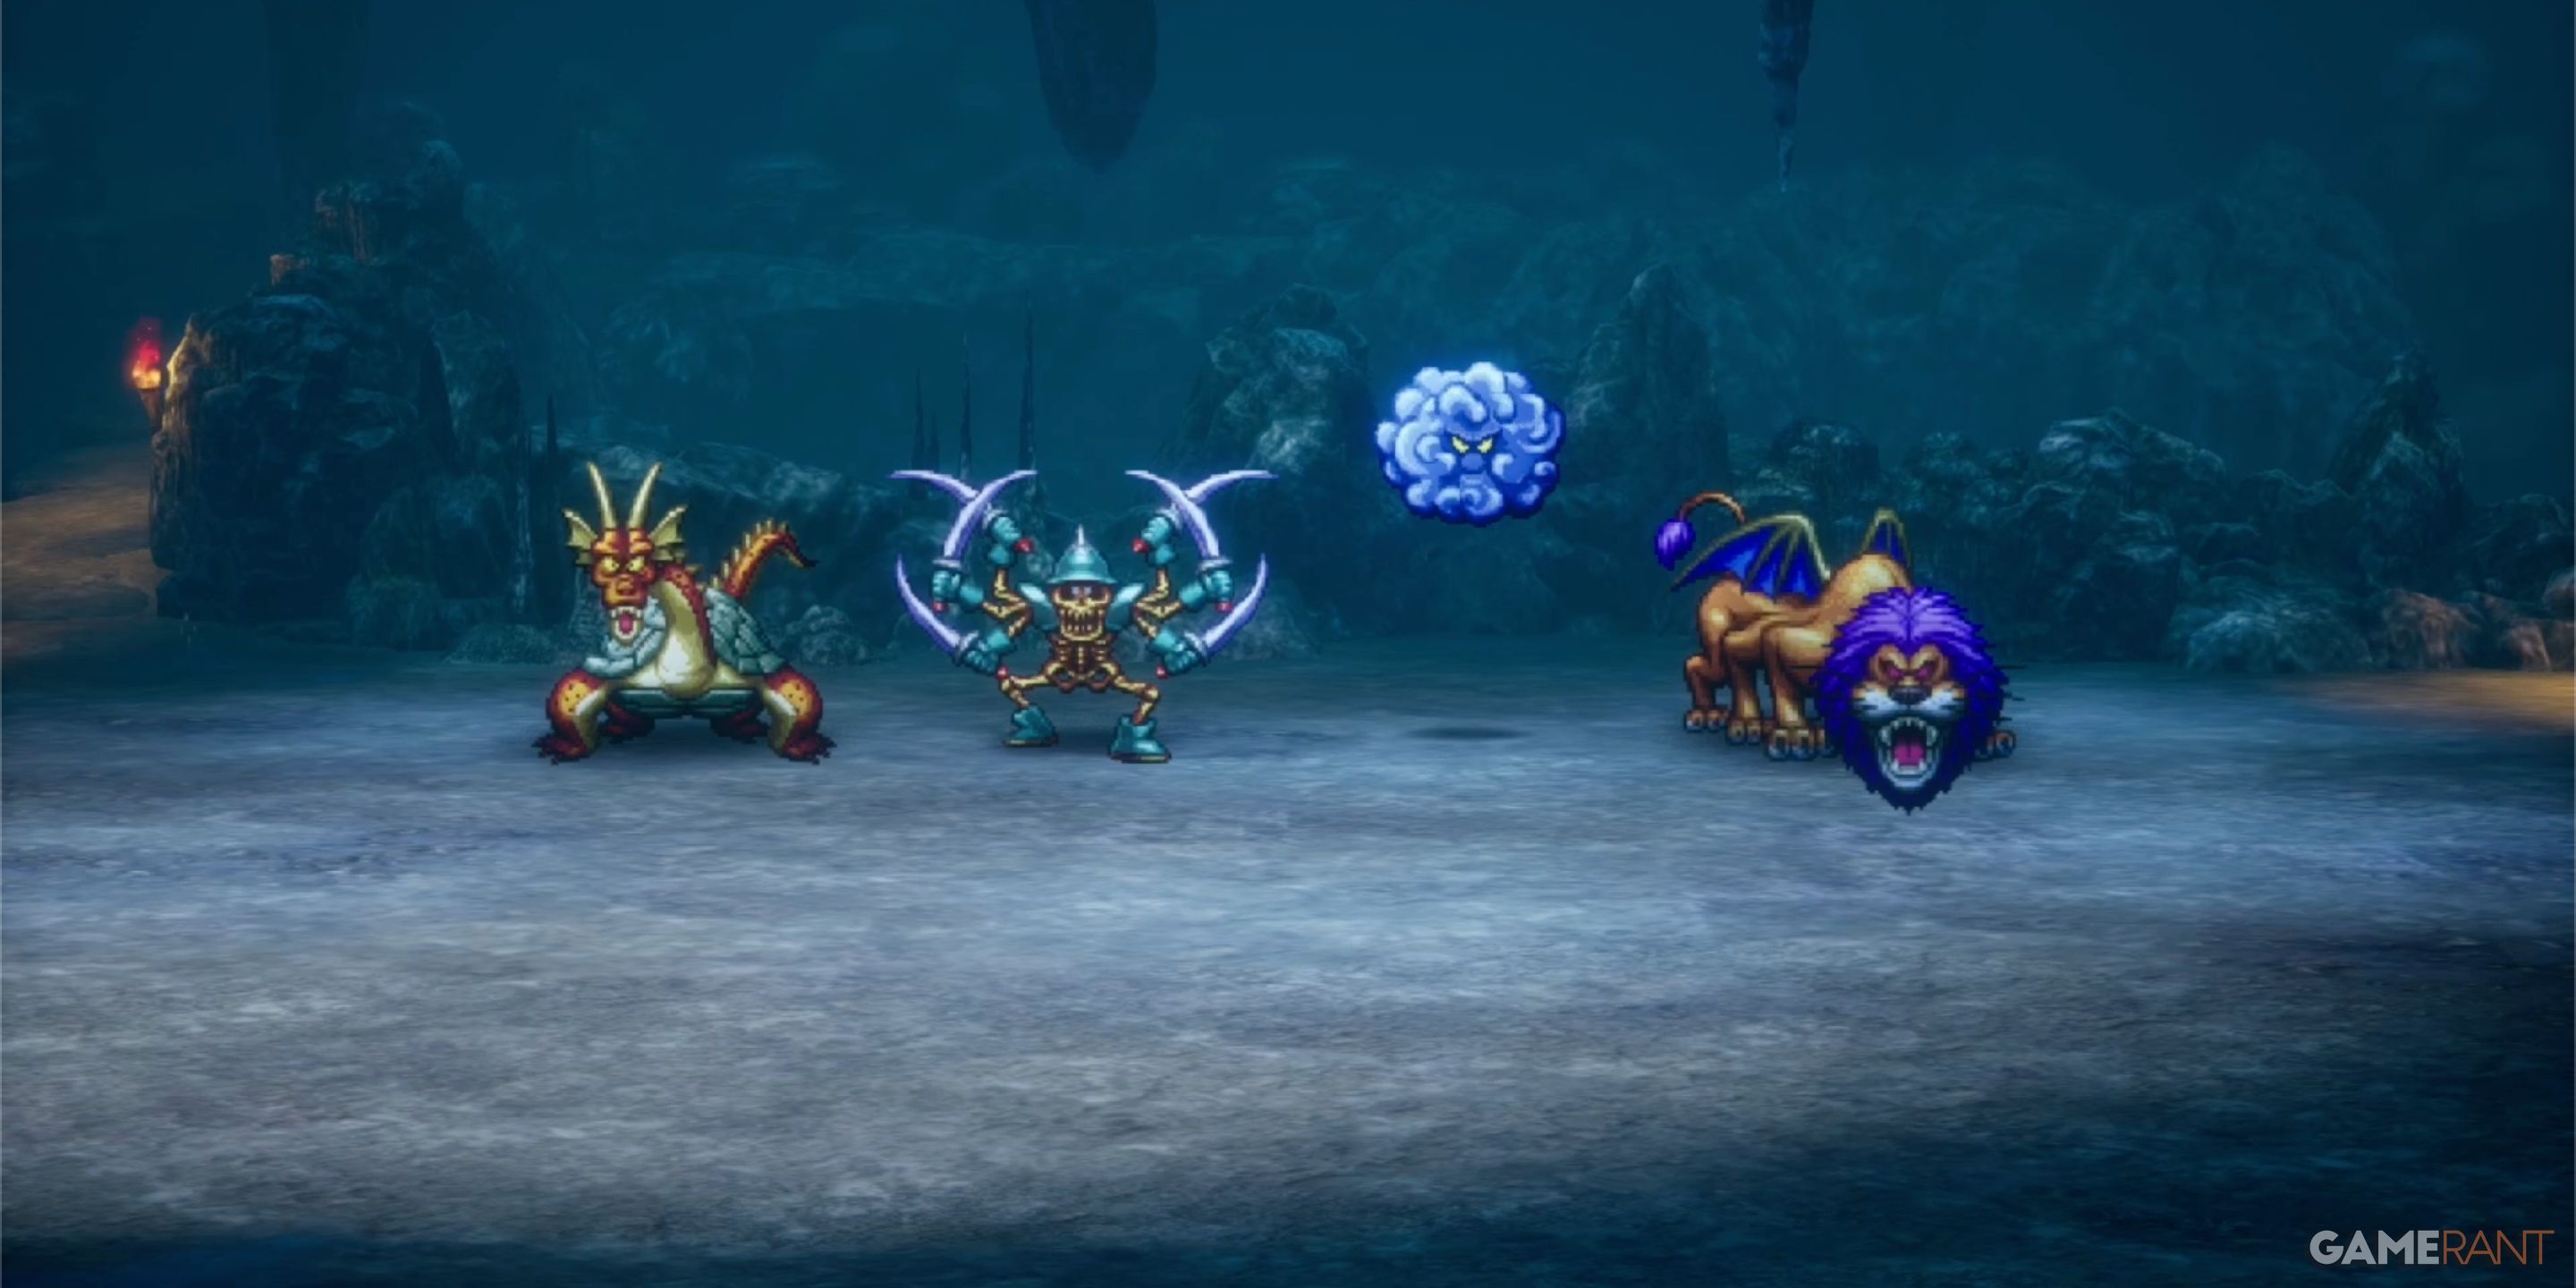
All Monsters in the Maw of the Necrogond – Dragon Quest 3 Remake
|
Monster Name |
Known Weakness |
|---|---|
|
Minidemon |
Unknown |
|
Armful |
Frizz (Fire), Boom (Explosive) |
|
Troll |
Unknown |
|
Silhouette |
Varies (Like Shade) |
|
Infanticores |
Unknown |
|
Freezing Fog |
Frizz |
|
Wyrtoise |
Unknown |
|
Goodybag |
None |







Leave a Reply