Well, we’re into the month of December, and temperatures are beginning to get close to freezing here in old England-land. What I’ve decided to do, in lieu of the cold weather, is take the time indoors to review some more keyboards, although this time with a focus on smaller choices that are rather interesting. Yes, I really am a nerd.
Nonetheless, here are three options and a fun wildcard for you to consider, ranging from a seriously customisable 65 percent choice to a ‘board with my favourite layout and some interesting changes and another 65 percent option which revives an important custom option from a decade ago.
Drop CSTM65 review: An SFF option with a hot-swappable case
Buy:
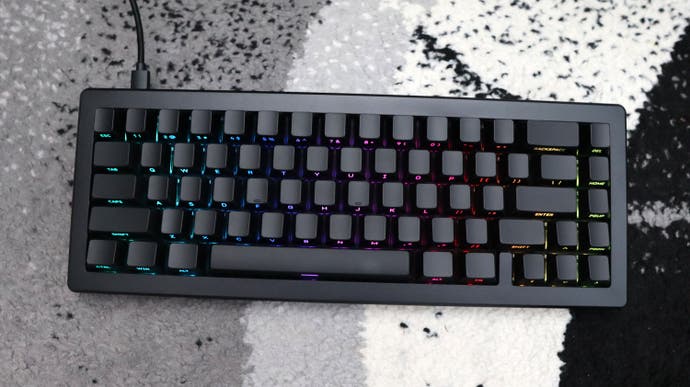
First up is the Drop CSTM65, whose name explains pretty much exactly what this ‘board is all about – a custom 65 percent choice. It offers the benefit of a smaller form factor layout for both providing more desk space and being on trend, while also coming with the fun of a hot-swappable plastic top case. That’s right – the CSTM65’s top housing can be replaced simply by taking the case off by lifting upwards to reveal the metal innards beneath. With my sample, Drop sent the keyboard in black, and provided the Overgrowth decorative case to go with it ($35) which can be swapped on in a matter of seconds. It completely changes the look of the keyboard, and is an ingenious and cost-effective way of giving your setup a new look without dropping a lot more on a new keyboard.
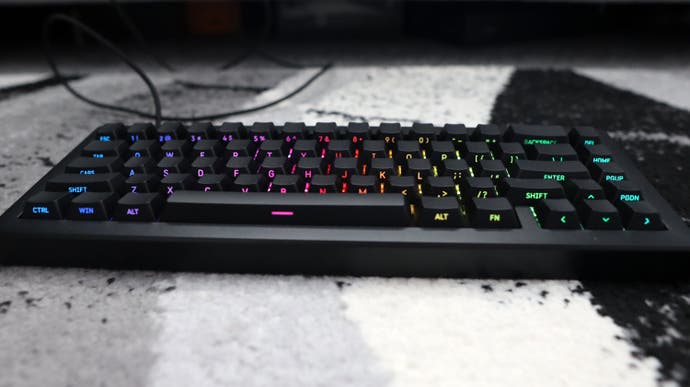
You also get funky aesthetic choices elsewhere on this standard, fully-assembled model with side-printed ABS keycaps. From the top down, they are blank, meaning you’ve got to be a competent touch-typist at least, although they can at least be swapped out for other keycaps with more standard legend placement if you’d prefer. These are ABS keycaps, so come with a cheaper feel than the PBT I crave, but nonetheless are decent enough under finger.
Connectivity here is purely wired via a USB-C to USB-A cable provided in the box, while inside the CSTM65 in pre-built form comes with either Gateron Yellow KS3 linear or Gateron Brown Pro 3.0 soft-tactile switches. My sample came with the latter. They’re a reasonable clone of MX Browns, although the tactility isn’t as crisp or present, and with the switches being lubricated, it has had the unfortunate side-effect of dampening the feeling a tad. With this in mind, they are comfortable switches to use for typing and the occasional piece of gaming, although if they aren’t what you’re after, you can soon change them to other switches with 3 or 5-pin mounting as the CSTM65 is hotswappable.
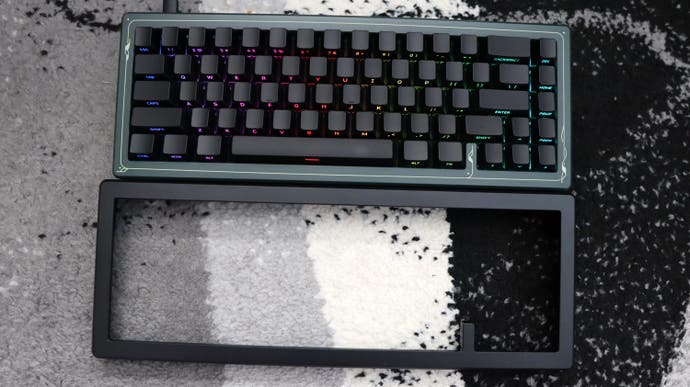
Acoustics here are also solid with the lubed switches, polycarb case and innards, and the range of sound-dampening foam that lives inside the CSTM65. There isn’t any case rattle or ping, and it sounds excellent. The RGB lighting on offer is bright, and with the side-printed keycaps, certainly adds to the overall aesthetic. It is addressable with the CSTM65 supporting both QMK firmware flashing and VIA, as Drop’s own online configurator where you can flash firmware choices directly to the keyboard. It is a little fiddly, but makes for powerful customisation.
In its prebuilt form, the Drop CSTM65 is going to run you $129, which for a mechanical choice with this much customisation, is rather decent value for money. Not many keyboards offer as much modularity as the CSTM65 without you paying a fair bit more, and if that’s what you’re after, this is an excellent keyboard.
WhiteFox Eclipse review: Reviving one of the most important custom ‘boards from a decade ago
Buy:
The WhiteFox Eclipse may not be the first keyboard that comes to mind when it comes to talking about some of the most important keyboards of all time. That discussion is usually reserved for the IBM Model F or M (and usually brought up with its mention of well-made clones). However, I’d argue, as Alpaca Keyboards (the folks behind the Whitefox Eclipse) would, that Matt3o’s Brown Fox is one of the most.
Allow me to explain – the WhiteFox Eclipse is a modern reproduction of one of the first custom keyboards developed from the ground up from a member of the mechanical keyboard hobbyist community – namely Matt3o on Deskthority. You might have heard of Matt3o before – he used to collaborate with Drop/Massdrop on a range of keycaps, with some of his designs still stocked. Back in 2013, he set out to build a custom keyboard from the ground up, opting to go for an laser cut acrylic case; hand-soldered, plate mounted MX switches (MX Blues for the main keys, MX Red for arrow keys and MX Green for the space bar) aluminium plate and some lovely brown keycaps, christening it the Brown Fox.
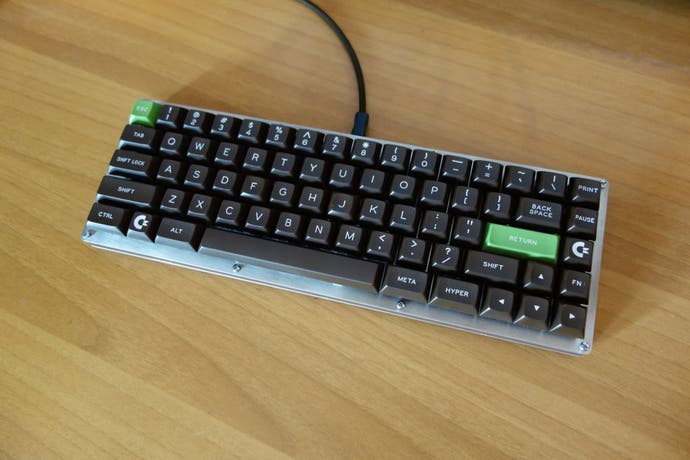
From there, the keyboard was launched in collaboration with Massdrop and Input Club in 2015 with some tweaks, known as the White Fox, which became the most-backed keyboard on Massdrop at the time, and popularised a form of the 65 percent layout that has since become a favourite for enthusiasts. The interesting part comes a couple of years later when Alpaca, the makers of the new Whitefox Eclipse, was established by former members of Massdrop’s mechanical keyboards team, who then set out to make a new version of the Whitefox keyboard. After a few years of development, the WhiteFox Eclipse was brought to market.
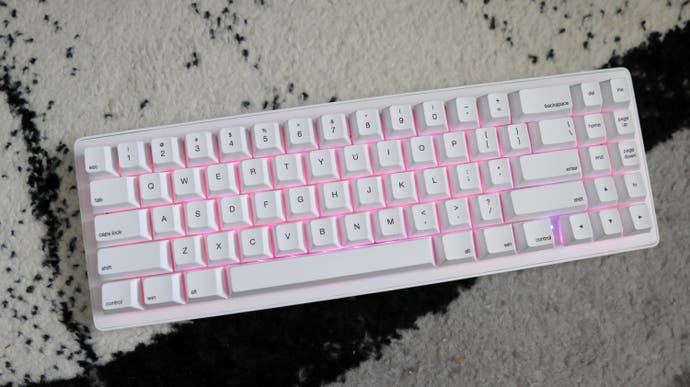
The similarities between the old WhiteFox from Massdrop and the new Eclipse model here are mostly cosmetic, with the same clean white finish, a similar ‘TrueFox’ 68 percent layout with a nav cluster and arrow keys on the right hand side, and the same Cherry profile dye-sub PBT keycaps. It results in a keyboard that looks gorgeous and wonderfully modern.
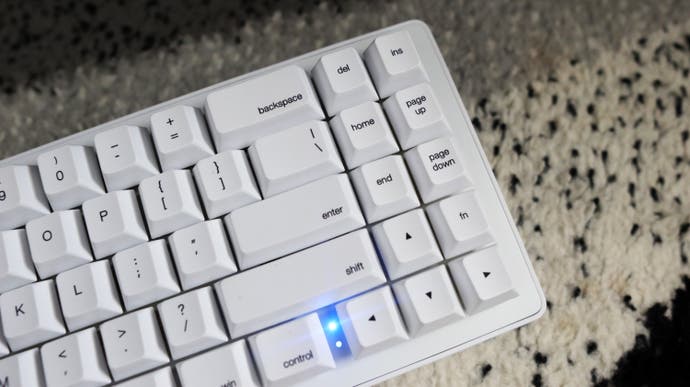
My sample is the plastic case version, although you can also get it with an aluminium case, much like the Massdrop version. It’s reasonably sturdy, although comes with some flex under pressure. By default, the WhiteFox Eclipse is a tall and flat keyboard with the case being quite thick and with it coming with full-size switches. This means it can be quite difficult to use without it being raised up to a more comfortable angle. To this end, I’m especially grateful for the magnetic feet that are provided in the box.
On the older Massdrop version, you got a serious amount of choice with the switches inside the WhiteFox. In total, there were 11 to pick from with a range which were the most popular among users of Massdrop at the time. You had a choice of more standard options such as Cherry MX Red, Blue, and Brown, alongside their Gateron clone counterparts, as well as odder options from the MX lineup that are rare even now – MX Green, Clear and White. You also got Gateron Green and Clear options, as well as Zealios switches, which were Gateron soft tactile switches that offered a similar force to MX Clears, a higher actuation point, and a supposedly even smoother actuation.
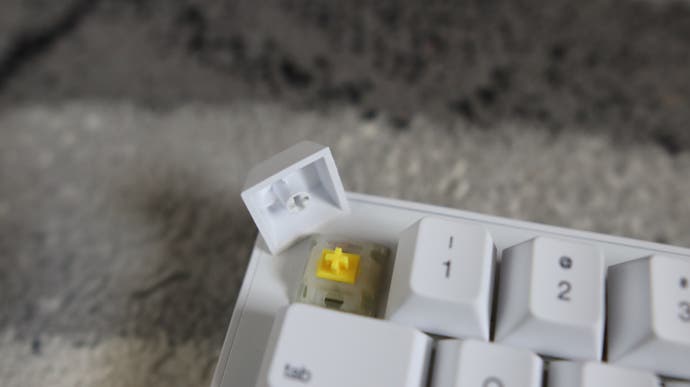
With the Eclipse version here, things are a lot simpler. This keyboard comes with pre-lubed Gateron Yellows inside, which are a 50g linear switch that feel especially smooth under finger. Unlike other Gateron choices in the past, these have a consistent, responsive keypress which felt excellent to use when typing up plenty of words in articles and such. Their lubrication also allowed for fantastic acoustics alongside the presence of a lot of poron foam inside the case for dampening. If these switches aren’t to your liking though, the WhiteFox Eclipse is hot-swappable. That’s one benefit of this newer version against the Massdrop option.
This keyboard is also gasket-mounted, which has become a standard feature on a lot of prebuilt mechanical choices these days, lending the typing feel to have a slightly bouncier and perceivably more responsive feel against other options. It works in the Eclipse’s favour, offering a comfortable experience, all things considered.
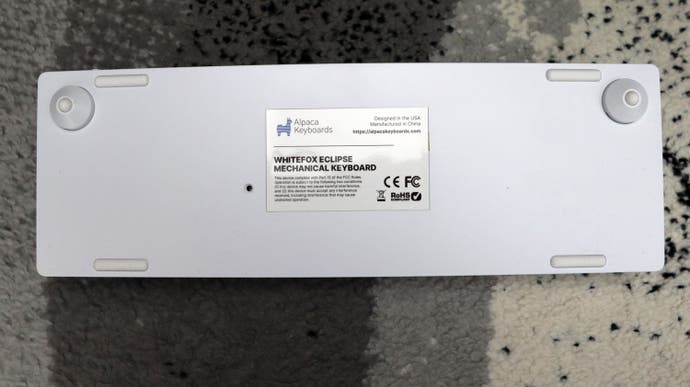
Connectivity is handled by Bluetooth connectivity on up to 3 devices, with pairing on each channel handled by holding down the Fn and Q, W or E keys respectively. The WhiteFox Eclipse also plays nicely on both Windows and macOS and worked without an issue on both OSes in my testing. For macOS use, there are also Mac-specific keycaps included in the box, alongside blue-coloured and Fox accent keys to stay true to the original, a keycap and switch puller, a double-ended spudger for accessing the keyboard’s innards and a fantastic quality braided USB-C to USB-A charging cable.
Alpaca rates the WhiteFox Eclipse’s 4000mAh battery to last for around 90 hours on a charge. This is pretty solid overall, and means you’ll be able to go for a good couple of weeks before needing to charge it back up again. That 90 hour runtime is also with the RGB lighting on, which is great. Turn it off, and this extends all way to 10 days.
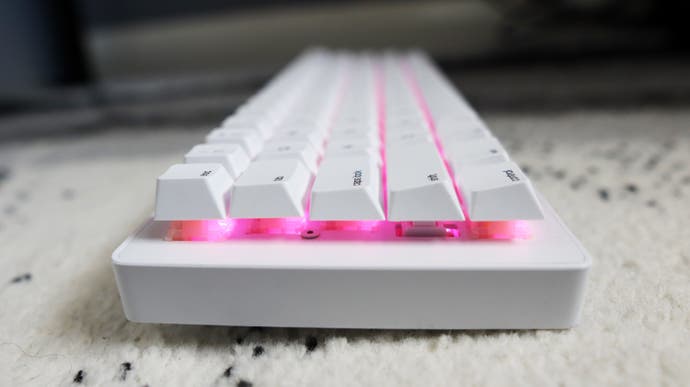
There isn’t any additional software here, with customisation limited to changing the RGB lighting mode through a series of keyboard shortcuts. There are a range to choose from, with most of them displaying colours of the rainbow in a slightly different patterns, although some only do this in red and white, or a different shade of blue. You can use Fn and M to change the pattern, and Fn and K to cycle through different colours for the pattern. There is single colour backlighting contained within these settings, although isn’t as easy to access as with actual software.
The WhiteFox Alpaca is an interesting successor to the original choice, adding some modern functional touches to one of the most important custom keyboards of the last decade. The market may have shifted a fair bit since the original version’s release, but there’s no doubt that this reimagined version still holds up in 2024.
HHKB Studio review: The legendary Japanese keyboard returns, although with a different everything
Buy:
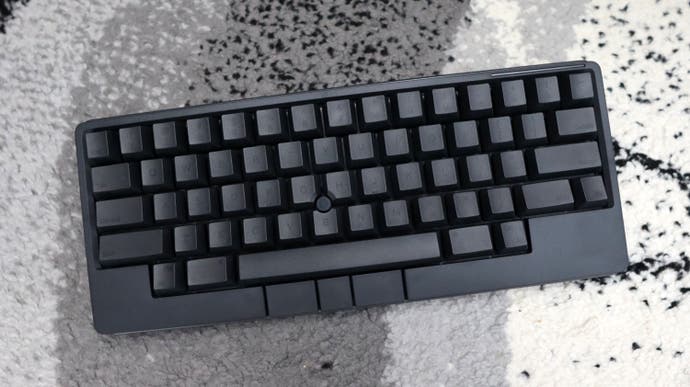
I’ve been using an HHKB Professional Hybrid Type-S, which is one of our favourite small form factor keyboards, on and off for the last 18 months. On its own, the HHKB is an expensive Japanese cult sensation known for its electro-capacitive switches which are unlike anything else, and its odd layout. The HHKB Studio is the PFU Corporation’s attempt to offer a first-party HHKB for the more normal mechanical keyboard enthuisast – allow me to explain.
There are two big differences with this new Studio model against the normal models, the first of which is its choice of switches. As opposed to opting for the classic Topre electro-capacitive options inside, the Studio uses silent linear switches from Kalih with a 45g actuation force. They were surprisingly smooth to type on and felt responsive for day-to-day working, although I still prefer electro-capacitives in my normal HHKB. They just have a crisper keypress because of their unique tactility that you miss out on with linears such as in the HHKB Studio, but the Kalih switches inside felt excellent for office work while also being super quiet.
The other big difference against the normal HHKB is the addition of a trackpoint slap bang in the middle of the alphanumeric keys. The trackpoint is recognisable for being in the sea of IBM and Lenovo ThinkPads across from the 1990s to today, as well as other laptops from that era. It was a patented tech by Lenovo in 1997, although with its expiry, it has made its way into other products, such as the HHKB Studio. In essence, it is a pointing stick that offers a way of moving your mouse cursor without the need for a mouse.
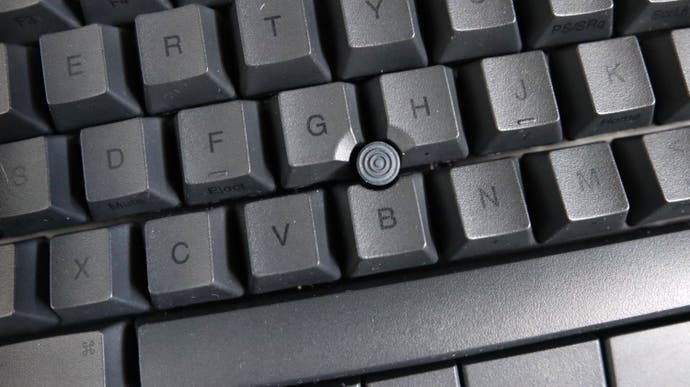
It takes some getting used to, and you do have to be precise with it, but the trackpoint is a reasonably useful addition to the HHKB Studio’s arsenal. There are also gesture pads around the bottom of the Studio for making tasks such as scrolling easier, as well as dedicated mouse buttons below the space bar for left, middle and right click. That’s an interesting addition, and one I did find myself using a fair bit – more than I thought I would, admittedly.
Along with the trackpoint, the HHKB Studio also bundles in some interesting gesture pads, which allow you to use the sides of the board’s chassis for commands such as increasing and decreasing volume, or scrolling through a web page. It’s an interesting addition here, although not one I found myself using too much due to its unfamiliarity compared to a traditional rotary dial.
It’s worth discussing the HHKB layout just before I move on, as it looks a bit weird. It’s all thanks to a collaboration between Japanese computer scientist Eiiti Wada and the PFU Corporation, the Japanese firm that makes the HHKB. Wada wanted a layout that would work with the range of different operating systems and computers he used in the mid 1990s. What resulted is a very comfortable layout with some small, but worthwhile modifications, such as moving the Ctrl key to where Caps Lock would normally be to reduce the distance your fingers need to travel for performing common functions such as Ctrl+C and Ctrl+V, removing the key between Backspace and Enter to make it easier to hit both of them, and moving the Function key to a row above its placement on a traditional keyboard.
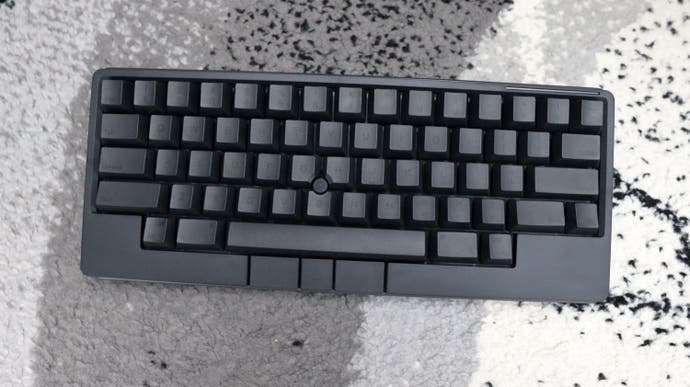
The HHKB Studio also works without a hitch on Windows and macOS, although comes with macOS keycaps by default – as an aside, the dye-sub PBT keycaps here are some of the best I’ve used. There is multi-point Bluetooth with it being able to connect to up to four devices at once, with pairing a breeze thanks to a key combo. There isn’t any USB receiver action here though, although having Bluetooth is arguably easier. I certainly had no trouble.
Software comes in the form of the HHKB Studio Keymap too, which allows you to remap keys, as well as add functions to dedicated keys, such as enabling the gesture pads’ functionality with a modifier key. In addition, there are also several function layers to program keys on to provide a fair amount of flexibility. It may not be as powerful as VIA, but the software is quite useful. The only issue is that it has to be used when the HHKB Studio is plugged in, which has you reaching for the cable if you want to remap any keys.
Then there’s the price – you might want to make sure you’re sitting up for this. The HHKB Studio is yours for £325/$329, which is hilariously expensive for a niche keyboard. It’s only something I’d recommend if it’s what you’re really after. Personally, I like the HHKB Studio, but then I am kind of the target market. For everyone else, if you want the HHKB experience in layout only with more customisation choices, this is great, but for everyone else, get a more ‘standard’ HHKB. You’ll thank me later.
Wildcard: NCR-80 R2 review: A DIY keyboard kit with retro sensibilities
Buy:
I usually include a wildcard, or odder, choice in these roundups if you want to consider something that’s even more niche than the three choices above for small form factor keyboards. Allow me to introduce you to the NCR-80 R2.
On its own, it’s a TKL mechanical keyboard kit that you can purchase in barebones form with a PCB, stabilisers and case. There aren’t any switches or keycaps included, so you will need to purchase these separately.
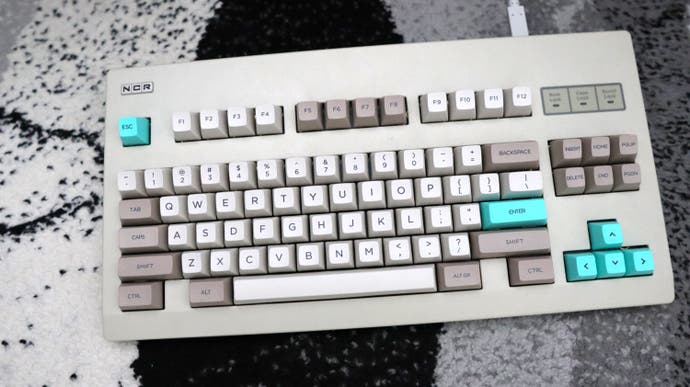
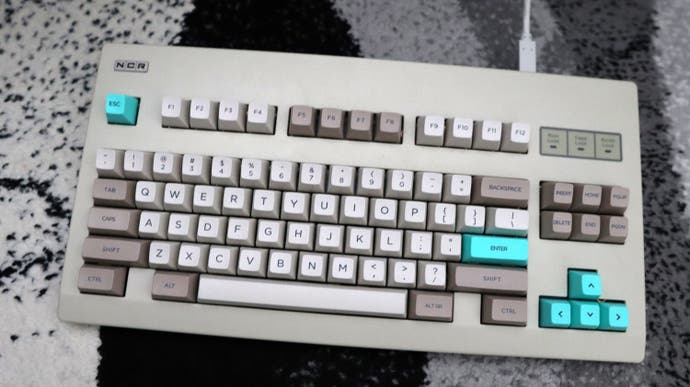
In a world where mechanical keyboard design has become increasingly zany, bright and perhaps a bit wacky in some cases, the NCR-80 might seem a little boring. There is a good reason for this, though. This beige plastic case is designed to mimic the older Cherry G80 and G81-3000 models from the 1990s, and does so admirably. Having used my fair share of G80-3000s old and new (my very first mechanical ‘board was one with MX Blues), I can safely say that the NCR-80 nails it, and arguably improves on those late-era versions with an injection moulded plastic frame that suffers from no flex whatsoever. It also leans into the G80-3000’s look with bright green functioning lock lights in the top right corner, a lovely NCR logo in the opposing corner, and a totally-not Cherry label on the reverse.
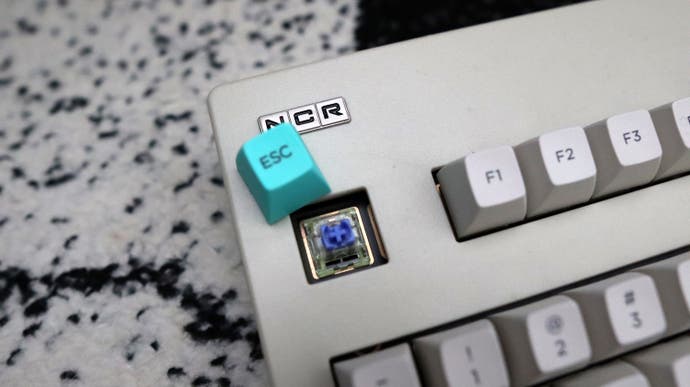
Of course, as a more modern take, you get benefits such as a USB-C port for wired connectivity, while there is full QMK and VIA support for controlling key functionality and programming on different layers. The PCB inside is also hot-swappable, and you can have whichever switches you want in here, as long as they’re 3 or 5 pin. You will have to supply your own though, as this is just the chassis, PCB and stabilisers.
The very kind folks at MechBoards UK sent this over, and specced it out with some TTC Golden Blues. I felt like it had to be something clicky because it leans into the romanticised era of loud keyboards that the G80-3000 was born into back in 1988. These are 37g tactile switches with a total travel of 3.5mm, making them lighter and snappier than your standard MX Blues. I found them quite comfortable to use for writing up all sorts of content, and being a lighter switch, you could conceivably use them for gaming, if you’re a madman. Nonetheless, the Golden Blues in here fitted well with the feel of the NCR-80, as do the lovely beige keycaps provided, which round off the look wonderfully.
I may swap the switches out down the line for a spare bag of MX Black Clear Tops that I’ve got in storage somewhere. Those are part of the recent series of ‘official’ MX reissues that included proper versions of the MX Ergo Clear community mod, and the revival of the MX Orange. Clear Top Blacks, or Nixies as they’re affectionately known, were initially made for a run of keyboards produced by Nixdorf in the 1980s, so I feel they’d fit well in here, but that’s for another day.
The thing with the NCR-80 is is that it isn’t one of these kits that cost an arm and a leg. At £120/$90 online, it’s one of the more ‘affordable’ ones I’ve come across, and one that blends wonderful retro charm with livable features and fantastic customisation in a lovely overall package. If you can get one, it’s definitely worth it.
So, there you have it. Four reviews of some small form factor keyboards I’ve indulged in testing over the last few months. If you’ve got any recommendations for other products for Will or I to test, feel free to drop them in the comments below or pester me on Twitter @RBithrey or on Bluesky @rbithrey.bsky.social.
function appendFacebookPixels() { if (window.facebookPixelsDone) return; !function(f,b,e,v,n,t,s) {if(f.fbq)return;n=f.fbq=function(){n.callMethod? n.callMethod.apply(n,arguments):n.queue.push(arguments)}; if(!f._fbq)f._fbq=n;n.push=n;n.loaded=!0;n.version='2.0'; n.queue=[];t=b.createElement(e);t.async=!0; t.src=v;s=b.getElementsByTagName(e)[0]; s.parentNode.insertBefore(t,s)}(window, document,'script', 'https://connect.facebook.net/en_US/fbevents.js');
fbq('init', '560747571485047');
fbq('track', 'PageView'); window.facebookPixelsDone = true;
window.dispatchEvent(new Event('BrockmanFacebookPixelsEnabled')); }
window.addEventListener('BrockmanTargetingCookiesAllowed', appendFacebookPixels);
Source link






Leave a Reply