The GameCube had a library of excellent games, ranging from first-party Nintendo exclusives to excellent third-party titles that never made it to the PlayStation 2 or the Xbox. Unfortunately, hooking up an older console without an HDMI-converting device on a modern TV can make the experience a nightmare for most players.
Steam Deck owners can play most of the GameCube’s library using EmuDeck. The EmuDeck program allows users to run classic games via emulation on the handheld PC. For those unsure about how to do so, here’s how to install the program and run GameCube and Wii games on the Steam Deck with ease.
Related
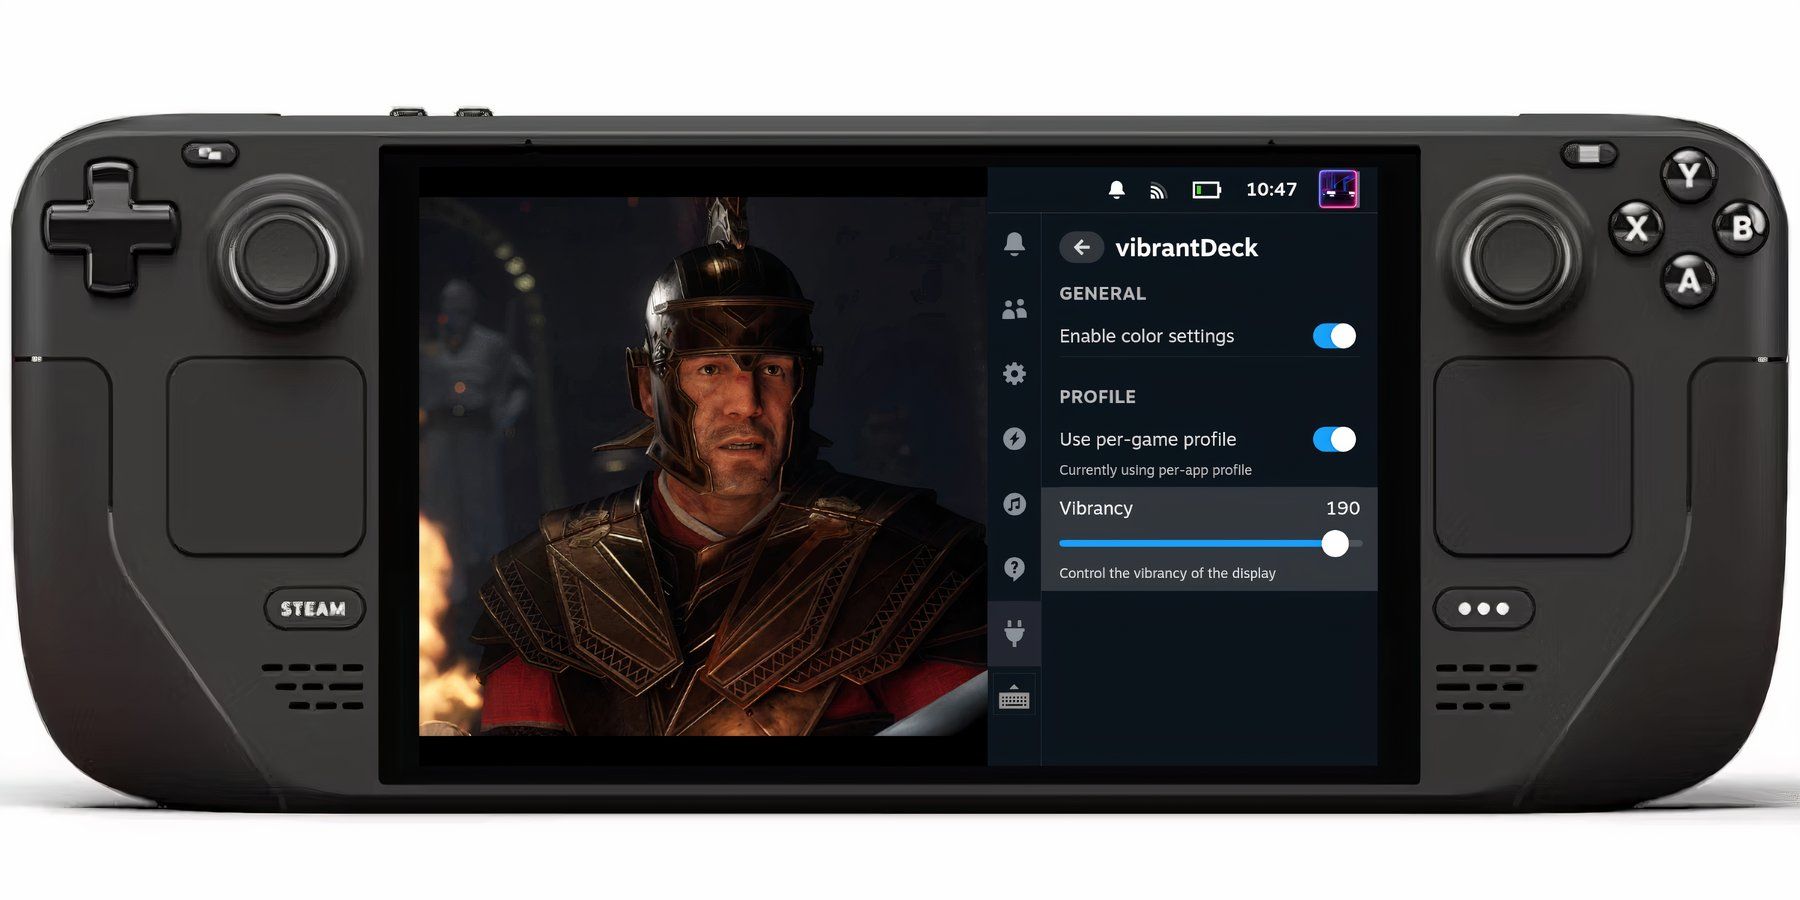
Steam Deck – How To Install Vibrant Deck For Better Colors
Want more control over the Steam Deck’s color settings? The Vibrant Deck plugin is the app for you; here’s how to install it.
Updated December 10, 2024 by Michael Llewellyn: The Steam Deck is the ideal way to play the incredible library of games on the GameCube and the Wii. However, some titles can run into performance issues without the correct settings. This guide is updated to include the steps to include Power Tools via Decky Loader as recommended by the EmuDeck developers and the steps to fix Decky Loader in the event of a Steam Deck update breaking it.
Before Installing EmuDeck On The Steam Deck
Players will need the following equipment to install Dolphin on the Steam Deck:
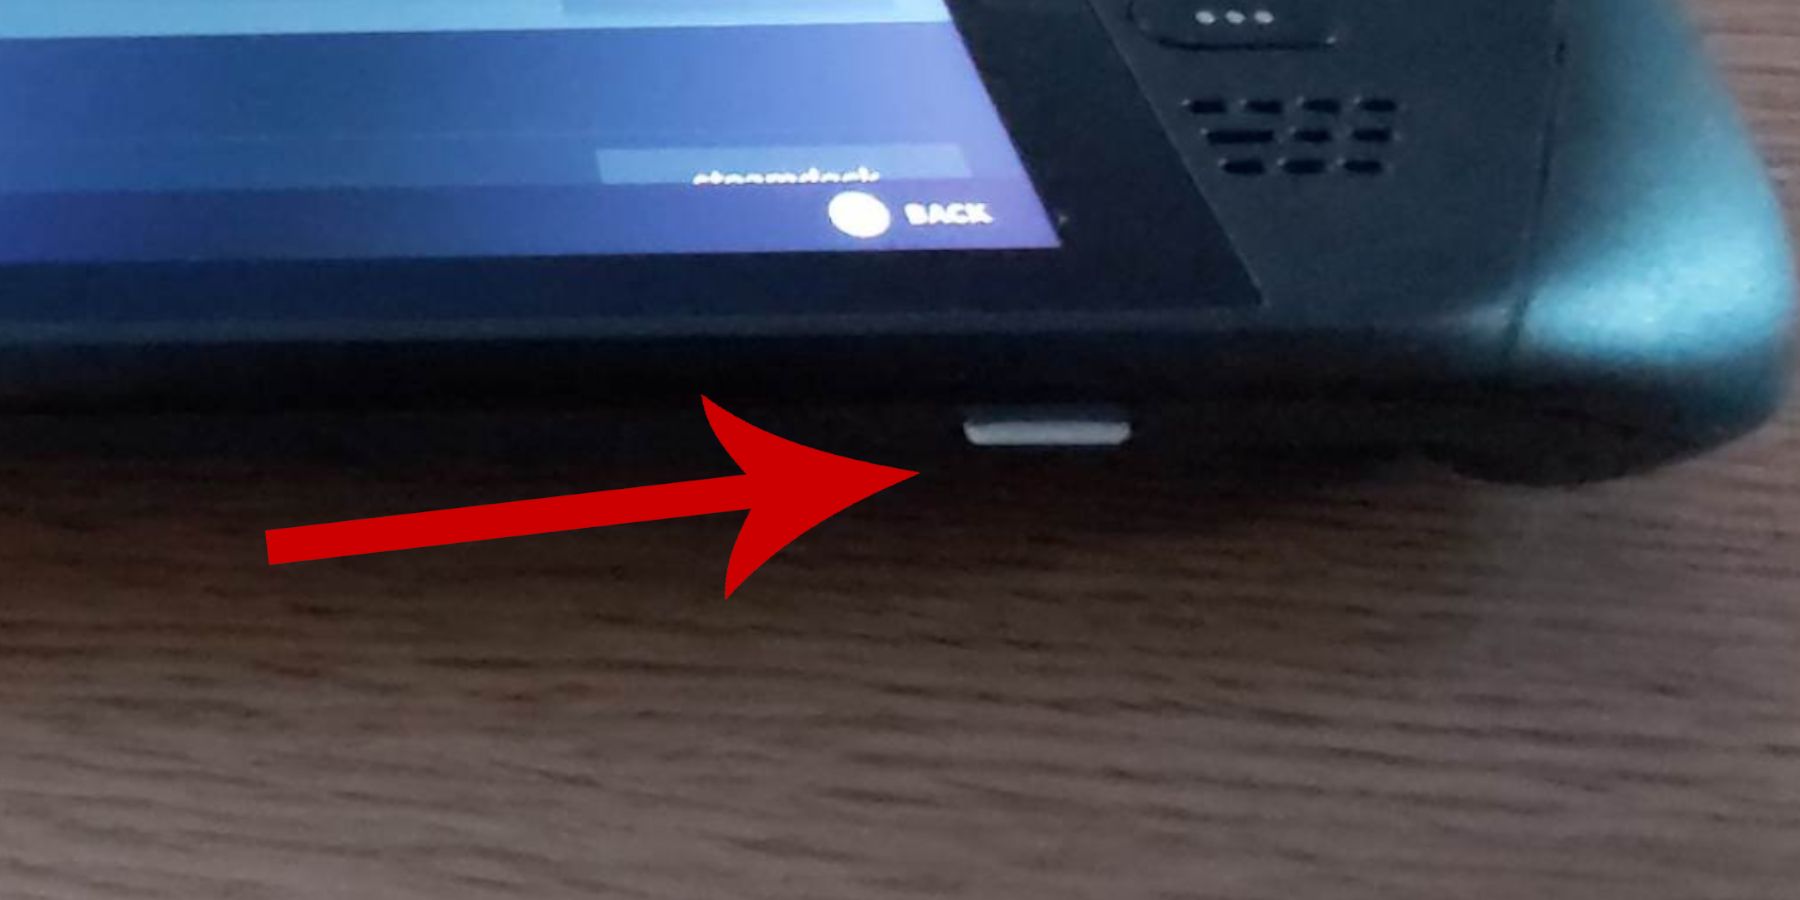
- High-speed A2 Micro SD card: The extra storage is required to install emulated games and keep the internal storage for faster and more demanding titles. Moreover, it ensures the Steam Deck’s SSD is safe from potential errors. Micro SD cards slot underneath the device. Steam Deck users can use an external HDD with a USB-C to install the Emulators and store games. However, this is the less portable option.
- GameCube and Wii ROMS: Players can have digital ROMS of games they legally own to back up their content.
- Keyboard and mouse: Using the Steam Deck in Desktop Mode is a more user-friendly experience with a keyboard and mouse.
How To Enable Developer Mode On The Steam Deck
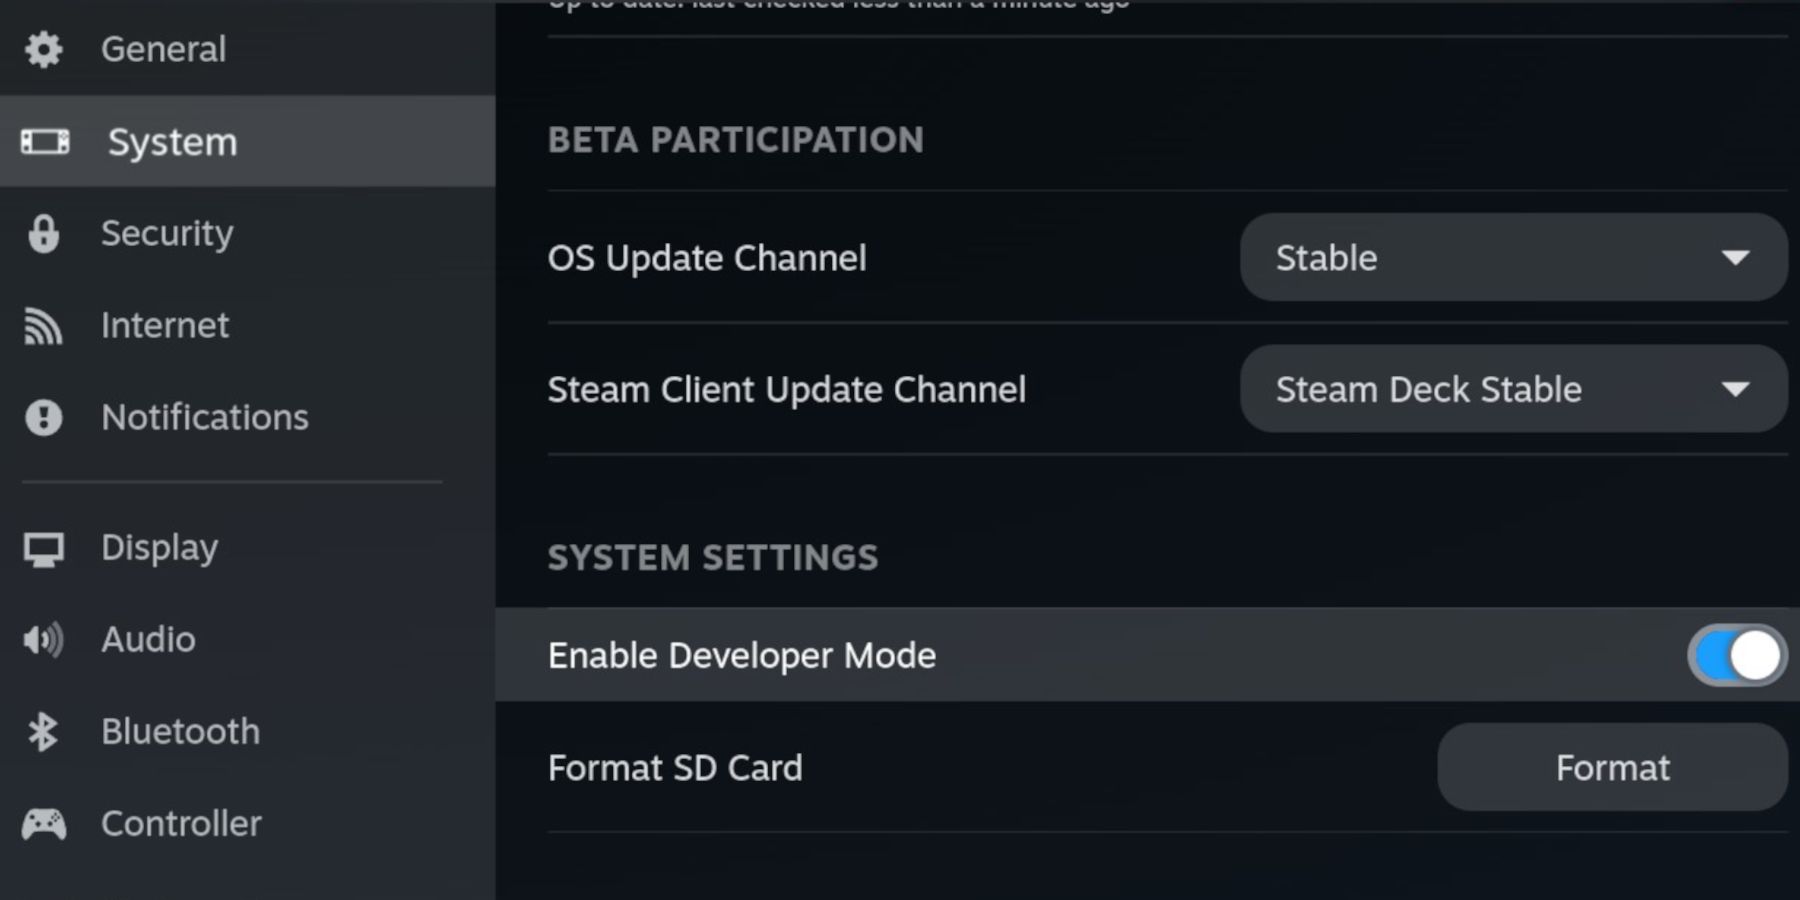
Before going ahead and downloading EmuDeck, you must enable the Steam Deck’s Developer Mode settings and make a small adjustment. This will ensure that the Steam Deck continues to run third-party plugins and programs like EmuDeck. Use the following steps to enable Developer Mode:
- Switch on the Steam Deck.
- Press the Steam button under the left trackpad.
- Open the System menu.
- In the System menu, toggle Developer Mode on.
- Open the new Developer menu located at the bottom of the left access menu and switch on CEF Debugging.
- Press the Steam Button, and select Power.
- Finally, Switch to Desktop Mode.
The Steam Deck receives regular updates to maintain stability and introduce new features. The stable version updates less frequently but, using the beta mode on the Steam Deck will entail more frequent minor and major updates. Consequently, the Developer Mode or CEF Debugging may not be enabled by default. If you encounter any issues after an update, remember to review the Developer setting menu.
How To Download EmuDeck For The Steam Deck
The Dolphin emulator is required to run GameCube and Wii games on the Steam Deck. Thankfully, the EmuDeck program makes installing the apps less challenging by removing the complications and making the experience as smooth as possible. Gamers can use the following steps to install EmuDeck:
- Press the Steam button underneath the left trackpad.
- Select the Power option.
- Switch to Desktop Mode.
- Wait a few moments for the device to switch to the Steam Deck’s Desktop OS.
- Open a favored browser and download EmuDeck using this link.
- Select the SteamOS version and download it.
How To Install The EmuDeck Program
With the EmuDeck app downloaded, it’s time to install the required programs to run GameCube and Wii games on the Steam Deck:
- Double-click on the EmuDeck icon to launch the installer.
- Select Custom Install.
- Click on the micro SD card image to install EmuDeck.
- Then click on the Steam Deck image.
- Players can choose from a range of Emulators, but if users only want to run GameCube games, they should select Dolphin. It’s worth installing more emulators as this takes advantage of the EmuDeck’s all-in-one features.
- Ensure the Steam Rom Manager option is also checked. This makes emulated games available from the Steam OS.
- Switch AutoSave on.
- Skip the Achievements section for now, as this can be activated later.
- Configure Game Bezels to on.
- Skip Configure LCD Shader for Handheld System unless other emulators have been downloaded. This option can be switched off for a brighter screen.
- For old-school TV shaders, configure CRT Shader for Classic 2D Games On.
- Select All Frontends for Steam Deck – Steam Library is the most important.
- Select Finish to complete the installation of Dolphin via EmuDeck.
Transferring GameCube And Wii ROMS
Steam Deck users must transfer their legally acquired ROMS to the correct folder. GameCube and Wii ROMS have the same extensions – .ciso, .dol, .elf, .gcm, .gcz, .iso, .m3u, .nkit, .rvz, .wad, .wbfs, .wia. With the files at hand, use the following steps:
- Open the Steam Deck’s file manager – also called Dolphin.
- Click on the micro SD card named Primary and select the Emulation folder.
- Select the ROMS folder.
- For GameCube games, copy the ROM files to the GameCube folder.
- For Wii games, copy the ROM files to the Wii folder.
Related
Steam Deck: How to Run SNES Games With EmuDeck
Gamers can expand their Steam Deck’s library by emulating SNES games; here’s how the process works.
How To Run GameCube & Wii Games On The Steam Deck
After the files have finished transferring, it’s time to add the games to the Steam OS and play them:
Save To The Steam Library
- Reopen the EmuDeck program.
- Select Steam Rom Manager and Launch.
- Click yes at the prompt to switch off the Steam app running in the background to let the Steam Rom Manager take over in Lizard Mode.
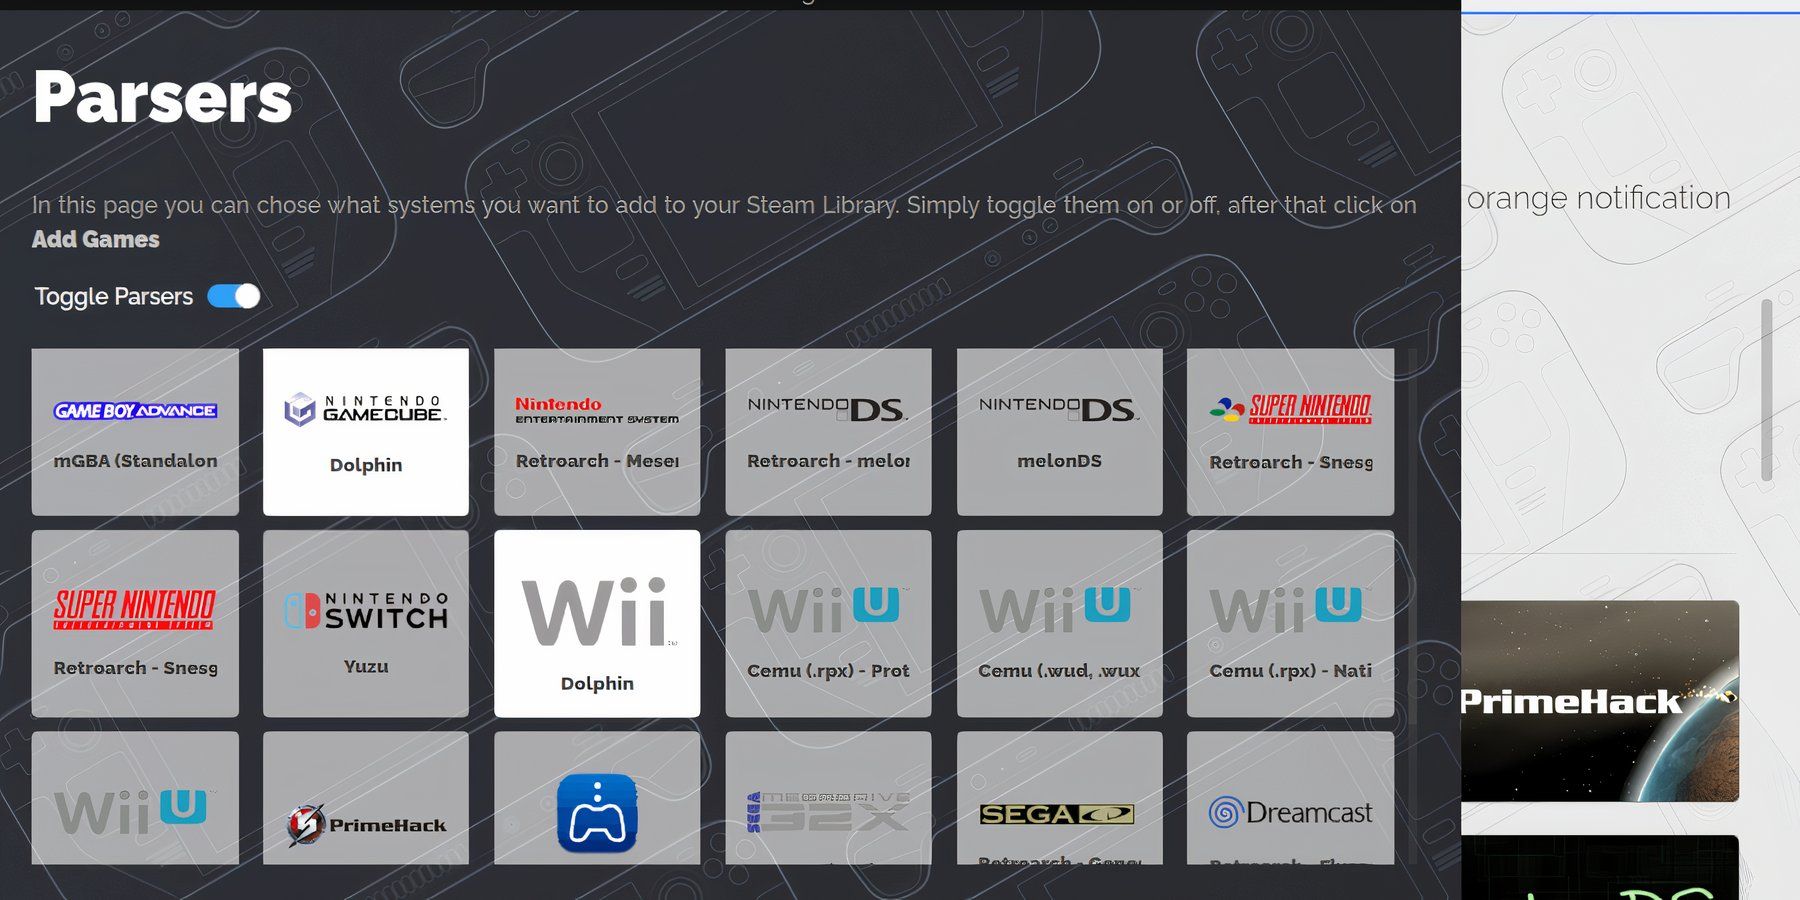
- Switch Toggle Parsers off.
- Select the Nintendo GameCube and the Wii Dolphin emulators on the Parsers menu.
- Click Add Games.
- Then click Parse on the next screen.
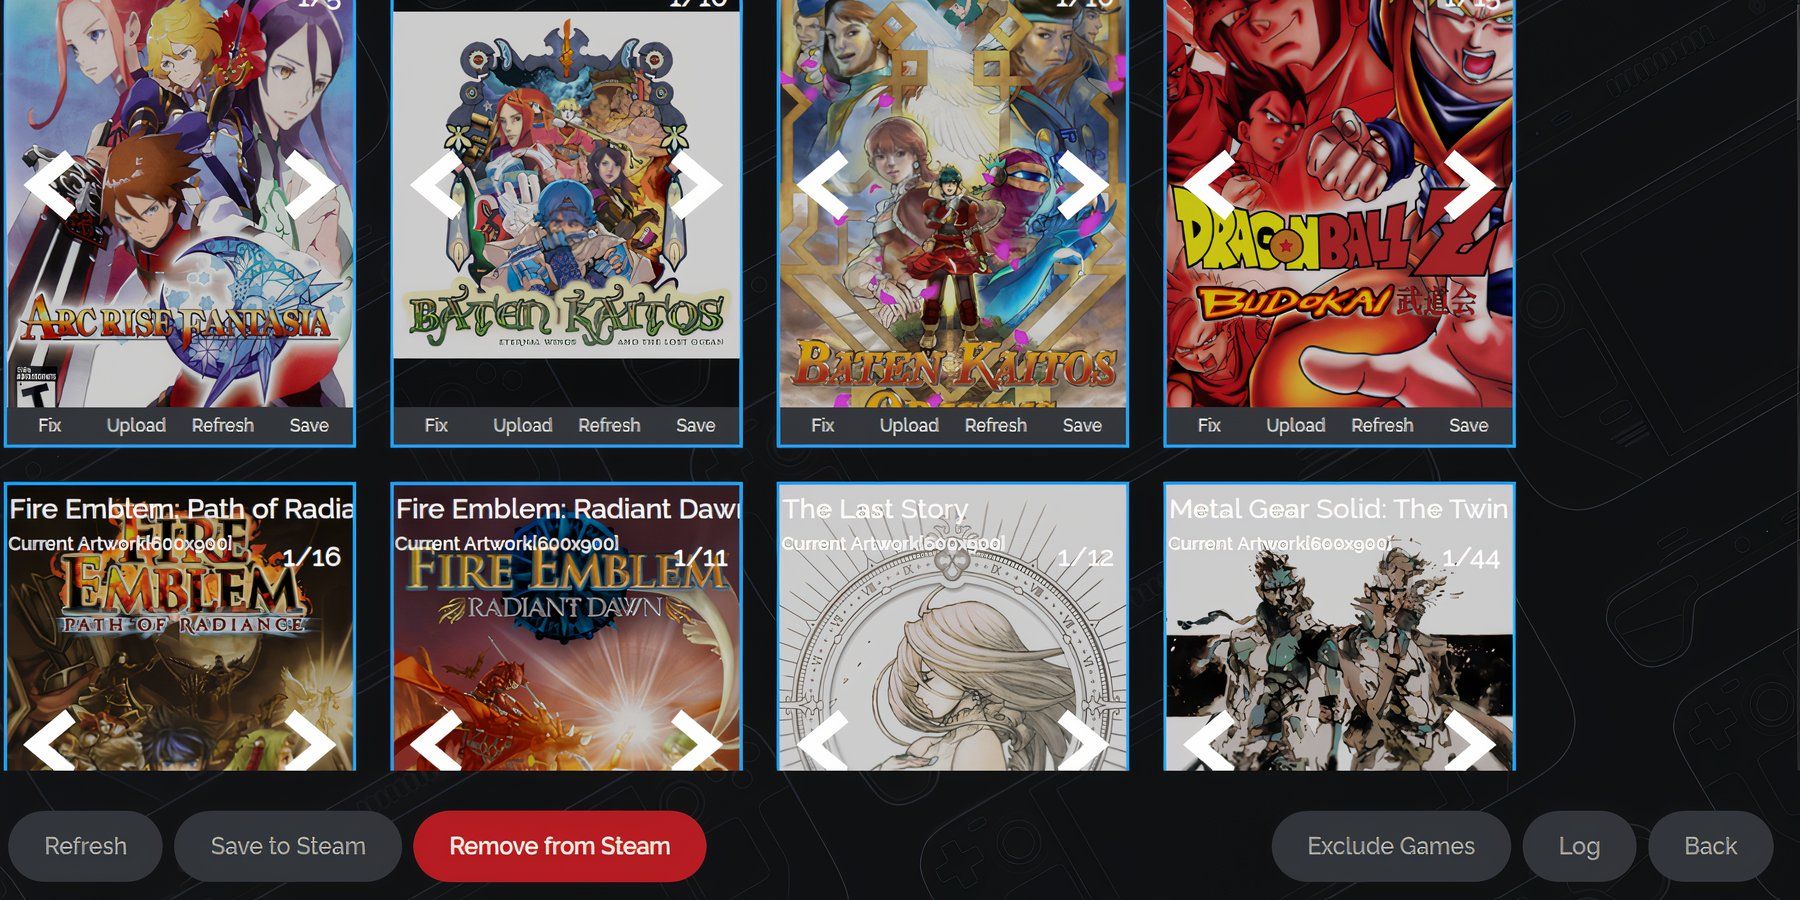
- Steam Deck users can now check the artwork and title covers for GameCube and Wii ROMS.
- When finished, select Save to Steam.
How To Fix Missing Artwork On The Steam Deck
The Steam Rom Manager should allocate the correct cover artwork for most emulated GameCube and Wii games. Unfortunately, some more obscure, modded, or translated titles may be missing covers. The following steps can be used to fix missing artwork:
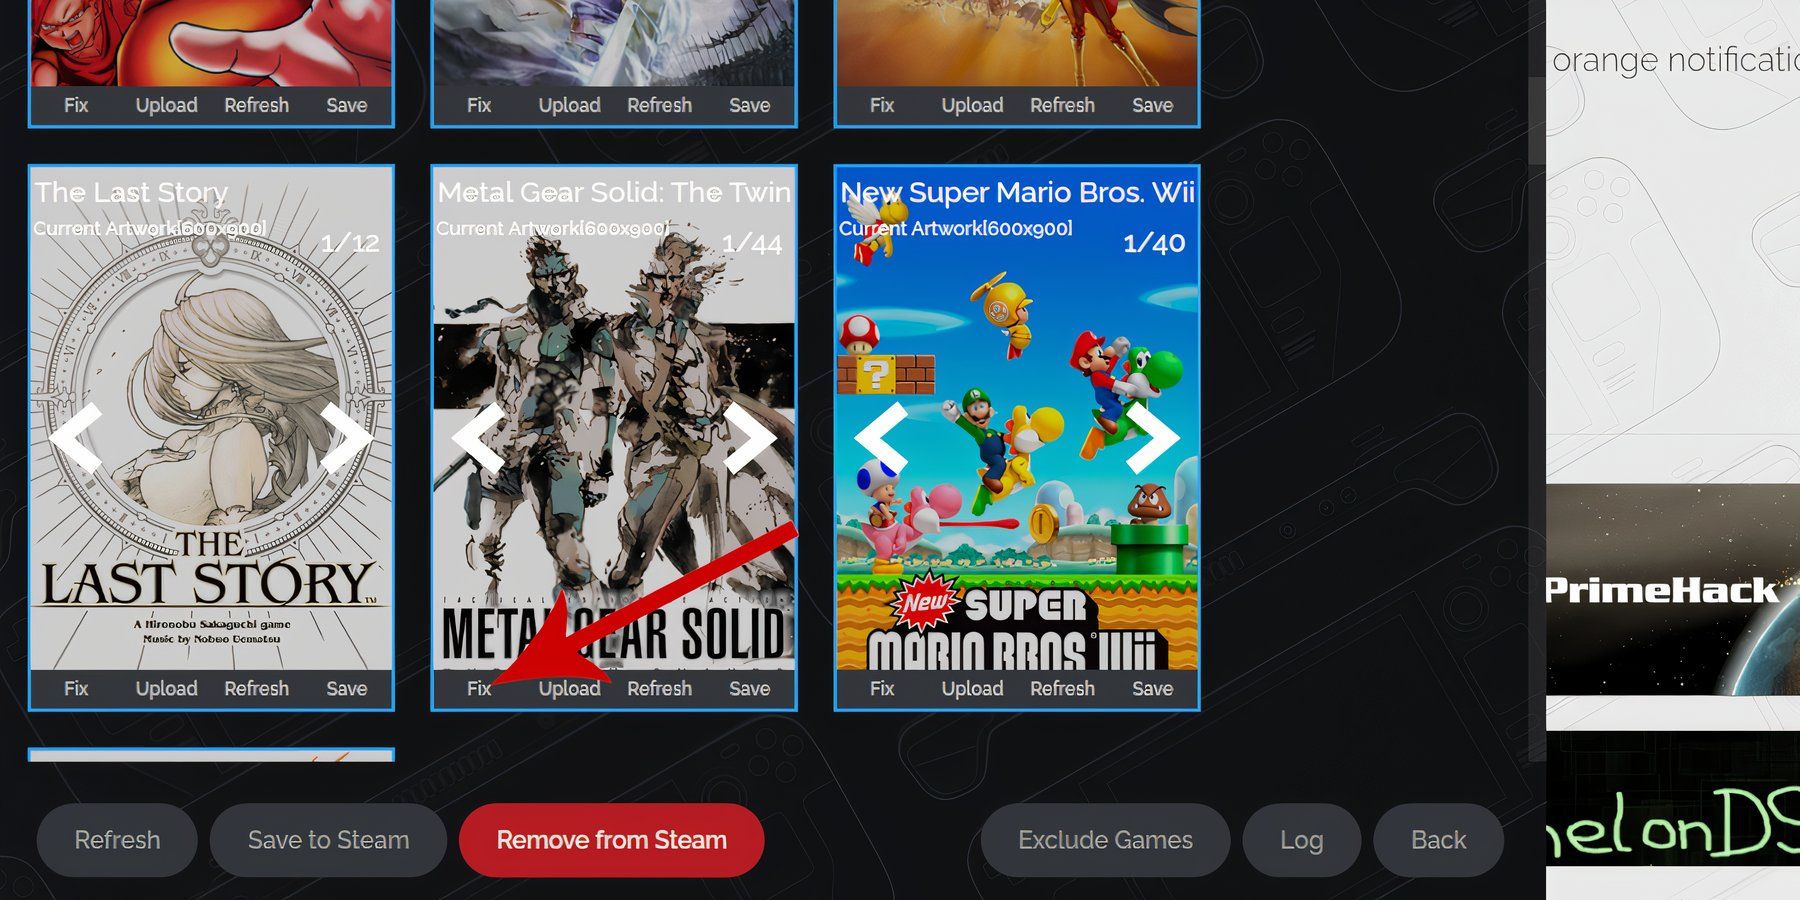
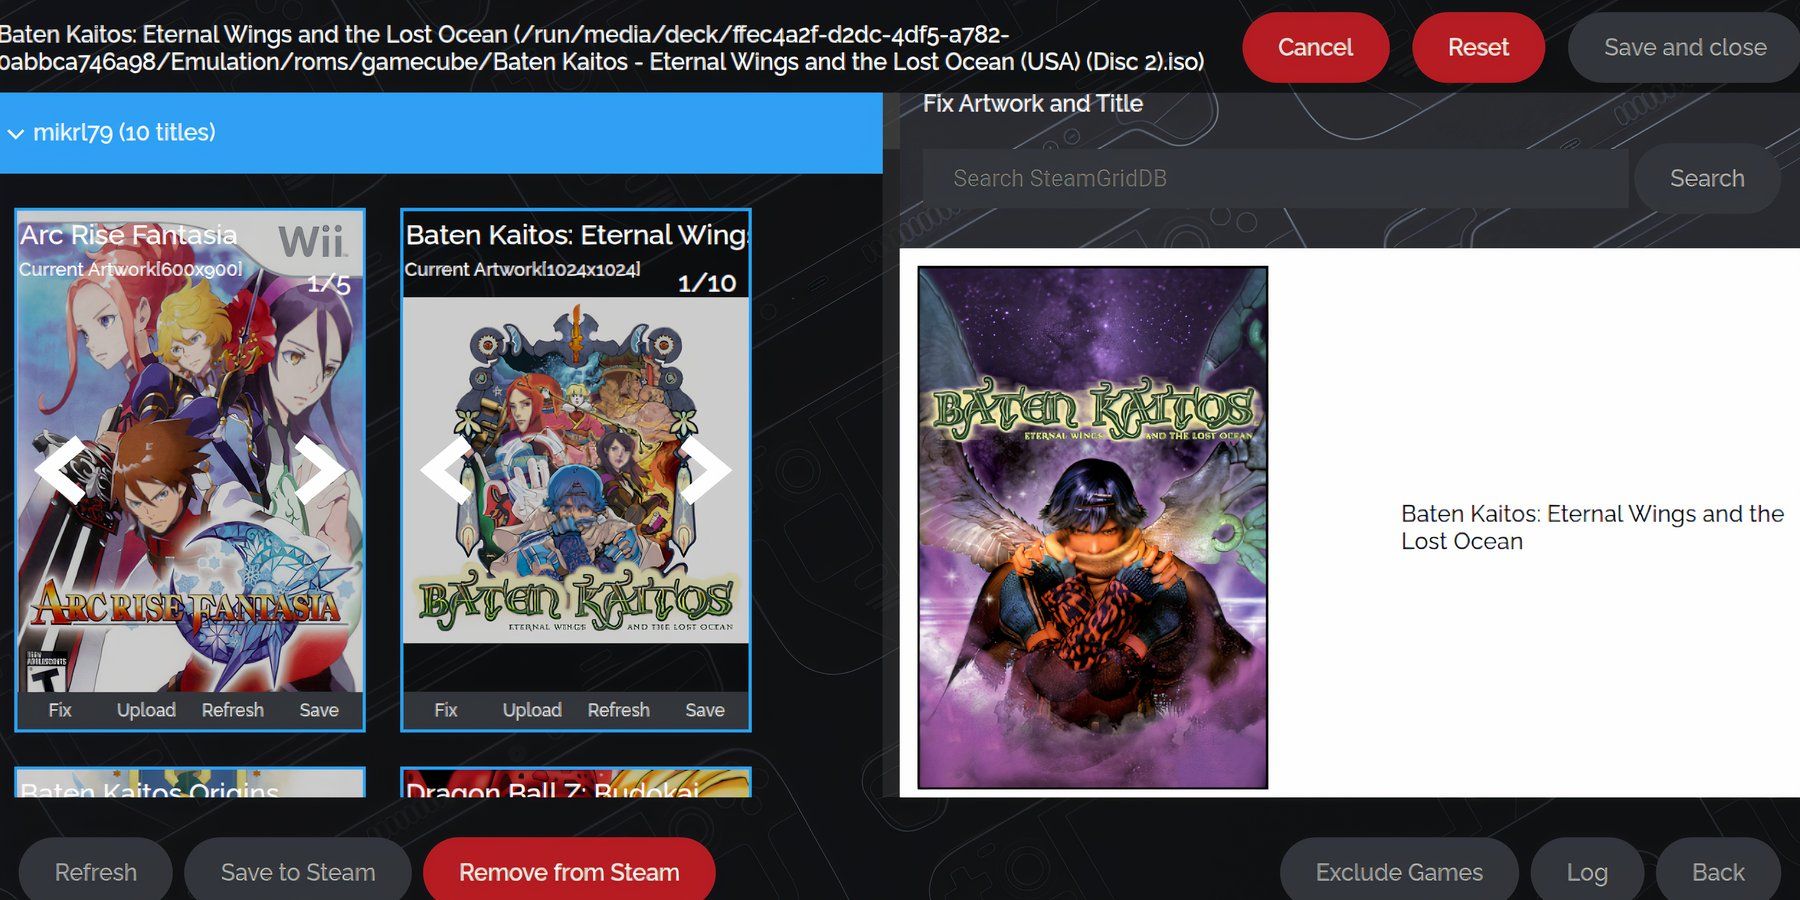
- If any titles have missing or incorrect game covers, click on the Fix icon.
- Type the game’s title in the Fix Artwork and Title search bar.
- Select one of the game covers on the sidebar and click the cover so it is highlighted in white.
Uploading Missing Artwork
If the emulated game doesn’t have covers, Steam Deck users also have the option to upload their own:
- Open Desktop Mode, access a browser, and search for a game cover.
- Click image search, and save the cover to the Pictures folder on the Steam Deck.
- Steam Deck users can also add a custom game cover and save it to the Pictures folder.
- Open the EmuDeck program.
- Run the Steam Rom Manager.
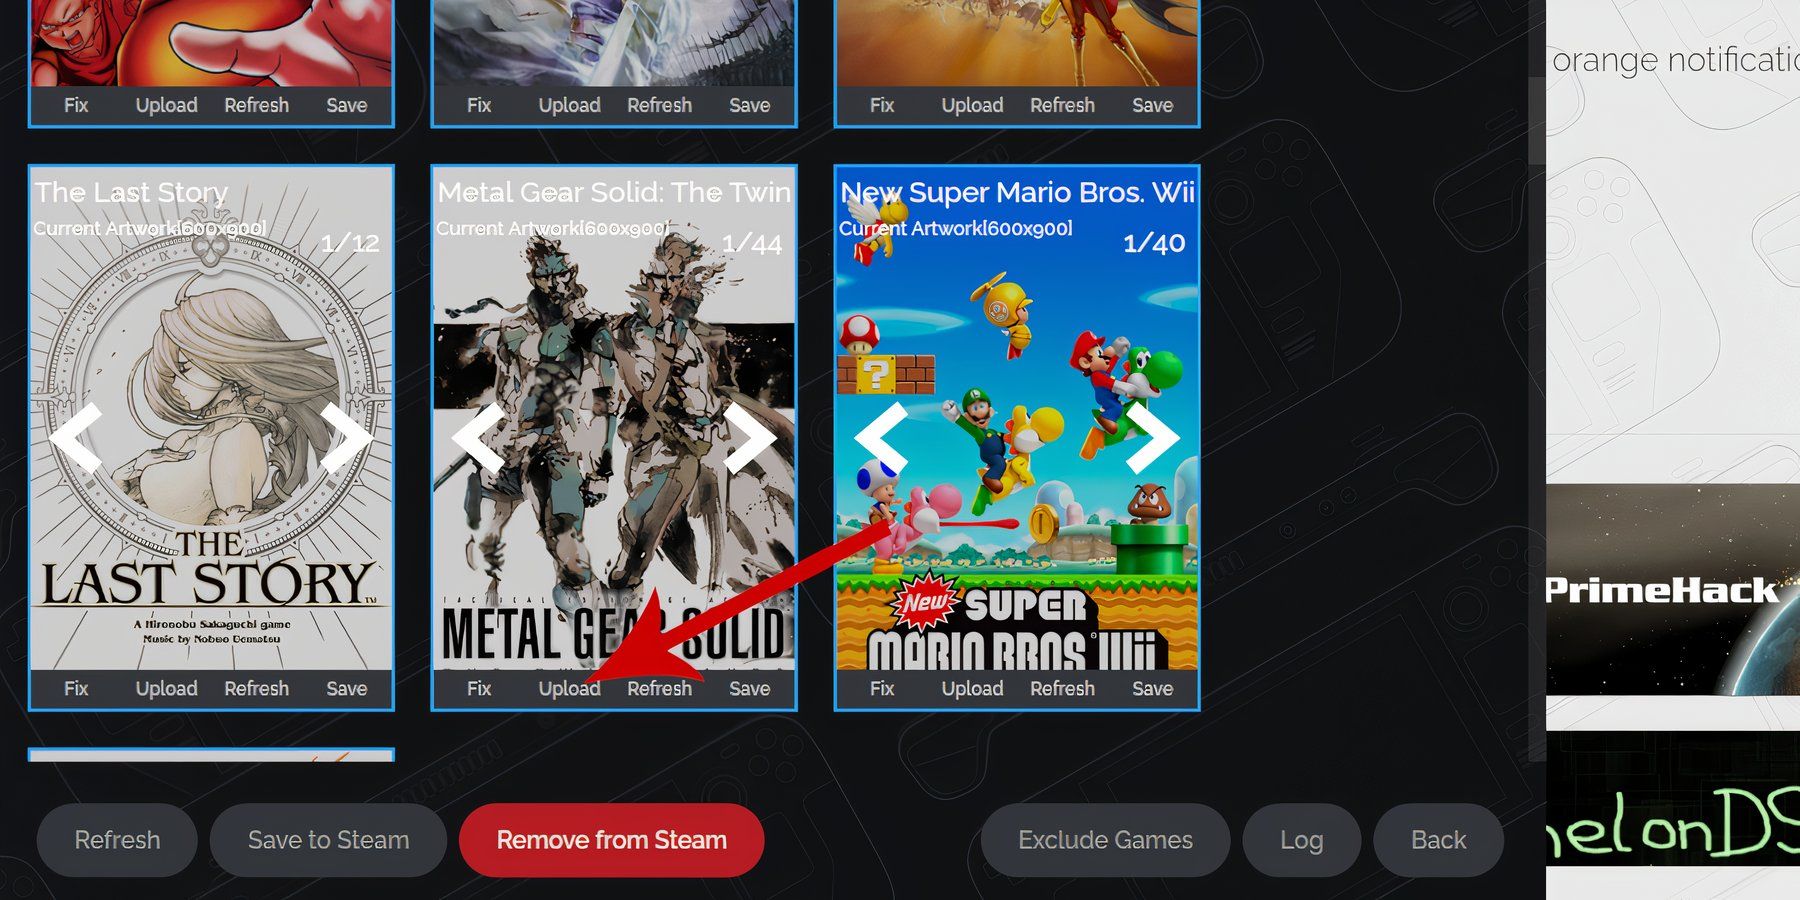
- Click on Upload – next to Fix – on the cover frame.
- Open the Pictures folder and select the new cover image.
- Select Save and Close.
After EmuDeck has finished saving the artwork and games to the Steam Library, use the following steps to play the games:
- Select Return to Gaming Mode on the Desktop screen.
- Press the Steam button and select Library.
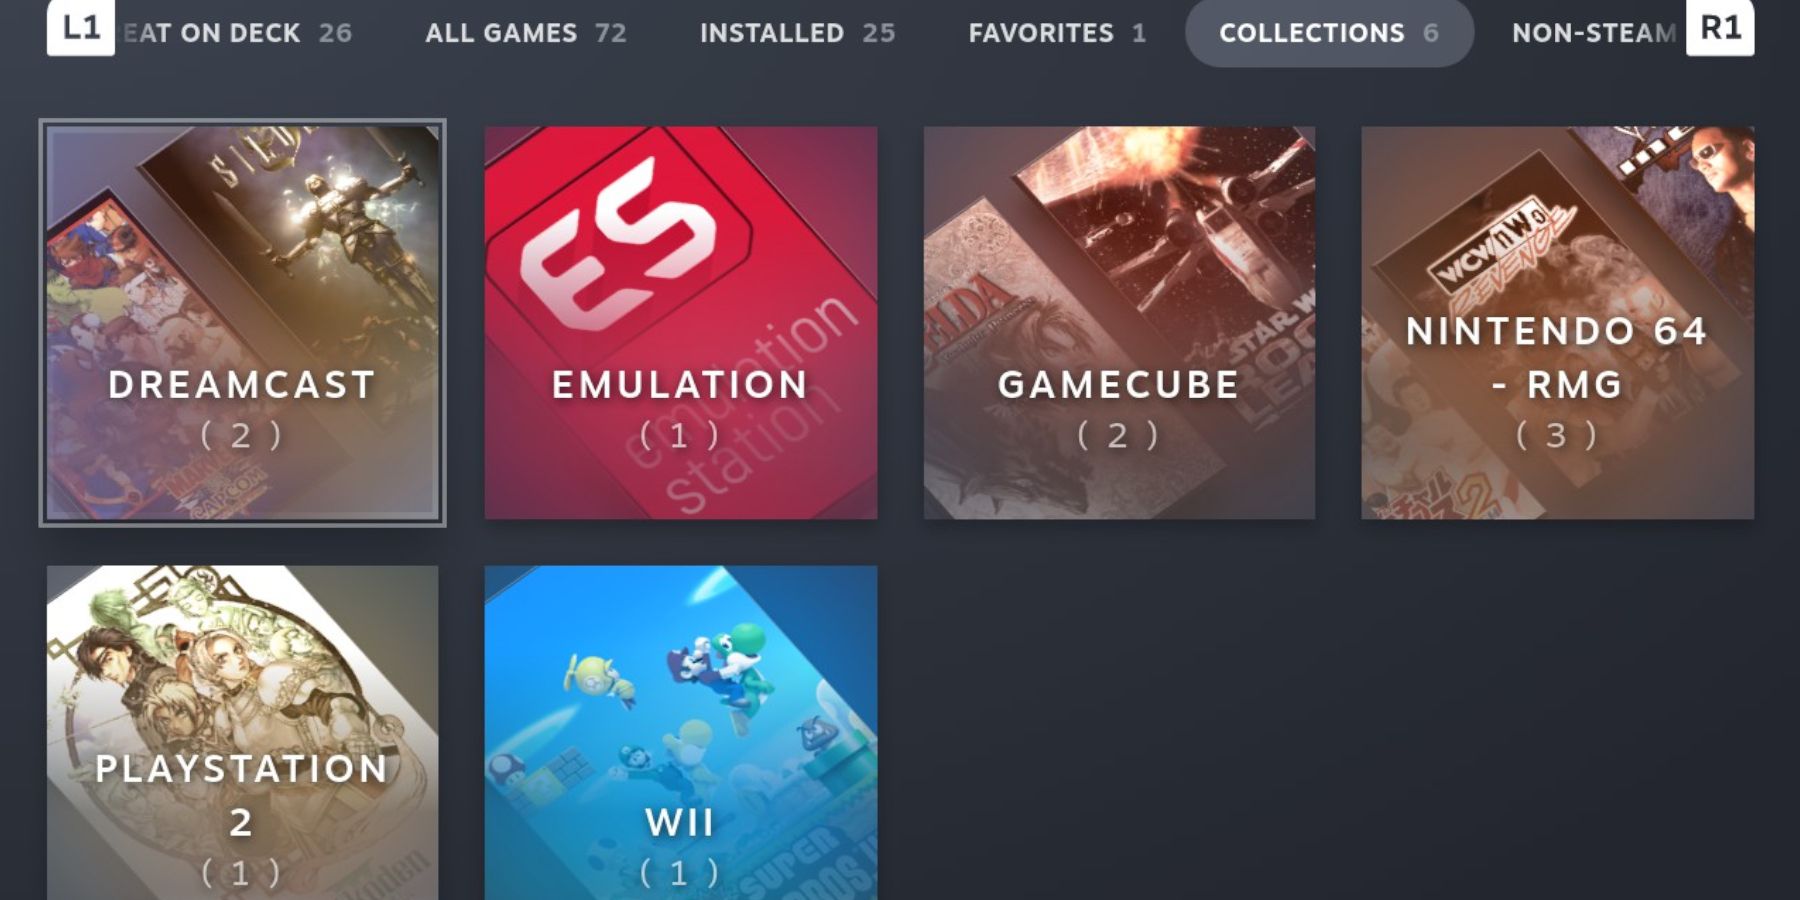
- Press the R1 button to select Collections.
- The GameCube and Wii games will have their own dedicated folders.
- Open the folders and run the games like they are part of the official Steam Deck Library of games.
How To Configure The Steam Deck’s Controls
Some GameCube and Wii games use motion controls. This is tricky to replicate on a normal controller unless the game supports it. Thankfully, the EmuDeck includes third-party support that utilizes the Steam Deck’s Gyro controls instead of motion controls. Players can use the following steps to configure the Steam Deck’s controls for Wii games:
- In Desktop Mode, open the EmuDeck application.
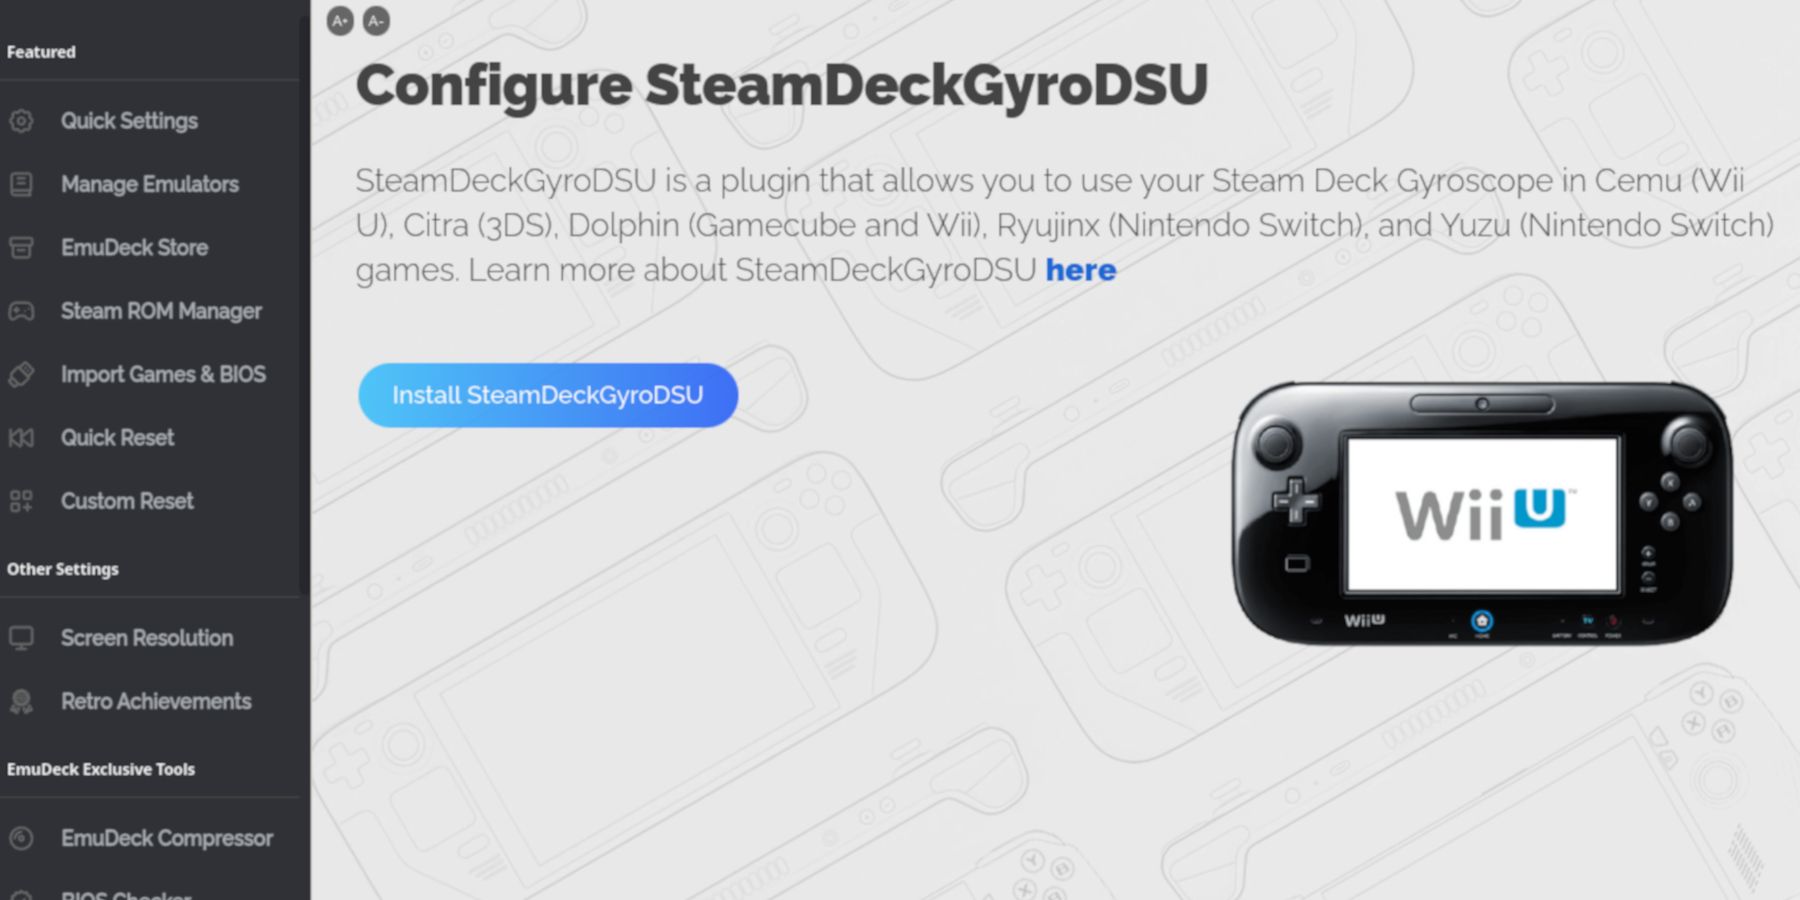
- Scroll down the left panel and click Gyroscope under Third Party tools.
- Then click Install SteamDeckGyroDSU.
- Close the run box when the installation has finished, and the Steam Deck’s controls will be ready to be configured to the Wii’s motion controls.
- Next, open the Dolphin Emulator under All Applications.
- Click Options and Controller Settings.
- Click Configure next to Wii Remote 1.
- Under Device, select Steam Deck from the Dropdown menu.
Reset Dolphin To The Default Settings
The Steam Deck’s updates can negatively affect the Dolphin’s control configuration. This can result in the Steam Deck’s controls not being detected when a GameCube and Wii game is running. Resetting the Dolphin config within EmuDeck can update and fix these issues. This can be done via the following steps:
- Open EmuDeck within Desktop Mode.
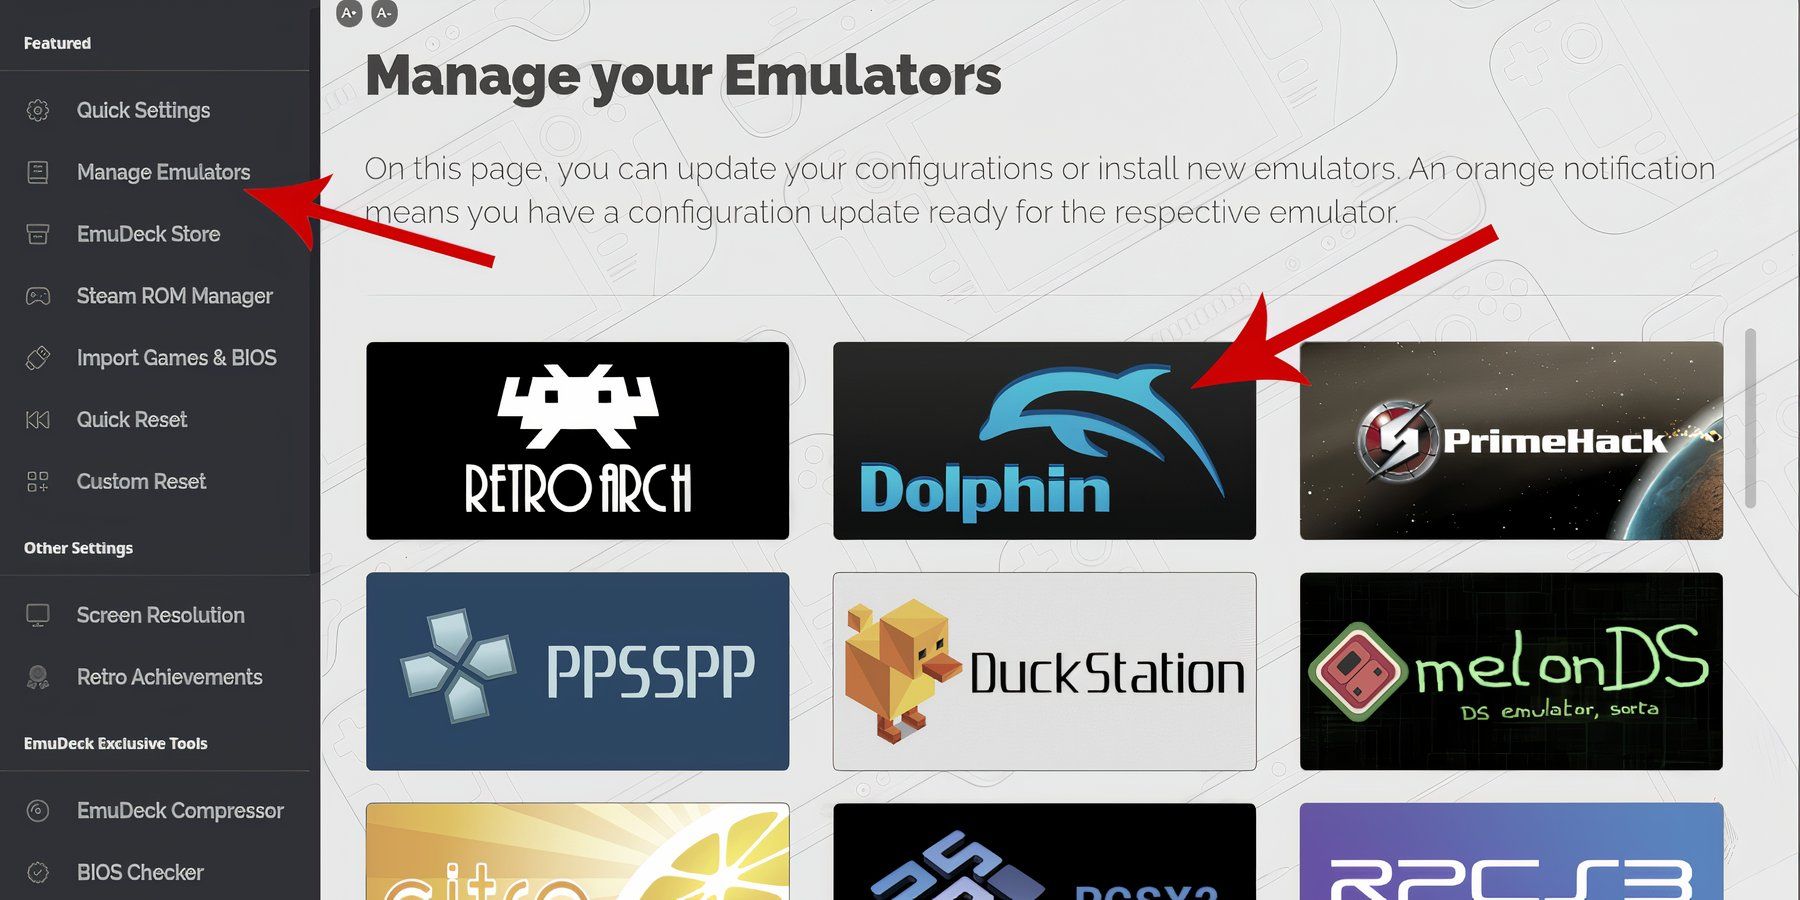
- Select Manage Emulators.
- Select the Dolphin icon.
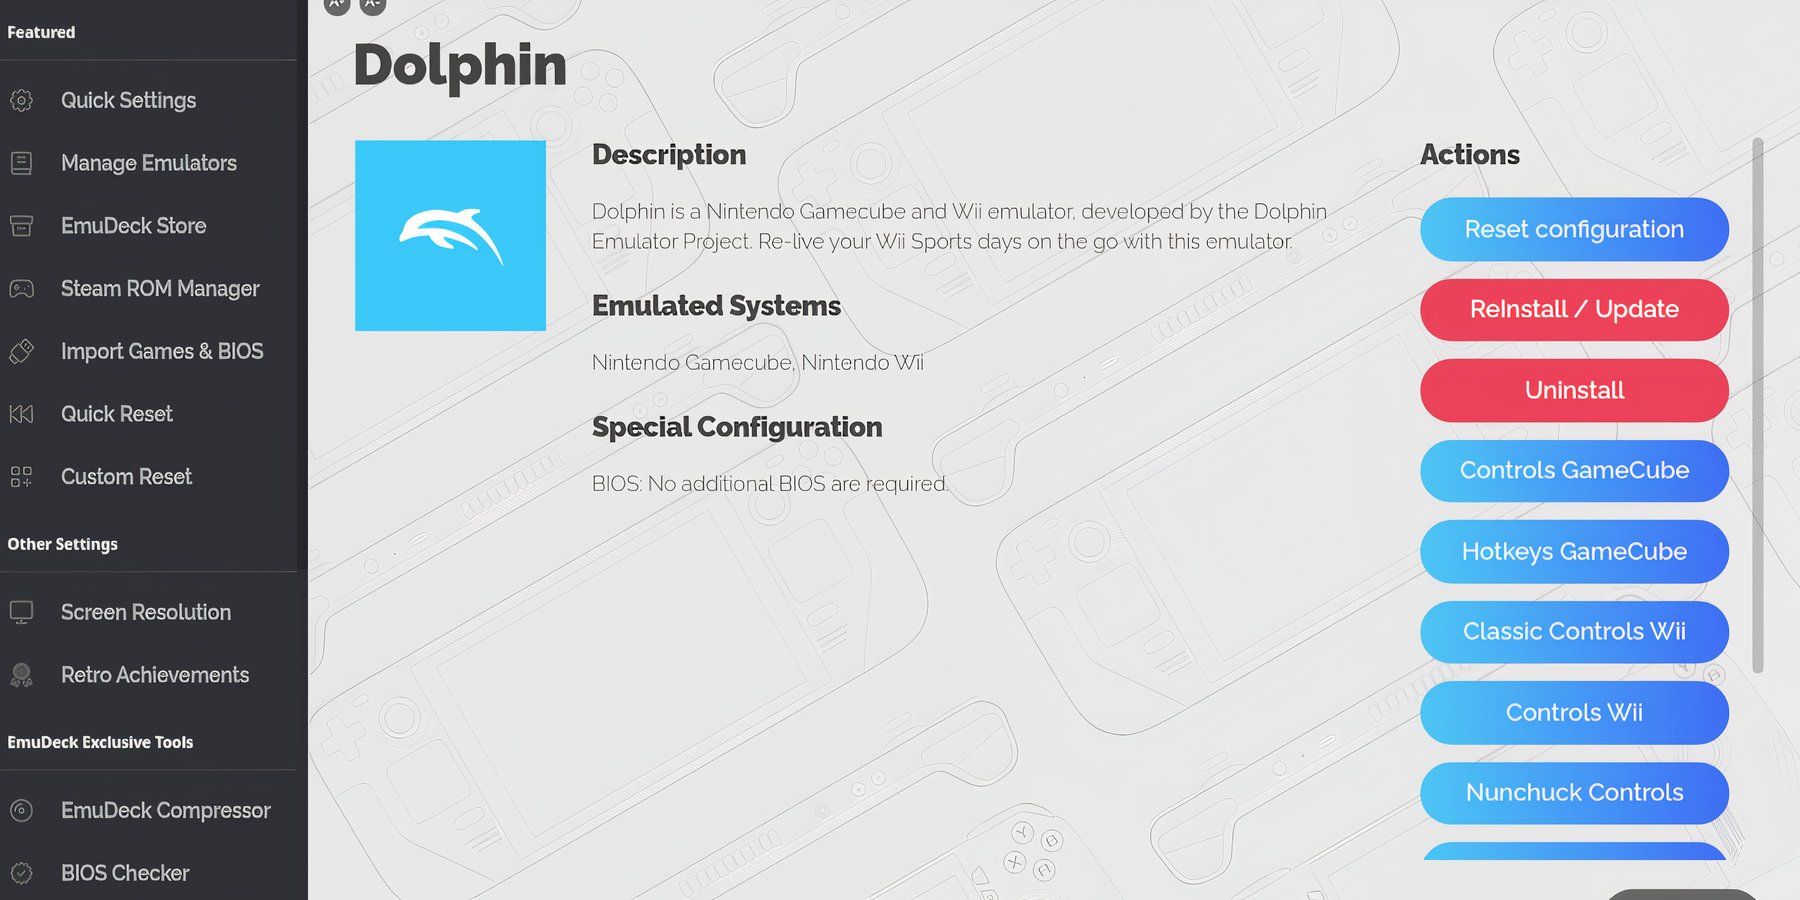
- Under Actions, select Reset Configuration.
- This should clear any conflicts within the past config settings and the latest updates.
The results are variable, and some games may have issues, but Steam Deck users can always switch back to the default device if they prefer.
Install Decky Loader For The Steam Deck
The recommended method to improve the performance of GameCube and Wii games on the Steam Deck via the EmuDeck is to install the Power Tools plugin via the Decky Loader app. The plugin allows for more control over SMTs and obtains a more stable performance. Use the following steps to install Decky Loader and Power Tools.
- You can connect a keyboard and mouse optionally for user-friendly navigation.
- Ensure you’re in Gaming Mode, then press the Steam button, Power, and Switch to Desktop Mode.
- In Desktop Mode open a browser. Browsers can be downloaded from the Discovery Store represented by the little bag icon at the bottom left side of the Steam Deck’s Linux taskbar.
- With your preferred browser open, open the GitHub Decky Loader page.
- Locate the large Download icon and click it to start downloading.
- After the download has been completed, double-click the launcher and choose the Recommended Install option.
- With the installation complete, restart the Steam Deck in Gaming Mode.
With Decky Loader ready installed, the next step is to install the Power Tools plugin. Follow the steps below to complete the installation and the correct settings to use.
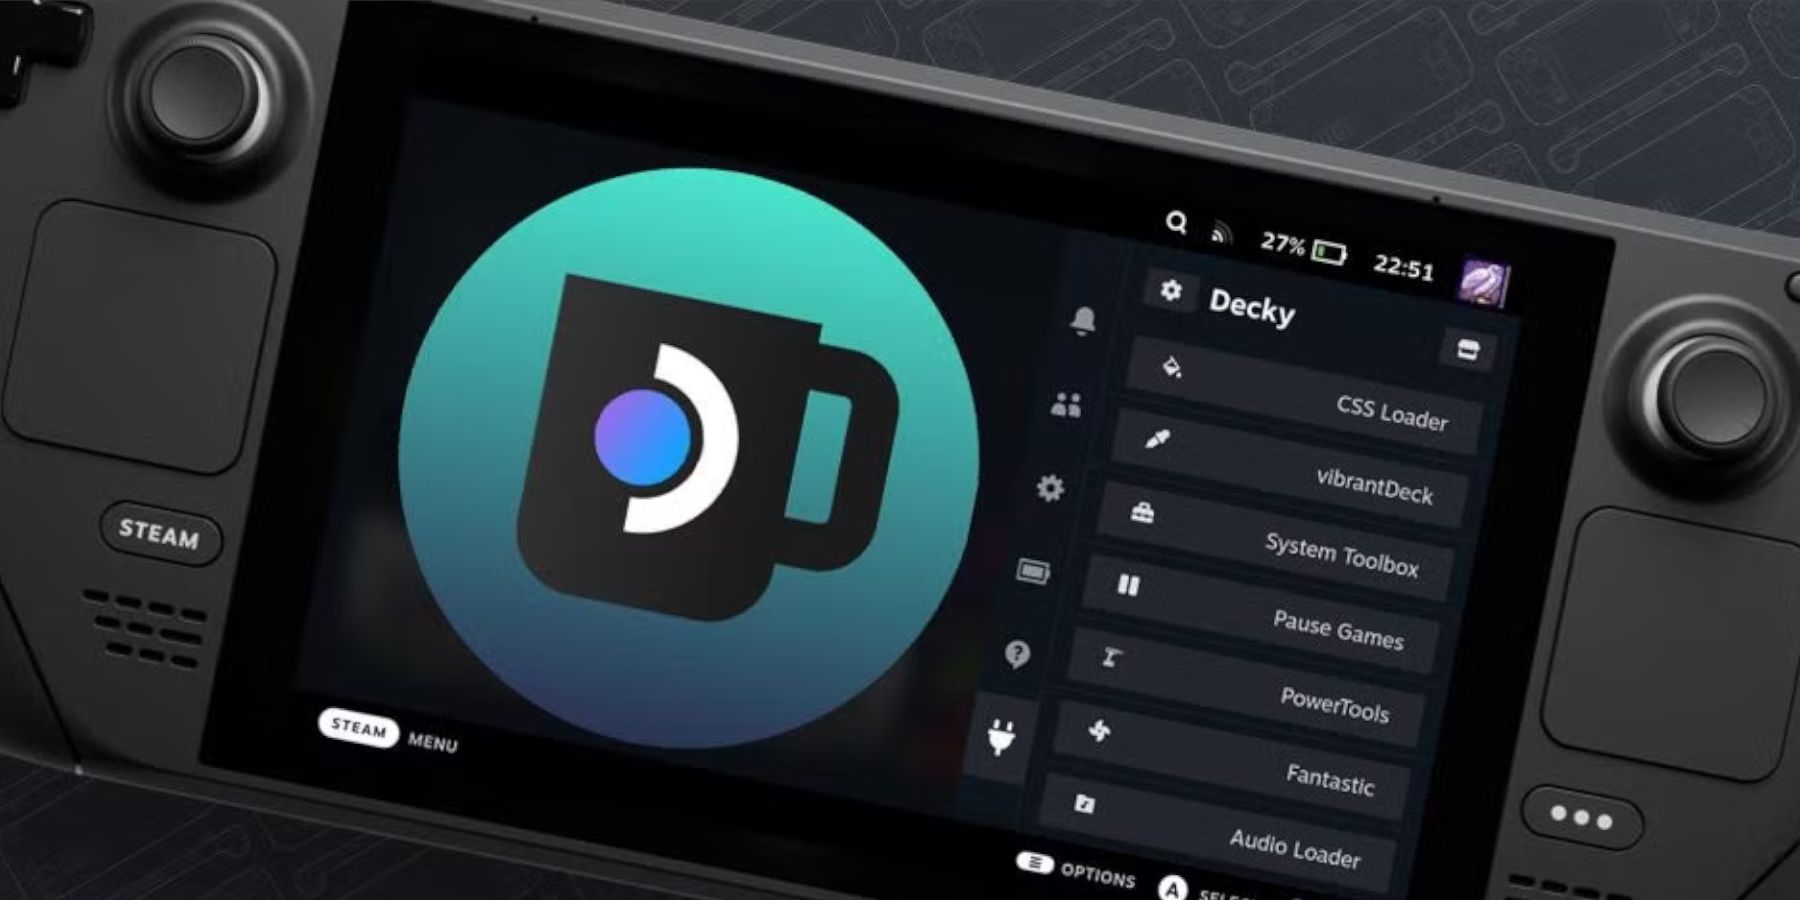
- In Gaming Mode, press the Quick Access Menu (QAM) button, which is located beneath the right trackpad.
- Select the new plugin icon at the bottom of the QAM.
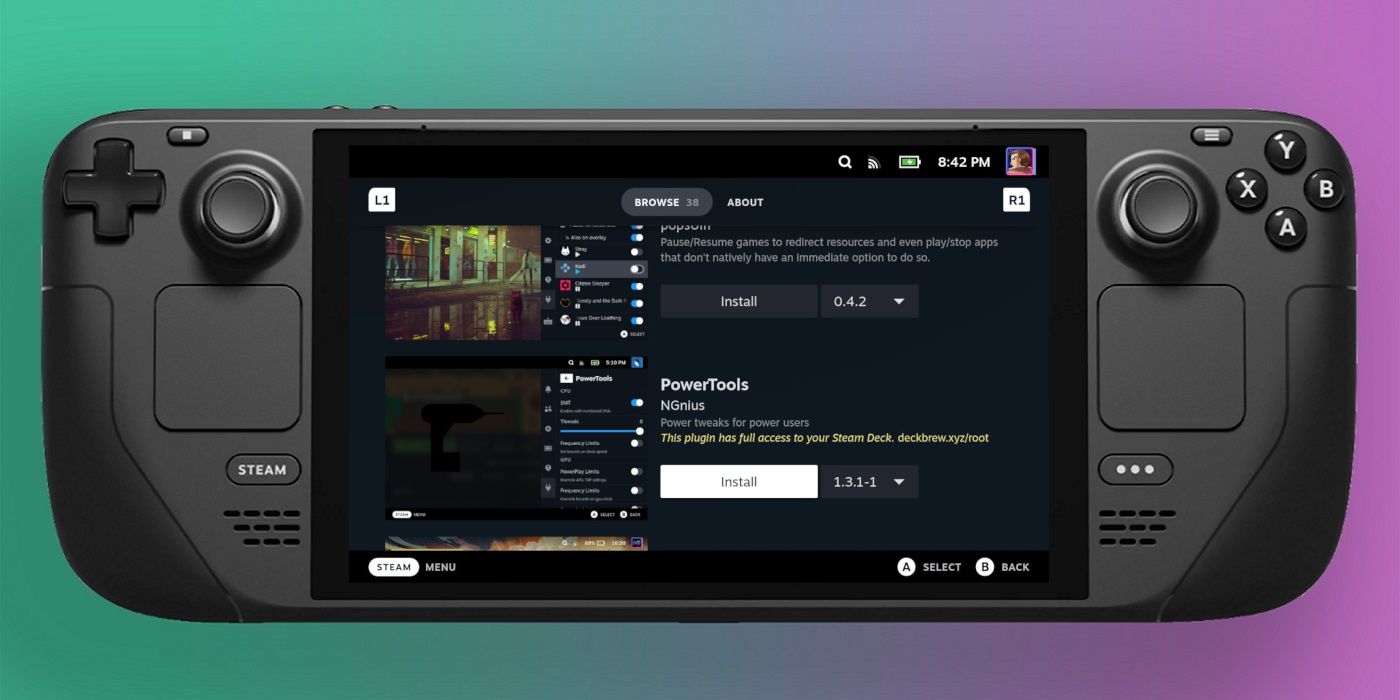
- Select the store icon at the top of the Decky Loader menu.
- Locate the Power Tools plugin within the Decky Store and install it.
Power Tools Settings For Emulated Games
- Launch a GameCube or a Wii Game.
- Press the QAM button in Decky Loader and open the Power Tools menu.
- In Power Tools Turn off SMTs.
- Adjust the number of Threads to 4.
- Press the QAM button, then access the Performance menu.
- Enable Advance View.
- Now switch the Manual GPU Clock Control On.
- Increase GPU Clock Frequency to 1200.
- Next, choose Per Game Profile to save these settings for individual games.
Fixing Decky Loader After A Steam Deck Update
The latest Steam Deck update added a lot of great new features like video recording without third-party apps. Unfortunately, it interfered with third-party apps like Decky Loader by removing it from the Quick Access Menu. To fix Decky and retrieve your plugins and settings, follow the below steps. This process will also restore the application in the event of future updates.
- Ensure you’re in Gaming Mode, press the Steam button to open Power, and switch to Desktop Mode.
- Open your installed browser in Desktop Mode.
- Open the Decky Loader GitHub page and click the Download icon.
- Now, you must select Execute and not Open.
- Enter your sudo password in the prompt window.
- If you have not yet created a sudo password, please follow the on-screen instructions to establish a new one. Choose a memorable password and ensure you make a note of it for future installations of third-party apps.
- After the installation, turn off the Steam Deck and then restart it in Gaming Mode.
- Press the QAM button, and your Decky Loader app, your settings, and plugins will return to their previous state.
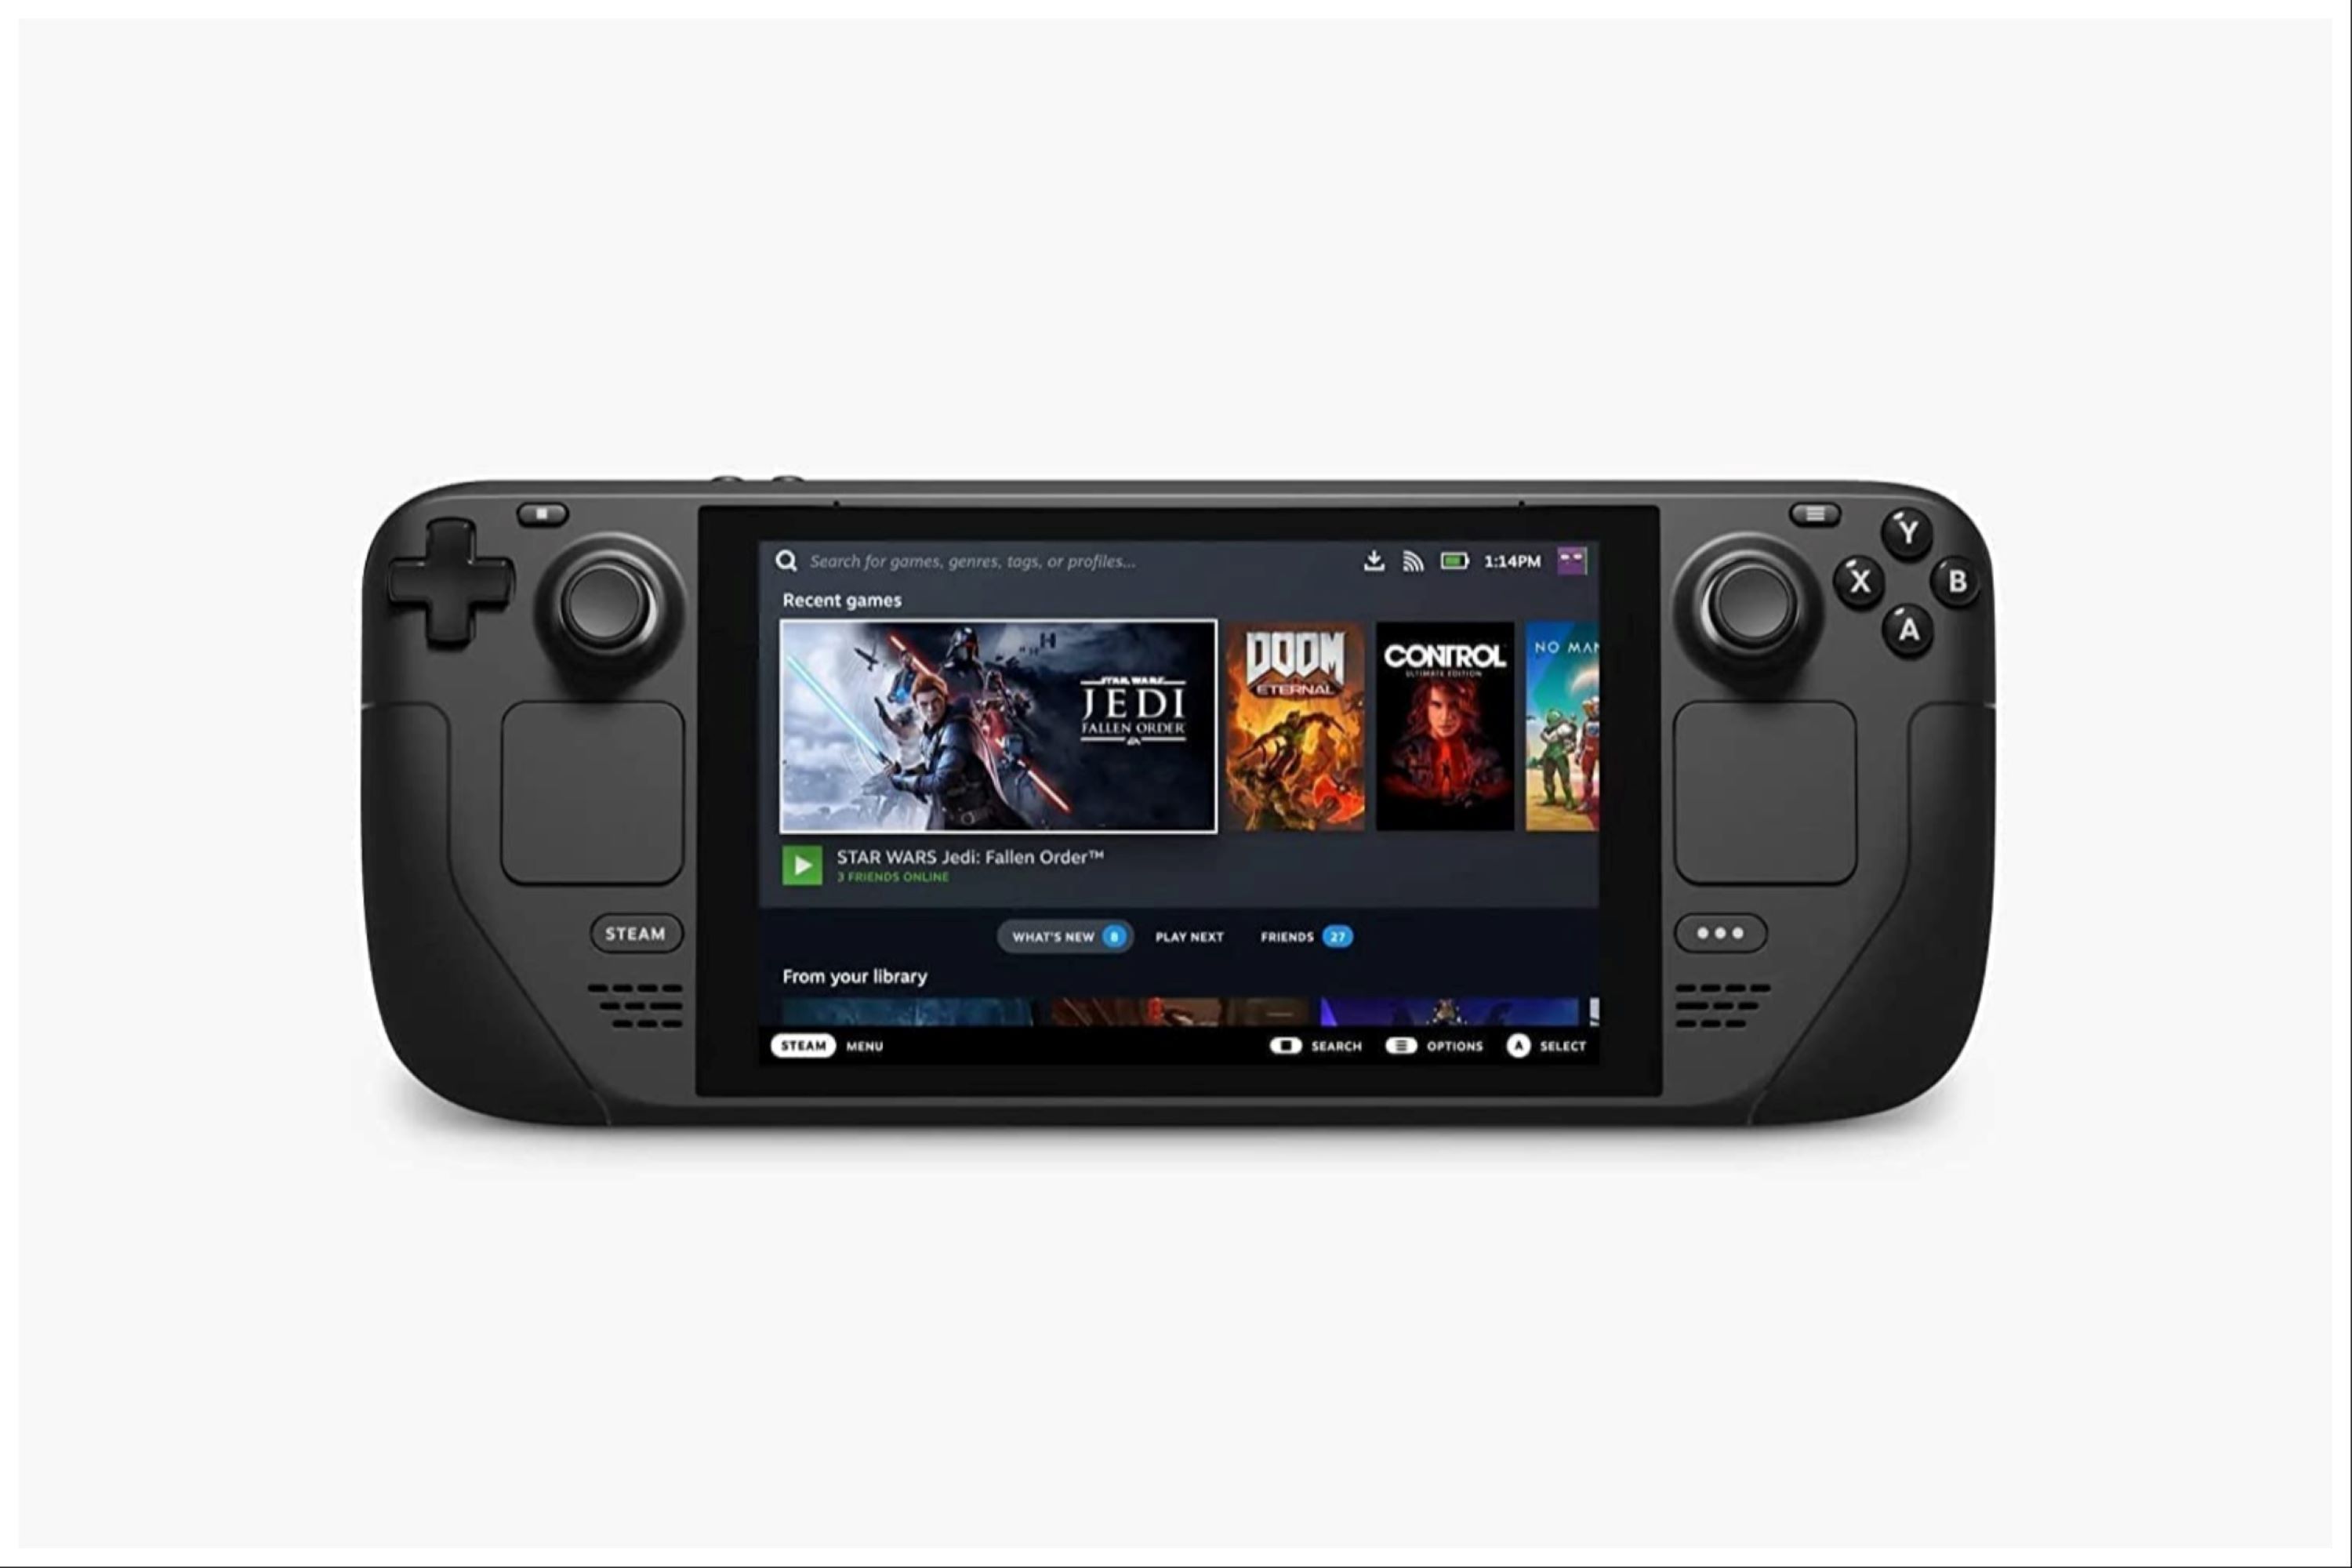
Valve Steam Deck
- Dimensions
- 16 x 5 x 3 inches
- Brand
- Valve
- Weight
- 3.54 pounds
- Battery
- 2 Lithium Ion batteries required
- Display
- 7-inch
Source link







Leave a Reply