Once you collect the Ultimate Key in Dragon Quest 3 Remake, you will have a wide range of options for what to do next. Overall, the main goal after the key is collecting the colored orbs spread throughout the world. Choosing the order you collect those orbs in, however, is entirely up to you. In this guide, we will be exploring the Blue Orb, and the dungeon that contains it, Gaia’s Navel.
Related
All Mini Medals in Dragon Quest 3 Remake (& Where to Find Them)
Where to find every Mini Medal in Dragon Quest III HD-2D Remake.
Gaia’s Navel is a special dungeon that is hidden in the town of Lanson. Like many of the mid-to-late game areas, you will need the Ultimate Key to enter the dungeon. This particular dungeon is unique, because it requires you to enter with only one party member. In this guide, we’ll show you how to find and complete the Gaia’s Navel dungeon, and how to get the Blue Orb in Dragon Quest 3 Remake.
How to Find and Enter Gaia’s Navel in Dragon Quest 3 Remake
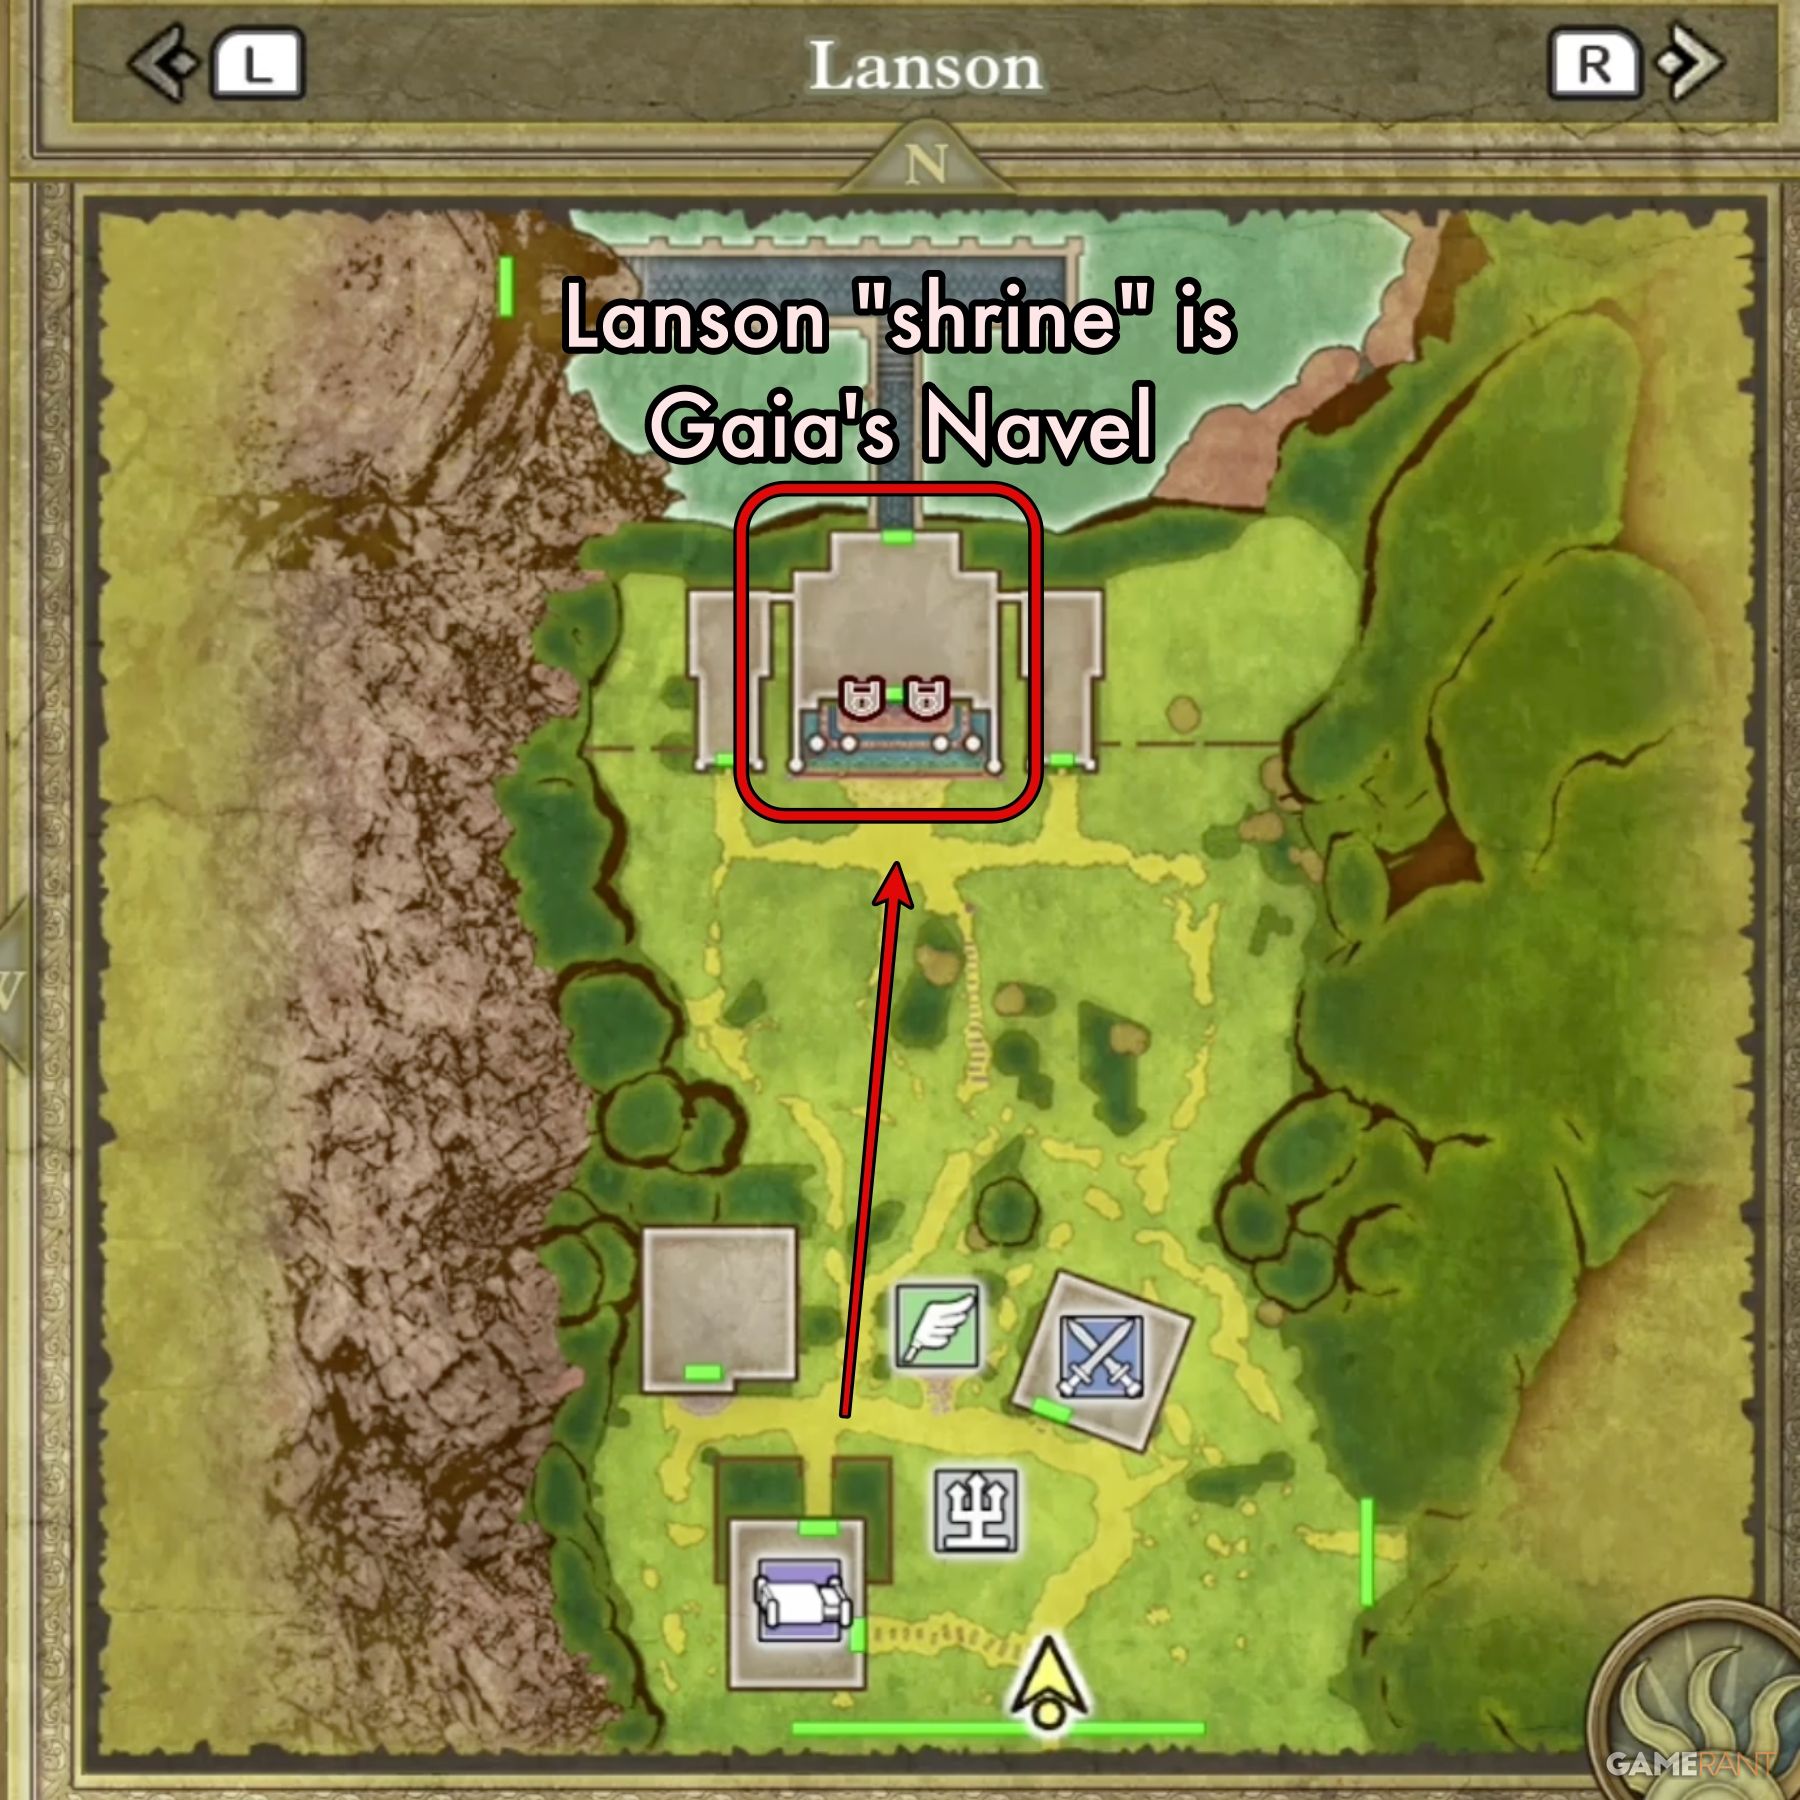
During your travels, it’s possible you encountered Gaia’s Navel and didn’t even realize it. It can be found in the town of Lanson, which is located on the large island west of Aliahan’s island. The first time you visit Lanson, you must reach it by ship, then it will be added to the fast-travel list going forward.
While exploring Lanson, you’ve likely noticed the large shrine on the north side of town, behind all the shops and normal structures. At first, it is completely locked up, and the door color clearly indicates that the Ultimate Key is needed to proceed.
Once you have the key, you can approach the shrine and use the two front doors. The two buildings off to each side of the main structure do not lead to the dungeon. Once inside, you’ll find a NPC priest that you must speak with. This priest will inform you that only one may enter the trial. Whomever you are controlling when you speak to him will be the one to enter Gaia’s Navel.
Entering Gaia’s Navel in Dragon Quest 3 Remake:
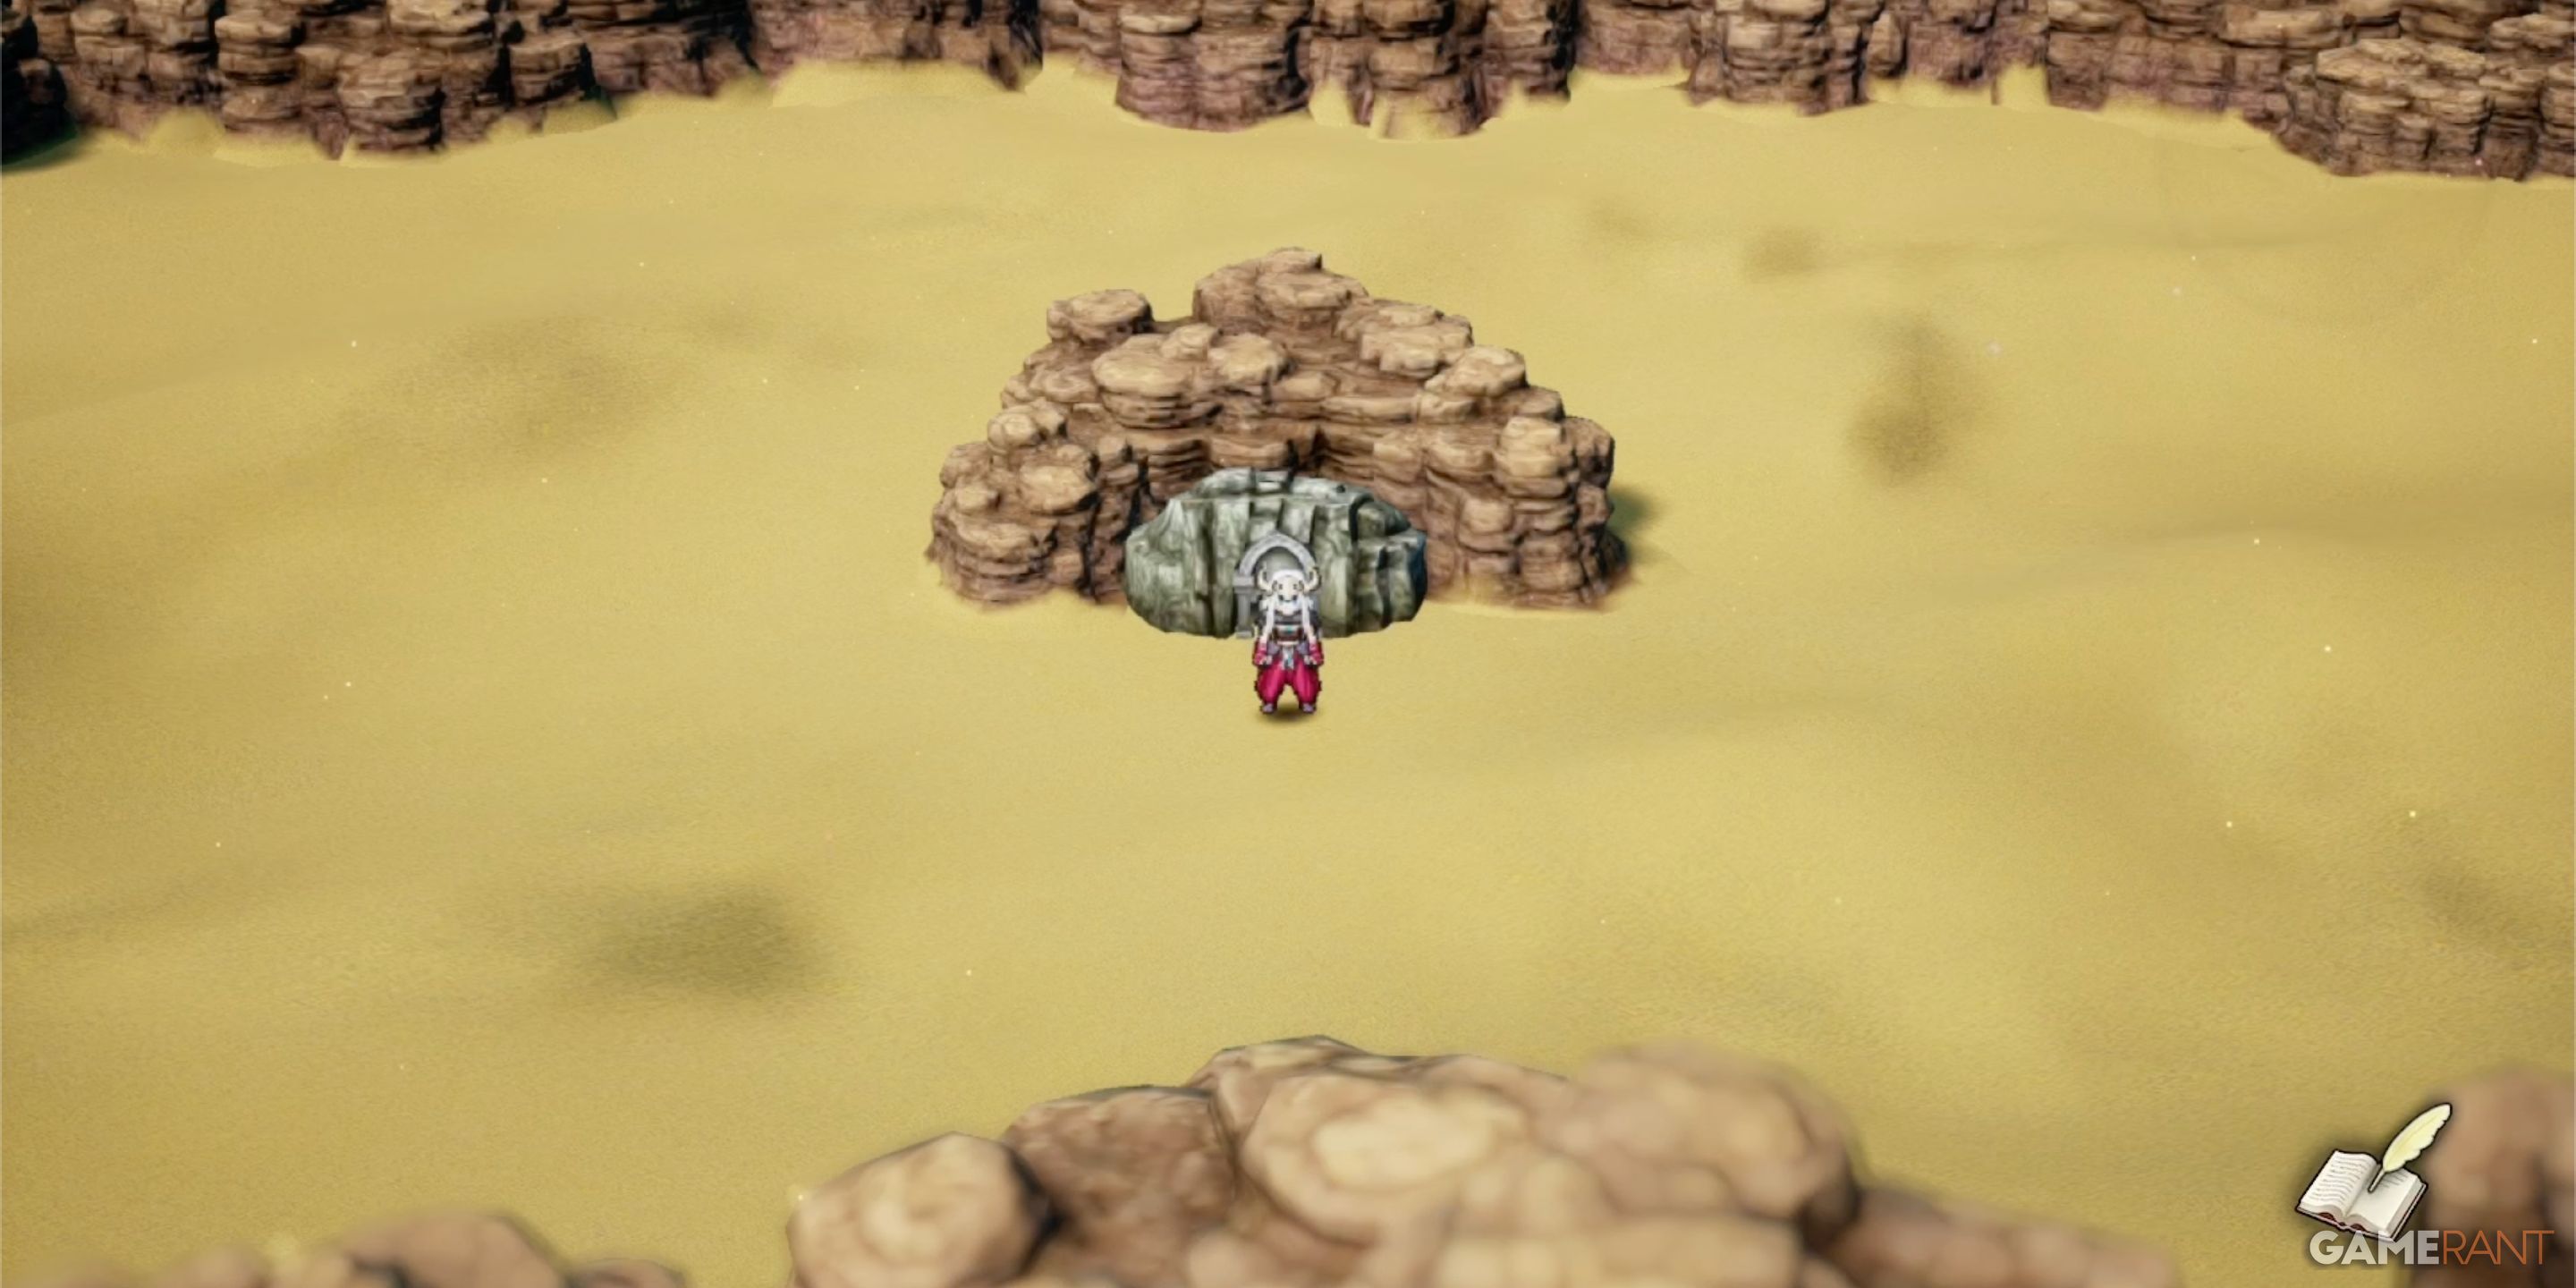
Once you speak with the Priest for the second time, you’ll set off on your own to reach Gaia’s Navel. After exiting the main path from the shrine, you’ll come to an enclosed section of desert that contains the entrance to Gaia’s Navel. If you head to the far west of the desert area, you’ll find a Secret Spot that contains Ribbert, a friendly Overtoad. Ribbert is scared, so you must use a Thief or Monster Wrangler to capture them.
In the center of the desert area, you’ll find the cave entrance to Gaia’s Navel.
Gaia’s Navel B1 Walkthrough – Dragon Quest 3 Remake
Gaia’s Navel Main Path B1:
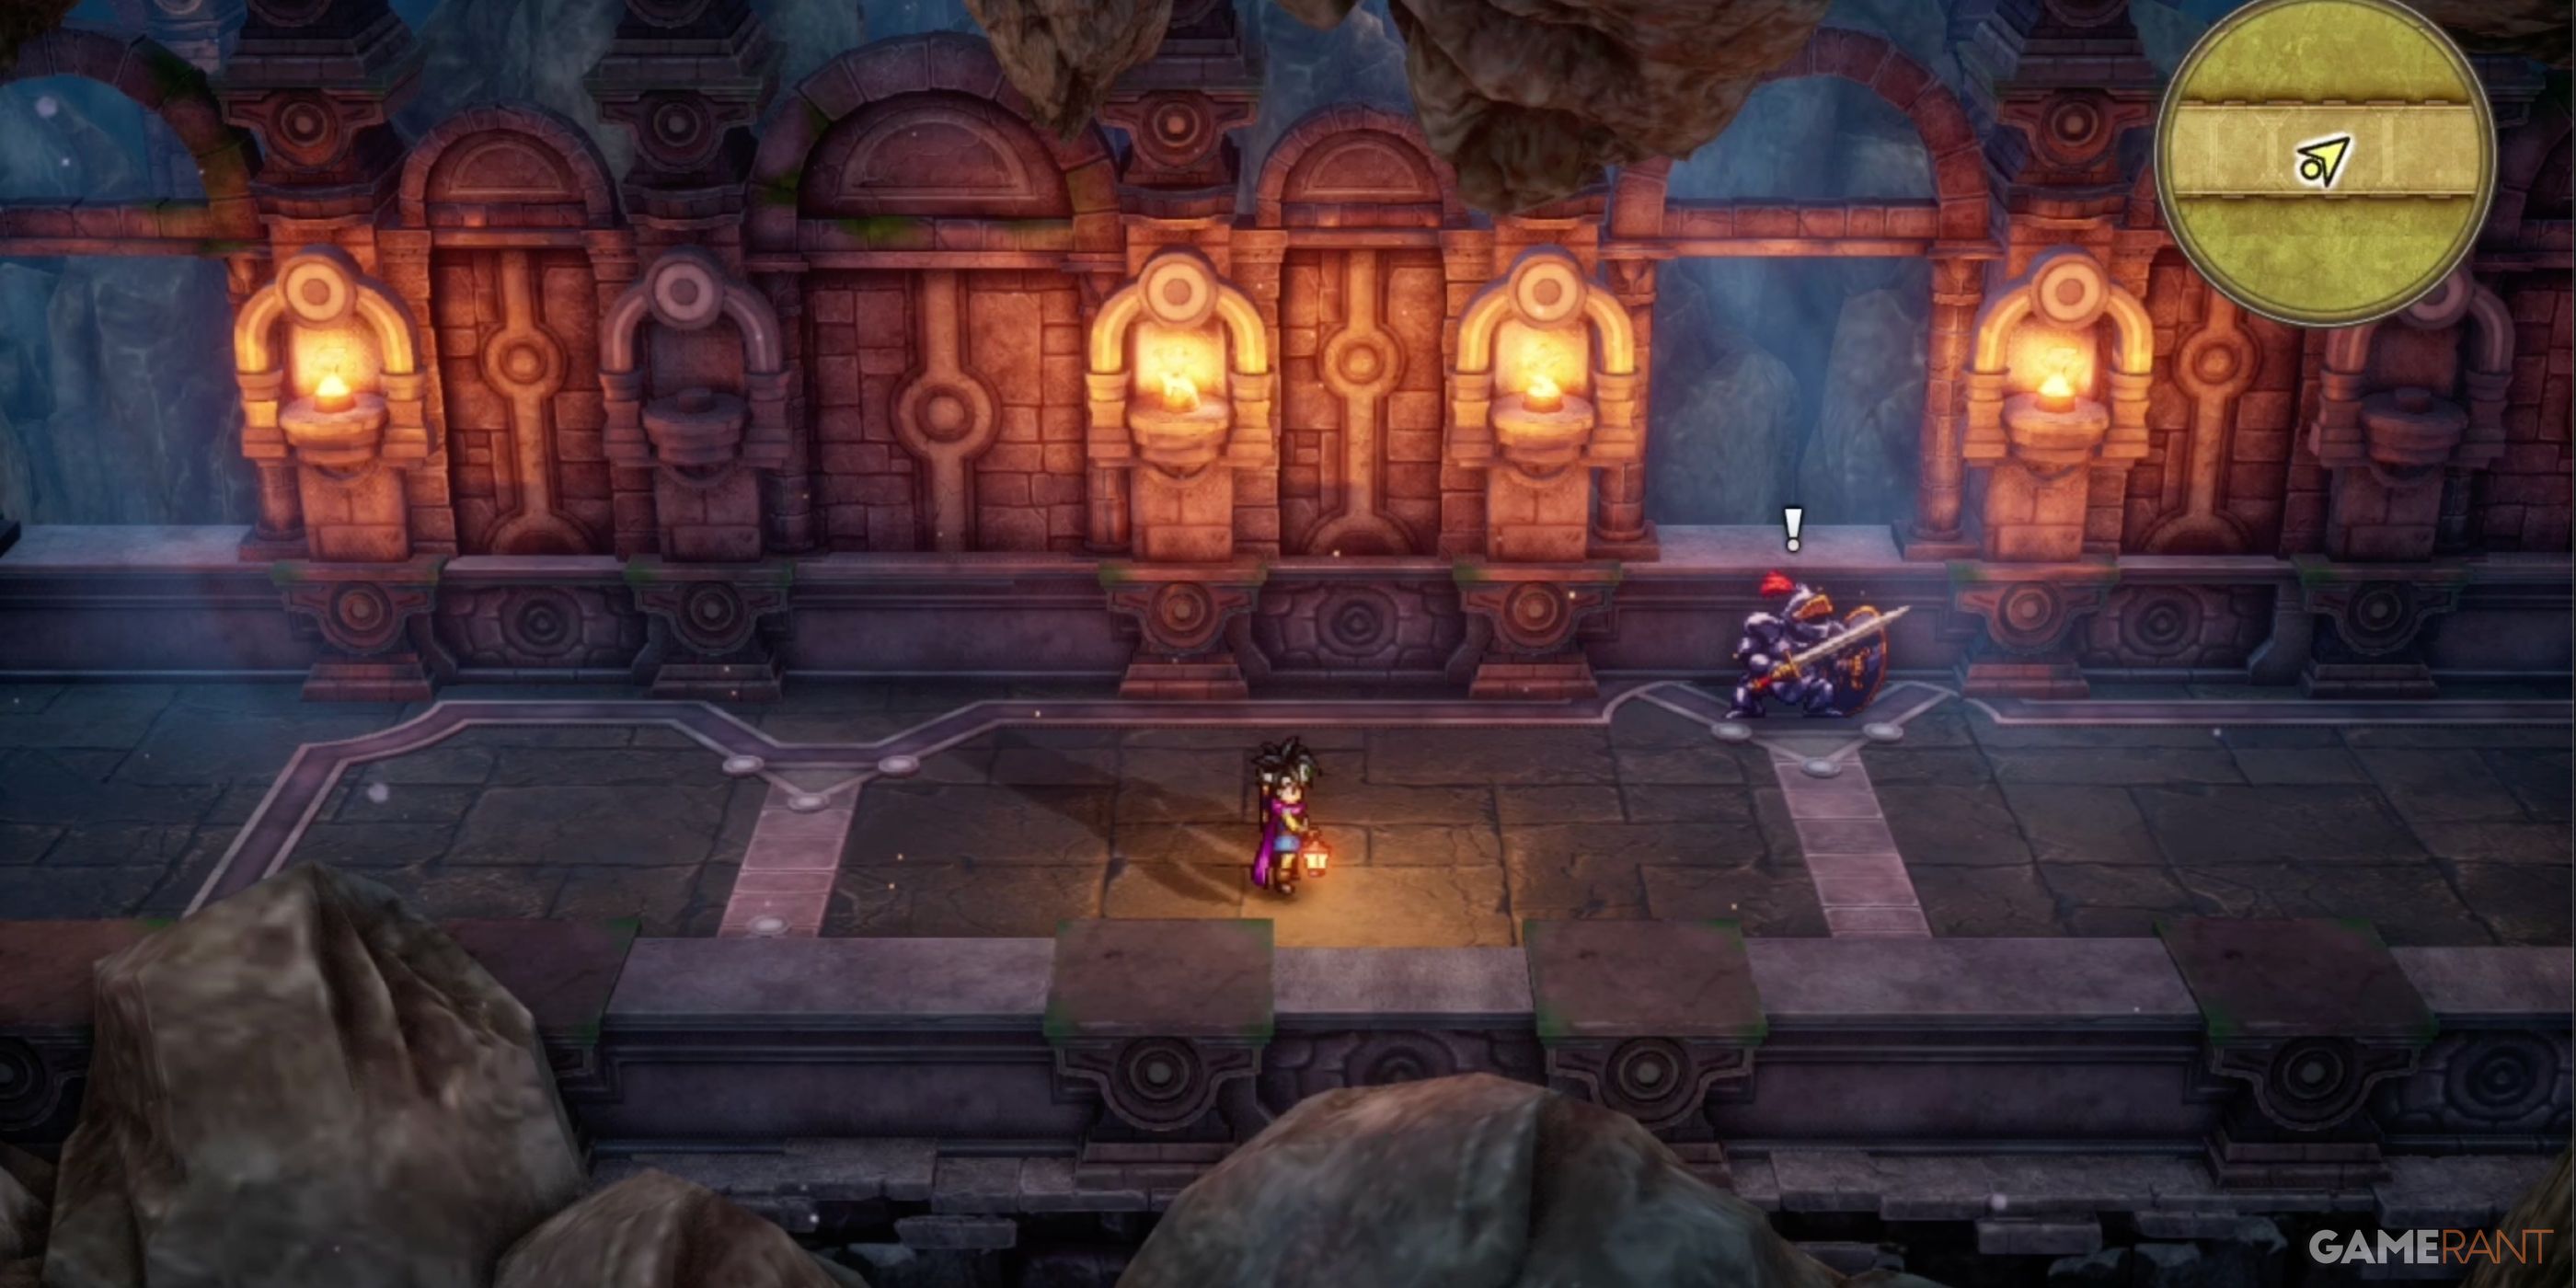
When you first enter Gaia’s Navel, you will be on Basement Level 1, or B1. The first level will allow you to become acclimated to working alone. Take the time to feel out the solo fights before moving to the lower level, and facing tougher foes.
Just after entering B1, you’ll see a split path that goes east and west. This is an endless corridor that will continue forever if you walk in the same direction. To exit, turn around and go back the way you came until you reach the main chamber. If you head east at the turn, you’ll find Percival, a Friendly Monster in the first section of the corridor. You’ll need a Monster Wrangler or Thief to convince him not to run.
All Treasure on Gaia’s Navel B1:
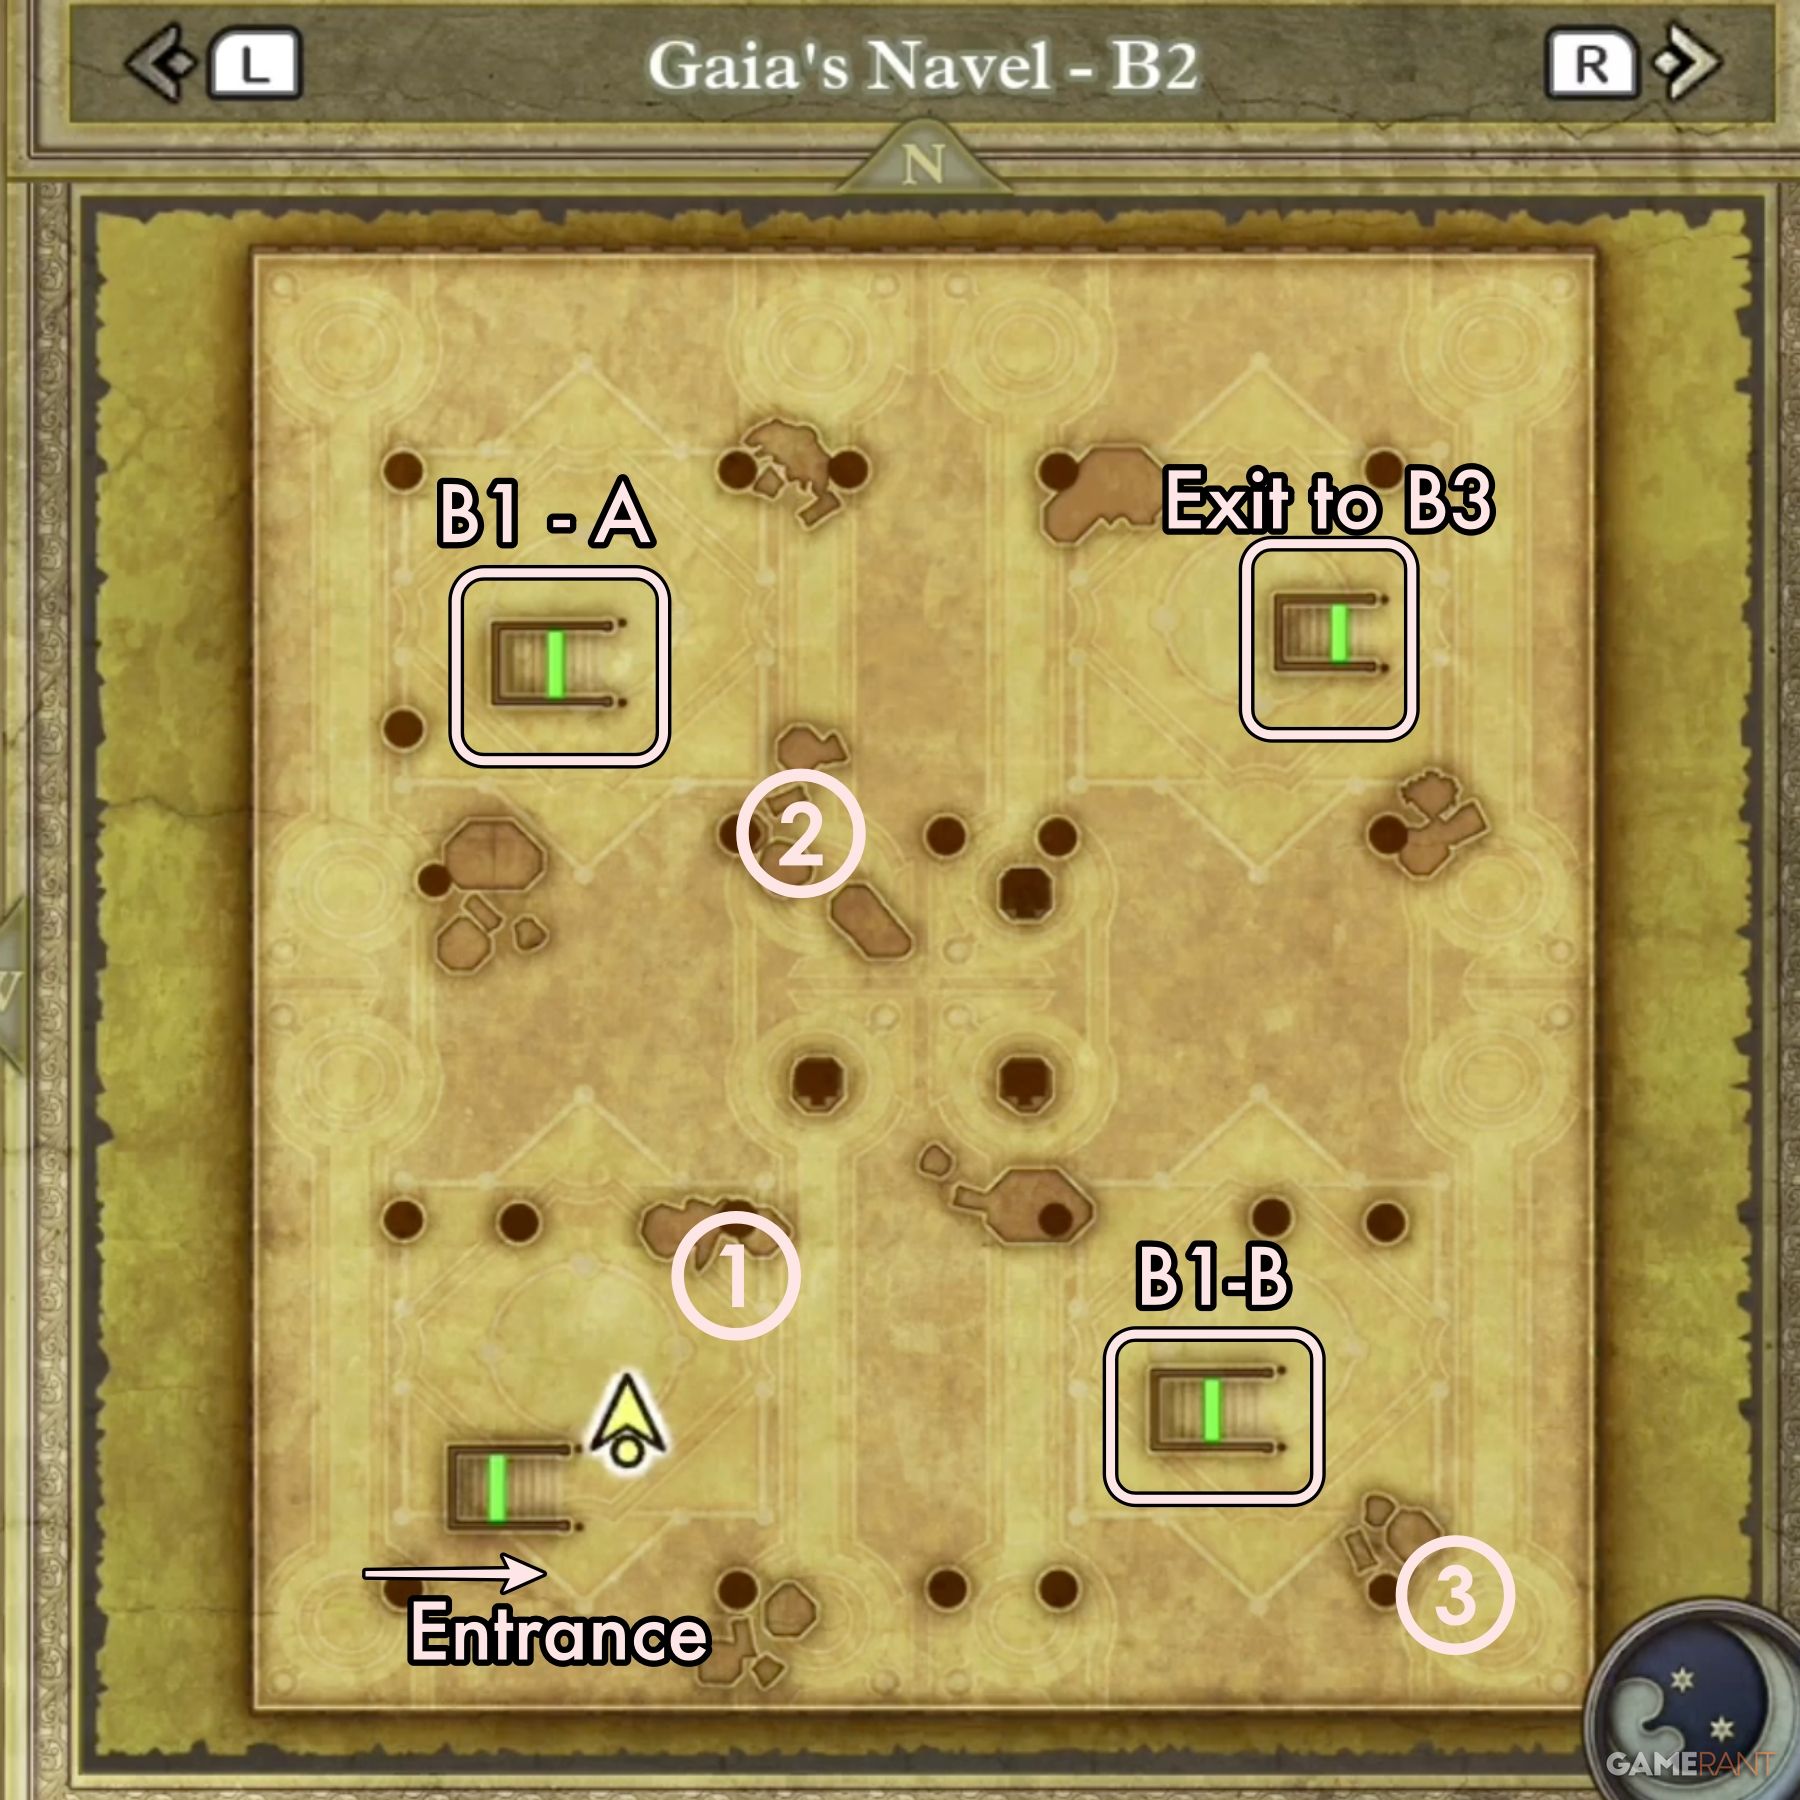
In the center of B1, there are four rectangular chambers – two on each side of the main path – that contain treasure. We will number them as such: one and two on the right, three and four on the left.
There are also two treasures on B1 that can only be accessed through the large chamber on B2. These will be labeled B1-A and B1-B, both on the accompanying maps, and on the list of treasure.
All B1 Treasure:
- Seed of Lidfe
- Seed of Wisdom
- Prayer Ring
- Cannibox
B1-A Treasure:
- 3,640 Gold Coins
B1-B Treasure:
- Earthenwear
Related
Dragon Quest 3 HD-2D Remake: Best Priest Spells, Ranked
The Priest Vocation is the go-to support/healer Vocation in Dragon Quest 3 HD-2D Remake. Here’s what Priest spells best support a team.
Gaia’s Navel B2 Walkthrough – Dragon Quest 3 Remake
Gaia’s Navel B2 Main Path:
When you enter B2 from the B1 stairs, you’ll see a large chamber with three more sets of stairs. Technically, the only stairs you need to use are those in the northeast corner. These will take you down to B3. The stairs in the northwest and southeast corners are those referred to as B1-A and B1-B in the above section. They lead to isolated chambers on B1. See the B1 section for the contents of treasure chests in these sections.
All Treasure on Gaia’s Navel B2:
There are three pots on level B2:
- Musk
- Fading Jenny
- Banishing Bell
Gaia’s Navel B3 Walkthrough – Dragon Quest 3 Remake
Gaia’s Navel B3 Main Path:
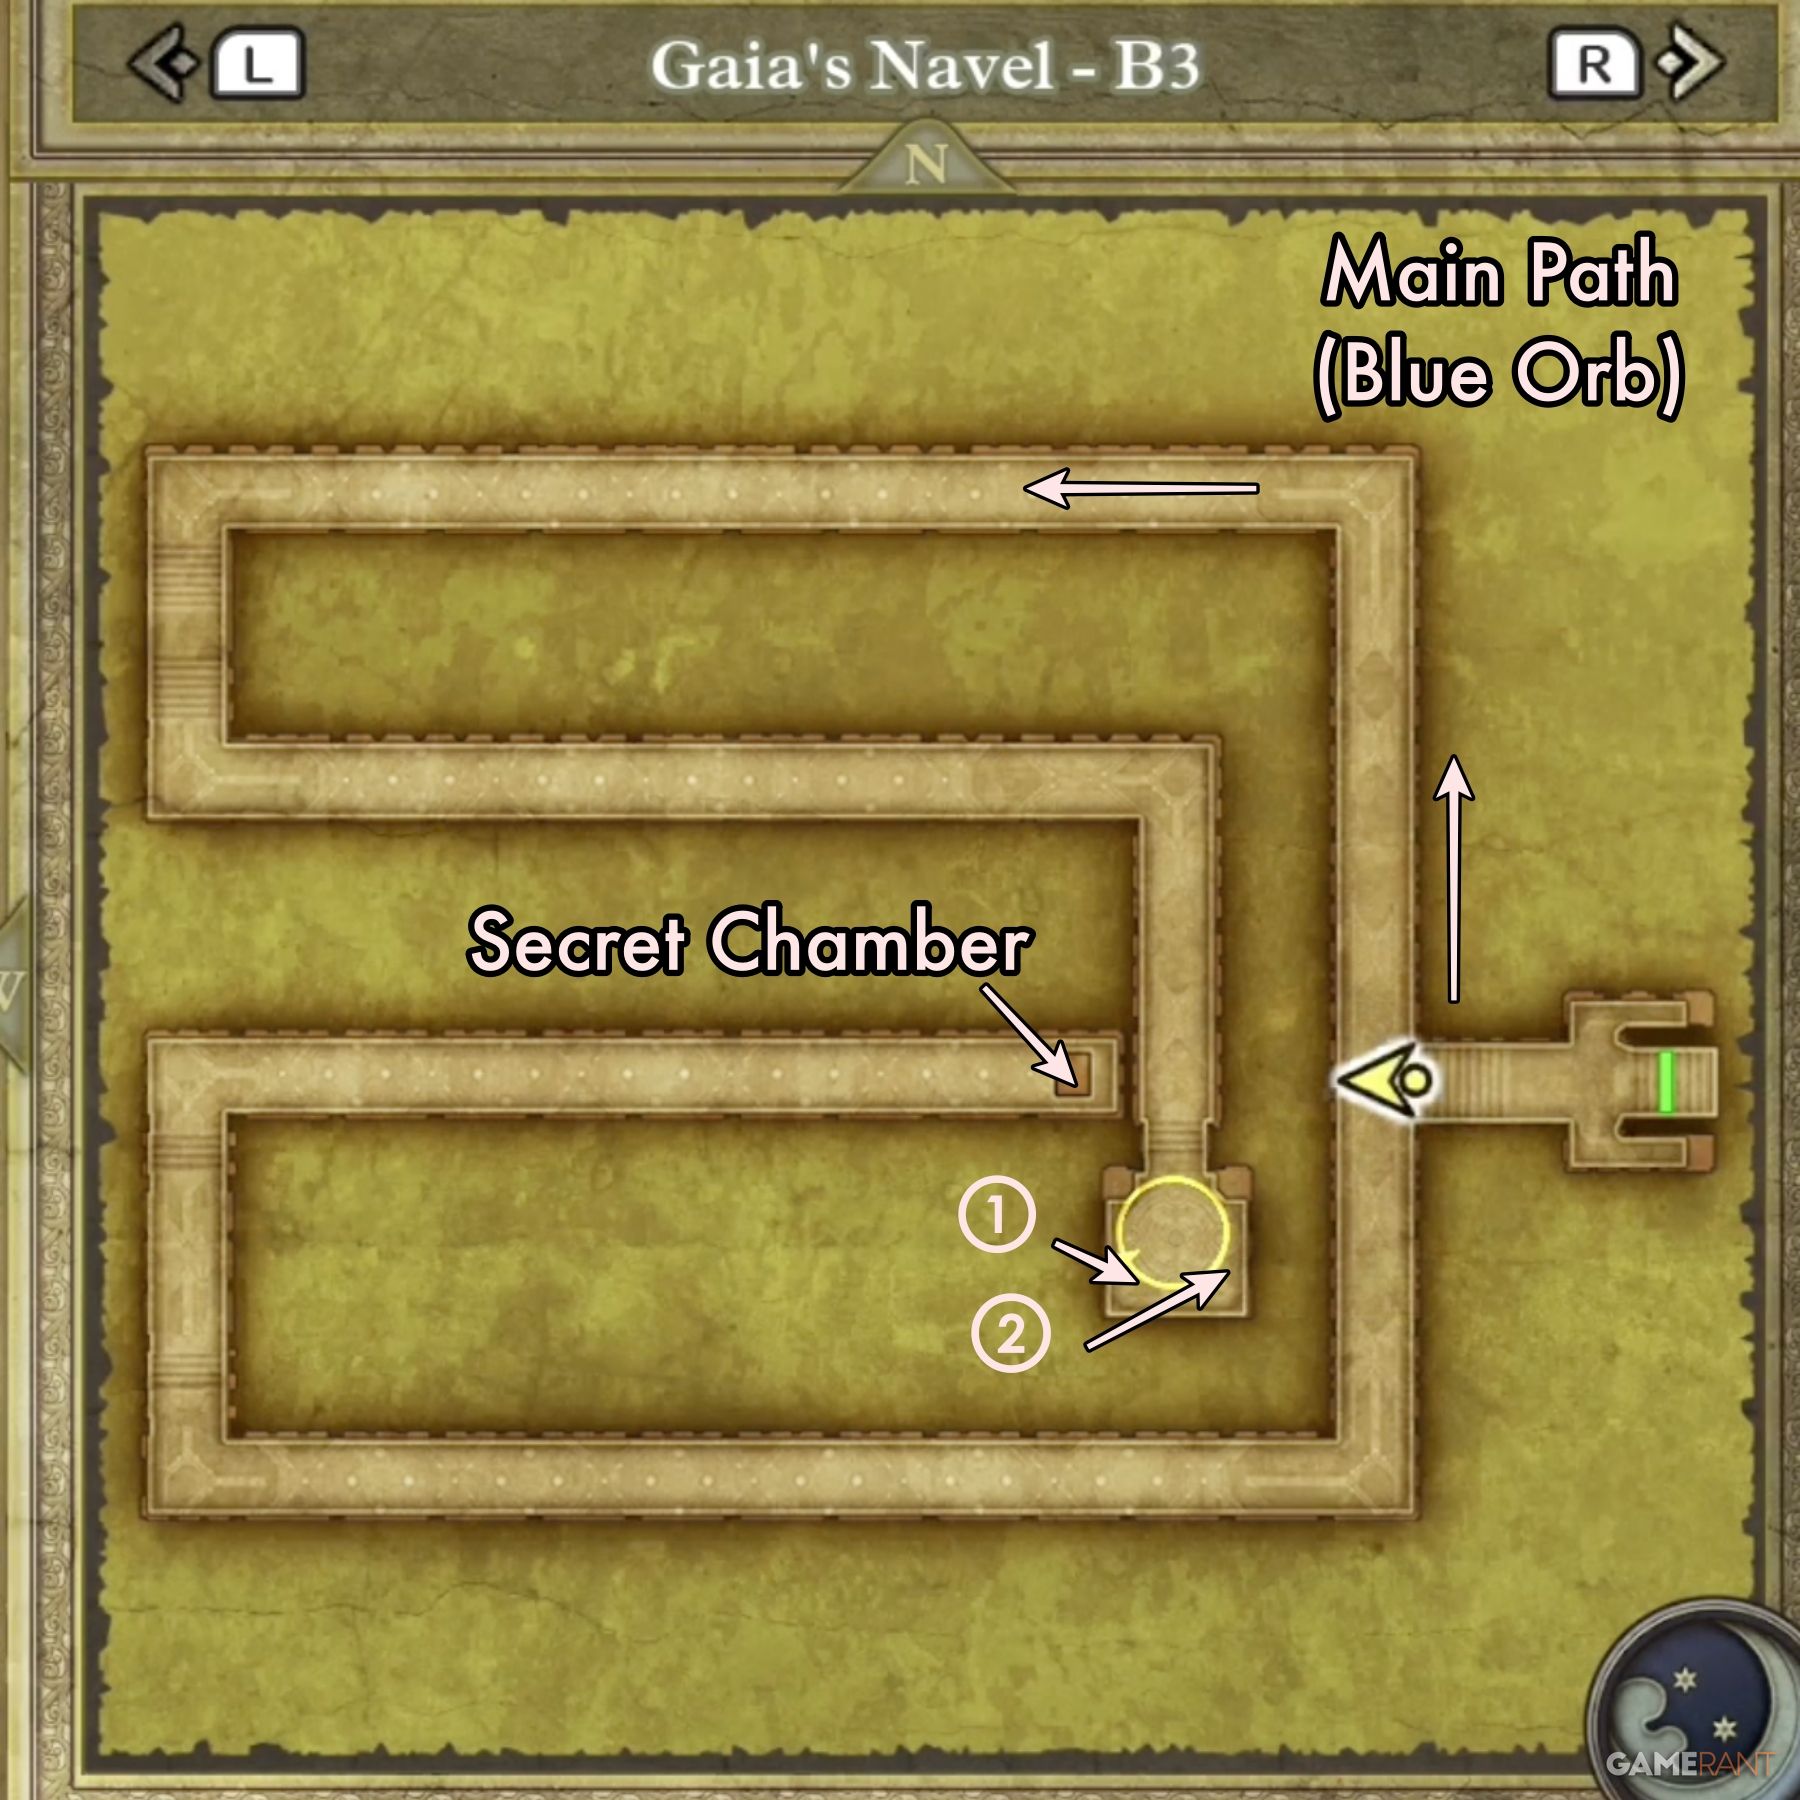
The first time you visit Gaia’s Navel, there’s really only one path you need to worry about on B3. When you come to the choice of heading north or south, take the path north towards the yellow circle on the map. This will lead to the Blue Orb, and a fight with the dungeon’s boss, The Chiromancer.
There isn’t anything different about the route to the boss, though the large heads on the wall will try to make you think otherwise. Simply complete any encounters, then make sure to refill your HP and MP as much as possible before approaching the Blue Orb.
Heading south will take you to a secret chamber that contains
Dragon Quest 3 Remake
‘s only piece of
Zenithium
. You cannot get it until you reach the
Quagmire Cave
in Alefgard. A complete guide to this process will be included at the bottom of this guide.
How to Defeat the Chiromancer in Dragon Quest 3 Remake:
The Chiromancer is one of the easier bosses in DQ3 Remake. It is extremely vulnerable to electrical attacks, so it is worth going back and getting your Hero if you come with anyone else.
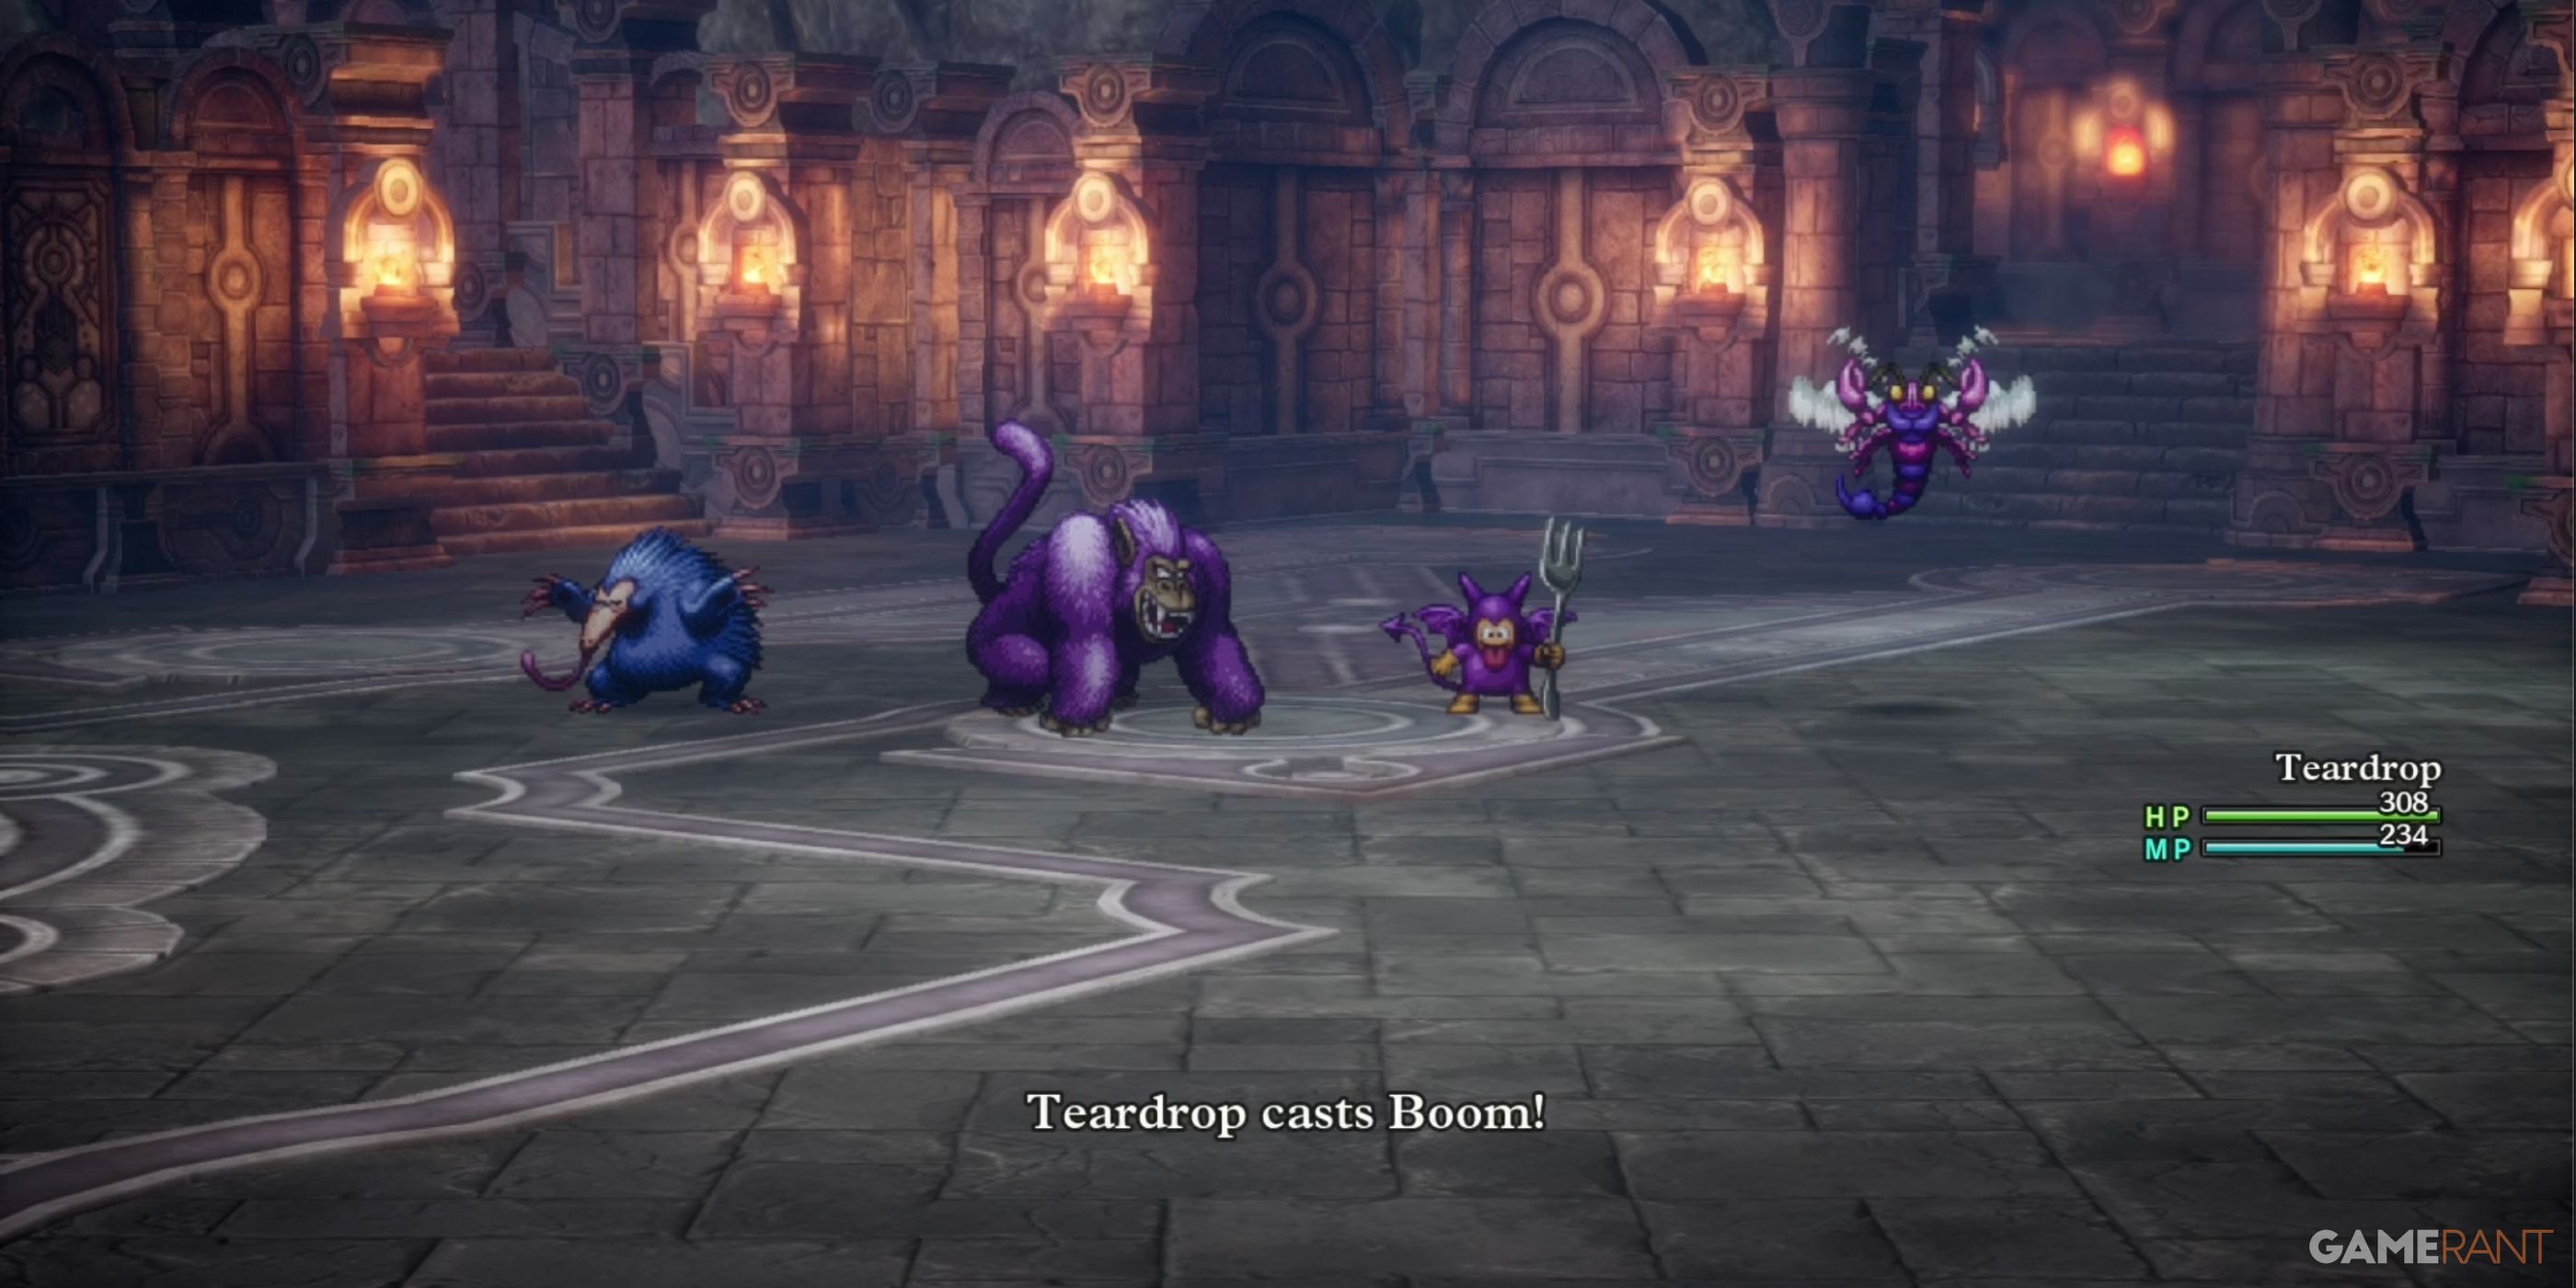
The Chiromancer has a Mad Vlad along with him to drain your MP each turn, which is why it’s important to start the fight with as much as possible. We were able to take them both out very quickly, focusing Zapple on the Chiromancer each round and essentially ignoring the Mad Vlad until the end.
Defeating The Chiromancer will allow you to grab the Blue Orb from the pedestal.
All Treasure on Gaia’s Navel B3:
There are two treasure chests next to the Blue Orb:
- Mini Medal
- Spirit Bracer
Related
Dragon Quest 3 HD-2D Remake – Best End Game Weapons
Get prepped for the final battle and beyond with these weapons equipped.
All Monsters in Gaia’s Navel – Dragon Quest 3 Remake
|
Monster Name |
Weakness |
|---|---|
|
Antguzzler |
Explosive (Boom) |
|
Imp |
Electric |
|
Whackanape |
Fire |
|
Rumble Bee |
Wind |
|
Hoodie |
TBD |
|
Crabber Dabber Doo |
Ice |
|
Mummy |
Fire |
|
None (Use only physical attacks) |
|
|
Etheral Serpent |
N/A |
|
Infernal Armor |
Electric |
|
Crone |
Wind |
|
Lump Shaman |
Electric |
|
Ram Raider |
Fire |
|
Mushroom Mage |
Wind |
|
Vampire Cat |
Wind |
How to Get Zenithium & Auroral Helm in Dragon Quest 3 Remake
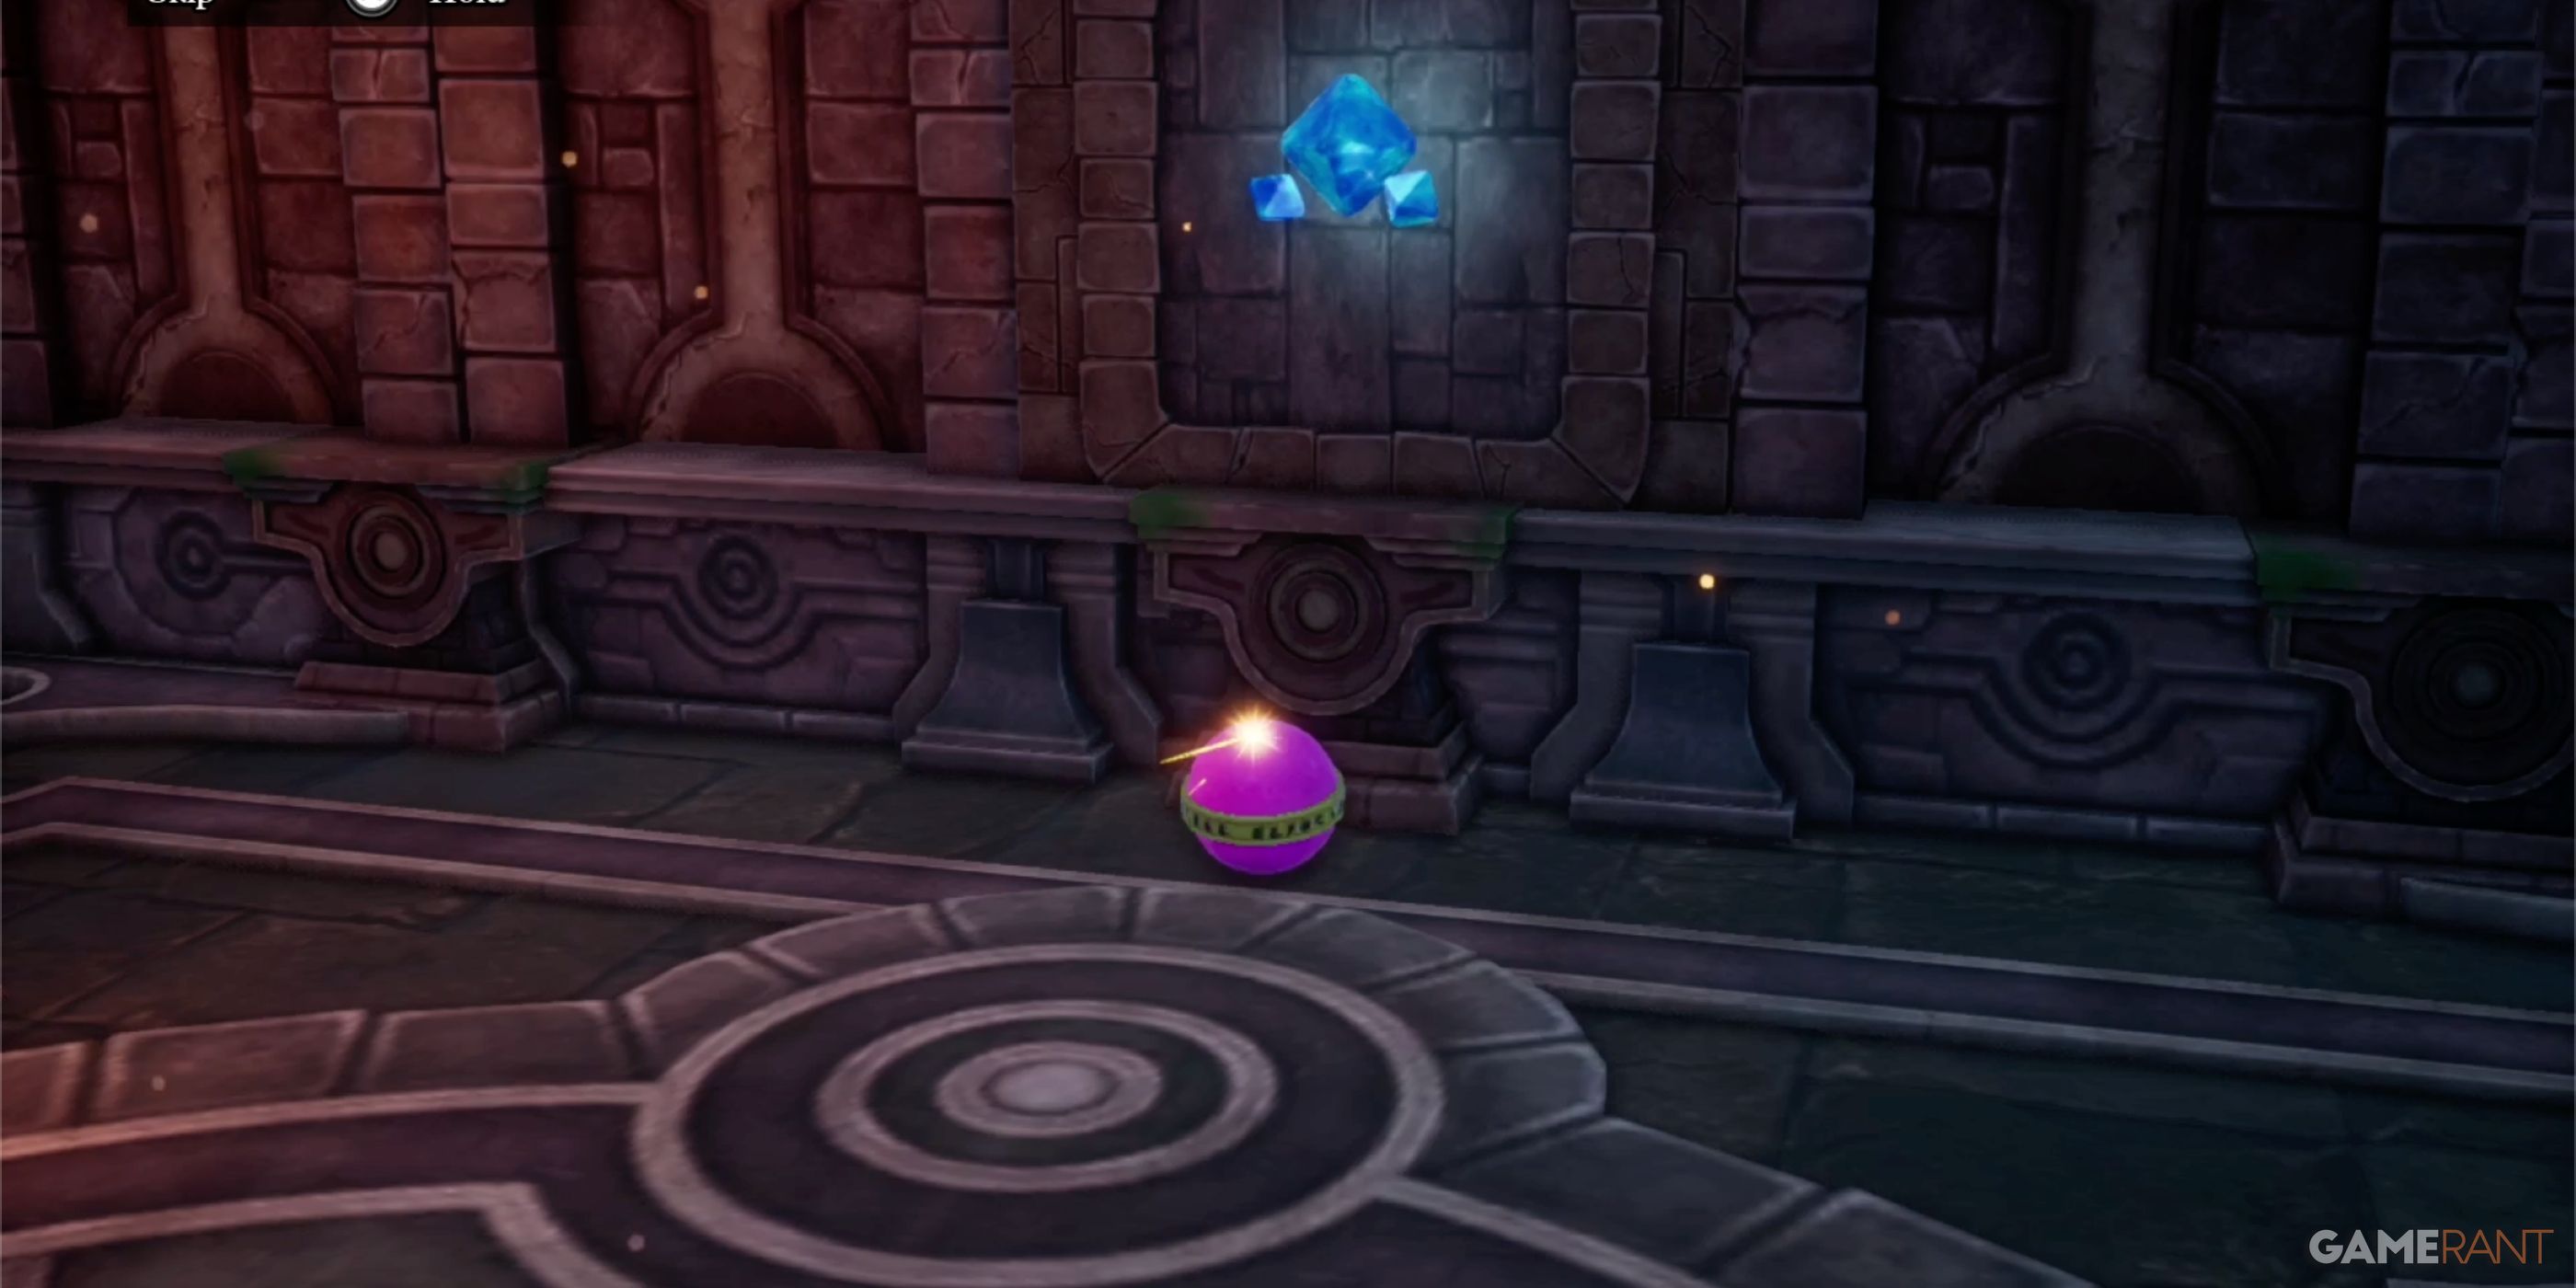
If you went ahead and found the secret passage beneath the statue on B3, then you know there is a chunk of Zenithium stuck in the wall at the bottom of Gaia’s Navel. You can use this material to repair Ortega’s Helm and turn it into the Auroral Helm.
Get Ortega’s Helm:
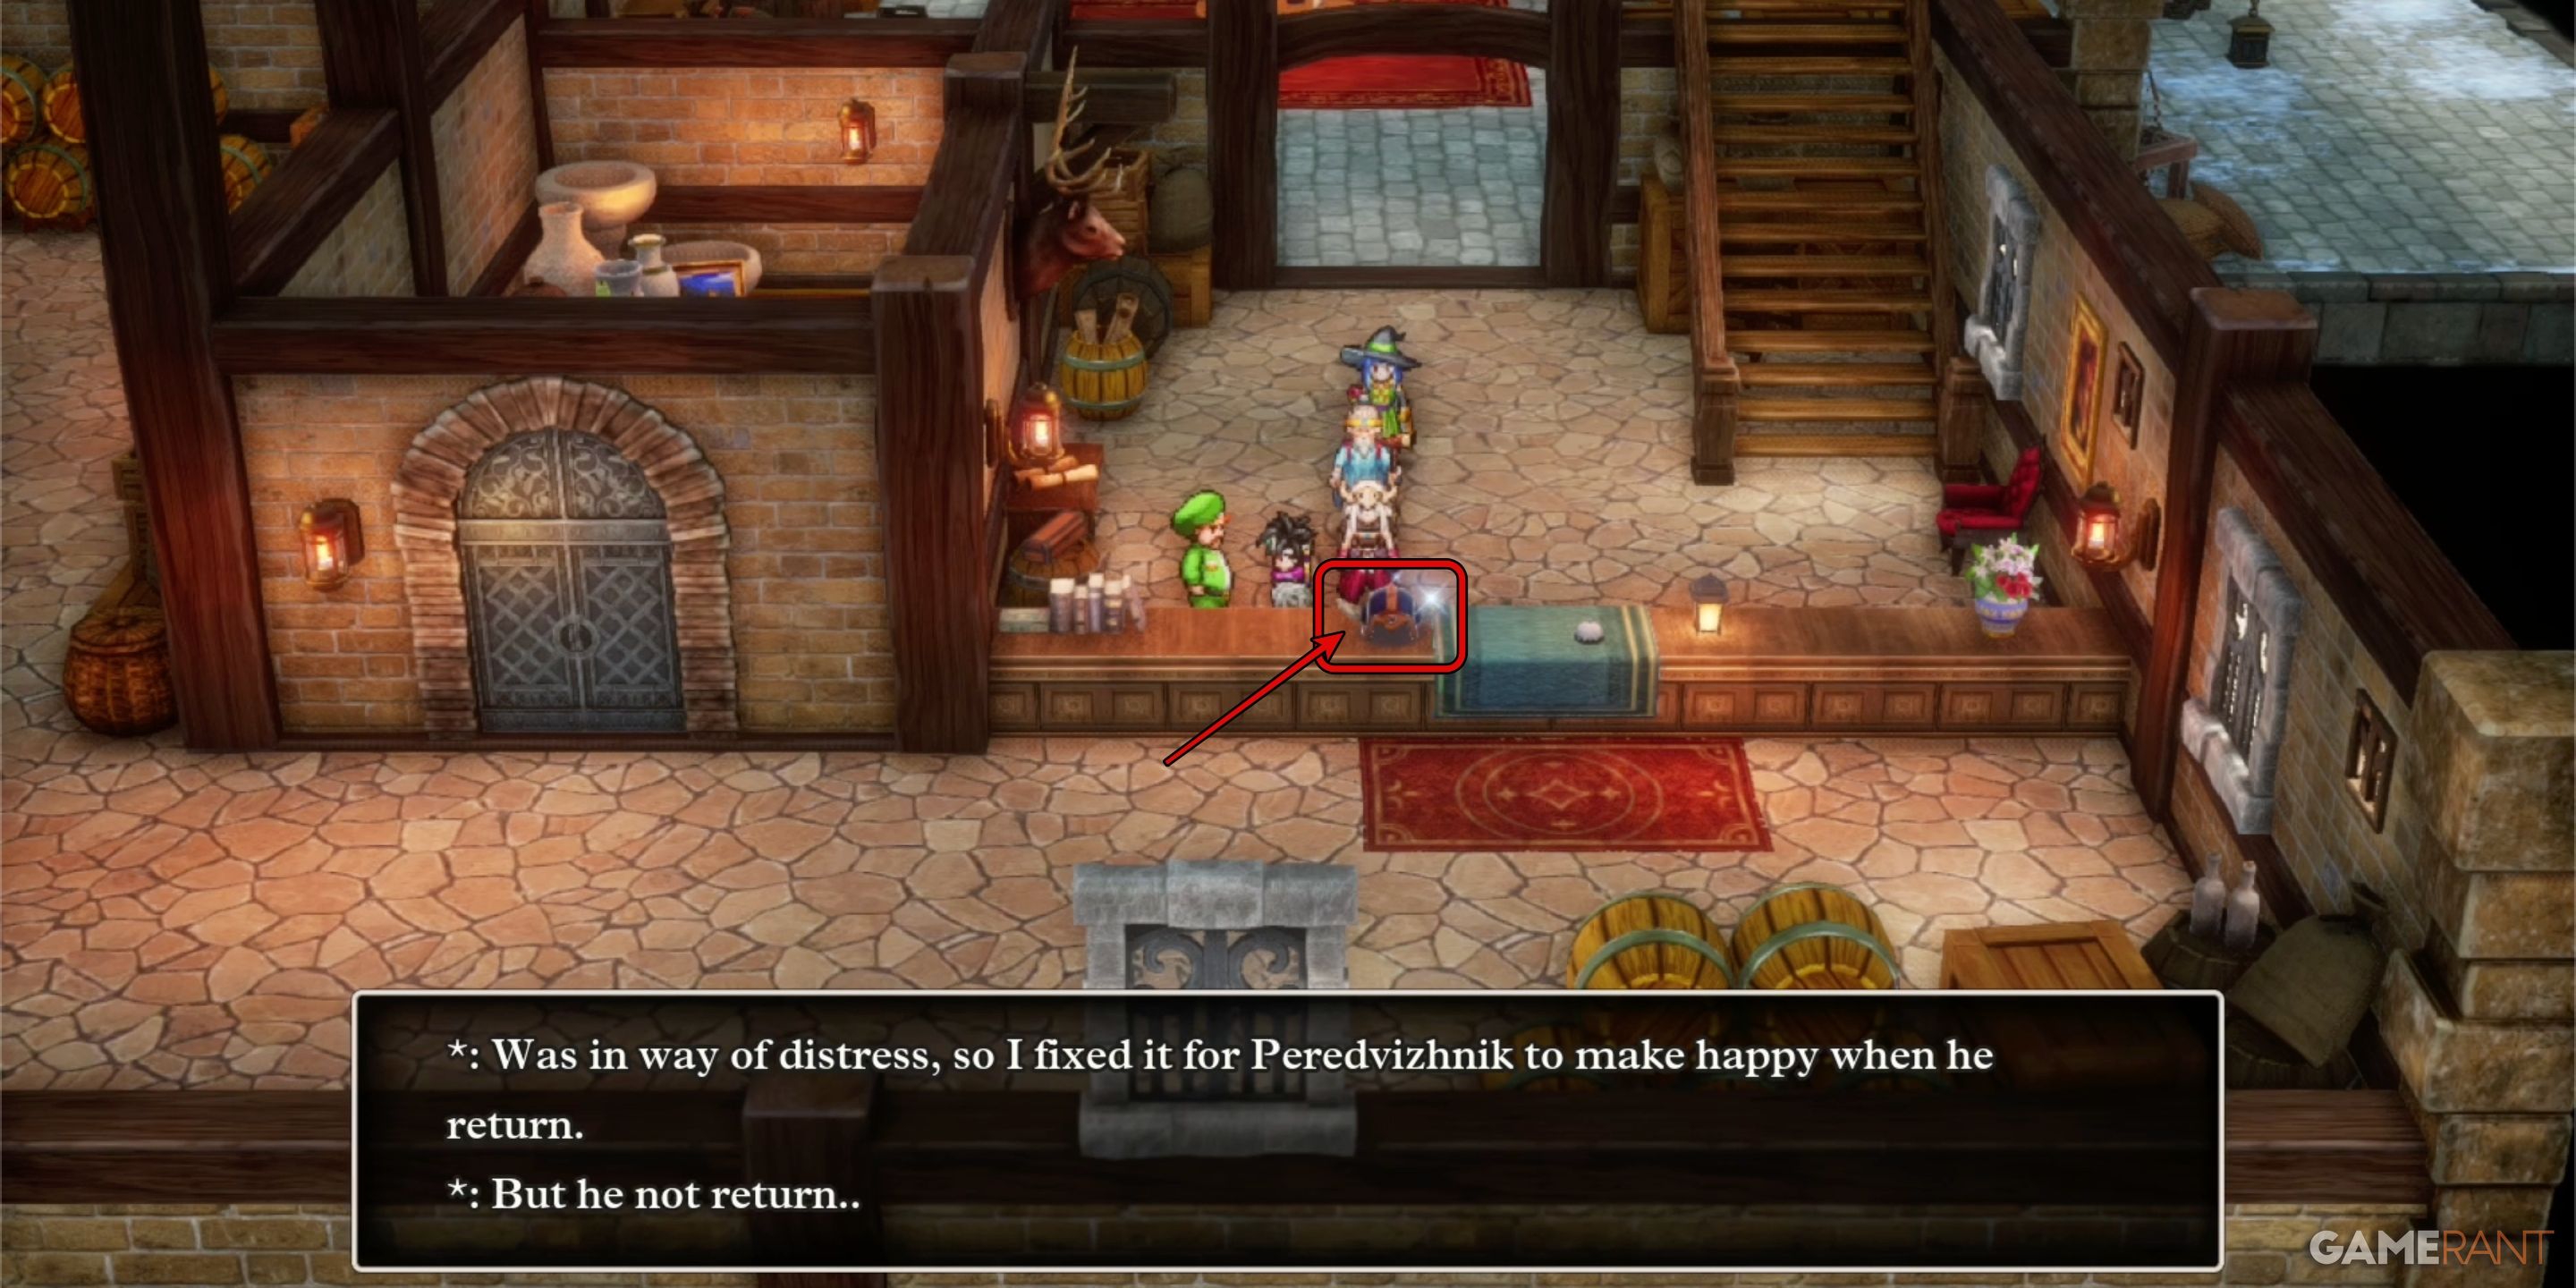
The first step to completing this process is to make sure you get Ortega’s Helm in Mur. Head to the shop in the northeast corner of town, head upstairs through the entrance on the eastern side, then come down behind the counter where Ortega’s Helm sits. Speak to the man at the counter and he’ll give you the helm.
Quagmire Cave:
Once you reach Alefgard, head to Quagmire Cave in the NE section of the map. It is found near the end of the river that ends at the sea just south of the NE corner. Head to the southeast corner of the cave and speak to the NPC with a quest marker over his head. He will trigger the game to allow you to get another Wrecking Ball in Reeve.
Wrecking Ball 2 – Reeve:
Head back to Reeve, to the same man who gave you the Wrecking Ball early in the game. He is found in the house at the northeast corner of the town. Head upstairs, and he’ll give you the second Wrecking Ball.
Return to Gaia’s Navel:
Now you can return to Gaia’s Navel level B3 and head south instead of north. At the end of the path you’ll find a statue that you can interact with. Head to the lower level and interact with the blue stone on the wall. This will trigger a quick cutscene showing the Zenithium being blown from the wall. WIth the material in hand, you can now craft the Auroral Helm.
Shrine of the Dwarf:
Take the Zenithium to the Shrine of the Dwarf. It is located directly up the coast from Mur. Speak to the dwarf and allow him to repair Ortega’s Helm. At the end of the process, you will now be the proud owner of the Auroral Helm, one of the best pieces of armor in the game.
This will conclude the process, but remember Gaia’s Navel. If you need to quickly level-up a single party member, it is one of the best locations to do it. This is especially true for the mid-level party members who are strong enough to hol their own.







Leave a Reply