Crafting is at the heart of Towers of Aghasba, but none of it is possible without being able to gather the necessary resources. This is where the main character’s tools come in, but the standard stone variants can only get you so far and won’t be of any use to farm certain resources.
One of the first things players will be looking for is a way to get more effective tools. This can be achieved by crafting iron tools in Towers of Aghasba, so this guide will walk you through how this can be achieved.
Related
Towers of Aghasba: How To Survive Withered Zones
Withered Zones are the most difficult to traverse in Towers of Aghasba, but are crucial to your progression through the story.
Players will pick up recipes for tool iron tool upgrades as they naturally progress through Towers of Aghasba, but it won’t be clear how they can be used initially. Thankfully, it won’t take too long before they are available, but the first thing you’ll need to do is rebuild the Lutoro Bridge and revive the settlement of Midhaven. It is through the second village in the game that you’ll be able to access the blueprints and materials to put these better-quality tools together.
To get iron tools, players will need to build a Blacksmith, which is a Tier Two Midhaven building, meaning it can be constructed sometime after settling onto the mainland. To build a Blacksmith, you’ll first need to construct a Lumber Mill and Tailor, complete the Tier One requirements, then grab the following materials:
Once you have the building up and running, you’ll have the ability to craft the three key iron tools, as well as an iron spear and some additional items. To craft the Iron Shovel, Pickaxe, and Hatchet, you will need two Iron Ore, one Metal Rod, and two Fiber for each tool.
How To Get Metal Rod
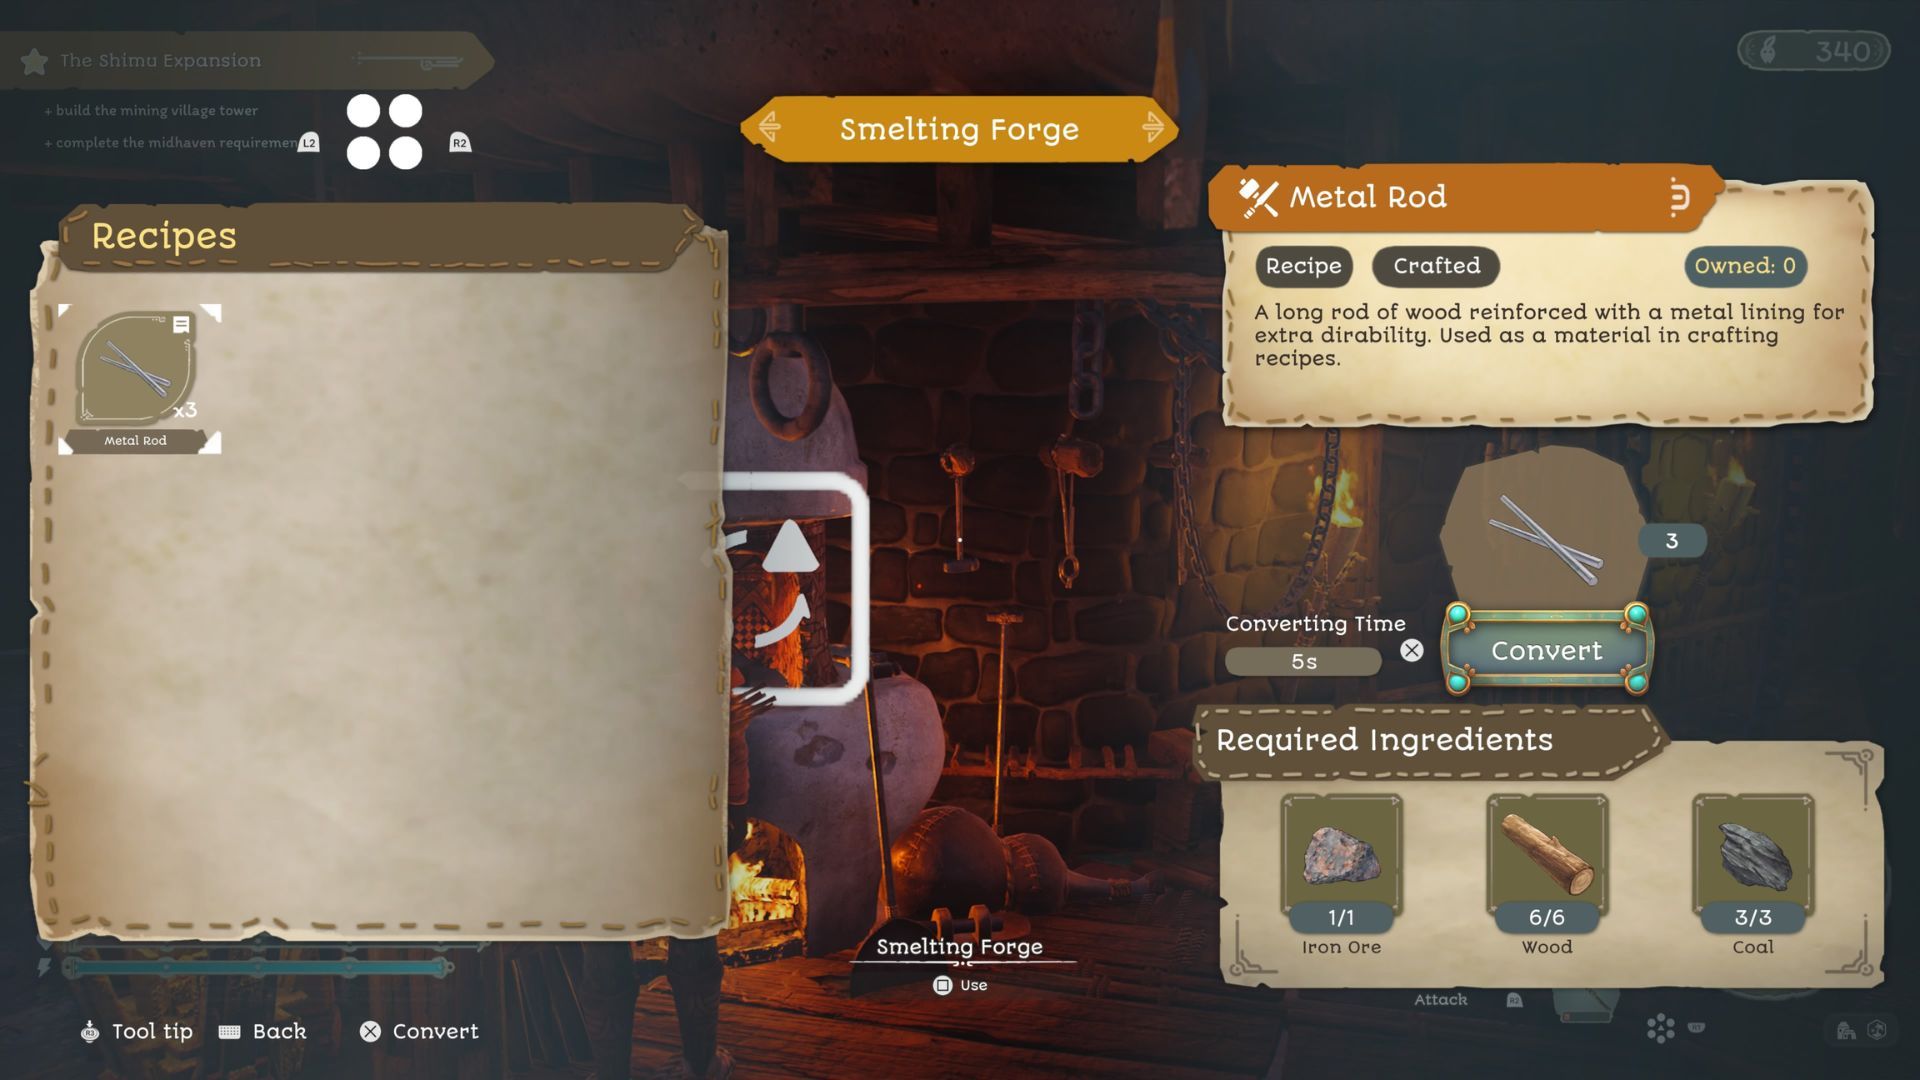
The one unfamiliar item for players at this stage in their playthrough is the Metal Rod, which is thankfully easy to acquire. To get it, players will need to use the Smelting Forge at the Blacksmith. To craft three Metal Rods, players will need one Iron Ore, six Wood, and three Coal.
Wood is a simple and plentiful resource, but Iron Ore and Coal may require some searching. If you venture in the area surrounding Midhaven, particularly to the east and south, you’ll encounter Coal Mounds. Iron Ore, on the other hand, is best acquired in the early stages of the game by venturing back to Amani Island and walking along the south coast. You’ll find around 3-4 orange Iron Boulders each run, which will hold the resources you need.
While you won’t be able to craft the iron tools until a little way into your playthrough, there is an opportunity for players to grab themselves one early. To do this, you’ll need to head to the far north-eastern point of Amani Island.
As you pass the rock formation that looks like webbing, which beneath is home to another Enchanted Dung, you’ll encounter a lone tall rock. If you climb this, you’ll come across an Ornate chest, which will house a random iron tool. You won’t have the option to choose which one you get, but they all have their uses.
Adventure
Open-World
Survival
- Developer(s)
- Dreamlit inc.
- Multiplayer
- Online Co-Op
- Engine
- Unreal Engine 5





Leave a Reply