Using your Stalker 2 flashlight to light the Zone is vital to making sure the game isn’t too dark, but you might need to adjust some display settings as well. There’s a prompt to turn on your flashlight in the tutorial of Stalker 2, but it’s a bit blink-and-you’ll-miss-it, so you might be stuck fumbling around in the dark. I’ve detailed how to turn on your flashlight in Stalker 2 and which settings you might need to adjust to make the game easier to see.
How to turn on your flashlight in Stalker 2 and stop the game being too dark
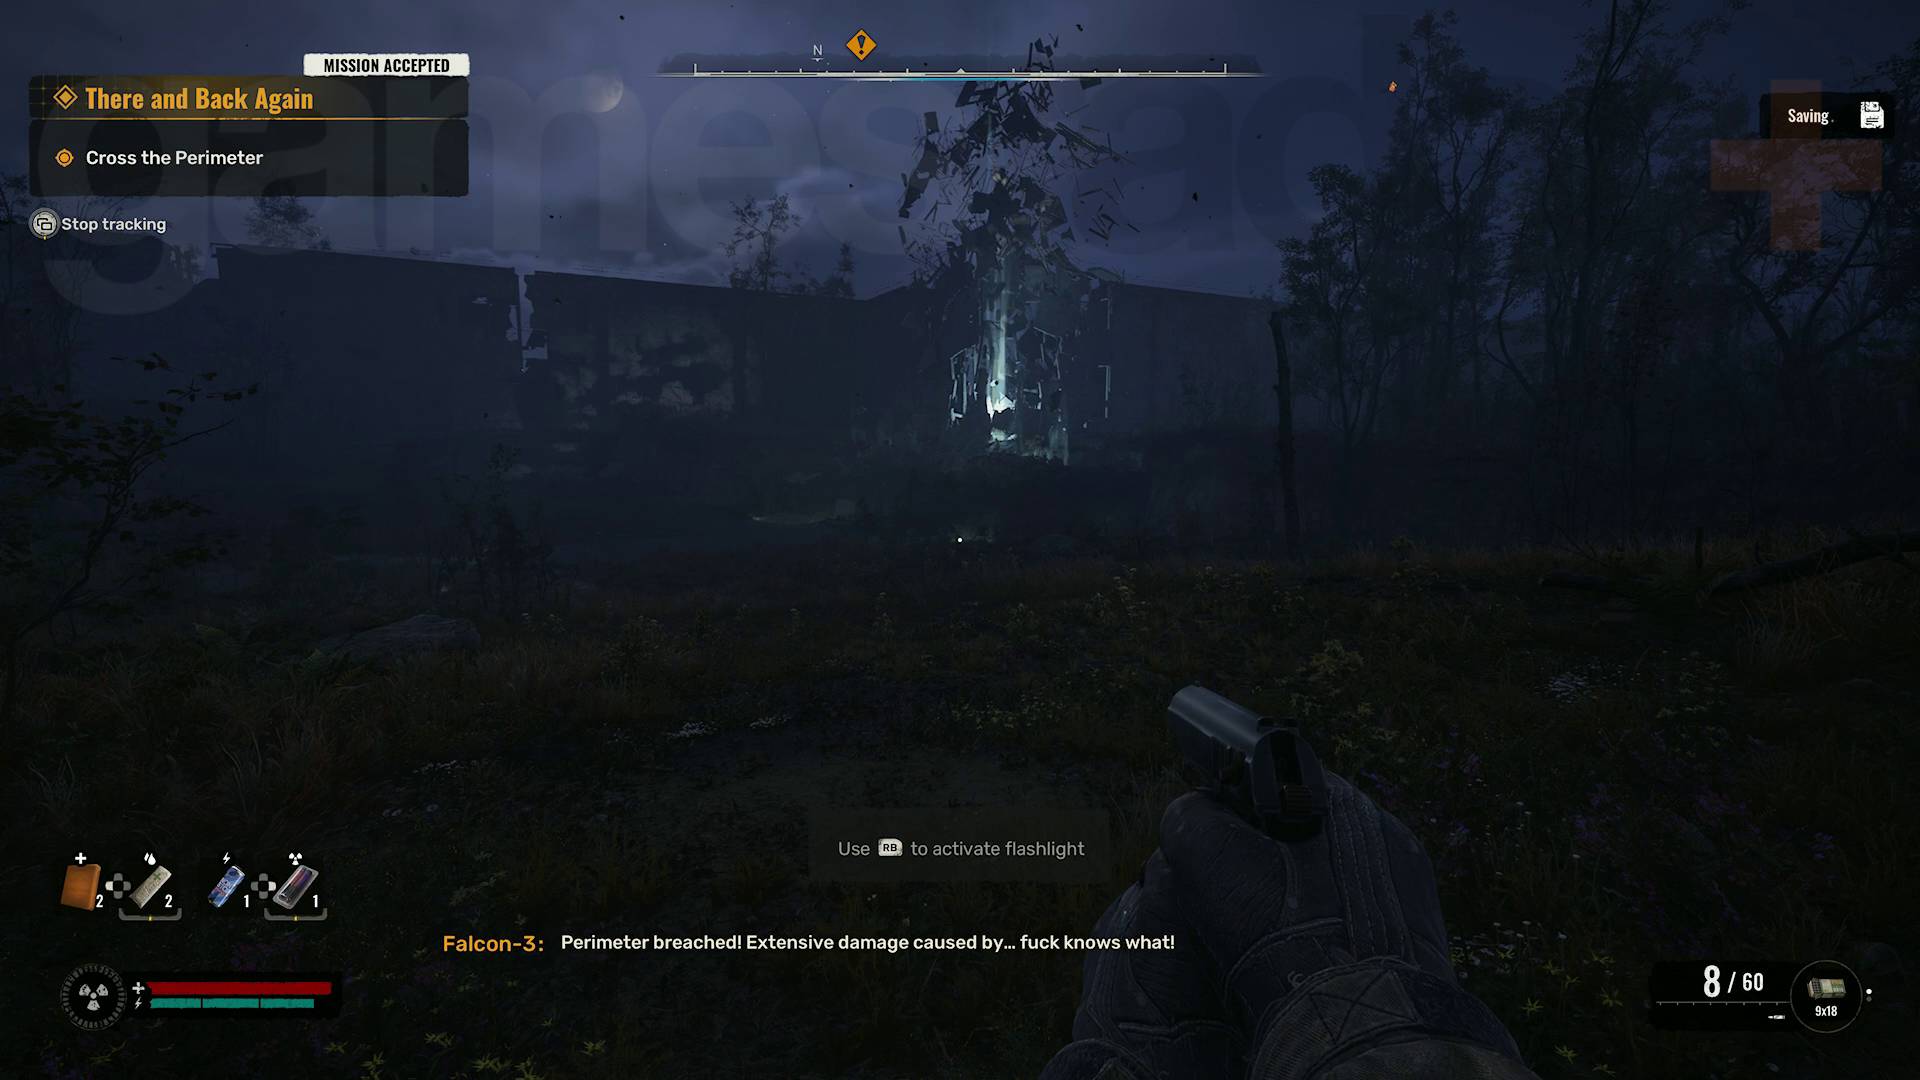
To turn on your Stalker 2 flashlight, press RB on Xbox or Tab on PC and press the same button again to turn it off – that’s it! Thankfully, you don’t even have to worry about batteries, so you can leave your flashlight on all the time. The game has some incredibly dark areas, particularly at night as in the Stalker 2 There and Back Again prologue.
The flashlight is admittedly not very powerful, so if things are still too dark in Stalker 2 you might want to adjust some in-game display settings. To do that, pause the game, open the “Options” menu, then switch over to the “Display” tab. Here you can adjust brightness and gamma settings, as well as HDR if you’ve got that running.
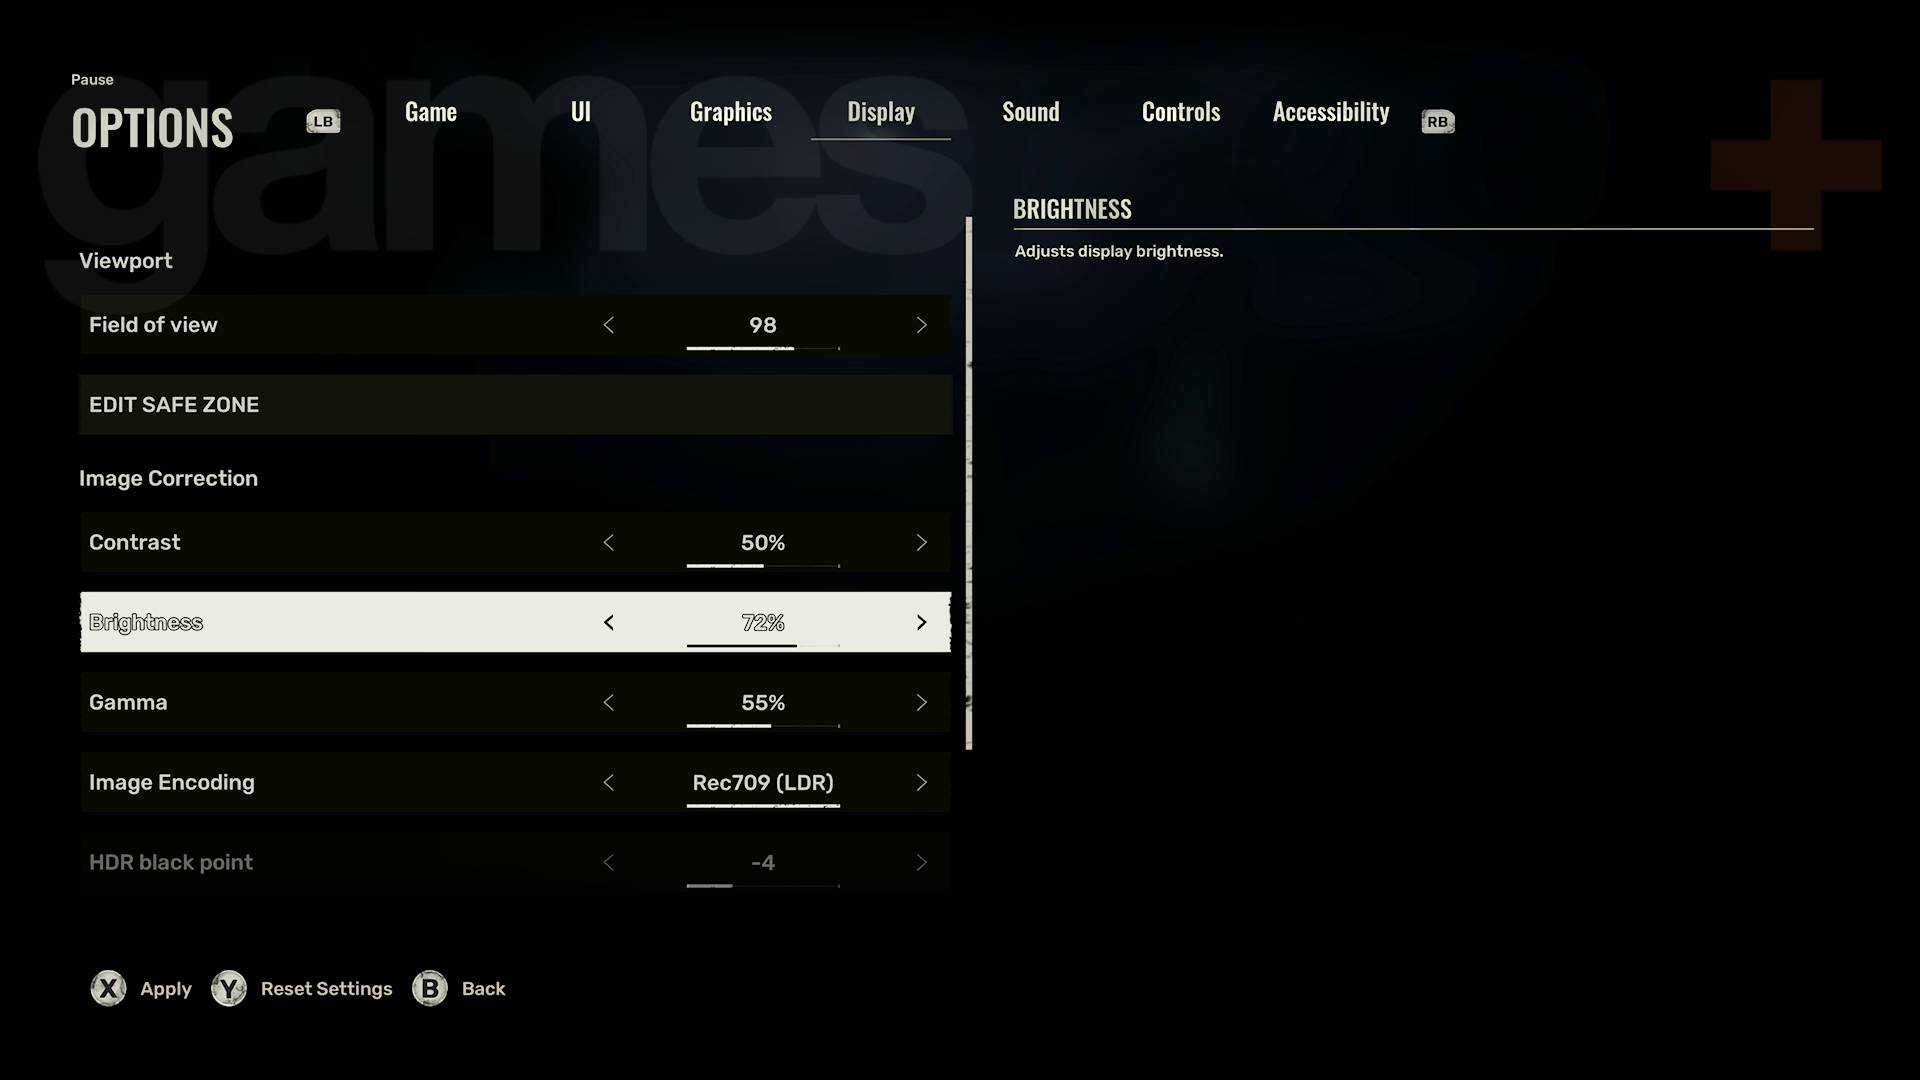
Obviously turning up brightness and gamma will improve visibility though might make the game look a bit more washed out. Turning off HDR will make your game less vivid but should also push shadows and darkness a little further from true black. Although, if you’re wondering why the Stalker 2 compiling shaders message pops up every time, that’s its own issue.
© GamesRadar+. Not to be reproduced without permission.







Leave a Reply