Quick Links
Flumes in Planet Coaster 2 let you make your water parks more thrilling and give them almost the same feel as a Roller Coaster. You can add high-speed sections and make twists and turns to let your guests dive into the water for a more exciting experience. These rides can also help you increase your Park Rating greatly depending on a Pool’s Prestige.
Related
There are three path types in Planet Coaster 2 and they all work differently. Here are the answers to some path FAQs.
A lot of presets are available in the Flume tab, which you can just place without editing. However, that drains the fun you get from making your own custom Flumes. You will find a variety of customizing options in the custom creator, which you can test out to create your fun rides.
How To Use The Flume Builder
To start building your own Custom Flume, open the Flumes tab and select “Create Custom.” After you do that, three model options will be presented to you. Choose Body Flume if you want to make a Flume instead of a slide. You will then see your cursor holding a platform that you can place near the pool’s edge.
If you are making a flume in the middle of a pool, make sure to build a path leading to the platform so you can place your entrance on it. Otherwise, you will keep getting a “This spot is obstructed” message.
Making a Flume Start
Make about two to three platforms side by side, and then connect a Flume Start to one of the platforms. You can pick any of them depending on the way you want to make your ride. However, make sure that your Flume isn’t too extreme upon completion and, that you have Excitement, Fear, and Nausea well-balanced.
- Open Flume Start
- Open Flume Start 1
- Enclosed Flume Start 1
- Enclosed Flume Start 2
- Flume Vertical Start
The Enclosed and Open Flume start work similarly, and the ride starts in the direction they are facing. However, the Flume Vertical Start will drop your guest into a vertical flume body.
Making Your Flume Body
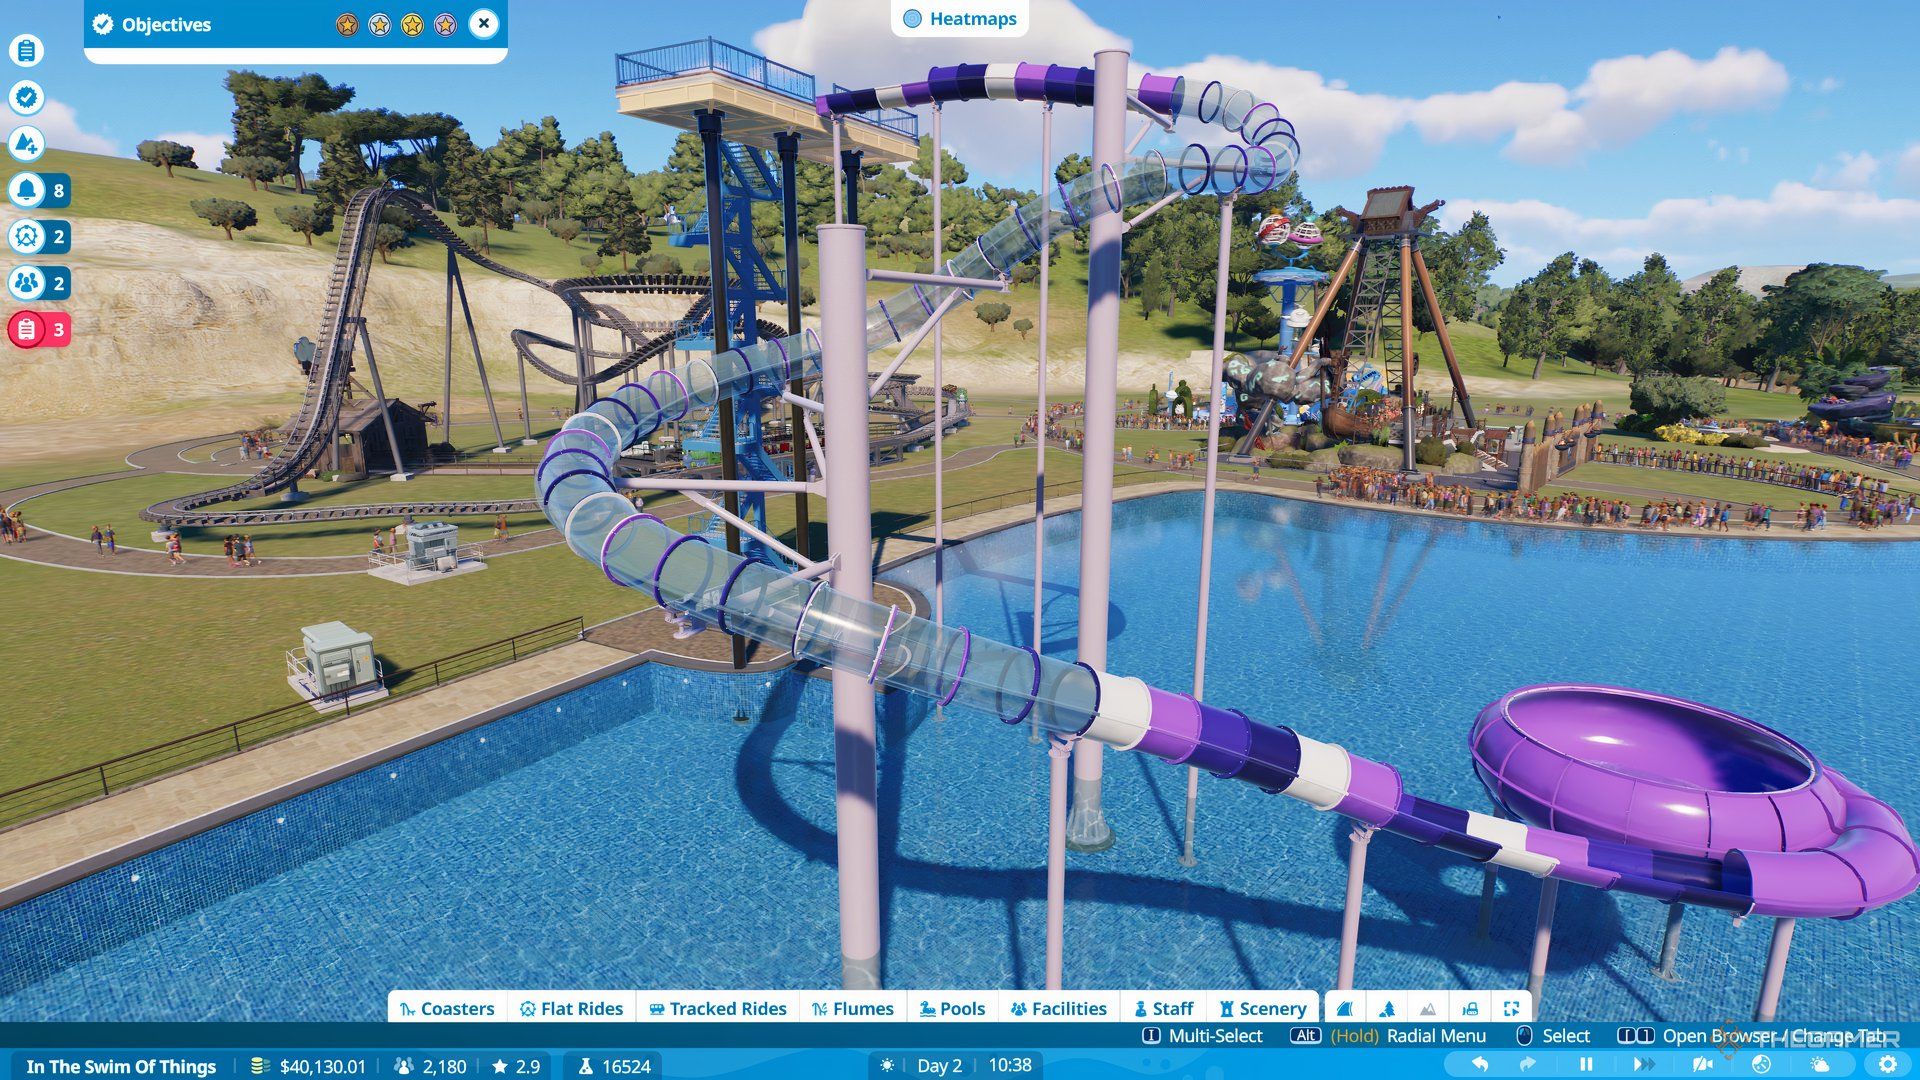
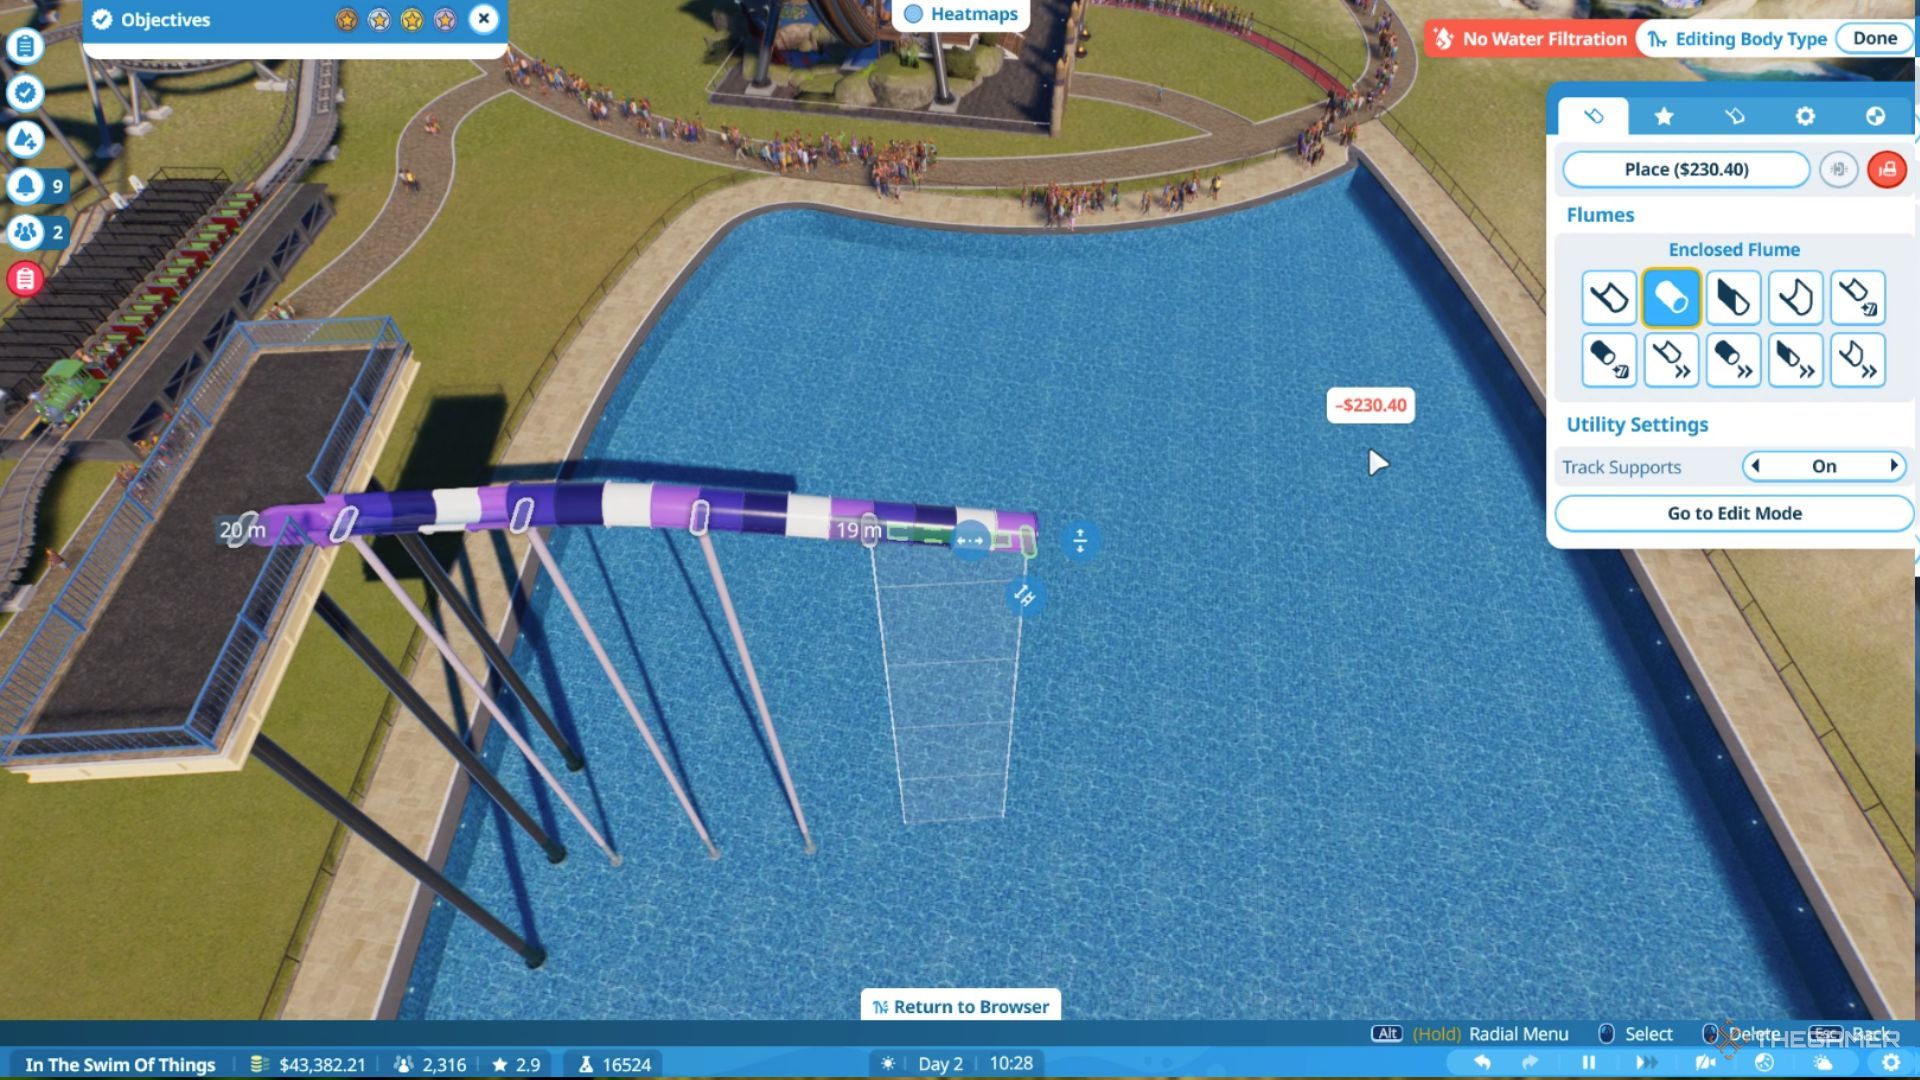
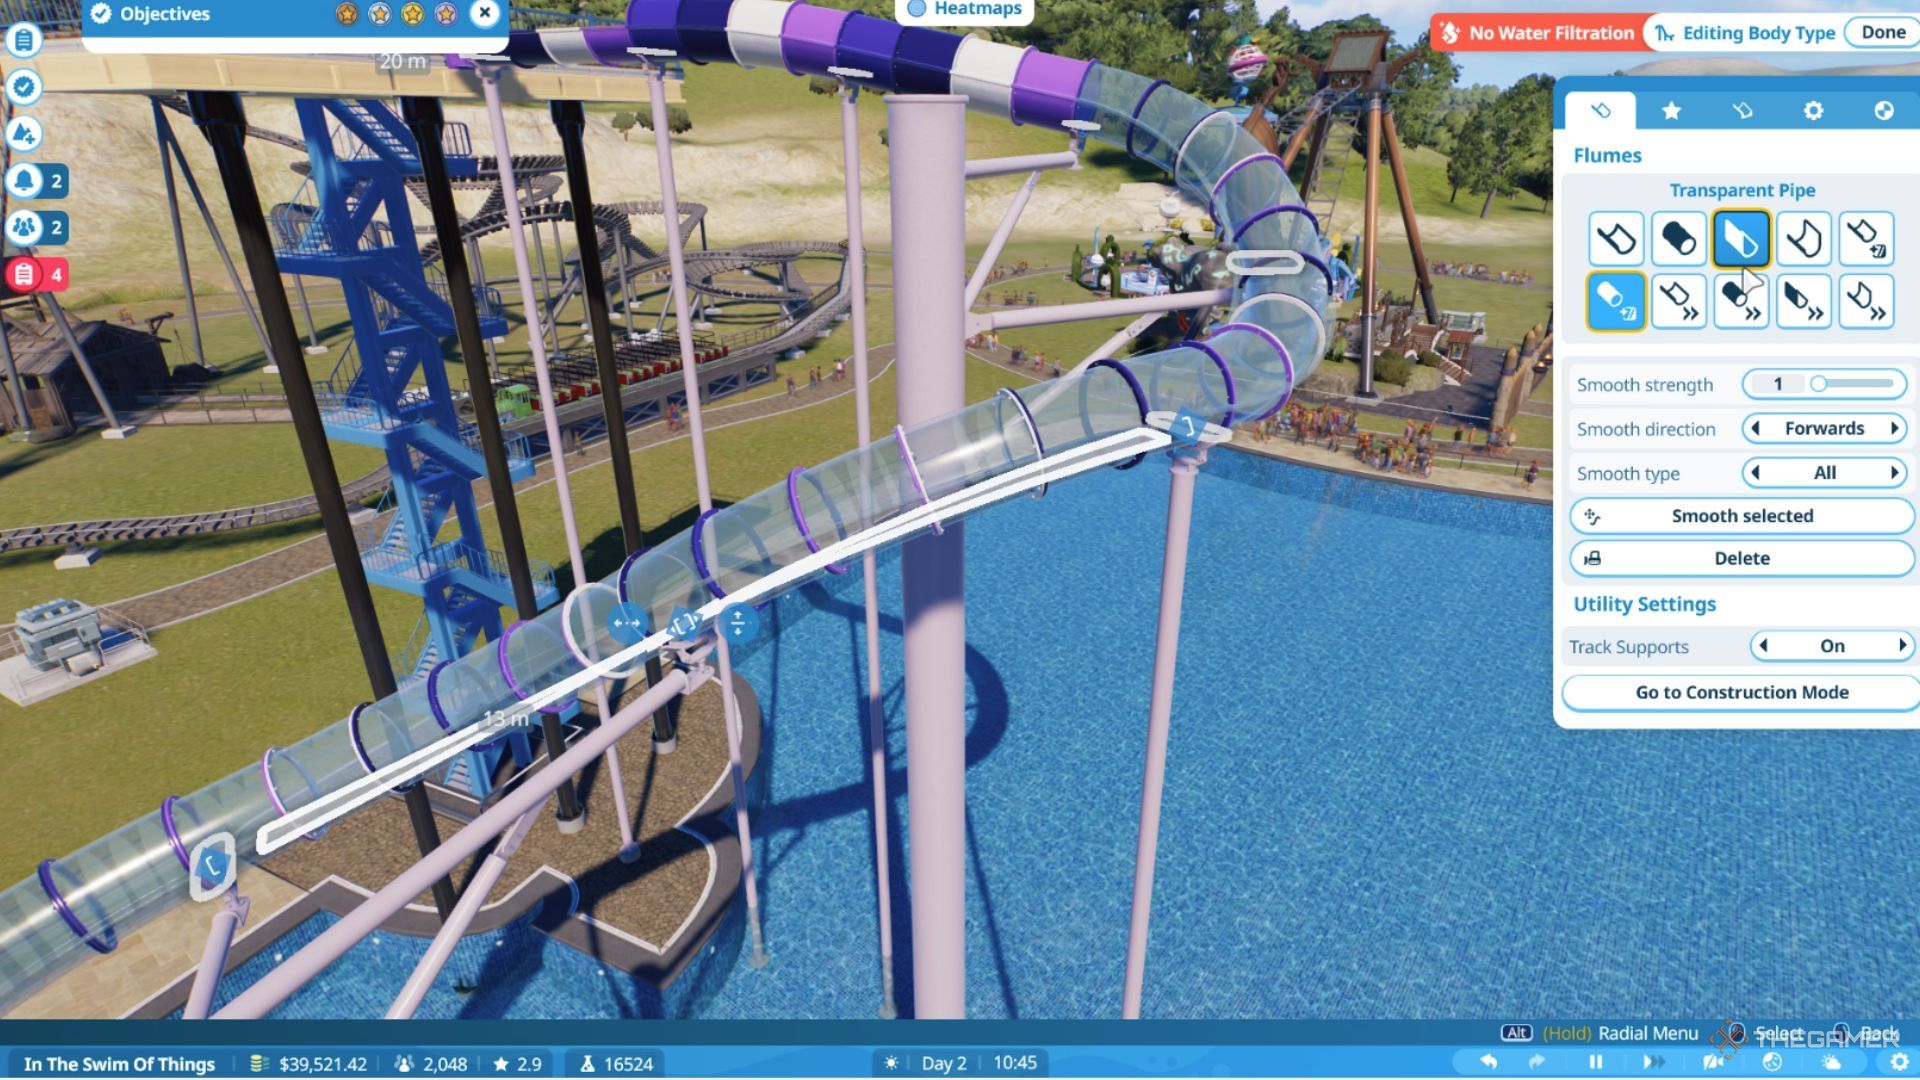
After making the start-point, you can start making the main body of your Flume. There are a couple of options here which might make the ride more exciting and look more appealing. You can pick the regular flume body either in open or closed forms. The Transparent flume body will let your guests see the pool below.
We recommend that you avoid high-speed options as a beginner. Speed can affect the fear and nausea values, and they might be harder to manage.
- Open Flume
- Enclosed Flume
- High Side Flume Right
- High Side Flume Left
- Transparent Half Pipe
- Transparent Pipe
- High Speed Half Pipe
- High Speed Enclosed Flume
- High Speed High Side Flume Right
- High Speed High Side Flume Left
Connect one side to the other until you complete making your Flume. You can be creative here and try making turns in your flume body to make your ride exciting.
However, be careful while adjusting to sharper angles, as they might make your guests feel sick. Using the elongate icon, you can determine the length of a body part.
You can also try some pre-made special body presets; however, make sure that your platforms are high enough for them.
After creating your body, you can place a Flume End to finish your Custom Flume. There are different kinds of ends that you can try out here. The ‘Place’ option is simple and lets you end where you want it to.
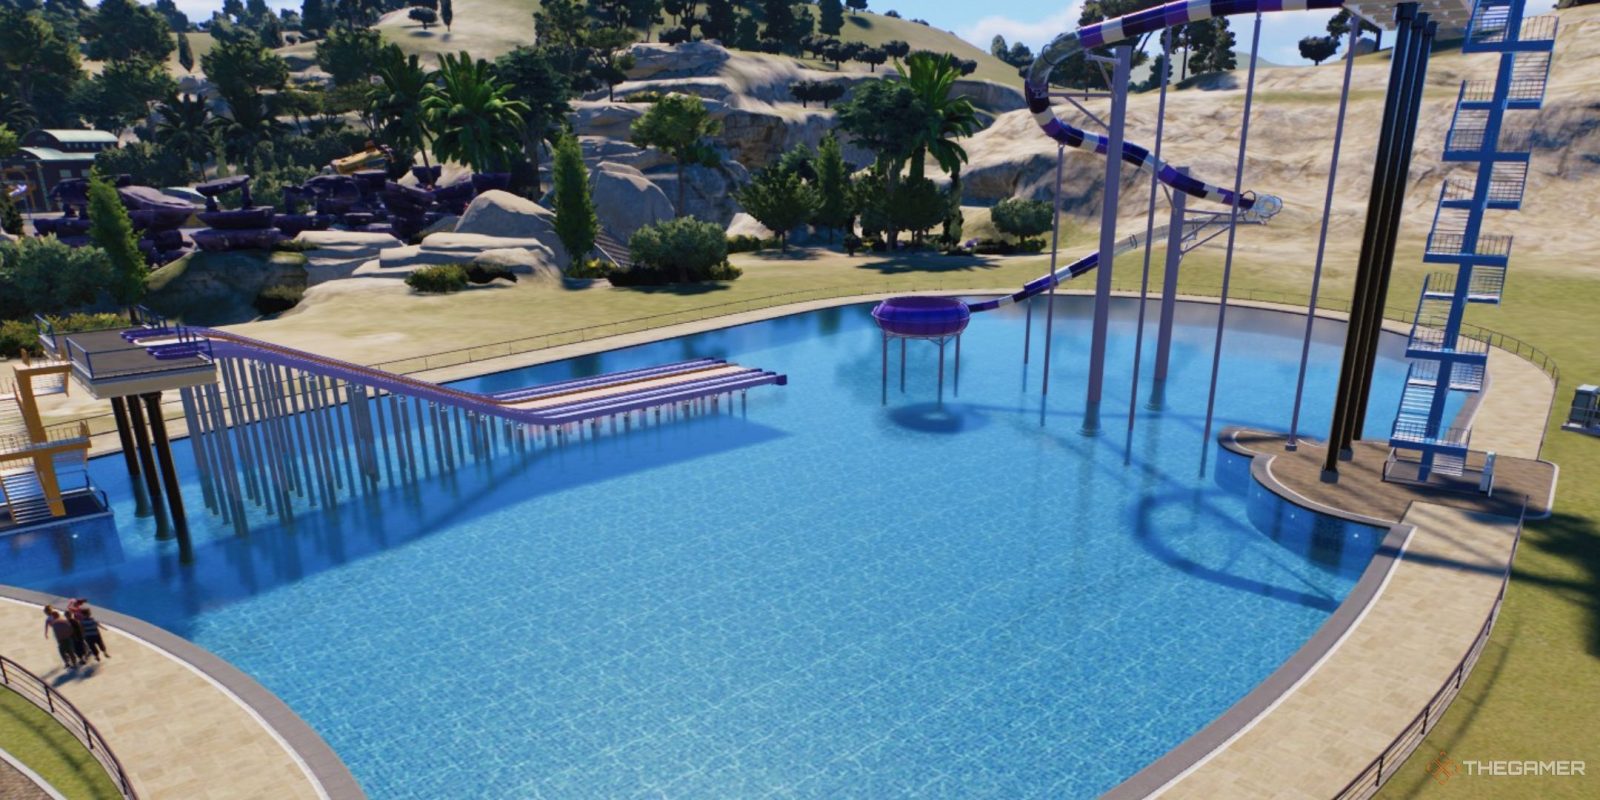
You need some distance between the water and your Flume body to place the Runout Lanes, as these are a bit longer. The Plugholes make the guests go on a round spiral before they drop into the water, which can increase the Excitement.
- Flume End
- Shallow Runout Lane
- Deep Runout Lane
- Plug Hole Right
- Plug Hole Left
- Plug Hole Enclosed Right
- Plug Hole Enclosed Left
Do not forget to place an entrance at the end of creating a Flume. Even if your Flume is high up, making an entrance will automatically build the stairs leading to the Flume Platforms.
Related
How To Test Your Flume
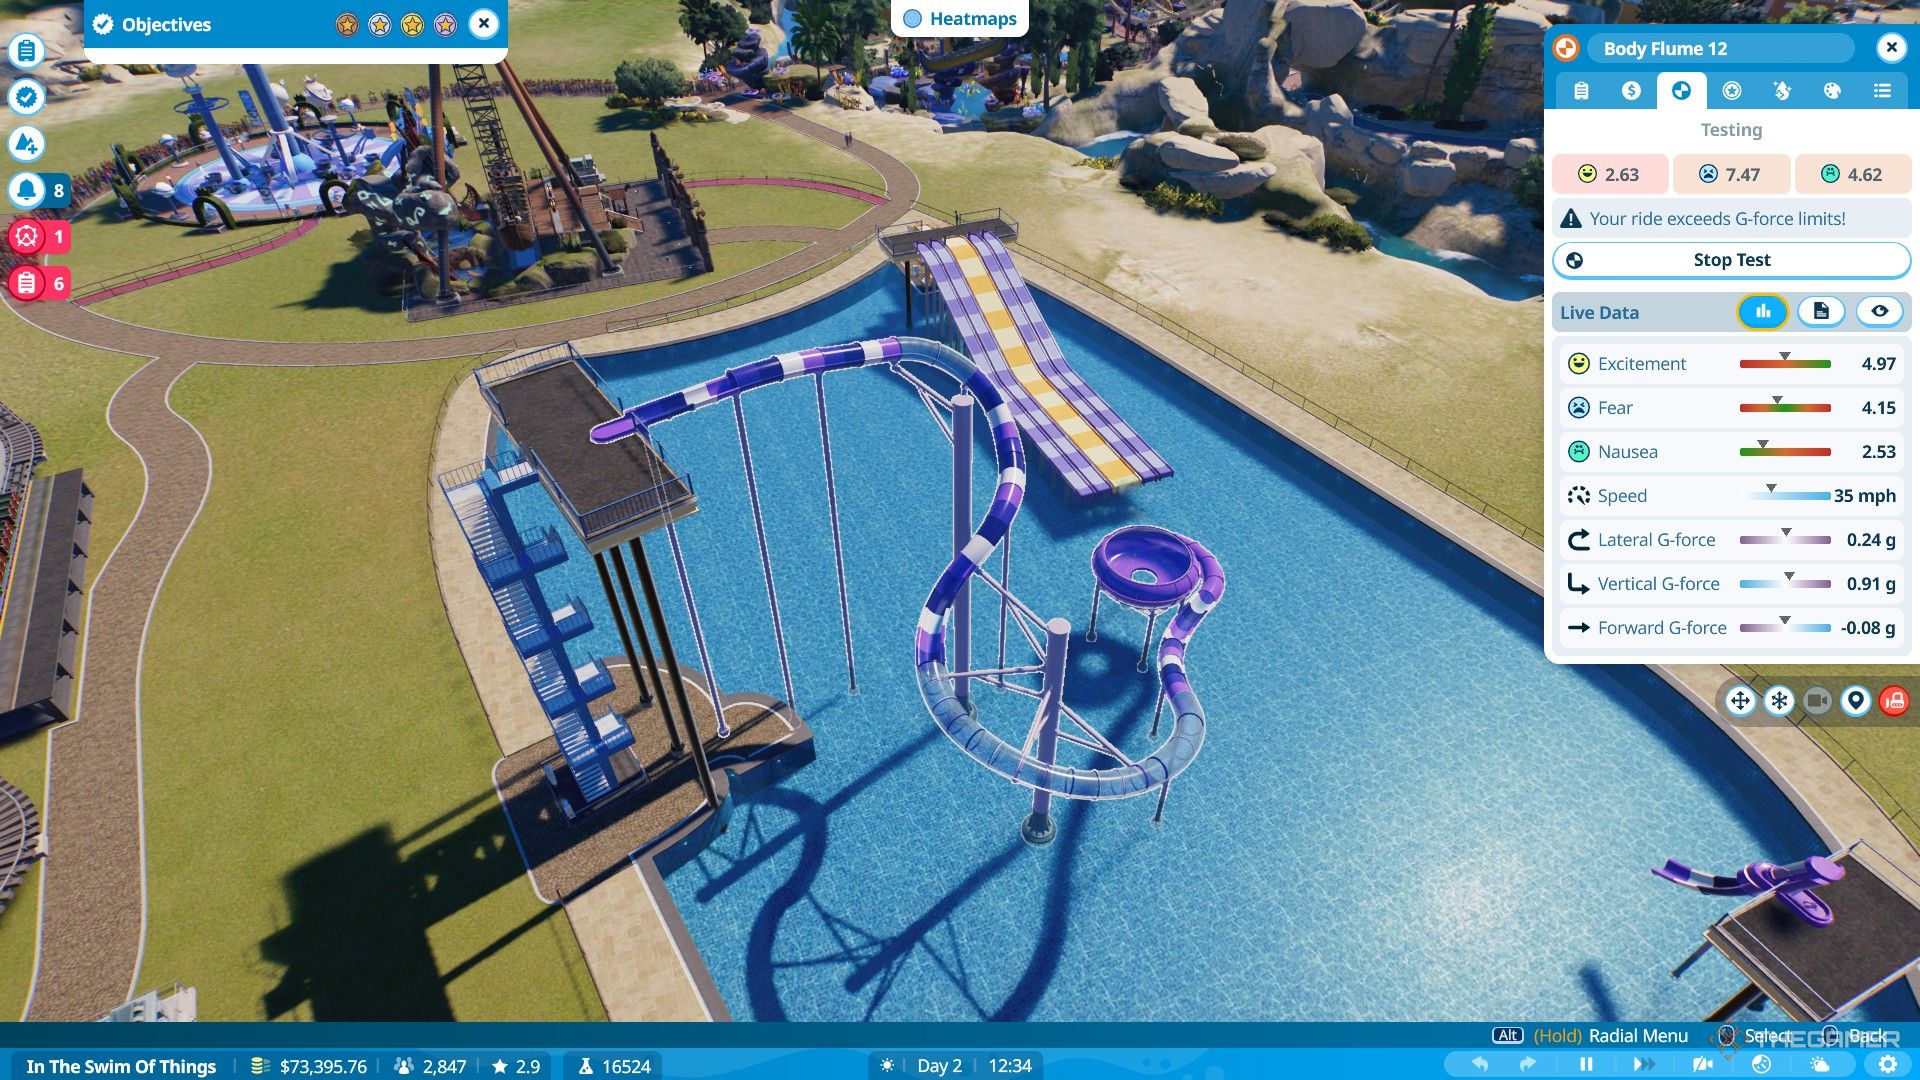
Now that you have completed your Flume, it’s time to test it out to determine if it’s safe for your guests to ride in. To do that, click on the Flume and then on the world-shaped icon on the menu to begin testing.
You do not want your guests to feel terrified or sick on your Flume after all; your focus should be on getting a maximum value of excitement.
The test will also display the different G-Forces that your guests will be subjected to on the ride. To reduce Nausea, make sure to reduce the lateral G-Forces as much as you can.
Guests are able to tolerate Forward and Vertical G-Forces much better, so you don’t need to reduce them much.
Change the tab in the menu to move over to the testing section. Here, you can see the changing ratings of Fear, Nausea, and Excitement as the dummy slides through the Flume. If Fear and Nausea spike too much, you know that it’s time to do some fine-tuning. At the end of the test, you will see the total ratings of your Flume at the top of the menu.
How To Fine-Tune A Flume
You might often notice sharper turns or steep slides in a few areas in your Flume Body. So, Fine-Tuning a Flume is important if you want to reduce Nausea and Fear. This is also your opportunity to add a few tweaks to the structure to make the guest’s experience more exciting.
Click on the “Edit Flume” setting after selecting your Flume to start tweaking. Then select a piece of the body that you want to edit, you can click on the arrow icons that show up to make a few changes to your Flume. You can also change your Flume body by clicking a piece and choosing a different option on the tab.
If you want to make major changes, you would need to delete the piece and adjust the rest of your flume body with the new piece you place.
After a successful test of the Coaster and if you are happy with the Fear, Nause, and Excitement Ratings, you can open your Coaster for the guests visiting your park.
After completing your Flume, make sure that you have a water filtration system in place near it, so you can keep it clean and increase your Pool Prestige.
How To Make A Custom Body Slide
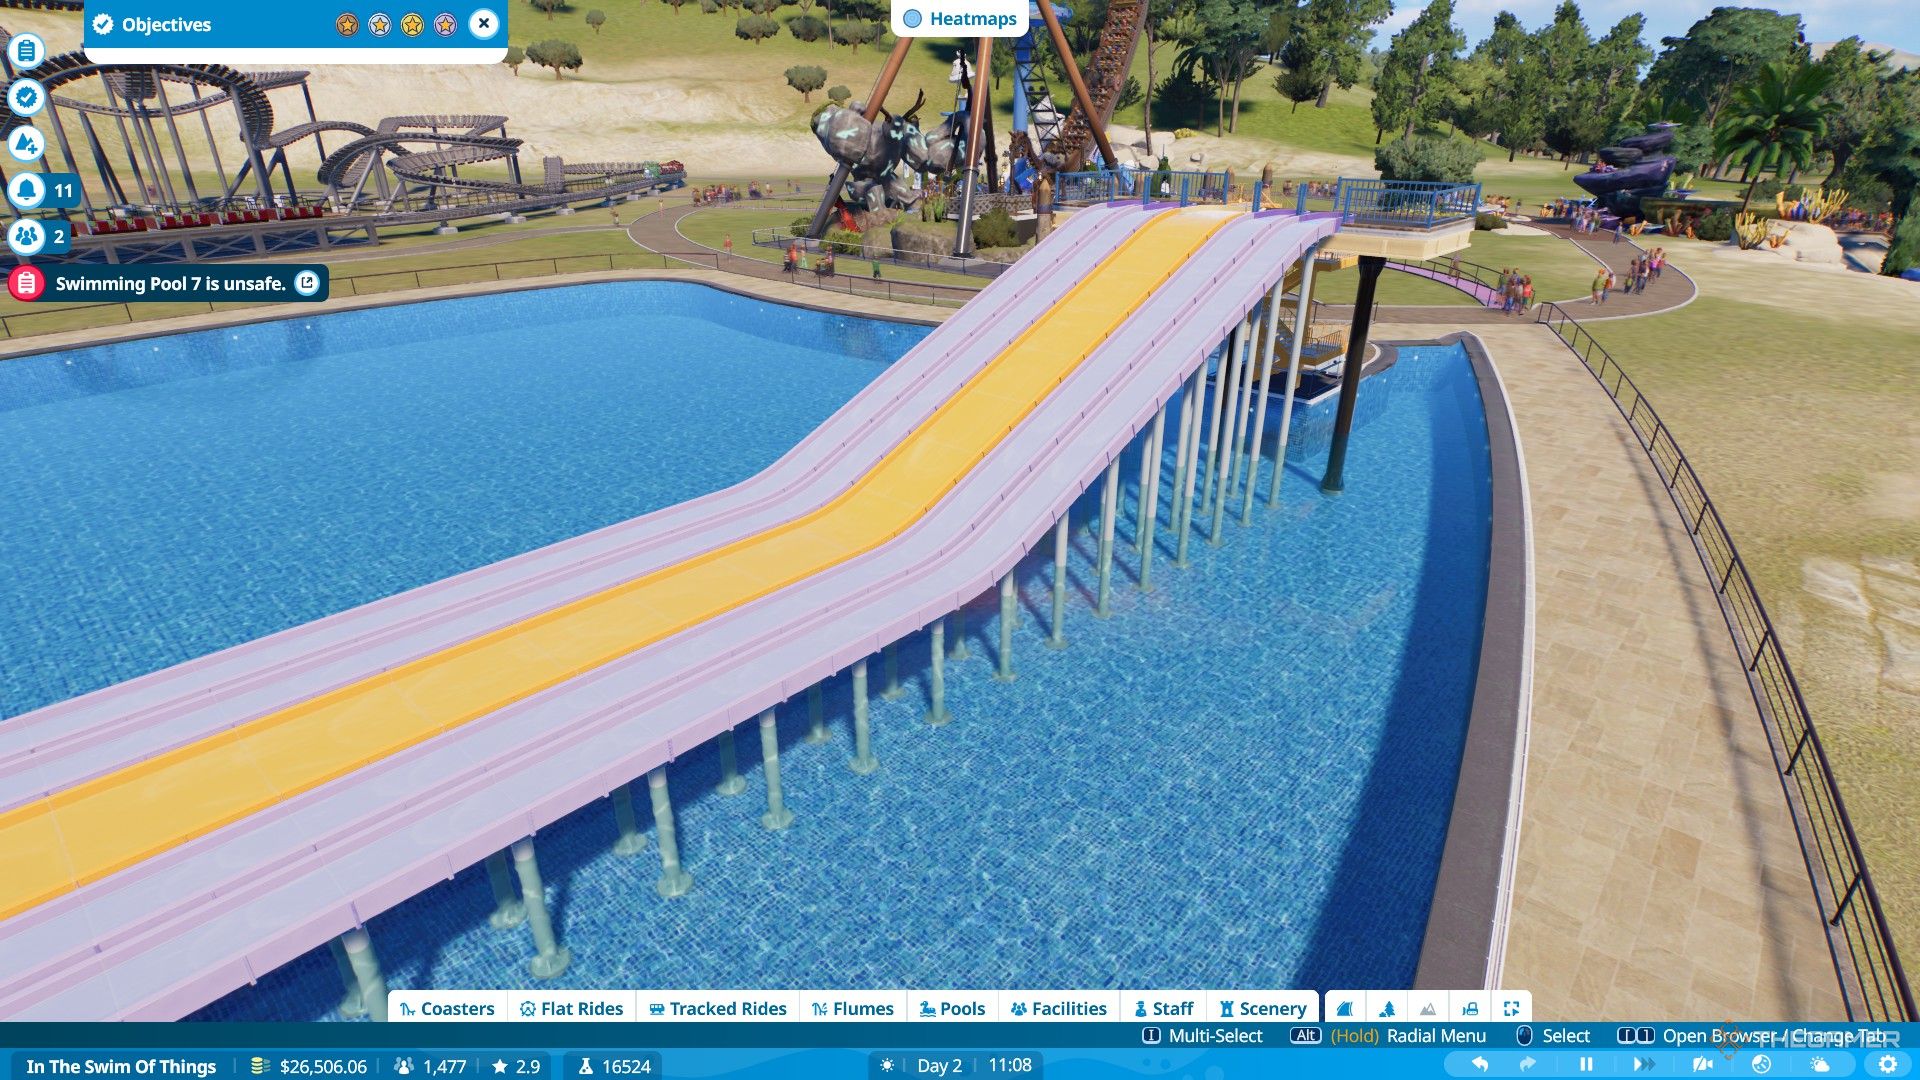
The other kind of Flume is a body slide, and creating it almost requires the same steps as building a body flume, but making a slide is actually less complex.
You will find some models of Body Slides under the “Create Custom” menu. There are two kinds here: the “Body Flume” and “Body Flume Wide.” Both of them are similar, except the latter is more wider.
There are only two body types for the Body Slides, and you can pick either the Transparent slide or the Open Flume option. All you need to do to make the body is place these parts one after the other to make a connected slide.
You can adjust the angle and length using the icons on the side, similar to how you did for the Flumes. Then, use the Flume Ends to finish your body slide.
You cannot change their direction; slides only go forward in the direction your slide body faces.





Leave a Reply